
In this media jam, we will build a Gatsby Theme for an Image Gallery. The images will be stored and fetched from Cloudinary. We will conclude this jam by publishing our theme to the npm registry.
If you want to jump right into the code, check out the GitHub Repo here and the NPM package here.
Gatsby Themes are plugins that include a gatsby-config.js file and pre-configured functionalities, UI design. These themes are Node.js packages that implement Gatsby APIs and are commonly installed through a registry like npm.
Make sure you have yarn installed on your local dev machine. You can read more about yarn installation here.
You will also need to install the Gatsby command-line tool (CLI). The gatsby-cli is the main entry point for getting up and running with a Gatsby application. You can read more about gatsby-cli here.
Run the following command in the terminal to install yarn and gatsby-cli globally.
npm install --global yarn
npm install -g gatsby-cli
Code language: PHP (php)Run the following command to create a package.json in your root directory.
touch package.json
Code language: CSS (css)
Add the following code to package.json.
{
    "private": true,
    "workspaces": ["gatsby-theme-cloudinary-gallery", "demo"]
}
Code language: JSON / JSON with Comments (json)
You will create two workspaces named gatsby-theme-cloudinary-gallery and demo. Here gatsby-theme-cloudinary-gallery is the Gatsby Theme, and the demo is the Gatsby site to test the theme.
The gatsby-theme-cloudinary-gallery will be installed as a dependency in the demo workspace to test the theme before publishing it to the npm registry.
Run the following command in your project’s root directory.
mkdir gatsby-theme-cloudinary-gallery
mkdir demo
cd gatsby-theme-cloudinary-gallery
npm init -y
cd ..
cd demo
npm init -y
cd ..
The above commands will create two directories named gatsby-theme-cloudinary-gallery and demo—each with a package.json in it.
Your file tree will look like this.
.
├── gatsby-theme-cloudinary-gallery
│   └── package.json
├── demo
│   └── package.json
└── package.json
Update gatsby-theme-cloudinary-gallery/package.json like this.
{
    "name": "gatsby-theme-cloudinary-gallery",
    "version": "1.0.0",
    "description": "",
    "main": "index.js",
    "scripts": {
        "build": "gatsby build",
        "develop": "gatsby develop",
        "clean": "gatsby clean"
    },
    "keywords": [
        "gatsby",
        "gatsby-theme",
        "gatsby-plugin",
        "react",
        "images",
        "cloudinary",
        "gallery",
        "cloudinary-gallery"
],
    "author": "",
    "license": "MIT"
}
Code language: JSON / JSON with Comments (json)
Inside the gatsby-theme-cloudinary-gallery directory, create a file named index.js. Run the following command to create it.
touch gatsby-theme-cloudinary-gallery/index.js
This file is needed since it is present as the main entry point in the package.json. You can leave it empty for now; you will update it in the last section to export the Gallery component.
Update demo/package.json like this.
{
    "name": "demo",
    "version": "1.0.0",
    "description": "",
    "main": "index.js",
    "scripts": {
        "build": "gatsby build",
        "develop": "gatsby develop",
        "clean": "gatsby clean"
    },
    "keywords": [],
    "author": "",
    "license": "MIT"
}
Code language: JSON / JSON with Comments (json)
Run the following command to add dependencies to the gatsby-theme-cloudinary-gallery and demo workspace.
yarn workspace demo add gatsby react react-dom gatsby-theme-cloudinary-gallery@*
yarn workspace gatsby-theme-cloudinary-gallery add -P gatsby react react-dom
yarn workspace gatsby-theme-cloudinary-gallery add -D gatsby react react-dom
You install gatsby, react, and react-dom in the demo workspace to set up a Gatsby site. You also install the gatsby-theme-cloudinary-gallery in the demo workspace as a dependency.
In the gatsby-theme-cloudinary-gallery workspace, you install gatsby, react, and react-dom as both dev dependencies and peer dependencies.
Dev dependencies are the packages you need during project development.
Peer dependencies are used to specify that your package is compatible with a specific version of the npm package.
During installation, if the package already exists in the node_modules directory, it will do nothing. But if it is not present, a warning will be shown to the user.
Since gatsby, react, and react-dom will be present in every Gatsby site, it is unlikely that this warning will be shown to the user.
Run the following command to check demo is using the gatsby-theme-cloudinary-gallery from the workspace.
yarn workspaces info
You should see an output similar to this.
{
  "gatsby-theme-cloudinary-gallery": {
    "location": "gatsby-theme-cloudinary-gallery",
    "workspaceDependencies": [],
    "mismatchedWorkspaceDependencies": []
  },
  "demo": {
    "location": "demo",
    "workspaceDependencies": [
      **"gatsby-theme-cloudinary-gallery"**
    ],
    "mismatchedWorkspaceDependencies": []
  }
}
Code language: JSON / JSON with Comments (json)
In this jam, you will use Tailwind CSS to style your theme. Run the following command to install it.
yarn workspace gatsby-theme-cloudinary-gallery add gatsby-plugin-postcss tailwindcss@latest postcss@latest autoprefixer@latest
Code language: CSS (css)
Next, run the following command to generate your tailwind.config.js file.
cd gatsby-theme-cloudinary-gallery
npx tailwindcss init
The last command will generate a tailwind.config.js file in the gatsby-theme-cloudinary-gallery directory. Update the tailwind.config.js file like this.
module.exports = {
  purge: ['./src/**/*.{js,jsx,ts,tsx}'],
    darkMode: false, // or 'media' or 'class'
  theme: {
    extend: {},
  },
  variants: {
    extend: {},
  },
  plugins: [],
}
Code language: JavaScript (javascript)
Run the following command to create a global.css file inside the gatsby-theme-cloudinary-gallery directory under the src/styles folder.
mkdir -p gatsby-theme-cloudinary-gallery/src/styles
touch gatsby-theme-cloudinary-gallery/src/styles/global.css
Code language: PHP (php)
Add the following code to the global.css file.
/* gatsby-theme-cloudinary-gallery/src/styles/global.css */
@tailwind base;
@tailwind components;
@tailwind utilities;
Code language: CSS (css)
Create gatsby-browser.js and gatsby-config.js files in the gatsby-theme-cloudinary-gallery directory by running the following command.
touch gatsby-theme-cloudinary-gallery/gatsby-browser.js
touch gatsby-theme-cloudinary-gallery/gatsby-config.js
Add the following code to the gatsby-browser.js file.
import './src/styles/global.css';
Code language: JavaScript (javascript)
Add the following code to the gatsby-config.js file.
module.exports = {
  siteMetadata: {
    title: "Gatsby Theme Cloudinary Gallery",
    description:
      "Gatbsy Theme to add a Cloudinary Image Gallery to your Gatsby site.",
    social: [
      {
        name: "GitHub",
        url: "https://github.com/lelouchB/gatsby-theme-cloudinary-gallery",
      },
    ],
  },
  plugins: [
    {
      resolve: `gatsby-plugin-postcss`,
      options: {
        postCssPlugins: [require("tailwindcss")],
      },
    },
  ],
};
Code language: JavaScript (javascript)
You can refer to the official documentation for detailed instructions on installing Tailwind CSS with Gatsby.
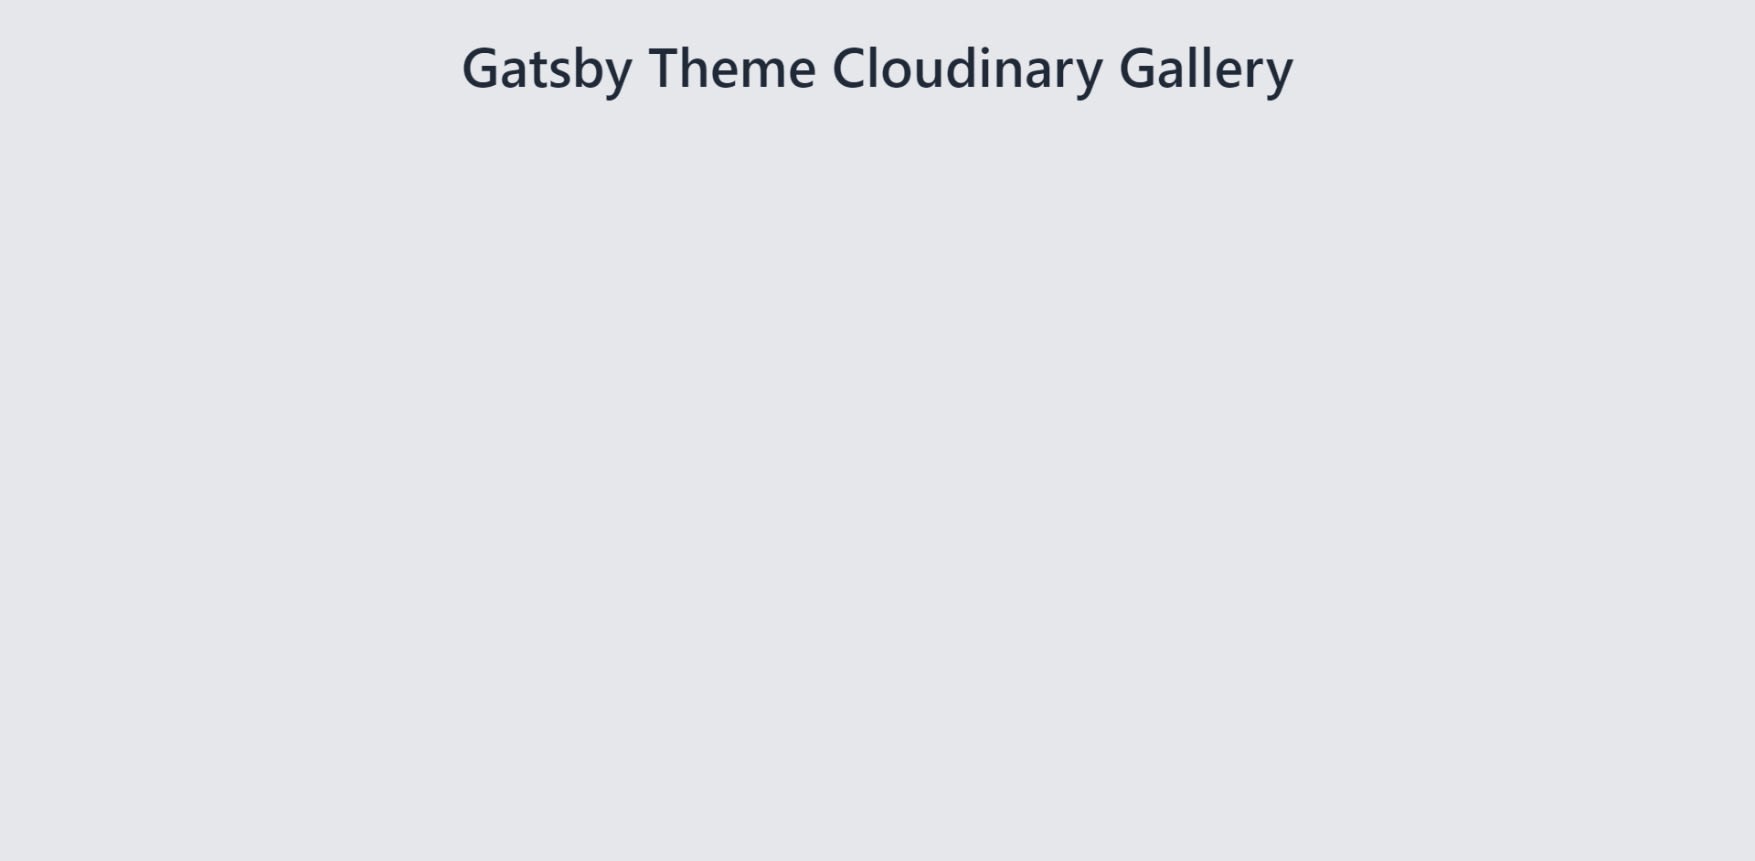
In this section, you will create the Heading component that will show the following heading: Gatsby Theme Cloudinary Gallery
Run the following command to create a components folder in the gatsby-theme-cloudinary-gallery/src directory.
Inside the components directory, create a file named Heading.js.
mkdir gatsby-theme-cloudinary-gallery/src/components
touch gatsby-theme-cloudinary-gallery/src/components/Heading.js
Add the following code to the Heading.js file.
import React from "react";

const Heading = () => {
  return (
    <h1 className="text-4xl md:text-5xl text-center text-gray-800 font-sans font-medium">
      Gatsby Theme Cloudinary Gallery
    </h1>
  );
};

export default Heading;
Code language: JavaScript (javascript)
The above code creates a simple heading styled with Tailwind CSS.
The next step is to create a page to use this Heading component. Run the following command to create a index.js file in the src/pages sub-directory.
mkdir gatsby-theme-cloudinary-gallery/src/pages
touch gatsby-theme-cloudinary-gallery/src/pages/index.js
Add the following code to the pages/index.js file.
import React from "react";
import Heading from "../components/Heading.js";

const Homepage = () => {
  return (
    <div className="bg-gray-200 min-h-screen p-8">
      <Heading />
    </div>
  );
};

export default Homepage;
Code language: JavaScript (javascript)
In the above code, you first import the Heading component and then use it inside the Homepage component.
The last step is to create a gatsby-node.js file that will create the page using Gatsby createPages method and the pages/index.js file.
Run the following command to create it.
touch gatsby-theme-cloudinary-gallery/gatsby-node.js
Add the following code to the gatsby-node.js file.
exports.createPages = async ({ actions }, options) => {
  const basePath = options.basePath || "/";

  actions.createPage({
    path: basePath,
    component: require.resolve("./src/pages/index.js"),
  });
};
Code language: JavaScript (javascript)
You export the createPages method to create your page. You can read more about createPages method here.
The above code creates a page dynamically at the / route. The options object contains the props passed by the user when using the theme. You can read more about createPage action here.
By default, the / route is used as the basePath. If the user passes a value to the basePath prop in the theme configuration, that value will be used instead.
Start your development server by running the following command.
yarn workspace gatsby-theme-cloudinary-gallery develop
Head over to http://localhost:8000/ in your browser. Here is how your app will look like.
You can stop the development server by hitting CTRL+C in the terminal.
You can also configure the demo workspace to show the heading or the theme. Create a file named gatsby-config.js in the demo directory by running the following command.
touch demo/gatsby-config.js
Add the following code to gatsby-config.js.
module.exports = {
  plugins: [
    {
      resolve: "gatsby-theme-cloudinary-gallery",
      options: {
        basePath:"/gallery",
      },
    },
  ],
};
Code language: JavaScript (javascript)
Since you have passed /gallery to the basePath prop, the theme or the heading will be displayed at the /gallery route.
Start the development server for the demo workspace.
yarn workspace demo develop
Head over to http://localhost:8000/gallery in the browser. Here is how your app will look like.
In this section, you will fetch the images from Cloudinary and create Gatsby Nodes from them.
Nodes are the center of Gatsby’s data system. All the data that is added to Gatsby is modeled using nodes. You can read more about them here.
Nodes are created by calling the createNode action. Nodes can be any object. Each Node has to be structured in a pre-defined manner, each with a unique id.
In gatsby-node.js file, create a function named createNodeData. This function will convert image resources into node data.
const createNodeData = (gatsby, image, options) => {
  return {
    id: gatsby.createNodeId(`cloudinary-gallery-${image.public_id}`),
    parent: null,
    public_id: image.public_id,
    cloud_name: options.cloudName,
    internal: {
      type: "CloudinaryGallery",
      content: JSON.stringify(image),
      contentDigest: gatsby.createContentDigest(image),
    },
  };
};
Code language: JavaScript (javascript)
The createNodeData function takes three arguments, gatsby, image, and the options object. Here image is the image resource fetched from Cloudinary.
You are not creating a node in the above function, just structuring the data in the way needed to create the node.
Each image resource has a public_id which is passed in the public_id key. The cloudName is passed as a prop to the theme by the user. This cloudName is accessed using the options object, similar to the basePath prop, and passed to the cloud_name key.
The createNodeId is a utility function to generate globally unique and stable node IDs. You can read more about the createNodeId function here.
The parent is a key reserved for plugins who wish to extend other nodes. It is not needed in this theme, so you pass null to it.
The type is the globally unique node type. This will be used when running GraphQL queries.
The contentDigest is a short digital summary of the content of this node, and the content exposes the raw content of this node that any transformation plugin can take and further process it.
You can read more about Node Creation here.
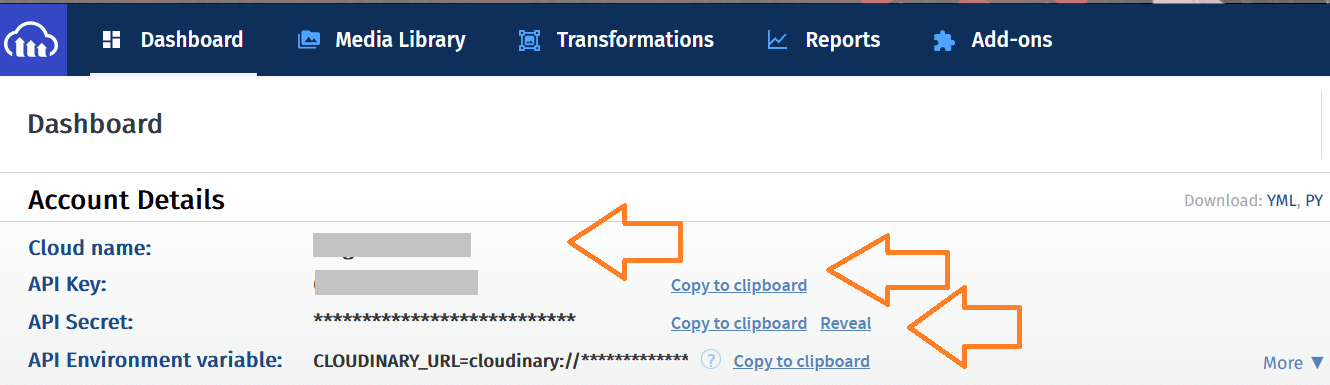
Navigate to your Cloudinary dashboard in the browser and copy your Cloudinary Cloud Name, API Key, and API Secret from there.
The next step is to create a function to fetch the images from Cloudinary and create nodes from them. You will use the cloudinary npm package to do so.
Run the following command to install cloudinary and cloudinary-react.
yarn workspace gatsby-theme-cloudinary-gallery add cloudinary cloudinary-react
Import cloudinary at the top of the gatsby-node.js file.
// gatsby-theme-cloudinary-gallery/gatsby-node.js

const cloudinary = require("cloudinary").v2;
Code language: JavaScript (javascript)
Create a function named createCloudinaryImageNodes in the gatsby-node.js file.
const createCloudinaryImageNodes = (gatsby, cloudinary, options) => {
  const cloudinaryOptions = {
    type: options.type || "upload",
    max_results: options.maxResults || 10,
    prefix: options.prefix || '',
  };

  return cloudinary.api.resources(cloudinaryOptions, (error, result) => {
    result.resources.map((resource) => {
      const nodeData = createNodeData(gatsby, resource, options);
      gatsby.actions.createNode(nodeData);
    });
  });
};
Code language: JavaScript (javascript)
In the above code, the createCloudinaryImageNodes function takes gatsby, cloudinary, and options as arguments.
You create a cloudinaryOptions object that contains the props to modify the Cloudinary fetch request. The user passes these props in the gatsby-config.js file similar to the basePath prop and is accessed using the options object.
These props are:
-
type-This is the storage type:upload,private,authenticated,facebook,twitter, etc. Defaults toupload. -
maxResults– Maximum number of assets to return. Default –10. -
prefix-Find all resources with a public ID that starts with the given prefix. This is helpful when you want to access the images present in a particular folder.
The above props are optional, and hence a default value is passed in each of them. You can create other fields like resource_type, tags, context, etc., in the cloudinaryOptions object. In this jam, we will restrict to these three props only.
You pass the cloudinaryOptions object in the cloudinary.api.resources() method. This method fetches the image resources from your Cloudinary account based on the options or the cloudinaryOptions object. You can read more about the api.resources method here.
The result.resources array contains the data of each image which is passed to the createNodeData function to reformat the data in the way needed to create the node.
The reformatted data is then passed to gatsby’s createNode() action creating a new node. You can read more about this action here.
Finally, you use the createCloudinaryImageNodes function inside the sourceNodes Gatsby API to source the nodes.
Add the following code for the sourceNodes function in the gatsby-node.js file.
exports.sourceNodes = (gatsby, options) => {
  cloudinary.config({
    cloud_name: options.cloudName,
    api_key: options.apiKey,
    api_secret: options.apiSecret,
  });

  return createCloudinaryImageNodes(gatsby, cloudinary, options);
};
Code language: JavaScript (javascript)
In the sourceNodes function, you create the Cloudinary instance and pass the API keys to it. These API keys are passed as props to the theme by the user and accessed using the options object.
You can read more about sourceNodes here.
To test the image nodes, update the demo/gatsby-config.js file like this. Make sure to add your API keys in the options object. You can also pass value to optional fields like basePath, type, etc.
// demo/gatsby-config.js
module.exports = {
  plugins: [
    {
      resolve: "gatsby-theme-cloudinary-gallery",
      options: {
        cloudName: <YOUR-CLOUDINARY-CLOUDNAME>,
        apiKey: <YOUR-CLOUDINARY-API-KEY>,
        apiSecret: <YOUR-CLOUDIANRY-API-SECRET>,
      },
    },
  ],
};
Code language: HTML, XML (xml)
Start the development server by running the following command.
yarn workspace demo develop
Navigate to localhost:8000/___graphql in your browser. You will see the GraphiQL playground.
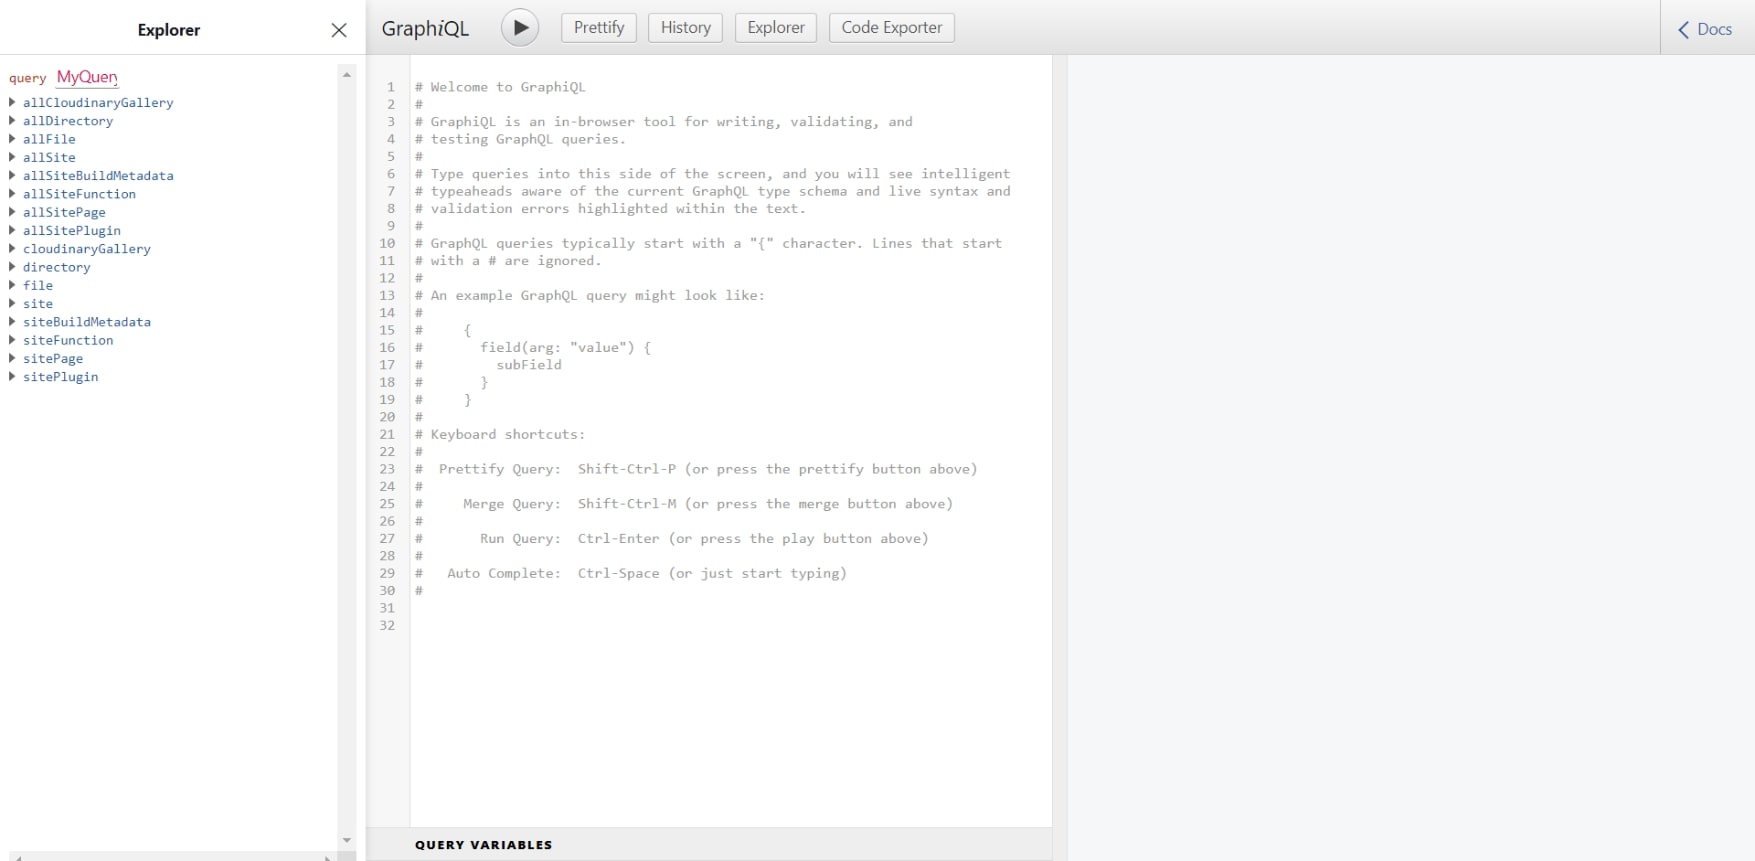
Paste the following query in the GraphiQL playground.
query MyQuery {
  allCloudinaryGallery {
    nodes {
      id
      cloud_name
    }
  }
}
Run the query by clicking the Run icon.
You will see your cloudName and public_id of the images in the result tab.
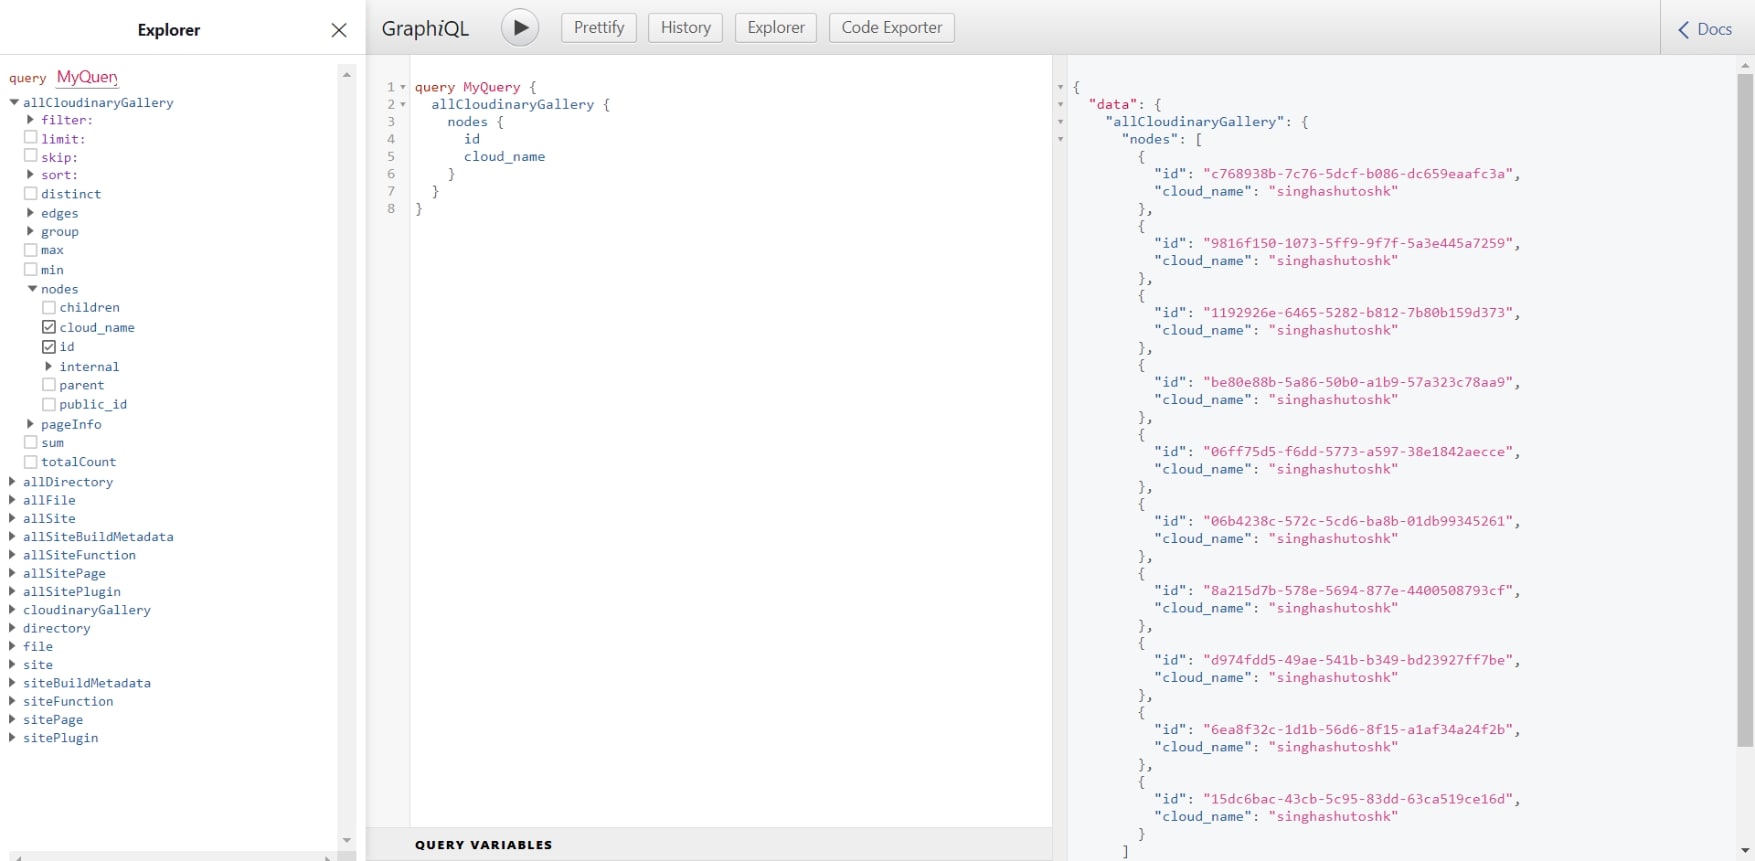
You have successfully created Nodes from the images fetched from Cloudinary.
In this section, you will create the Gallery component to display the images in a grid layout.
Create a file named Gallery.js inside the gatsby-theme-cloudinary-gallery/src/components directory by running the following command.
touch gatsby-theme-cloudinary-gallery/src/components/Gallery.js
Add the following code to the Gallery.js file.
import React from "react";
import { Image, Transformation } from "cloudinary-react";

const Gallery = ({ cloudinaryImages }) => {
  return (
    <main className="container mx-auto grid grid-cols-1 md:grid-cols-2
      lg:grid-cols-3 gap-3 p-8">
      {cloudinaryImages.length > 0 &&
        cloudinaryImages.map((cloudinaryImage) => (
          <Image
            key={cloudinaryImage.id}
            cloudName={cloudinaryImage.cloud_name}
            publicId={cloudinaryImage.public_id}
            className="w-full block mx-auto"
          >
            <Transformation
              fetchFormat="auto"
              width="800"
              height="800"
              loading="lazy"
              radius="20"
              gravity="face"
              crop="fill"
            />
          </Image>
        ))}
    </main>
  );
};

export default Gallery;
Code language: JavaScript (javascript)
In the above code, you take the images as a prop in the Gallery component. You map over the cloudinaryImages array to display the images using the Image component from the cloudinary-react package. Tailwind CSS is used to style the gallery and create the grid layout.
You transform the images using the Transformation component. Here are all the default transformations applied to the images.
| Key | Default | Description |
|---|---|---|
| fetchFormat | auto |
The format of the fetched image. Using auto, delivers the image in the most optimized format for each browser that requests it. For more details see image format conversion. |
| width | 800 |
Width of the fetched image. |
| height | 800 |
Height of the fetched image. |
| loading | lazy |
Lazy Loading to delay loading images if they are not yet visible on the screen. |
| radius | 20 |
Round the corner of the images. |
| gravity | face |
To automatically crop an image so that the detected face(s) is used as the center of the derived picture, set the gravity parameter to faces – the region of the image that includes all the faces detected. |
| crop | fill |
Resizes the image to fill the specified dimensions without distortion. The image may be cropped as a result. For more details see. |
You can add more transformations in the above code as per the requirements of your theme.
Update the pages/index.js file like this.
import React from "react";
import { graphql, useStaticQuery } from "gatsby";
import Gallery from "../components/Gallery.js";
import Heading from "../components/Heading.js";

const Homepage = () => {
  const data = useStaticQuery(graphql`
    query {
      allCloudinaryGallery {
        nodes {
          public_id
          id
          cloud_name
        }
      }
    }
  `);

  const images = data.allCloudinaryGallery.nodes;

  return (
    <div className="bg-gray-200 min-h-screen p-8">
      <Heading />
      <Gallery cloudinaryImages={images} />
    </div>
  );
};

export default Homepage;
Code language: JavaScript (javascript)
You use the useStaticQuery hook from Gatsby to fetch the data using the query discussed above. The useStaticQuery hook fetches data using a GraphQL query. This fetched data is parsed and injected into your React components. You can read more about this hook here.
You pass the images array, which contains id, image’s public_id, and cloud_name, to the Gallery component.
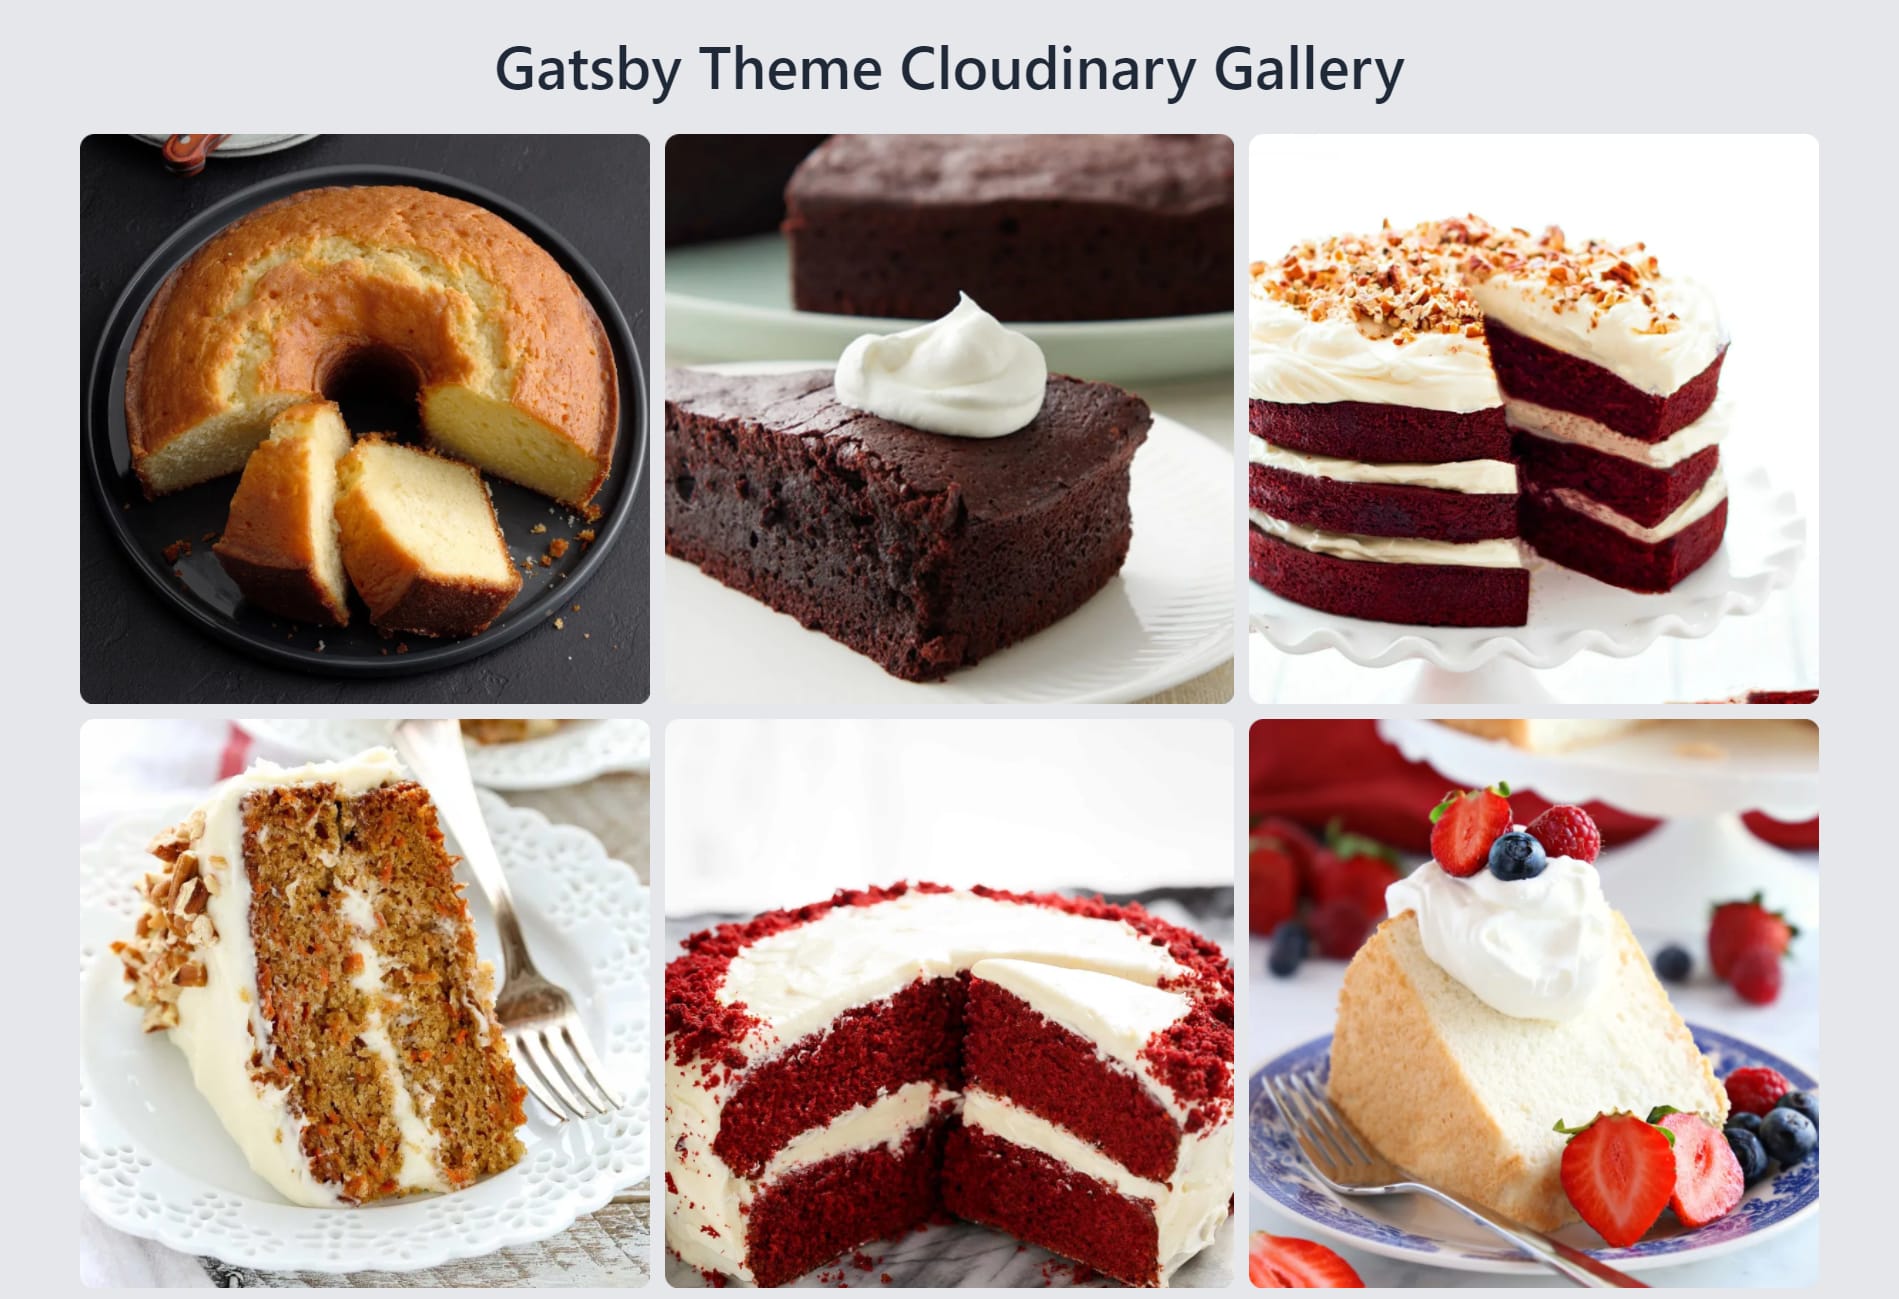
Start the demo workspace development server and head over to http://localhost:8000/ in the browser.
Your app will look similar to this. The images may vary from the photos in your Cloudinary dashboard.
What if the user wants to embed the image gallery in another page and not create a specific route for it. For this, you can export the pages/index.js file in the gatsby-theme-cloudinary-gallery/index.js file.
Add the following code to the gatsby-theme-cloudinary-gallery/index.js file.
//gatsby-theme-cloudinary-gallery/index.js
export { default as Gallery } from "./src/pages/index";
Code language: JavaScript (javascript)
Now, you can import this Gallery component in any page of your Gatsby site and use the component inside it.
import { Gallery } from "gatsby-theme-cloudinary-gallery";
const Homepage = () => (
<div>
<Gallery />
</div>
);
export default Homepage;
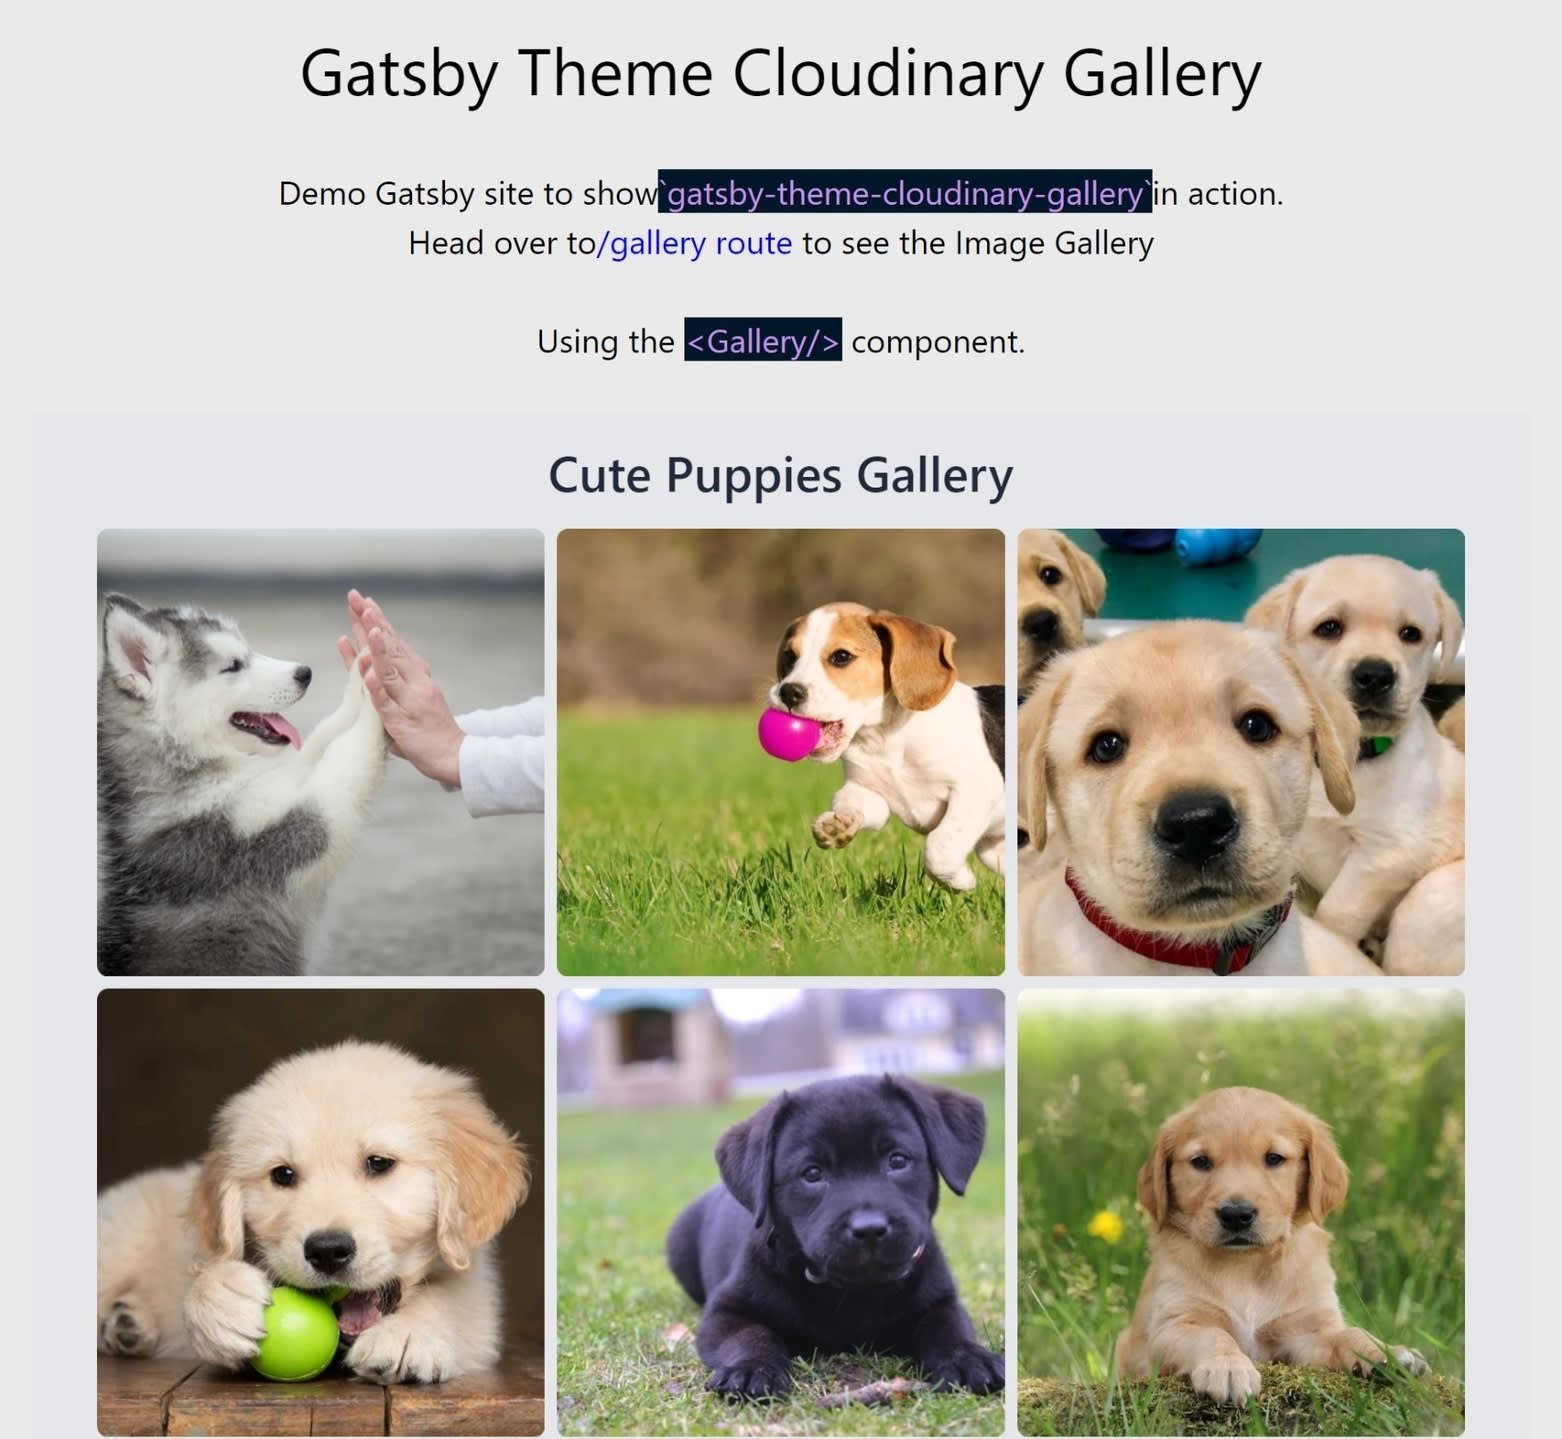
Code language: JavaScript (javascript)Here is how the embed Image Gallery will look like.
In this section, you will publish your Gatsby Theme to the npm registry.
Create a README.md file in the gatsby-theme-cloudinary-gallery directory and create a simple documentation for your theme. You can refer to the README.md file of this project here.
Update the name field in the gatsby-theme-cloudinary-gallery/package.json with your GitHub handle like this.
{
"name": "@lelouchb/gatsby-theme-cloudinary-gallery",
...
}
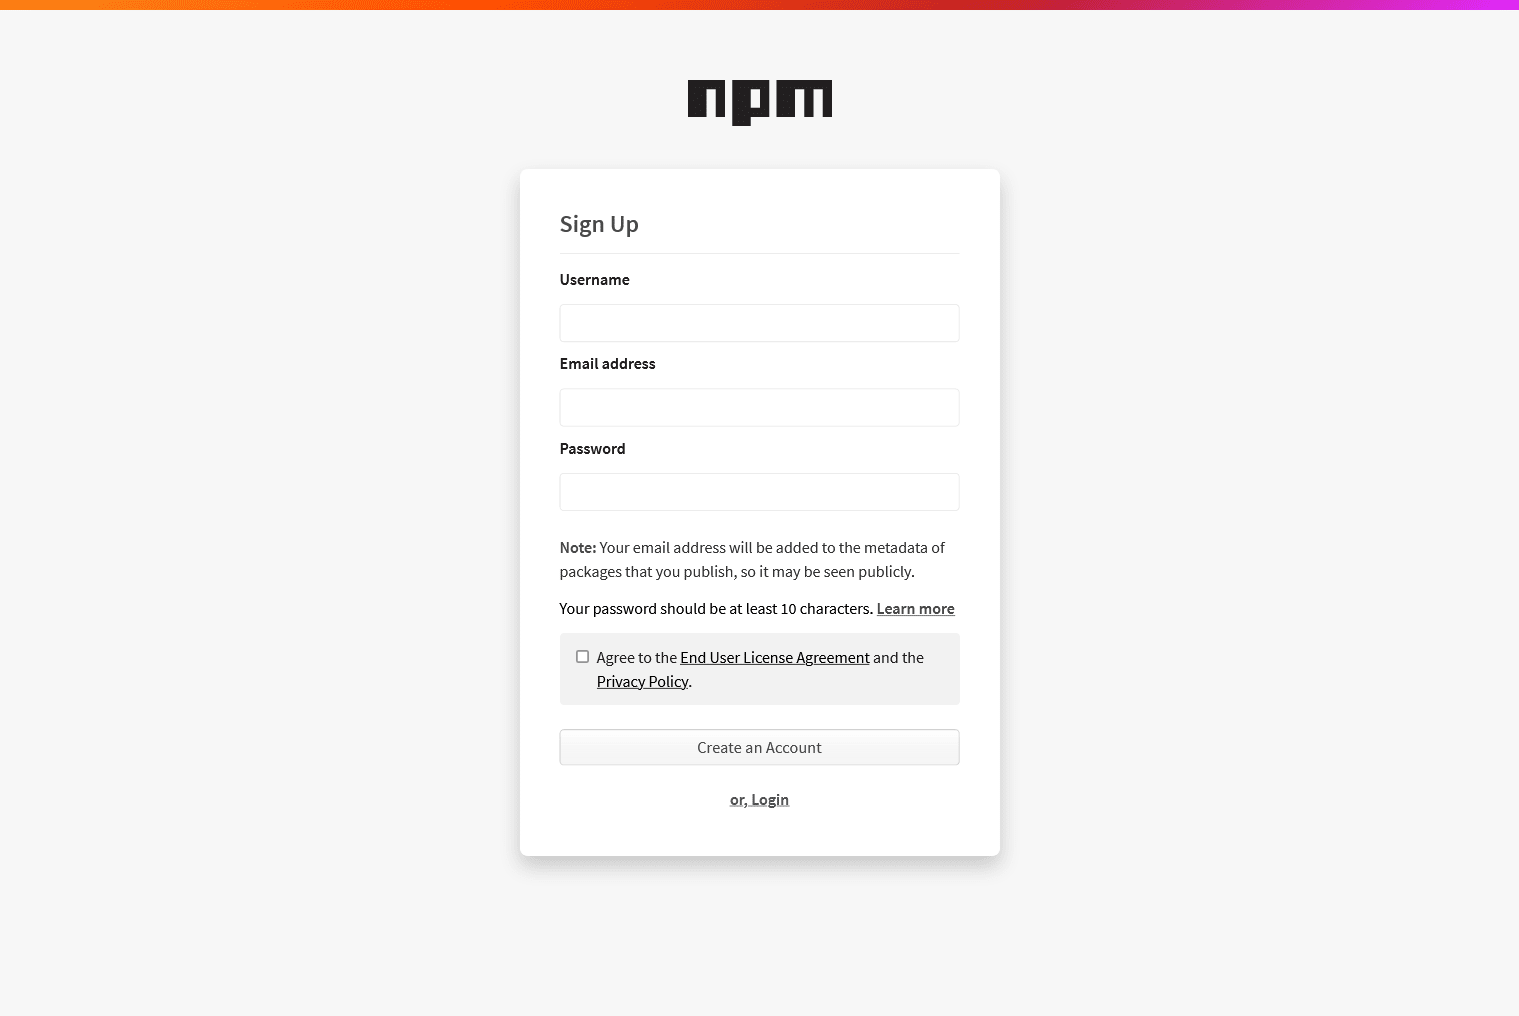
Code language: JavaScript (javascript)Create an NPM account if you haven’t already from the NPM Signup page.
Login to your NPM account by runnning the following command in the terminal.
npm adduser
You will be prompted for your username, password, and email id.
Once you have logged in, run the following command in your project’s root terminal to publish your theme.
cd gatsby-theme-cloudinary-gallery
npm publish --access public
Code language: PHP (php)
After the theme has been published you will see a message similar to this in your terminal.
npm notice
npm notice 📦  @lelouchb/gatsby-theme-cloudinary-gallery@1.0.0
npm notice === Tarball Contents ===
npm notice 962B    package.json
npm notice === Tarball Details ===
npm notice name:          @lelouchb/gatsby-theme-cloudinary-gallery
npm notice version:       1.0.0
npm notice filename:      @lelouchb/gatsby-theme-cloudinary-gallery-1.0.0.tgz
npm notice package size:  531.7 kB
npm notice unpacked size: 1.7 MB
npm notice shasum:        e98761e3870f1f50fatWrERwybd5c6819e809548eaed82ef3
npm notice integrity:     sha512-wCSHgJpQcgprkJeo-Po+aG[...]PJL3PXjK9ZkdA==
npm notice total files:   237

+ @lelouchb/gatsby-theme-cloudinary-gallery@1.0.0
Code language: CSS (css)
You can view this theme on NPM here.
In this media jam, we discussed how to create a Gatsby Theme for Image Gallery. We saw how to integrate Tailwind CSS with a Gatsby site.
Finally, we published our Gatsby Theme to the npm registry.
Here are a few resources that you might find helpful:
Happy coding!
