
Website developers and administrators today tend to find themselves managing quite a few files, images and other media assets. Whether you upload content to your web application yourself, allow your users to upload files or have files imported from content partners, you’ll need to handle the upload process, storage, and possibly thumbnail creation required to showcase your assets online.
Many website developers consider moving their assets from hosted storage to cloud-based storage solutions. While somewhat costlier, these modern storage services offer nearly limitless scale and close to 100% uptime.
To start using a cloud-based storage, you’ll first need to migrate images to the cloud.
One way to go at it is to take a plunge, migrate images to the cloud and update your application to start uploading new images to cloud, going forward. You can use Cloudinary’s upload APIs to simplify this process.
Another option is to keep maintaining your images in your existing storage location(s), and use dynamic fetch URLs to let Cloudinary fetch these images on-demand, transform them on-the-fly and deliver these optimized to your visitors.
Today, we wanted to introduce a new, powerful integration option – Cloudinary’s new Automatic image uploading, which combines the advantages of dynamic image fetching from existing online locations with the advantages of managing new images directly in the cloud. This method allows lazy migration to the cloud as well as other powerful origin pulling options.
Cloudinary already supports fetching images dynamically from remote HTTP URLs while transforming these on-the-fly.
For example, the following URL dynamically fetches an image from Wikimedia, transforms it and delivers it optimized via a fast CDN. You can further secure this powerful feature by limiting the set of domains you allow your Cloudinary account to fetch images from, or even require that all fetch URLs will include unique server-side signatures.

The new Automatic image uploading offers similar fetching capabilities, but instead of treating the image as a cached resource, the image is uploaded to Cloudinary on first access and treated as a first class Cloudinary citizen from then on.
To use the new Automatic image uploading feature, start by visiting the Settings page of Cloudinary’s Management Console, and define an initial mapping between a folder name to a base remote URL. Defining remote URL prefix allows your Cloudinary delivery URLs to be shorter and more SEO friendly, and gives you fine-grained control on which remote domains are allowed for automatic uploads.
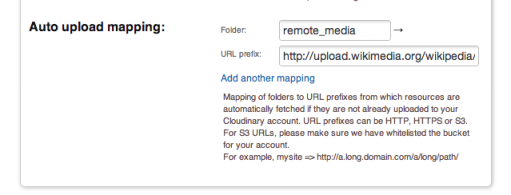
As you can see in the screenshot above, we configured the ‘remote_media‘ folder to be mapped to ‘http://upload.wikimedia.org/wikipedia/‘ base URL.
You can now access Cloudinary delivery URLs with the ‘remote_media‘ folder prefix. Cloudinary will automatically fetch the remote image from the origin URL and store it in your Cloudinary account. From that point on, remotely fetched images are treated just like any image that was uploaded to the cloud.
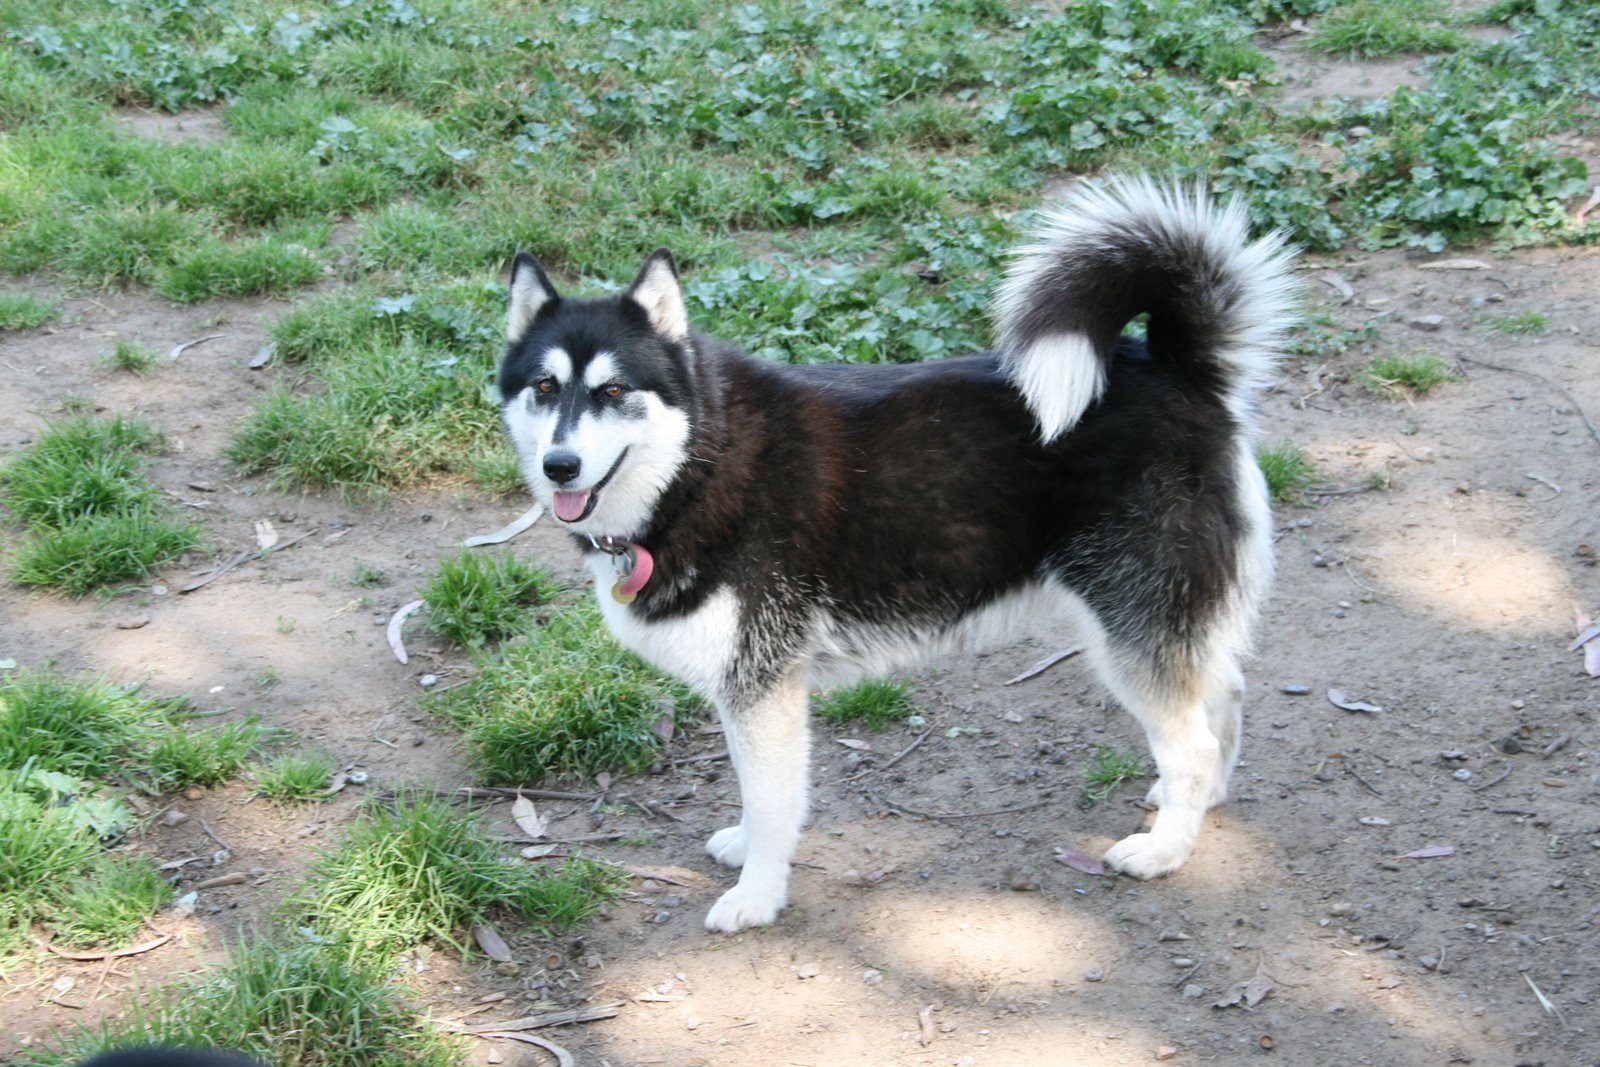
For example, we want to take the following image from Wikimedia, and automatically upload it to Cloudinary:
Simply accessing the following Cloudinary URL will dynamically fetch the remote image and create an upload image resource in your cloud-based media library with the ‘remote_media/2/26/YellowLabradorLooking_new‘ ID.
https://res.cloudinary.com/demo/image/upload/remote_media/commons/2/26/YellowLabradorLooking_new.jpg

Embedding such an image in your code can be easily done using Cloudinary’s client libraries. For example, in Ruby on Rails:
<%= cl_image_tag("remote_media/commons/2/26/YellowLabradorLooking_new.jpg") %>
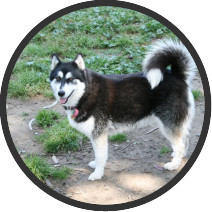
This image is now available for further transformation and CDN delivery like any other image uploaded to Cloudinary. For example, the following URL crops a 300×300 thumbnail of the original image, makes it circular, applies a sharpen effect, increases color saturation by 70% and delivers the image optimized and cached via Akamai’s CDN:

Creating an HTML image tag with such a transformation URL, in PHP for example:
<?php echo cl_image_tag("remote_media/commons/2/26/YellowLabradorLooking_new.jpg",
              array(
                array( "width" => 300, "height" => 300, "crop" => "crop",
                       "gravity" => "north_west", "radius" => "max",
                       "effect" => "sharpen" ),
                array( "effect" => "saturation:70" ))); ?>
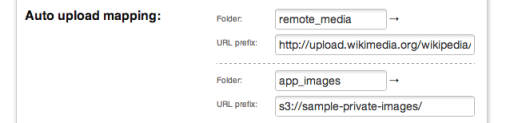
Cloudinary’s auto-upload folder mapping allows you to further map multiple folder names to different base remote URLs. In addition, instead of using a sub-folder, you can use your root folder (“/”).
While Cloudinary focuses on image management, you can actually upload files of any type to Cloudinary. Cloudinary will store such “raw” files safely in the cloud, including multiple backups and revision history and deliver these via a CDN.
The new automatic uploading capability supports fetching remote raw files as well as image files.
For example, the following Excel spreadsheet is available under the same Wikimedia base URL that we already mapped on Cloudinary.
http://upload.wikimedia.org/wikipedia/zh/d/d3/Statistics_for_wikipedia_in_top_ten_languages.xls
In order to automatically upload the raw files, the resource type should be set to ‘raw‘ and the public ID of the resource is the remainder part of the remote URL, in this case ‘zh/d/d3/Statistics_for_wikipedia_in_top_ten_languages.xls‘
The following Node.js and Python code show how to generate such a URL in a more developer-friendly way:
cloudinary.url("remote_media/zh/d/d3/Statistics_for_wikipedia_in_top_ten_languages.xls",
               { resource_type: 'raw' } );
cloudinary.utils.cloudinary_url("remote_media/zh/d/d3/Statistics_for_wikipedia_in_top_ten_languages.xls", resource_type = "raw")
A one-time bulk migration is always a good option, but when your existing web application already manages millions of images, a lazy migration from your existing online image URLs might be a simpler approach.
So far, we’ve shown how you can upload images to Cloudinary on-the-fly from remote locations. This method is quite powerful when handling external images, but also enables you to lazily migrate images to Cloudinary’s cloud-based image management solution.
Lazy migration is made possible since our new automatic image upload URLs share the exact URL convention as our regular uploaded image URLs. This means that for each image accessed, Cloudinary first checks whether an image with the given public ID exists, and if it doesn’t (and it matches a given auto uploading folder mapping), it is fetched on-the-fly from the remote host.
To migrate private resources to Cloudinary, you can also map remote S3 URLs. Please contact us if you want this option enabled for your account.
For example, the S3 bucket of ‘sample-private-images’ contains the image ‘dogs/dog1’ that is blocked from public access:
https://s3.amazonaws.com/sample-private-images/dogs/dog1.jpg
We’ll go ahead and define a folder mapping between the ‘app_images‘ folder to ‘
s3://sample-private-images/‘.
Now simply accessing Cloudinary URLs with the ‘app_images‘ folder prefix fetches the remote images from their S3 source. The image can then be delivered and further transformed.
https://res.cloudinary.com/demo/image/upload/app_images/dogs/dog1.jpg

Now that all existing images are automatically uploaded to Cloudinary when first accessed, we can go ahead and update our live application. The following Ruby upload command uploads a given image file to the ‘app_images/dogs‘ folder using ‘dog2‘ as file name (i.e., the public ID is ‘app_images/dogs/dog2‘). Note that if your model includes the full public ID path, you don’t need to specify the ‘app_images‘ folder explicitly.
Cloudinary::Uploader.upload(params[:file], :folder => "app_images",
                            :public_id => "dogs/dog2")
The new uploaded image is available for delivery via a URL of an identical convention of the automatically uploaded one:
Both the lazily migrated image and the newly uploaded image can now be similarly transformed using Cloudinary’s cloud-based image transformations and delivered optimized via a CDN. Below is an example of the two images cropped to fill a 200×200 circle with a dark gray border of 6 pixels.

The following Ruby on Rails code generates an image tag with the same transformation URL as above:
<%= cl_image_tag("app_images/dogs/dog1.jpg", :width => 200, :height => 200,
                 :crop => :fill, :gravity => :north, :radius => :max,
                 :border => "6px_solid_rgb:333") %>
Same example in .Net:
@Model.Cloudinary.Api.UrlImgUp.Transform(
  new Transformation().Width(200).Height(200).Crop("fill").
    Gravity("north").Radius("max").Border("6px_solid_rgb:333")).
      BuildImageTag("app_images/dogs/dog1.jpg")
The lazy migration example above allows public access to the original image as well as all its derived versions. As an alternative, you can automatically upload remote images as ‘private’ and restrict transformations using Cloudinary’s strict transformations.
You can restrict ‘Uploaded‘ image access and enable ‘Strict Transformations‘ from the settings page:
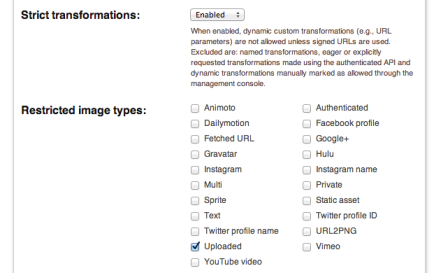
You can now access the image using the ‘private’ image type and upload new images as private as well. This prevents access to the original image and permits access only to allowed or signed transformed image versions.
For example, access to the following private image is blocked, while access to its derived image below is allowed:
https://res.cloudinary.com/demo/image/private/app_images/dogs/dog1.jpg

The following Java snippet uploads new images as private:
Map result = cloudinary.uploader().upload(new File("new_dog.jpg"), Cloudinary.asMap(
  "folder", "app_images",
  "public_id", "dogs/dog2",
  "type", "private"));
With Cloudinary’s powerful new automatic image uploading capability, migrating assets of an existing dynamic website or mobile application to the cloud has never been easier.
Automatic uploading and folder mapping, including support for images, non-image raw files, private images, HTTP/S URLS and S3 URLs is now available for all Cloudinary’s plans.
If you haven’t done so already, you can sign-up to Cloudinary’s fully featured free account.