
Most developers are familiar with ImageMagick, a very capable open source software suite that they can use to manage and transform images.
The functionality of ImageMagick is typically utilized from the command-line, but wrappers have been written for a wide selection of programming languages, making ImageMagick a very popular choice among developers.
Often programmers use ImageMagick for simple operations such as scaling or stretching an image to fit specific dimensions. But as we’ll see in this post, there are many advanced techniques available, such as ‘masking’, pixel ‘blending’ and others that enable you to achieve more complex and extremely useful effects.
In this post, I’ll share three examples of image transformations using RMagick (a Ruby wrapper for ImageMagick). I will start with a sepia effect combined with an overlay image, and follow that with increasingly complex transformations such as creating text textures and pixelating faces. For each of these examples, I’ll compare what it takes to address the same challenges using Cloudinary. With its cloud-based platform, Cloudinary eliminates the complexity of coding and the hassles associated with installation. Cloudinary also saves developers time, enabling them to leverage a single line of code to complete the image transformations .
You can find the full source code for this blog post in Cloudinary’s official repository in Github. Installing the dependencies for the examples is not a trivial task, mostly because of OpenCV. But for simplicity’s sake, I’ve containerized both ImageMagick and OpenCV dependencies, so you only need to have Docker installed.
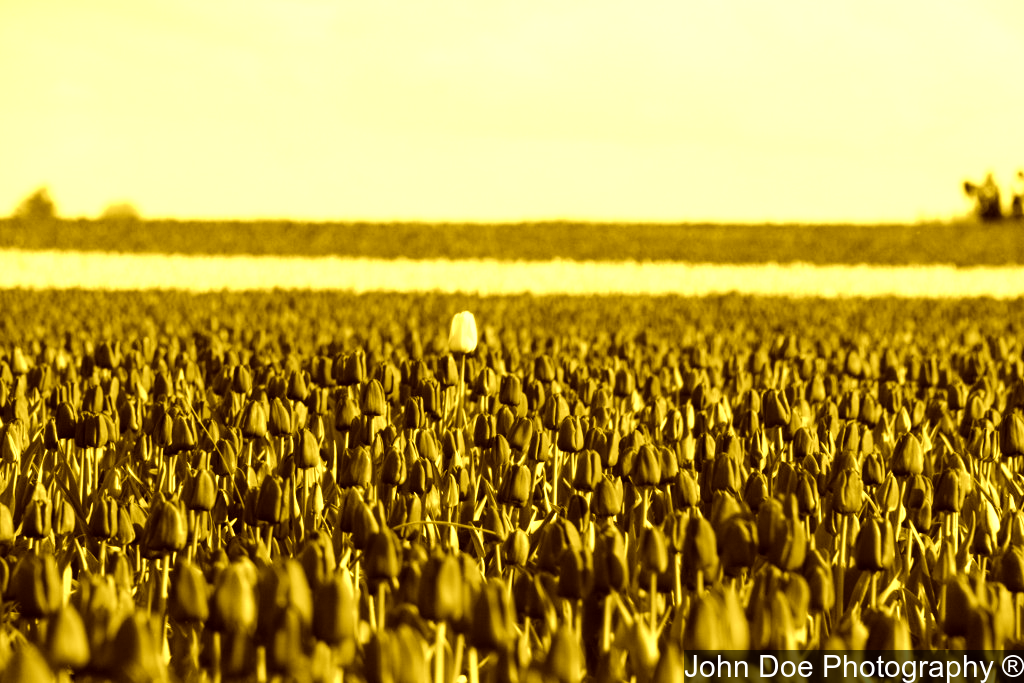
The first example describes a common use case: Adding a photographer’s name to the bottom right corner of an image.
To make the example more interesting, we first want to apply a sepia effect.
The final result should look something like this:

The example is built using two main methods:
-
add_author_to_image!, which receives aMagick::Imageobject and theauthorname and returns a newMagick::Imageobject that contains the resulting image – the original image with the author name overlay applied. -
sepiatize_image!, which receives aMagick::Imageobject and returns the modified image object with the sepia effect applied.
First, let’s describe add_author_to_image!:
Using ImageMagick, I create a Draw object, which will enable me to put the text over the original image.
I also select the color “white”, “Arial” as the font, and choose my font size.
text = Magick::Draw.new
text.fill = "white"
text.font_family = "Arial"
text.pointsize = 30
text.gravity = Magick::CenterGravity
Code language: PHP (php)
The overlay image size should match the text dimensions, so I need to calculate the text dimensions before creating the overlay image:
metrics = text.get_type_metrics(author)
I then create the overlay image and set its background color to a semi-transparent black to ensure that the text will be visible on top of any image.
author_overlay = Magick::Image.new(metrics.width, metrics.height) {
  self.background_color = "#00000080"
}
Code language: PHP (php)
Next, I draw the text over the the semi-transparent background.
text.annotate(author_overlay, 0, 0, 0, 0, author)
Code language: CSS (css)
Then I position the author overlay on top of the image:
I use the composite method to combine the two images in a certain way. The destination image is our input image. I have to tell ImageMagick that I want to position the author overlay in the “southeast” edge of the image.
Magick::OverCompositeOp tells ImageMagick that the source image (author_overlay) should override the destination image (our input image) with the source image’s pixels, which makes the author name visible on top of the image.
image.composite!(author_overlay, Magick::SouthEastGravity, Magick::OverCompositeOp)
Code language: CSS (css)
The final step is destroying the author image object overlay. It’s important to clean up any temporary image objects. I don’t need the overlay anymore because I’ve combined the images and flattened them. Destroying an image object is done using the destroy! method:
author_overlay.destroy!
Code language: CSS (css)
What’s missing now is the sepia effect (applied by the sepiatize_image! method).
ImageMagick offers a method for setting sepia tone, so I chose the sepia level and set the desired effect.
SEPIA_LEVEL = Magick::QuantumRange * 60 / 100
def sepiatize_image!(image)
  image.sepiatone(SEPIA_LEVEL)
end
Code language: PHP (php)
After defining the two methods, we need to apply both operations on our original image and write the result to a file:
add_author_to_image!(sepiatize_image!(source_image), author).write(dest)
Code language: CSS (css)
Whew! I’m sweating a bit, but I managed to get the result I wanted.
If this is your first time using Cloudinary, you’ll need sign up for an account (start with a free one), and use the upload API to upload your image. You can use the https API with no installation required, or download and install the SDK for your favorite framework (a few quick configurations required).
Here’s how you would upload the yellow_tulip.png file to your account in the cloud using the Ruby SDK:`
Cloudinary::Uploader.upload('yellow_tulip.png', :public_id => 'yellow_tulip')
Code language: JavaScript (javascript)
Now, let’s see what it takes to deliver that image in sepia with the photographer’s name in the corner. Ready?
![Sepia and Overlay] (https://res.cloudinary.com/demo/image/upload/e_sepia:60/l_text:Arial_30:John%20Doe%20Photography%20%C2%AE,co_white,g_south_east,b_rgb:00000090/yellow_tulip.png “with_image: false”)
Done!
##Example 2: Text Textures In this example, which is a bit more complex than our first one, I will use our source image as a texture effect on specified text with a selected font, so that it will look something like this:

###The ImageMagick way:
I will employ the concept of masking in this example.
Let’s create a ‘mask’ image in the shape of our desired text and font. I do this using the create_text_mask method, which receives the text as a string and returns a ‘mask’ Image object.
The following is a short walkthrough:
Like in the previous example, I create a Draw object, which is being used for the text.
I then add color, font family, size and weight, and get a type metric to create our ‘mask’ image object with the dimensions I calculated.
Then I create a new Image object and set it’s background to transparent:
draw = Magick::Draw.new
draw.fill = "white"
draw.font_family = "Arial"
draw.pointsize = 100
draw.font_weight = Magick::BoldWeight
draw.gravity = Magick::CenterGravity
metrics = draw.get_type_metrics(text)
mask = Magick::Image.new(metrics.width, metrics.height) { self.background_color = "transparent" }
Code language: PHP (php)
Like in the previous example, I use the draw object’s annotate method to actually draw the text over the image I’ve created.
draw.annotate(mask, 0, 0, 0, 0, text)
Code language: CSS (css)
The result is a semi transparent image having the text itself in fully opaque “white” and the rest – fully transparent.
Let’s move to the cut_image_to_text! method which calls create_text_mask:
After creating the mask image by calling create_text_mask, using the composite method, I combine the ‘mask’ image and our input image, but this time relying on a different type of composite operator: CopyOpacityCompositeOp.
Doing this changes the opacity value of all pixels in our input image that are not part of the text letters region, to fully transparent. This hides the pixels and results in a texture effect over the fonts:
image.composite!(mask, Magick::CenterGravity, Magick::CopyOpacityCompositeOp)
Code language: CSS (css)
Next, I have to clean up by destroying the mask image, which isn’t needed anymore.
mask.destroy!
Code language: CSS (css)
Then I trim the remaining transparent border and tighten up the image to the text itself.
image.trim!
Code language: CSS (css)
At this point I’m almost done, but there’s one last thing to take care of.
A lot of formats – like JPEG – don’t have an alpha channel to support opacity. So, if you export the image now in one of those non-alpha formats, you’ll see the original image since all ‘hidden’ and ‘fully transparent’ pixels from our last step will not preserve their transparency. As a result, I’ll need to turn all transparent pixels to “opaque white”, which will make sure I get a uniform result no matter what the desired format is. This will be done using the simple opacify! method.
Here I set the background color to white:
opacified = Magick::Image.new(image.columns, image.rows) { self.background_color = "white" }
Code language: PHP (php)
Then I put the cut-to-text image that I created in the previous step on top of the new image with the white background color. This causes all transparent pixels from before to turn white.
opacified.composite!(image, Magick::CenterGravity, Magick::OverCompositeOp)
Code language: CSS (css)
After defining the relevant methods, I apply them on the original image and write the result to a file:
opacify!(cut_image_to_text!(source, text)).write(dest)
Code language: CSS (css)
Impressive! We did it!
###The Cloudinary way:
You’d think this example would take a bit more effort than the previous one, even in Cloudinary. But with a combination of text overlay capabilities and the built-in cutter flag, here’s all we need to do:
##Example 3: Pixelating Faces
For my last example, I will show how to combine face detection with a pixelation effect, which is really useful for hiding people’s identities in public photos. Here’s what our final image will look like:
![]()
###The ImageMagick way:
This example involves use of the OpenCV library and the ruby-opencv gem. My code in this example is written in a flexible way that enables easy swapping of the face detection part to any other library or implementation (modify the detect_faces method to one of your liking, but you must make sure it returns an array of regions).
First, let’s have a look at the transform_faces method.
I’m creating a Magick:Image object out of this file, which I took from the user’s input, similar to the way I’ve done in our first two examples.
image = Magick::Image.read(image_file).first
Code language: PHP (php)
Then I detect faces for the image file. This process, which is done outside of ImageMagick, returns a collection of face regions.
detect_faces(image_file).each do |region|
  transform_region!(image, region, operation)
end
Code language: JavaScript (javascript)
Next, for each region, I call transform_region! over the image object. The transform_region method has top_left and bottom_right attributes, each with an X,Y value. Here I crop a new image out of the original image at the exact region that was identified.
cropped_region = image.crop(region.top_left.x, region.top_left.y, region.width, region.height)
Then I call a method for the operation that I want to do with this cropped region image.
cropped_region = send("#{operation}_image!", cropped_region)
Code language: JavaScript (javascript)
In the example code in the repository, I pick an operation called pixelate. However, you also could select “blur” if that treatment was preferred:
PIXELATE_FACTOR = 5
def pixelate_image!(image)
  image.scale!(1 / PIXELATE_FACTOR.to_f).scale!(PIXELATE_FACTOR)
end
Back to transform_region!: I need to set the “transformed” region on top of the original image, using composite again at the X,Y position. After that is complete, I flatten the image and then clean it up by destroying the cropped image region.
image.composite!(cropped_region, region.top_left.x, region.top_left.y, Magick::OverCompositeOp)
cropped_region.destroy!
Code language: CSS (css)
Not bad, huh?
###The Cloudinary way: By now, you have probably come to expect that you can accomplish the same goal with Cloudinary in one line of code, right? Yup!
Cloudinary has a built-in automatic face detection mechanism that enables, among other things, quick pixelation (or blurring) of all faces in a photo:
Pixelating faces
Blurring faces
##Conclusion
ImageMagick is a flexible, capable, open source software suite that developers have used to manage and transform images for years. As we saw in this post, ImageMagick can be utilized to do so much more than simply resizing an image.
At Cloudinary, we make use of ImageMagick for a wide range of use cases, and it serves as one of the valuable tools in our toolbelt.
Cloudinary abstracts the complexities of image transformations, storage, administration and delivery and provides developers with an easy-to-use, end-to-end, cloud-based solution. Cloudinary enables developers to focus on creating their apps and presenting the best images possible.
If you haven’t tried Cloudinary yet, I invite you to test it out. Visit our website to sign up for a account