
You probably want to use a hosted image with Gatsby-image in your Gatsby.js project. You don’t need to have this image stored locally, and you won’t need to fetch it with a GraphQL query. We’ll see how in this jam.
Part 1 of this project chronicles using remote images from Cloudinary in Gatsby.js projects through GraphQL queries. In this part, we’ll discuss how to —
- Utilize a remote image stored on Cloudinary with gatsby-image.
- Serve fluid or fixed images with gatsby-image without a GraphQL query.
- Render optimized, responsive images with gatsby-image.
- Transform those images with Cloudinary.
You don’t need to read part 1 to go through this post.
We completed this project in a Codesandbox, and you can fork it to see all the code in action. To use the sandbox, you need to create a .env file, and add your Cloudinary API key and secret. Follow the format specified in the .env.example in the root directory of the projects.
Suppose you don’t need to upload local images to your Cloudinary account. In that case you don’t need to specify your API key and secret in the plugin configuration.
https://codesandbox.io/s/using-remote-images-in-gatsby-w-gatsby-image-5qtpi?file=/.env.example
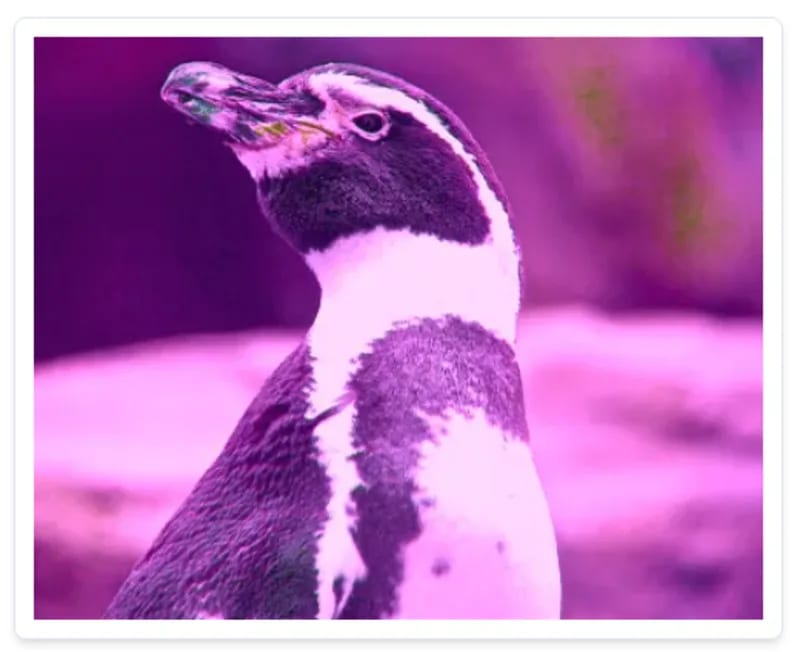
We have an image on Cloudinary which we will source and transform from

to
Specifically, this post guides you through two processes:
-
Fetch an image from Cloudinary with the
getFluidImageObjectAPI of gatsby-transformer-cloudinary and render that image with gatsby-image. You can fetch any image from your Cloudinary account. Also, even after applying the Cloudinary transformations that you specify, the API optimizes that image with gatsby-image during the build process. -
Create a user interface and typography with Chakra-ui.
We implement this feature on an existing Gatsby.js project. You can fork this base Codesandbox containing the dependencies installed, configuration, and layout. Otherwise, we install Gatsby.js globally and create a new project with
     npm install -g gatsby-cli && gatsby new gtc-demo
Code language: JavaScript (javascript)
We proceed to install the required dependencies with
cd gtc-demo && npm i --save gatsby-transformer-cloudinary dotenv @chakra-ui/gatsby-plugin @chakra-ui/react @emotion/react @emotion/styled framer-motion
Sign up for a Cloudinary account. Cloudinary offers a free tier, which is more than adequate for small to medium projects. Once signed up, note your cloud name, API key, and API secret for later use.
With the required dependencies installed, we need to configure the gatsby plugins in gatsby-config.js – a Gatsby file in the project’s root directory to manage plugin configurations.
First, we import dontenv, a required dependency to setup environment variables. Also, we update the site meta data to match the current project.
    require("dotenv").config()
    module.exports = {
      siteMetadata: {
        title: `Gatsby x Cloudinary`,
        description: `Serve remote images in your Gatsby app using gatsby-image`,
        author: `@gatsbyjs`
      },
		}

Code language: JavaScript (javascript)
Next, we configure installed plugins including react-helmet, gatsby-source-filesystem, @chakra-ui/gatsby-plugin and gatsby-transformer-cloudinary.
	module.exports = {
			{other config goes in here},

      plugins: [
        `gatsby-plugin-react-helmet`,
        {
          resolve: `gatsby-source-filesystem`,
          options: {
            name: `cloudinary-images`,
            path: `${__dirname}/src/remote-images`
          }
        },
        {
          resolve: "@chakra-ui/gatsby-plugin",
          options: {
            isUsingColorMode: true
          }
        },
        {
          resolve: "gatsby-transformer-cloudinary",
          options: {
            cloudName: process.env.CLOUDINARY_CLOUD_NAME,
            apiKey: process.env.CLOUDINARY_API_KEY,
            apiSecret: process.env.CLOUDINARY_API_SECRET,
            uploadFolder: "gtc-art-gallery"
          }
        }
      ]
    }
Code language: JavaScript (javascript)
In the configuration file, gatsby-source-filesystem, a source plugin, sources file nodes into the Gatsby data layer. Here, we’ve sourced all the images in a folder, which are uploaded once to Cloudinary on build.
We created the remote-images folder in the src directory of the project. We uploaded all the images into the folder.
We proceed to create a .env file in the project’s root directory, and add our Cloudinary credentials as specified below:
    # Find this at https://cloudinary.com/console/settings/account
    CLOUDINARY_CLOUD_NAME=xxxxx

    # Generate an API key pair at https://cloudinary.com/console/settings/security
    CLOUDINARY_API_KEY=xxxxxxxxxxxxxx
    CLOUDINARY_API_SECRET=xxxxxxxxxxxxxxxxxxx
Code language: PHP (php)
Next, we start the development server on localhost:8000 by running the command:
gatsby develop
All the images in the remote-images folder are uploaded to Cloudinary and added to file nodes for the returned URLs are created in Gatsby’s GraphQL layer.
Even though both getfluidImageObject and getFixedImageObject fetch images from Cloudinary accounts with multiple or chained transformations, the two APIs vary as follows:
getFluidImageObject returns a fluid image object with the breakpoints you specified. If you did not set any, it returns breakpoints with a maximum width of 1000.
getFixedImageObject returns a fixed-width image object.
Passing the response from the asynchronous calls of the functions to the fluid or fixed property of the gatsby-image <Image/> component renders the image.
Both APIs fetch images with a single asynchronous operation, hence no need for GraphQL queries.
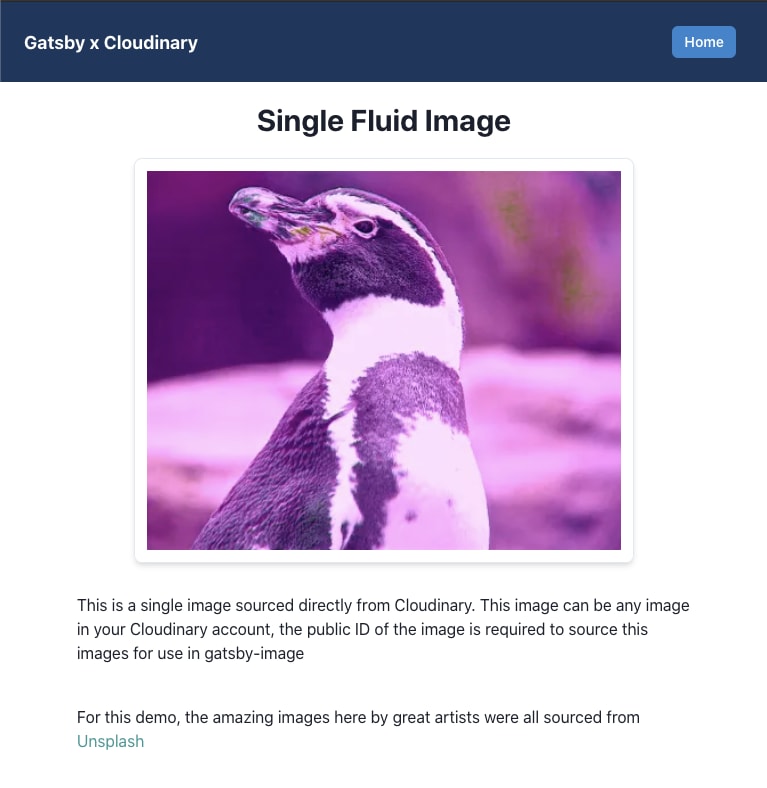
We create a webpage that contains an image fetched with getFluidImageObject. We apply the same layout from part 1 (you can use any layout).
Gatsby.js builds pages from the JavaScript (JS) files in the src/pages directory.
We do the following:
-
Create a JavaScript file titled
single.jsinsrc/pages. Gatsby.js addssingle.jsto the route/single. -
Import the required modules into single.js with this code:
    import React, { useEffect, useState } from "react"
    import Layout from "../components/layout"
    import { getFluidImageObject } from "gatsby-transformer-cloudinary/api"
    import Image from "gatsby-image"
    import { Box, Heading, Text } from "@chakra-ui/react";
Code language: JavaScript (javascript)- Create and export a functional component titled
SinglePage. In the function, fetch a single Cloudinary image with a public ID of your choice. Below is the code, in which the public ID isgatsby-source-cloudinary/penguin:
    const SinglePage = () => {
      const [fluid, setFluid] = useState(undefined)

      useEffect(() => {
        async function getData() {
          const res = await getFluidImageObject({
            public_id: "gatsby-source-cloudinary/penguin",
            cloudName: "chuloo",
            originalHeight: 400,
            originalWidth: 500,
            maxWidth: 800,
            transformations: ["e_replace_color:purple", "a_hflip", "f_auto", "q_auto"],
          })
          setFluid(res)
        }

        getData()
      }, [])

		return (
			// return statement goes here
		)
  }

    export default SinglePage
Code language: JavaScript (javascript)
In the above code, getFluidImageObject is an asynchronous function called on page load using useEffect. Once that function returns the image object, we store it in the component’s fluid state with useState.
Next, we pass the following keys to getFluidImageObjects in its object argument:
- public_id: The public ID of the Cloudinary image
- cloudName: The cloud name of your Cloudinary account
- originalHeight: The height of the image to be fetched
- originalWidth: The width of the image to be fetched
- transformations: The transformations Cloudinary applies to the returned image
See the complete keys along with their optional, and required, arguments.
getFluidImageObject passes Cloudinary transformations in the transformation’s key to add a purple effect, horizontally flip the image with e_replace_color:purple and a_hflip, and apply optimization transformations for quality and format.
With getFluidImageObjects, you can fetch with gatsby-image any image in your Cloudinary account for display on the page.
Gatsby-image lazy-loads images that we sourced and transformed with getFluidImageObject.
In the SinglePage component, we’ll proceed to return the JSX elements to render the page. The global layout is used, <SEO/> element to provide search engine optimization data for the page, and the gatsby-image <Image/> component to render the fluid image data returned by getFluidImageObjects.
return (
        <Layout>
          <SEO title={"single"} />
          <Box>
            <Heading as={"h1"} size={"lg"} m={5} textAlign={"center"}>
              Single Fluid Image
            </Heading>
            <Box
              maxWidth={[350, 400, 500]}
              mx={"auto"}
              shadow="md"
              borderWidth="1px"
              rounded={"lg"}
              p={3}
            >
              {fluid ? <Image fluid={fluid} /> : "loading..."}
            </Box>
            <Box my={30}>
              <Text>
                This is a single image sourced directly from Cloudinary. This image
                can be any image in your Cloudinary account, the public ID of the
                image is required to source this images for use in gatsby-image{" "}
              </Text>
            </Box>
          </Box>
        </Layout>
)
Code language: JavaScript (javascript)
Chakra-ui styles the components for a responsive layout and responsive typography in the above code, with breakpoints for mobile, tablet, and desktop.
Now we restart the development server for the updated look of the webpage.
You now know how to fetch images with getFluidImageObject from Cloudinary into gatsby-image for Gatsby.js projects. getFixedImageObject conveys fixed images for gatsby-image in a similar manner.
Coming up is part 3, which describes how to add a dark mode as a toggle for the website and convert it to a progressive web app (PWA) with only a few code lines. Pretty amazing.
You can find the links below useful