Most people don’t need to worry too much about image types. However, understanding image formats can help preserve image quality, which is especially important if it’s intended to represent you or your business. Plus, it pays to know the advantages and disadvantages of the many image formats available and their intended use cases.
Before diving into automated solutions, it’s useful to understand basic, manual methods for converting images to JPG format, which can be done using standard tools on your computer. For instance, converting an image on a computer can be as simple as opening the image in an application like Paint, selecting ‘Save As,’ and choosing JPEG from the list of image types. This method works for various file types, including converting PNG files to JPG. Similarly, images embedded in Word documents can be converted by right-clicking the image, selecting ‘Save as Picture,’ and then choosing JPEG from the ‘Save as Type’ dropdown menu.
For those who prefer online solutions, there are free websites that allow you to convert images to JPG without any software installation. These methods are handy for quick, one-off conversions and do not require any technical knowledge or special accounts.
This post will discuss the different types of image formats, their uses, and how to leverage third-party platforms like Cloudinary to perform powerful changes at scale.
In this article:
- Why Would I Need To Change Image Formats?
- Changing Image Format at Scale
- Creating Our App
- Automatic Format Selection
- Using Cloudinary to Add Transformations and Change Formats
Why Would I Need To Change Image Formats?
It’s essential to remember that some image formats won’t work or be accessible everywhere because they aren’t as extensively supported as others. Certain formats have specific properties that enable them to be served or changed to a different format later, but others do not.
Understanding file formats and sizes allows you to efficiently distribute, store, and serve images. In fact, serving slow-loading images can negatively impact both user experience and SEO.
Why Should You Change Image Format to JPG?
JPG is the most widely used image format over the web, as it creates smaller files and loads on a page faster. This reduces the rendering time of a website significantly and provides a better user experience.
Typically, JPGs are the best option for optimal performance while giving the smallest file size. It also maintains a good level of quality, despite the compression. With these in mind, you can see how having the ability to change the format to JPG is a powerful tool.
Changing Image Format at Scale
There are many free websites and tools that can change image formats. Some even allow you to add custom parameters to your image conversions. But these websites do not support changing image formats at scale — this is where Cloudinary comes in.
Cloudinary is an end-to-end media management solution for websites and applications that allows you to quickly and easily change image format and dimension. You can also apply effects and other visual enhancements too, all within their API. Cloudinary automatically optimizes images and videos while maintaining high visual quality for a better user experience and less bandwidth.
To understand this better, let’s see this in action by creating an app that automatically changes format to JPG.
Creating Our App
So to set up this app, we’ll use Cloudinary alongside some simple Node.js and React setup. All of these products are free to use, but at a minimum, you’ll need to sign up for a Cloudinary free tier account.
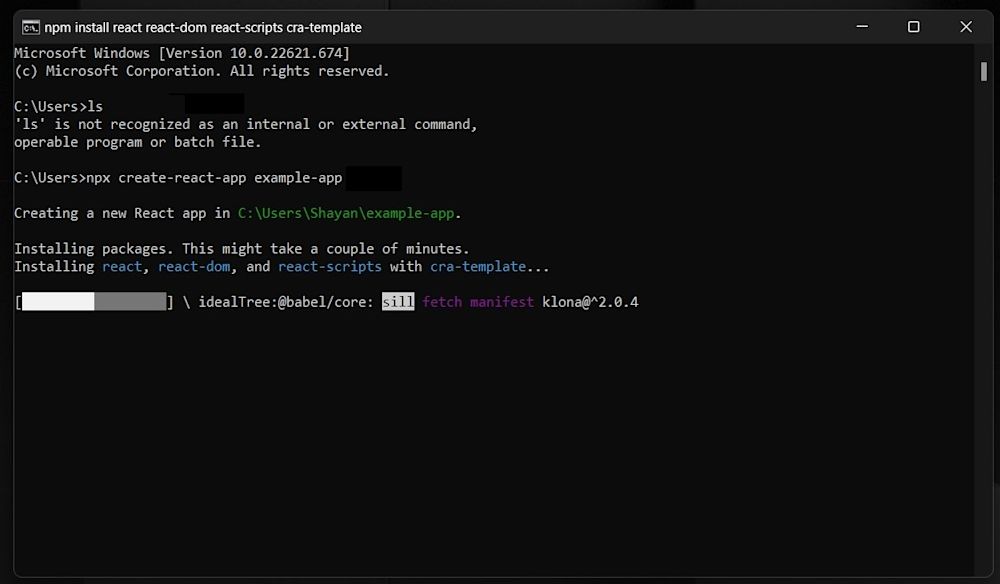
After you have successfully installed Node on your system, create a simple React application:
npx create-react-app example-app
Then, install Cloudinary’s JavaScript and React packages using NPM:
npm i @cloudinary/url-gen @cloudinary/react
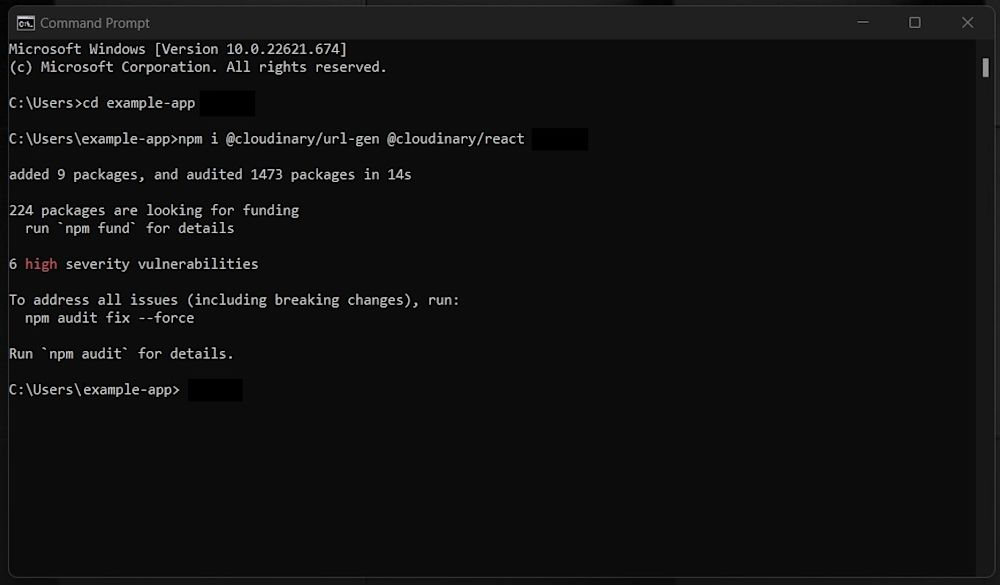
Navigate to your example-app directory and start using npm start:
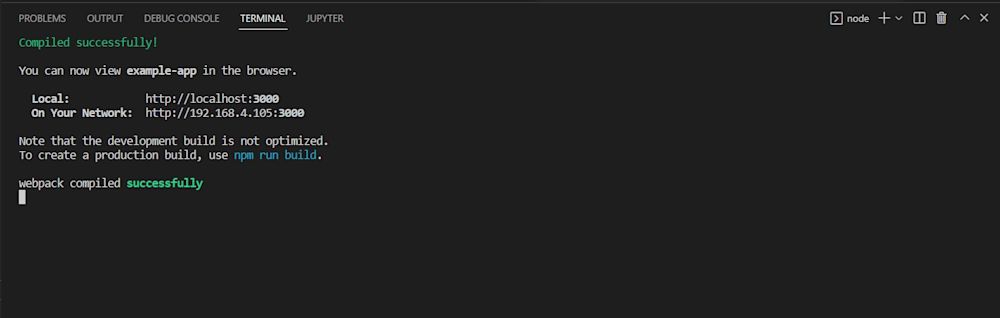
By default, React provides an example implementation for your app. However, these aren’t needed for this tutorial. So let’s move ahead and start creating your application!
Setting Up Our React App
Now that we have the basic file structure, head on over to your App.js file in the src directory and add the following code:
import React from 'react'
import {Cloudinary} from "@cloudinary/url-gen";

const App = () => {

  // Create a Cloudinary instance and set your cloud name.
  const cld = new Cloudinary({
    cloud: {
      cloudName: 'demo'
    }
  });

};
export default App;
In this snippet, we are creating a basic Cloudinary instance that will help us with image formatting. We set the couldName to demo, but you can change this to your cloud name to use and format your assets.
Changing Image Format
We can upload static or dynamic images to Cloudinary in various formats. You can dynamically convert them to your website in your desired format. Here’s the original image named "kitten_fighting" . When not specifying the extension, Cloudinary will serve it in its original format – in this case, a .GIF.

To change the format to JPG, first, we need to upload the image to Cloudinary. You can check out the Cloudinary Documentation to learn step-by-step how to upload images and other media.
Once you have some media, add an image to the application and import relevant functions that will help display the image:
import './App.css';

import React from 'react';
import {Cloudinary} from "@cloudinary/url-gen";
import {AdvancedImage} from '@cloudinary/react';
...
And here we’ll add an image to our app:
...
  const myImg =  cld.image("kitten_fighting", {format : 'gif'});
...
Note: A PublicID is the unique identifier for an asset stored in Cloudinary. In the image above, we renamed the PublicID of the image to "kitten_fighting".
Then, we can return the image using return:
...
  return (
    <div>
      <AdvancedImage cldImg={myImg} controls/>
    </div>
  )
...
We can convert the image to any format by changing the file’s extension or setting the format parameter. You can either convert the image’s format while uploading or upload the image as is and dynamically convert its format on delivery:
...
const myImg =  cld.image("kitten_fighting", {format : 'jpg'});
...
As before, we finally return the rendered image in a React Component. Here is what our final code and output look like:
import './App.css';
import React from 'react';
import {Cloudinary} from "@cloudinary/url-gen";
import {AdvancedImage} from '@cloudinary/react';

const App = () => {

  // Create a Cloudinary instance and set your cloud name.
  const cld = new Cloudinary({
    cloud: {
      cloudName: 'demo'
    }
  });
  // Create a Cloudinary instance and set your cloud name.
  const myImg =  cld.image("kitten_fighting", {format : 'jpg'});

  return (
    <div>
      <AdvancedImage cldImg={myImg} controls/>
    </div>
  )

};
export default App;
Here is what our final image looks like:

We can also pass in the format as part of the public ID which would also yield the same result:
const myImg = cld.image("kitten_fighting.jpg");
This same method can be applied to any image transformation. With Cloudinary, you can change file formats on the fly to have every image you need customized for each use case.
Automatic Format Selection
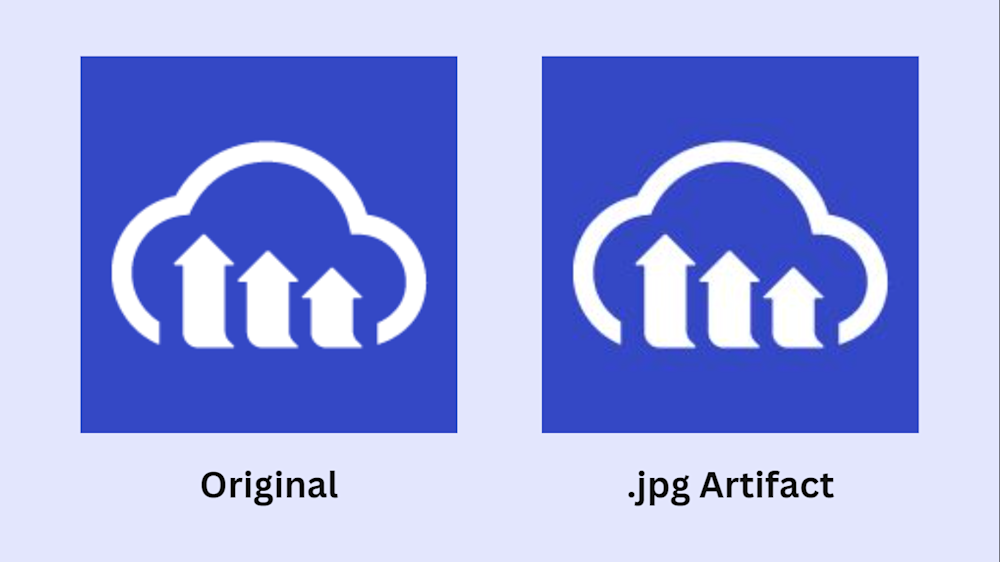
Images can be encoded in various formats, some of which are better than others in compressing the file size without sacrificing visual quality. For example, you may want images with the best quality. However, setting your image format to JPG can create unwanted artifacts, like so:
Delivering the right format for each browser is the best way to maximize delivery time and conserve bandwidth since different browsers support different image formats.
The fetch_format parameter can be set to ‘auto’ for automatic format selection based on the requesting browser. By using f_auto, the image is supplied in the format indicated by the file extension if a browser does not support any optimal formats that f_auto is allowed to return.
Using Cloudinary to Add Transformations and Change Formats
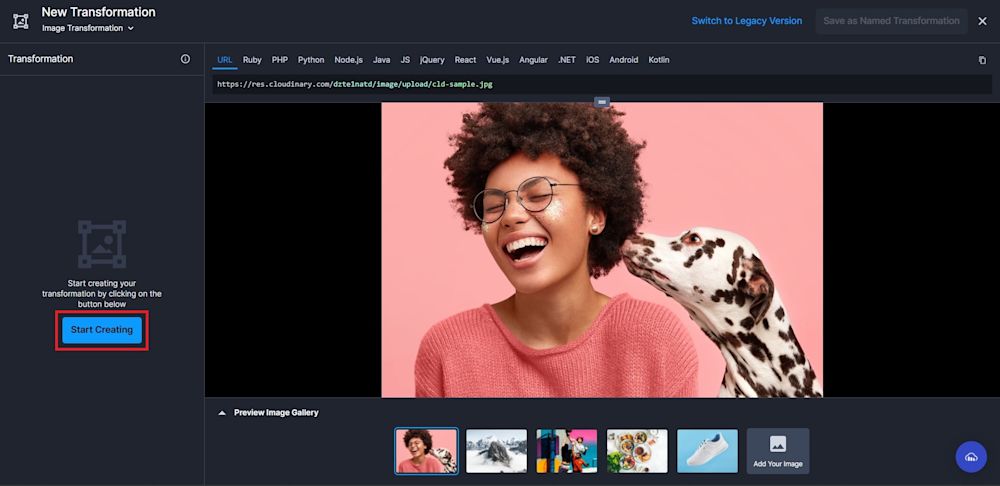
You can also use Cloudinary to change formats and add image transformations. All you need is that free Cloudinary account from earlier. Log in, and head to the Transformations tab. This is where you can add or create scalable transformations and where we’ll start. Click on Add New to start building your transformations.

The transformation tab allows you to create new transformation profiles to apply to your images. By default, Cloudinary provides you with several sample images you can transform. You can see all the pictures on your Cloudinary account in the Preview Image section.
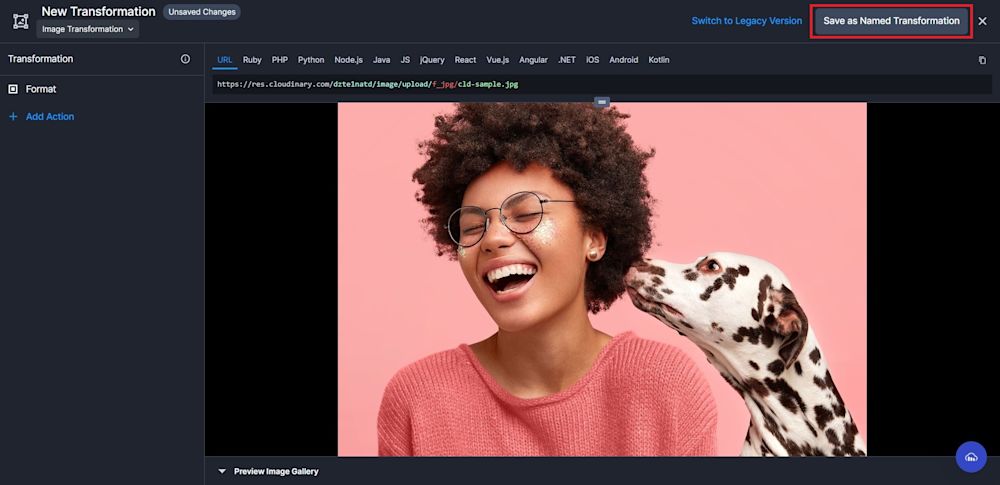
We will perform transformations on "cld-sample.jpg". Click on Start Creating to follow along:
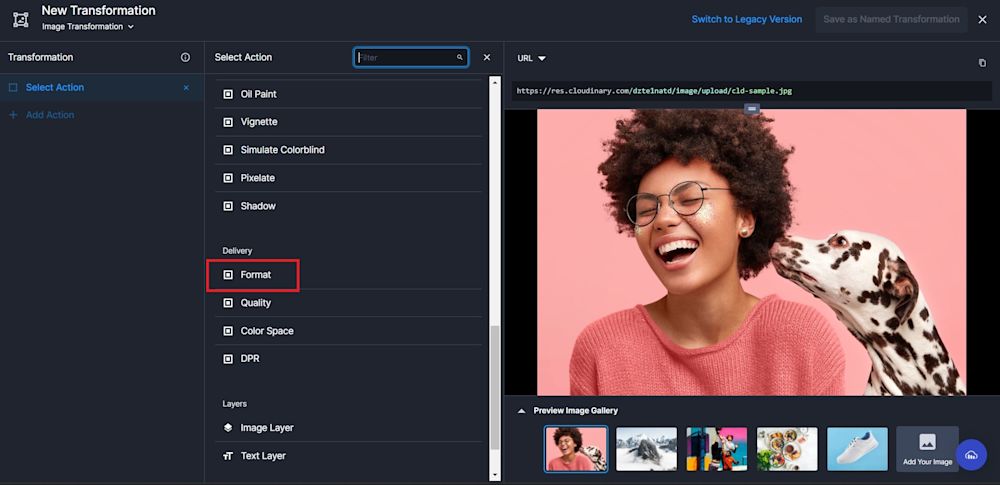
First, scroll down to the Delivery section and click on the Format tab.
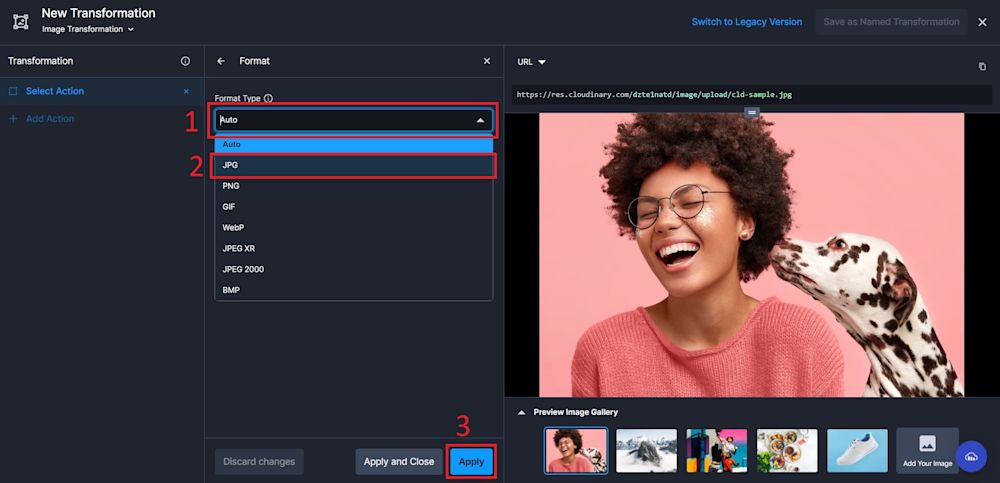
Cloudinary sets your delivery format to Auto, which puts your fetch_format as f_auto. To change this, click on the Format Type menu and select your delivery format. In this example, we have changed the format to JPG. Then click on Apply to create your new transformation:
After that, click on Save as Named Transformation and save your new transformation:
Wrapping It Up
Optimizing your images for improved performance on your website or application should be your first step. Different image formats have their benefits and compression methods, and only a few browsers support some of the newer formats.
Cloudinary makes it simple to manage the images on your website. Our optimization capabilities guarantee that your images are delivered to users as quickly as possible—improving website performance Core Web Vital metrics. To get started, check out Cloudinary and sign up for a free account today!

