As the world’s most popular mobile operating system, Android boasts over 3 billion active devices. With such a vast user base, the demand for efficient and user-friendly applications is constantly growing. One common functionality that users often seek is the ability to convert PDF files to JPG format.
This feature can significantly enhance the user experience, whether for work, school, or personal use. This comprehensive guide will walk you through the process of converting PDF to JPG on Android using Cloudinary, providing a valuable resource for developers and users alike.
In this article:
The Process of Converting PDF to JPG in Android
Before you start converting PDFs to JPG in Android, ensure you have the necessary tools.
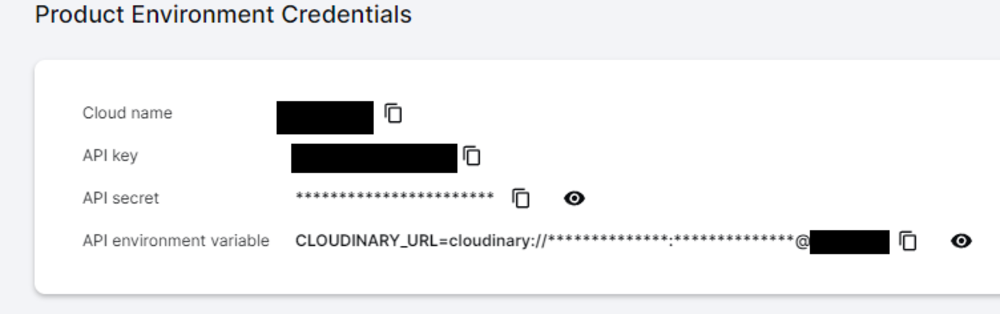
To begin, you need to install Android Studio on your system. Download the latest version from the Android Studio website if you haven’t already done so. We’ll also use Cloudinary to power our app and host our videos. Go ahead and sign up for a free account if you haven’t already. For this tutorial, we’ll specifically require our Cloudinary API credentials.
To obtain your credentials, log in to your Cloudinary account. Then, click the Programmable Media button in the top left corner to navigate to the Dashboard. There, you’ll find details such as your Cloud Name, API Key, and API Secret. Remember to copy these credentials; we’ll use them later in the tutorial.
Now that you’re all set up, we can set up our Android App.

Setting Up Your First Android Studio Project
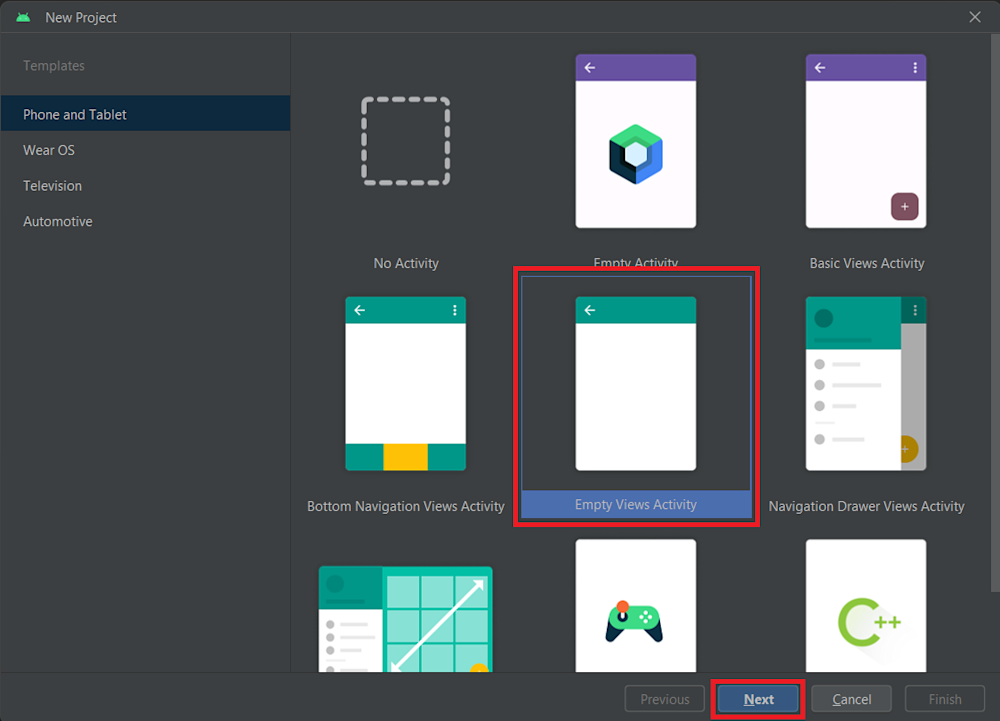
Start by launching Android Studio on your system. You’ll see the New Project window. Here, you begin your project setup. Choose the Empty Activity template for your project. This template provides a clean starting point without any pre-defined components. Now, proceed to the next window by clicking the Next button.
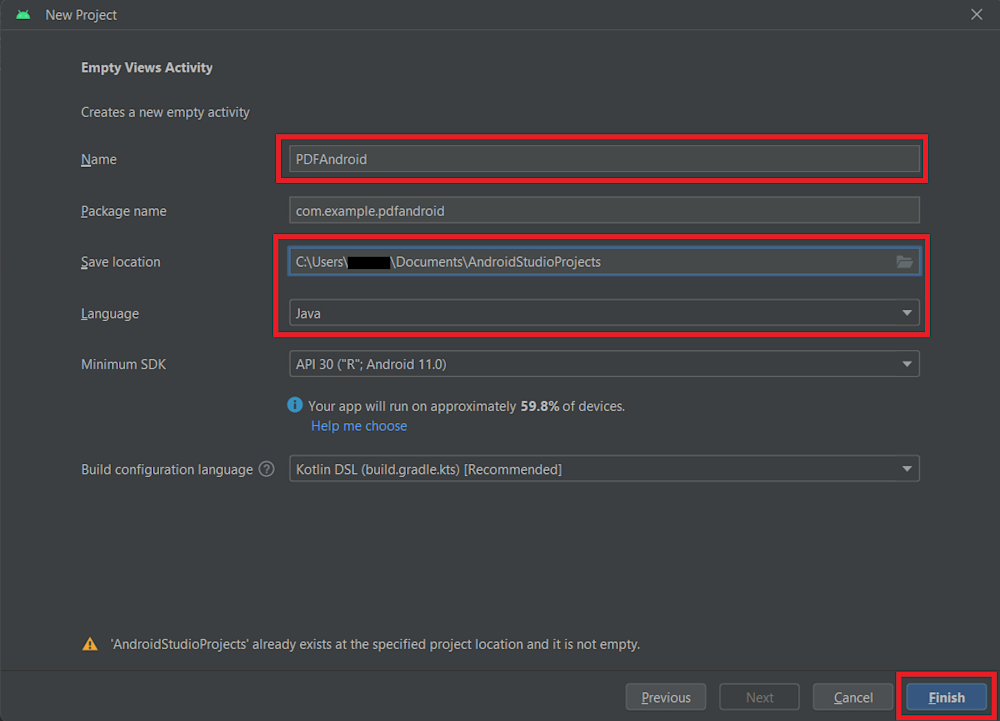
We will begin by renaming your project. For this tutorial, we’ve named our project PDFAndroid.
Next, choose the directory where you want to save your project. This location will contain all your project files. Here, we will choose Java as our project’s language. Finally, click on Finish to complete the project setup process. Android Studio will generate the necessary files and structure for your new project.
Once your project has finished building, head over to the gradle.build file located in the Gradle Scripts directory. Here, we will import the Cloudinary Android module.
implementation("com.cloudinary:cloudinary-android:2.5.0")
Finally, open up AndroidManifest.xml in the manifests directory. Now, we will add permissions for reading device storage for files and requesting access to the internet.
<!-- Read Storage -->
<uses-permission android:name="android.permission.READ_EXTERNAL_STORAGE"/>
<uses-permission android:name="android.permission.INTERNET"/>
Now that we have our project set up, we can start building the UI for our Android app.
Designing an Intuitive UI For Android
To create our UI, open up activity_main.xml in Android Studio located within your project’s res/layout directory. This will launch Android Studio’s UI editor, where we can easily create an appealing UI with drag and drop components.
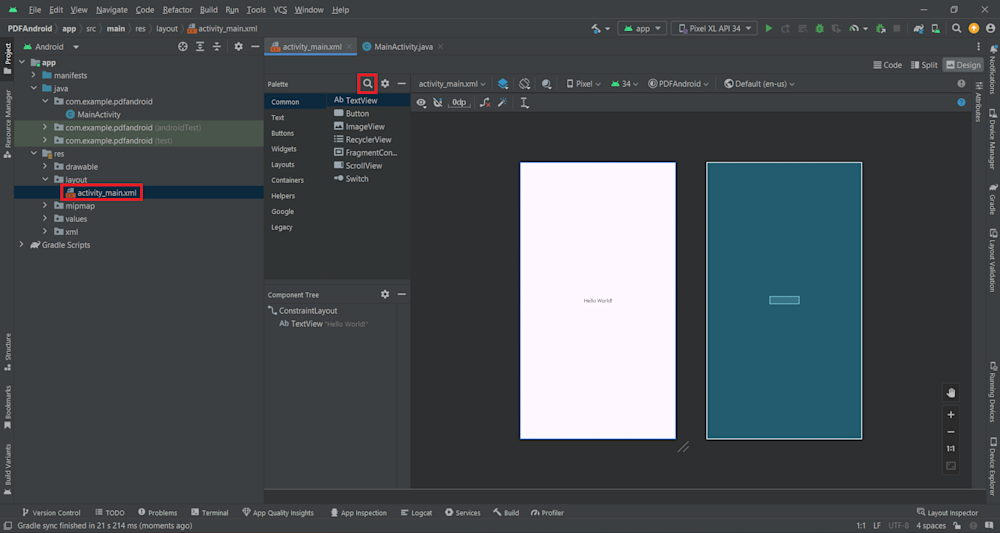
Here, we will start by searching for and adding two Button components to our UI. The top button will help us select a PDF file, whereas the bottom button converts the PDF to a JPG. Next, we add an EditText that will select the page of the PDF we want to convert to a JPG. Finally, we will add some TextView components for some visual appeal.
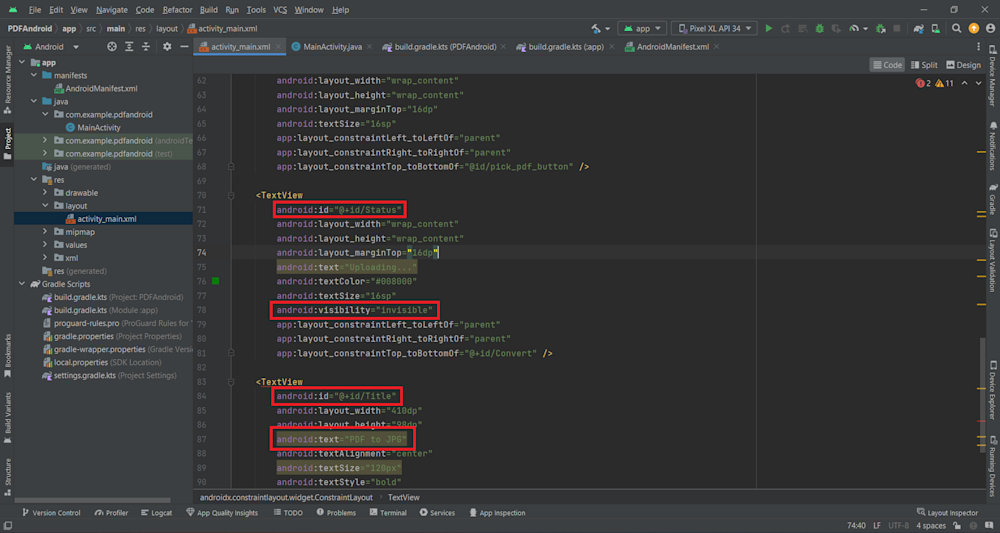
Once we’ve added all of our components, select each and connect it to the XML code by clicking on the Code button at the top right corner of your editor. Here, redefine your UI objects according to your needs.
For example, in the screenshot below, we have defined two TextView components, Title and Status. The Title simply displays the app’s title for the visual appeal of the UI, whereas the Status will display the status of the conversion. This component is also set to invisible:
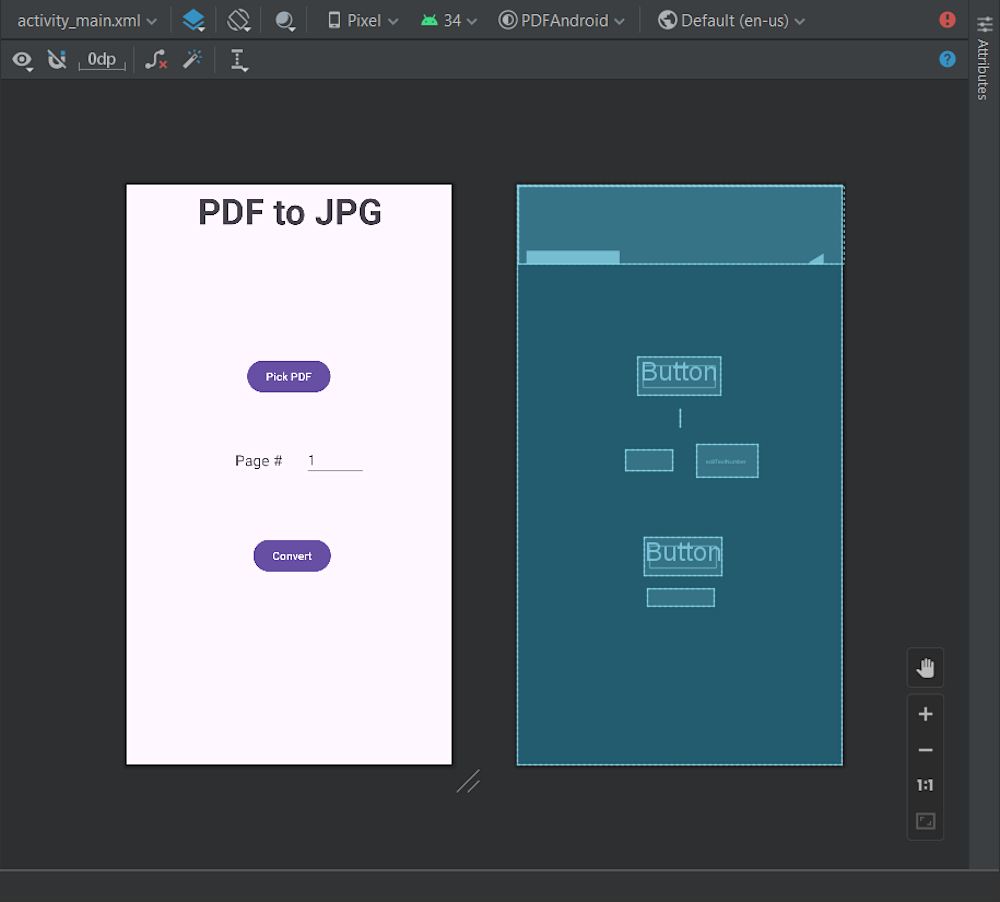
Here is what our UI looks like:
Adding Code to Our PDF to JPG Converter App
Now that our UI is complete, we can start writing the main logic for our app. So, navigate to MainActivity.java located in the com.example.cloudinary folder and create new variables for our app:
public class MainActivity extends AppCompatActivity {

   Uri pdfUri;
   Map config = new HashMap();
   private Button pickPdfButton;
   private Button convertButton;
   private TextView selectedPdfTextView;
   private TextView Status;
   private EditText page;

   private ActivityResultLauncher<Intent> pdfPickerLauncher;
Here, we have defined two Button variables for our PDF Picker button, as well as our Convert button. We have also defined a Uri variable called pdfUri, which will help us store the location of our PDF on our Android device.
The two TextView variables will help us display important messages on our UI, while the EditText variable will help us retrieve the page number that will be converted to a JPG. We also create an ActivityResultLauncher variable, which we will define later. Finally, the HashMap() will be used to configure our Cloudinary API.
Now that we’ve set up our variables, let’s move on to the OnCreate() function. Here, we will populate our variables by retrieving our objects from the XML UI document using the findViewById() function:
@Override
protected void onCreate(Bundle savedInstanceState) {
   super.onCreate(savedInstanceState);
   setContentView(R.layout.activity_main);

   pickPdfButton = findViewById(R.id.pick_pdf_button);
   convertButton = findViewById(R.id.Convert);
   selectedPdfTextView = findViewById(R.id.selected_pdf_text_view);
   Status = findViewById(R.id.Status);
   page = findViewById(R.id.editTextNumber);
Next, we will use the config hashmap to configure our Cloudinary API:
...
config.put("cloud_name", "...");
config.put("api_key","...");
config.put("api_secret","...");
MediaManager.init(this, config);
...
Finally, we will add click functions to both of our buttons:
pickPdfButton.setOnClickListener(new View.OnClickListener() {
   @Override
   public void onClick(View v) {
       openPdfPicker();
   }
});

convertButton.setOnClickListener(new View.OnClickListener() {
   @Override
   public void onClick(View v) {
       int pagenum = Integer.parseInt(page.getText().toString());

       String pdfID = pdfUri.getLastPathSegment();

       MediaManager.get().upload(pdfUri)
               .option("resource_type", "image")
               .option("public_id", pdfID)
               .callback(new UploadCallback() {
                   @Override
                   public void onSuccess(String requestId, Map resultData) {
                       // The PDF has been uploaded successfully
                       // Now you can retrieve the URL
                       Status.setText("PDF Uploaded Successfully");
                       String transformedUrl = MediaManager.get().url().transformation(new Transformation().page(pagenum)).generate(pdfID + ".jpg");

                       Intent myIntent = new Intent(Intent.ACTION_VIEW, Uri.parse(transformedUrl));
                       startActivity(myIntent);

                       Log.d("Uploaded PDF URL", transformedUrl);
                   }

                   @Override
                   public void onError(String requestId, ErrorInfo error) {

                   }

                   @Override
                   public void onReschedule(String requestId, ErrorInfo error) {

                   }

                   @Override
                   public void onStart(String requestId) {

                       Status.setVisibility(View.VISIBLE);

                   }

                   @Override
                   public void onProgress(String requestId, long bytes, long totalBytes) {

                   }

               }).dispatch();
Here, our pdfPick button will simply call another function called openPdfPicker(), which we will define later. The convertButton starts by retrieving and storing the page number from the TextEdit. Next, it retrieves the last segment of the PDF’s Uri and stores it in new variables called pdfID. This helps us create unique public ID’s for our assets when we upload them to the Cloudinary cloud using the MediaManager.
Next, it calls the MediaManager to upload the PDF using the pdfUri. Here, we define the resource as an image and its public ID as the pdfID. Finally, we use Cloudinary’s UploadCallback() function to define several functions. The onStart() function simply sets the visibility of the Status TextEdit to visible, revealing a green “Uploading…” message.
On the other hand, the onSuccess() function starts by setting the status as uploaded. It retrieves and generates a new URL for a JPG that converts a specific page of our PDF to a JPG. Finally, it creates a new Intent, which it uses to open the JPG in a new browser tab.
Now, we can define our activity launcher variable:
pdfPickerLauncher = registerForActivityResult(new ActivityResultContracts.StartActivityForResult(),
       result -> {
           if (result.getResultCode() == Activity.RESULT_OK) {
               Intent data = result.getData();
               if (data != null) {
                   pdfUri = data.getData();
                   selectedPdfTextView.setText(pdfUri.toString());
                   // Do something with the selected PDF file
               }
           } else {
               Toast.makeText(MainActivity.this, "No PDF selected", Toast.LENGTH_SHORT).show();
           }
       });
Here, we simply define an activity that retrieves the path of our PDF file in our system. It then displays the path of this PDF file onto a TextView on our UI.
Here is what our complete onCreate() function looks like:
@Override
protected void onCreate(Bundle savedInstanceState) {
   super.onCreate(savedInstanceState);
   setContentView(R.layout.activity_main);

   pickPdfButton = findViewById(R.id.pick_pdf_button);
   convertButton = findViewById(R.id.Convert);
   selectedPdfTextView = findViewById(R.id.selected_pdf_text_view);
   Status = findViewById(R.id.Status);
   page = findViewById(R.id.editTextNumber);


   config.put("cloud_name", "...");
   config.put("api_key","...");
   config.put("api_secret","...");
   MediaManager.init(this, config);

   pickPdfButton.setOnClickListener(new View.OnClickListener() {
       @Override
       public void onClick(View v) {
           openPdfPicker();
       }
   });

   convertButton.setOnClickListener(new View.OnClickListener() {
       @Override
       public void onClick(View v) {
           int pagenum = Integer.parseInt(page.getText().toString());

           String pdfID = pdfUri.getLastPathSegment();

           MediaManager.get().upload(pdfUri)
                   .option("resource_type", "image")
                   .option("public_id", pdfID)
                   .callback(new UploadCallback() {
                       @Override
                       public void onSuccess(String requestId, Map resultData) {
                           // The PDF has been uploaded successfully
                           // Now you can retrieve the URL
                           Status.setText("PDF Uploaded Successfully");
                           String transformedUrl = MediaManager.get().url().transformation(new Transformation().page(pagenum)).generate(pdfID + ".jpg");

                           Intent myIntent = new Intent(Intent.ACTION_VIEW, Uri.parse(transformedUrl));
                           startActivity(myIntent);

                           Log.d("Uploaded PDF URL", transformedUrl);
                       }

                       @Override
                       public void onError(String requestId, ErrorInfo error) {

                       }

                       @Override
                       public void onReschedule(String requestId, ErrorInfo error) {

                       }

                       @Override
                       public void onStart(String requestId) {

                           Status.setVisibility(View.VISIBLE);

                       }

                       @Override
                       public void onProgress(String requestId, long bytes, long totalBytes) {

                       }

                   }).dispatch();
       }

   });

   pdfPickerLauncher = registerForActivityResult(new ActivityResultContracts.StartActivityForResult(),
           result -> {
               if (result.getResultCode() == Activity.RESULT_OK) {
                   Intent data = result.getData();
                   if (data != null) {
                       pdfUri = data.getData();
                       selectedPdfTextView.setText(pdfUri.toString());
                       // Do something with the selected PDF file
                   }
               } else {
                   Toast.makeText(MainActivity.this, "No PDF selected", Toast.LENGTH_SHORT).show();
               }
           });
}
Next, we will create our openPdfPicker() function. As the name suggests, this function helps the user select a PDF file in the device’s storage. It does this by creating a new intent and then simply calling the pdfPickerLanuncher’s activity using the .launch() method. Here is what our function looks like:
private void openPdfPicker() {
   Intent intent = new Intent(Intent.ACTION_OPEN_DOCUMENT);
   intent.setType("application/pdf");
   pdfPickerLauncher.launch(intent);
}
Here is what our complete MainActivity.java file looks like:
package com.example.pdfandroid;

import android.app.Activity;
import android.content.Intent;
import android.database.Cursor;
import android.net.Uri;
import android.os.Bundle;
import android.provider.OpenableColumns;
import android.util.Log;
import android.view.View;
import android.widget.Button;
import android.widget.EditText;
import android.widget.TextView;
import android.widget.Toast;

import androidx.activity.result.ActivityResult;
import androidx.activity.result.ActivityResultLauncher;
import androidx.activity.result.contract.ActivityResultContracts;
import androidx.appcompat.app.AppCompatActivity;

import com.cloudinary.Transformation;
import com.cloudinary.android.MediaManager;
import com.cloudinary.android.callback.ErrorInfo;
import com.cloudinary.android.callback.UploadCallback;

import java.util.HashMap;
import java.util.Map;

public class MainActivity extends AppCompatActivity {

   Uri pdfUri;
   Map config = new HashMap();
   private Button pickPdfButton;
   private Button convertButton;
   private TextView selectedPdfTextView;
   private TextView Status;
   private EditText page;

   private ActivityResultLauncher<Intent> pdfPickerLauncher;

   @Override
   protected void onCreate(Bundle savedInstanceState) {
       super.onCreate(savedInstanceState);
       setContentView(R.layout.activity_main);

       pickPdfButton = findViewById(R.id.pick_pdf_button);
       convertButton = findViewById(R.id.Convert);
       selectedPdfTextView = findViewById(R.id.selected_pdf_text_view);
       Status = findViewById(R.id.Status);
       page = findViewById(R.id.editTextNumber);


       config.put("cloud_name", "...");
       config.put("api_key","...");
       config.put("api_secret","...");
       MediaManager.init(this, config);

       pickPdfButton.setOnClickListener(new View.OnClickListener() {
           @Override
           public void onClick(View v) {
               openPdfPicker();
           }
       });

       convertButton.setOnClickListener(new View.OnClickListener() {
           @Override
           public void onClick(View v) {
               int pagenum = Integer.parseInt(page.getText().toString());

               String pdfID = pdfUri.getLastPathSegment();

               MediaManager.get().upload(pdfUri)
                       .option("resource_type", "image")
                       .option("public_id", pdfID)
                       .callback(new UploadCallback() {
                           @Override
                           public void onSuccess(String requestId, Map resultData) {
                               // The PDF has been uploaded successfully
                               // Now you can retrieve the URL
                               Status.setText("PDF Uploaded Successfully");
                               String transformedUrl = MediaManager.get().url().transformation(new Transformation().page(pagenum)).generate(pdfID + ".jpg");

                               Intent myIntent = new Intent(Intent.ACTION_VIEW, Uri.parse(transformedUrl));
                               startActivity(myIntent);

                               Log.d("Uploaded PDF URL", transformedUrl);
                           }

                           @Override
                           public void onError(String requestId, ErrorInfo error) {

                           }

                           @Override
                           public void onReschedule(String requestId, ErrorInfo error) {

                           }

                           @Override
                           public void onStart(String requestId) {

                               Status.setVisibility(View.VISIBLE);

                           }

                           @Override
                           public void onProgress(String requestId, long bytes, long totalBytes) {

                           }

                       }).dispatch();
           }

       });

       pdfPickerLauncher = registerForActivityResult(new ActivityResultContracts.StartActivityForResult(),
               result -> {
                   if (result.getResultCode() == Activity.RESULT_OK) {
                       Intent data = result.getData();
                       if (data != null) {
                           pdfUri = data.getData();
                           selectedPdfTextView.setText(pdfUri.toString());
                           // Do something with the selected PDF file
                       }
                   } else {
                       Toast.makeText(MainActivity.this, "No PDF selected", Toast.LENGTH_SHORT).show();
                   }
               });
   }

   private void openPdfPicker() {
       Intent intent = new Intent(Intent.ACTION_OPEN_DOCUMENT);
       intent.setType("application/pdf");
       pdfPickerLauncher.launch(intent);
   }

}
Testing Our Android PDF to JPG Converter App
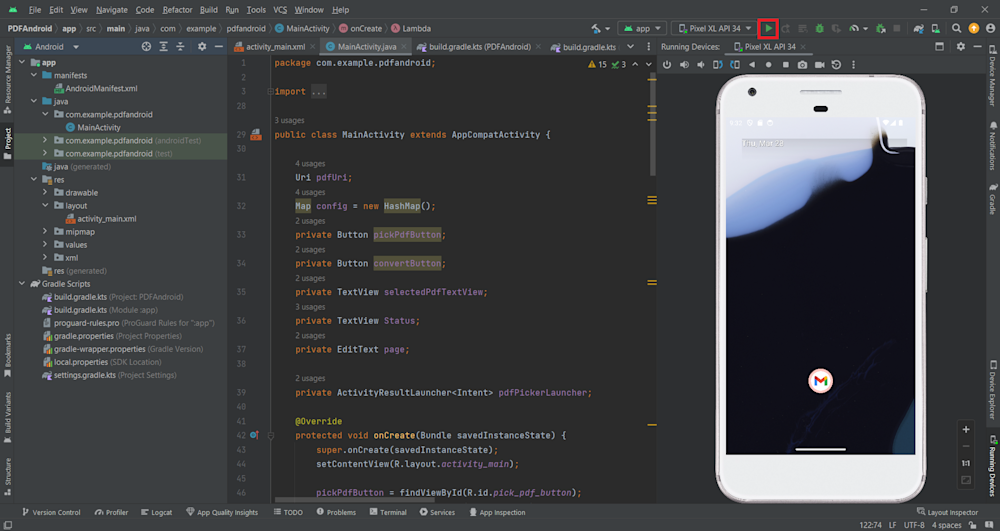
Now, all we need to do is run our app. To do this, simply click the Play button at the top-right corner of your screen. This will launch your mobile emulator and run your Android flip video app.
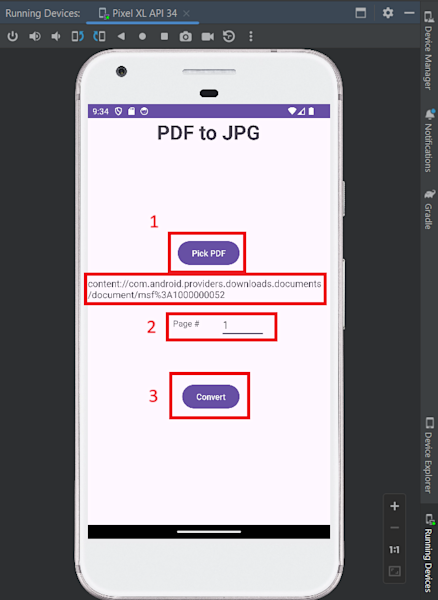
Now click the Pick PDF button to select a PDF you want to convert. You will see the Uri of your pdf on the TextView as shown above. Next, write the page you want to convert to a JPG, and finally, click on the Convert button to see your converted PDF. Let’s see our app in action:

Wrapping Up
While it’s not something you’d use every day, the ability to convert PDF to JPG on Android is a handy feature. Hopefully, this tutorial helped show you a little more on how to make the magic happen with powerful tools like Cloudinary, to fuel your next big idea.
Not using Cloudinary Yet? Sign up for a Cloudinary account today and start exploring the endless possibilities it offers.
More from Cloudinary:
Uploading, Managing and Delivering PDFs
Convert Images to PDF Files With React-To-PDF

