Did you know that WebP can reduce file sizes by up to 34% compared to JPEG files while maintaining the same image quality? This remarkable compression technology has made WebP increasingly popular, especially among web developers looking to optimize website performance and load times. As impressive as WebP may be, it does have its share of limitations – most notably, its compatibility with older browsers and certain software tools.
WebP brings several benefits to the table, such as faster page load times, reduced bandwidth usage, and ultimately, an improved user experience. However, alongside these perks come compatibility issues, making it crucial for developers to consider when and where to use WebP images. This is where converting WebP to more widely-supported formats like JPG comes into play.
In this article, we’ll explore the process of converting WebP to JPG, looking at various tools and techniques, and providing insights to help you choose the best approach for your projects.
In this guide:
- What is a WebP file?
- Why is JPG so popular?
- Why convert a WebP file to JPG?
- Most common conversion methods
- Converting WebP to JPG on an iPhone
- How to convert WebP to JPG on your Mac
- How to convert WebP to JPG on your Windows
- How to convert WebP to JPG with Paint
- How to convert WebP to JPG on Convertio
- How to convert WebP to JPG on Google Chrome
- Automatically convert WebP to JPG with Cloudinary
What is a WebP file?
WebP is a modern image format created by Google in 2010 to enhance web performance. Images are a major contributor to data transfer online, and WebP aims to reduce this load by offering improved compression. Its key advantage is delivering high-quality images with much smaller file sizes compared to traditional formats like JPG and PNG. By efficiently compressing images without a noticeable loss in quality, WebP has become a popular choice for developers focused on optimizing website speed and performance.
While WebP excels in size efficiency, its feature set is equally noteworthy. The format has the capability to support animation and transparency, similar to GIF and PNG, and excels in the balance of image size and quality. Despite its benefits, WebP has a few limitations, with the most notable one being compatibility issues with certain web browsers and graphic editing software. This underscores the need for conversion processes such as WebP to JPEG.
Why is JPG so popular?
JPEG, often simply referred to as JPG due to its filename extension, has become synonymous with image files. Its roots go deep, and its adoption is vast. Let’s delve into the reasons behind JPG’s unmatched popularity.
Historical Context: Introduced in 1992 by the Joint Photographic Experts Group, the JPEG format was one of the first image formats that allowed effective image compression. This was during a time when digital storage and internet bandwidth were both limited and expensive. An image format that could considerably reduce file sizes without drastically compromising quality was a boon.
Balance Between Size and Quality: One of JPEG’s most appealing attributes is its ability to strike a balance between image quality and file size. With its lossy compression algorithm, JPEG allows users to decide the degree of compression, making it versatile for different use cases—from web graphics where smaller sizes might be prioritized to printing where quality takes precedence.
Universal Support: Over time, JPEG’s widespread use led to a virtuous cycle of adoption. As more software and hardware vendors supported it, more creators used it. From image editing software to cameras to browsers, JPEG became the default or go-to option.
Simplicity and Usability: JPEG is straightforward and doesn’t overwhelm users with options. While formats like PNG support transparency and GIFs allow animation, JPEG is designed for static images and offers efficient compression. This simplicity has made it a popular choice for those who don’t require advanced features.
Embedded Metadata: JPEG supports embedding metadata directly within the image file, such as EXIF data from cameras. This feature is useful for photographers and archivists, allowing them to store important details like shutter speed, aperture, date taken, and even geolocation alongside the image.
Platform Independence: JPEG images can be viewed and processed on virtually any device, including Windows PCs, Macs, Linux machines, smartphones, digital cameras, and embedded systems. This widespread compatibility ensures that a JPEG image can be shared and viewed by almost anyone, regardless of the device they use.
The popularity of the JPEG format is a blend of age, accessibility, and the network effects of broad adoption. While newer formats, including WebP, offer technical improvements, JPG’s deep-seated presence ensures it remains a dominant player.
Why convert a WebP file to JPG?
Each image format offers its own set of strengths. Despite the technical advantages of WebP, there are practical reasons developers and designers might want to convert WebP to JPG:
- Software Limitations. Not every software tool, especially older versions or niche applications, has been updated to support WebP. Some popular image editing or viewing software might operate best with JPG. Converting WebP to JPG can provide a more seamless workflow for those accustomed to such tools.
- Device Compatibility. Certain devices, particularly older ones, might not handle WebP natively. Think of digital picture frames, some older smartphones, or specific printers. For optimal compatibility across a broad spectrum of devices, JPG remains a reliable choice.
- Platform Restrictions. Some online platforms or services might have limitations on the types of image formats they accept. For instance, a few online printing services or stock photo websites might prefer or only accept JPG uploads.
- User Familiarity. The average user is likely more acquainted with JPG than with WebP. If you’re distributing images to a less tech-savvy audience, providing them in JPG format can circumvent potential confusion or issues with file handling.
- Archival and Backup. When archiving or backing up image libraries, some prefer to maintain uniformity in format. If the bulk of an existing image library is in JPG, converting incoming WebP images to JPG can maintain that consistency.
- Lossy to Lossy Concerns. It’s worth noting that both JPG and WebP utilize lossy compression techniques. When converting from WebP to JPG, there’s potential for additional quality loss due to the double compression. However, in some scenarios, the ease of use and compatibility of JPG might outweigh this consideration.
Pro Tip!
Consider Cloudinary’s URL Transformations
Cloudinary allows you to easily transform your images on the fly to any required format without the need for coding skills. Simply upload your images to Cloudinary and deliver them in your desired format via URL.
Most common conversion methods:
The necessity to swap formats is a frequent task. Whether it’s for compatibility, usability, or sharing, being able to transition from WebP to JPG can be vital. Here’s a breakdown of some common methods to accomplish this:
Online Converters
These platforms provide a fast solution without requiring installation. Simply upload your WebP image, choose your desired output (such as JPG), and receive the converted image in seconds. Many online converters even support bulk uploads, making the process more efficient. However, it’s important to be cautious when uploading sensitive or copyrighted images to online platforms. Always review the website’s privacy policy and terms of use before uploading such images.
Dedicated Image Editing Software
Tools like GIMP, Photoshop, and XnConvert provide a suite of editing options alongside conversion capabilities. This can be advantageous if your images require tweaks or edits during the conversion process. Unlike online converters, once installed, these tools work without internet access, ensuring you can convert images whenever required.
Command Line Tools
Tools like ImageMagick and FFMpeg, commonly used by developers and IT professionals, provide command-line options for image conversion. These tools are powerful and flexible, allowing integration into scripts for automation. Command-line tools are particularly useful for batch conversions or when specific parameters need to be set during the conversion process.
Browser Extensions and Plugins
Some browser extensions can automatically convert WebP images to JPG when downloading from the web. This is particularly useful if you frequently download images from sources that primarily serve in WebP. Once installed, these tools typically operate in the background, requiring minimal interaction from the user.
CMS and Web Platforms
If you’re dealing with a content management system (CMS) or specific web platforms, there might be plugins or modules available that handle the conversion seamlessly. For example, a WordPress plugin might automatically convert and serve images in JPG even if uploaded in WebP.
The method you choose typically depends on the task at hand. Online converters offer quick solutions for occasional needs, while dedicated software and command-line tools provide more control and advanced features for regular or bulk conversions. Whatever your conversion requirements, there’s likely a tool or method that fits the job.
The Many Ways to Convert WebP to JPG
Converting WebP to JPG on an iPhone
Unfortunately, iOS doesn’t natively support WebP, but numerous apps on the App Store can handle converting it to other formats. Download one of the many options, import your WebP image, and export it as a JPG.
How to convert WebP to JPG on Mac
- Mac’s built-in Preview tool allows you to natively convert images without needing any extra bells and whistles. To convert images:Open the WebP image in Preview.
- Go to File > Export.
- Choose the JPG format and save.
Alternatively, for batch conversions or more settings, you should consider third-party software like GraphicConverter or Cloudinary.
How to convert WebP to JPG on Windows
Windows offers a few different ways to convert images, with the easiest one being the built-in Paint tool. To convert images with Paint, you’ll need to:
- Open the WebP image in Paint.
- Go to File > Save As.
- Choose the JPEG option, and click Save!
How to convert WebP to JPG with Paint
Here’s how to convert a WebP image to a JPG on a Windows computer using Paint:
- Open Paint.
- Open the WebP image.
- Select File.
- Select Save As.
- Select JPEG picture.
- Select a folder to save the image to.
How to convert WebP to JPG on Convertio
You can also use online file converters for this purpose. A popular choice is Convertio. Here’s how you can use it:
- Open Convertio in a browser.
- Select ‘Choose Files’.
- Select the WebP file to convert.
- Set the ‘to’ menu to JPG.
- Select ‘Convert’.
How to convert WebP to JPG on Google Chrome
In Google Chrome, you can convert WebP to JPG by right-clicking on the image and selecting ‘Save image as JPG’. This feature provides a quick and easy way to convert images directly from web pages.
How to Convert WebP to JPG with Cloudinary via URL
Converting WebP to JPG with Cloudinary is easier than you think.
Simply upload your image to Cloudinary, get the URL, and change the URL extension from WebP to JPG.
For example, if your original URL is:
https://res.cloudinary.com/image/upload/logo.webp
To change it to JPG, just modify the URL to:
https://res.cloudinary.com/image/upload/logo.JPG
And that’s it!
Automatically convert WebP to JPG with Cloudinary
While manually converting WebP to JPG may work for a small number of images, it can quickly become tedious as the library grows. This is where Cloudinary comes in. Cloudinary simplifies and streamlines the image conversion process, effortlessly converting WebP images to JPG format, turning a cumbersome task into an easy one.
Cloudinary is more than just a conversion tool. It’s a powerful cloud-based service that offers a wide range of features, including image and video management, optimization, and delivery. Think of Cloudinary as a comprehensive toolbox for all your multimedia needs—whether it’s resizing, cropping, applying effects, or delivering media with optimal performance across any device or platform.
Let’s break down the image conversion process step-by-step:
Sign Up & Log In
If you’re new to Cloudinary, the first step is to create an account. The user-friendly website will guide you through the process. Once you have an account, simply log in to access your dashboard.

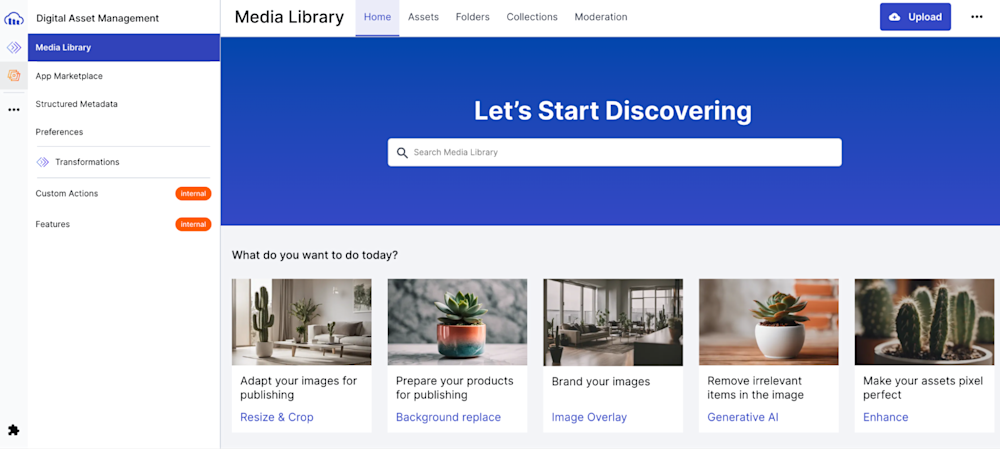
Navigate to the Media Library
Once inside your dashboard, look for the ‘Media Library‘ tab. This is your personal space where all your uploaded images and videos reside.
Upload Your WebP Images
Click on the ‘Upload’ button, found at the top or corner of the Media Library. You can either drag and drop your WebP files or use the file picker to select and upload them.

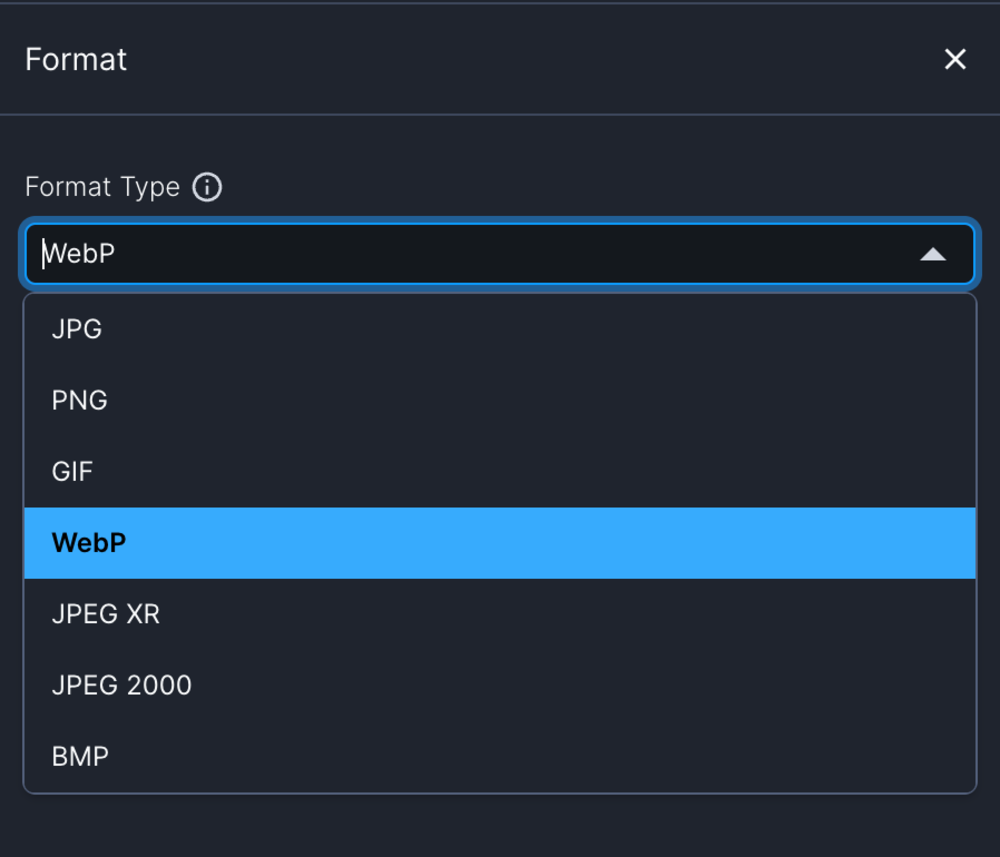
Automatic Detection & Conversion
One of Cloudinary’s strengths is its intuitive nature. Upon uploading, it detects the format of your image. To convert WebP to JPG, all you need to do is deliver or fetch the image via a URL and set the format to ‘.jpg’. Cloudinary does the rest, transforming the file on-the-fly.
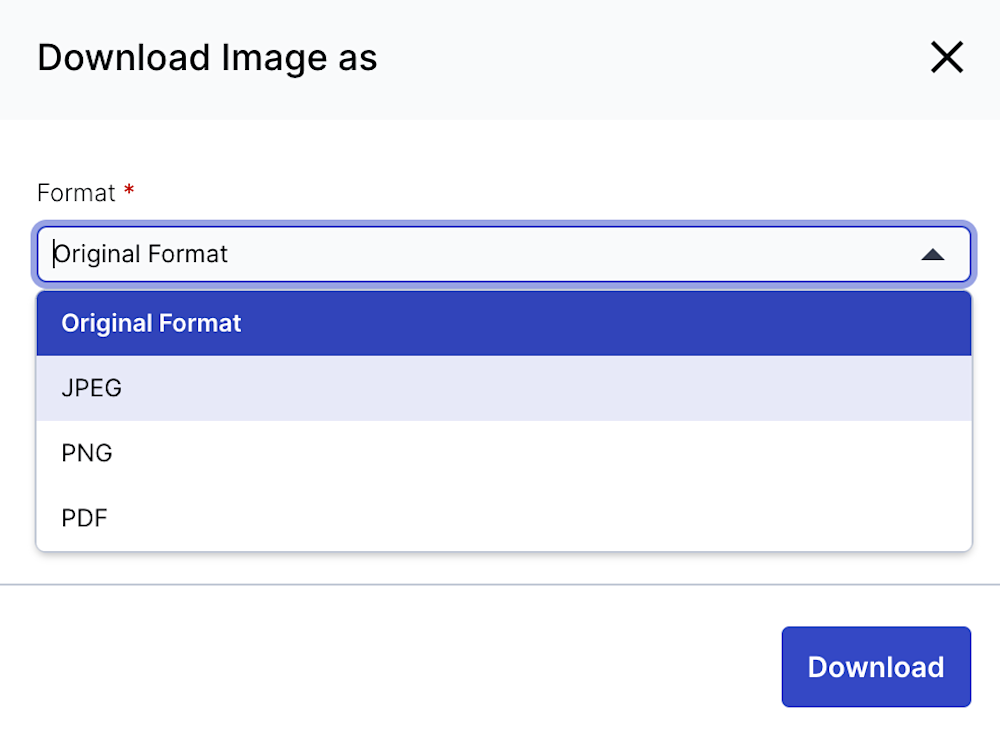
Access & Download the Converted Image
Your converted JPG image will now be available in the Media Library. Click on the image thumbnail for a detailed view. From here, you can either share a direct URL or download the converted image to your device.
For those wanting more granular control, Cloudinary offers transformation and optimization settings. This means you can resize, crop, adjust quality settings, and apply effects even as you convert from WebP to JPG, ensuring the output is tailored to your precise needs.

