What is a TIFF file?
A Tagged Image File Format (TIFF), originally developed by Aldus Corporation in the 1980s and now maintained by Adobe, is a standardized image format widely used for high-quality graphics and scanned documents. TIFF files can preserve multiple pages and images within a single file, making them ideal for detailed imagery such as photographs, publishing materials, and high-resolution scans.
Unlike formats that use lossy compression, TIFF is lossless, which means it retains all image data without sacrificing quality. While this results in larger file sizes compared to formats like JPEG, it ensures that TIFF files deliver superior detail and clarity. They can also act as containers for smaller images such as JPEGs.
Compared to PDFs, TIFFs offer some notable advantages. For one, TIFF imagery generally retains higher quality. Additionally, TIFF files are easier to edit because when a PDF is converted to TIFF, it becomes rasterized. This allows pixel-level manipulation that would not be possible in a vector-based PDF.
In this article:
- Why convert a PDF to a TIFF file?
- Methods of Converting PDF to TIFF
- Converting PDF to TIFF with Cloudinary
Why convert a PDF to a TIFF file?
Converting a PDF to a TIFF file can be beneficial for several reasons. Unlike vector-based PDFs, TIFF files are raster images composed of pixels, which makes them easier to edit and manipulate at a detailed level. This is especially useful for tasks such as graphic design, desktop publishing, or high-resolution photo editing, where precise control over imagery is required.
TIFF files retain comprehensive image data, ensuring higher quality results that are widely compatible with editing software. This makes them ideal for projects such as creating magazine covers, where you may need to extract an image from a PDF and layer text or graphics on top of it.
Methods of Converting PDF to TIFF
Converting a PDF file to a TIFF format can be done in different ways, depending on your use cases and considerations. For example, an online conversion tool may be quick and convenient but limiting. At the same time, command line tools can offer you the flexibility to control and modify the conversion process.
Let’s take a look at the common methods available.
Pro Tip!
Convert Files On-The-Fly
Say goodbye to traditional converter programs. Cloudinary allows you to easily convert your files on the fly to different formats via URL delivery. From PDF to TIFF, Cloudinary supports a vast array of formats.
PDF to TIFF
1. Go to the pdf2tiff conversion page and upload up to 20 PDF files by clicking Select File or dragging and dropping them into the upload box.
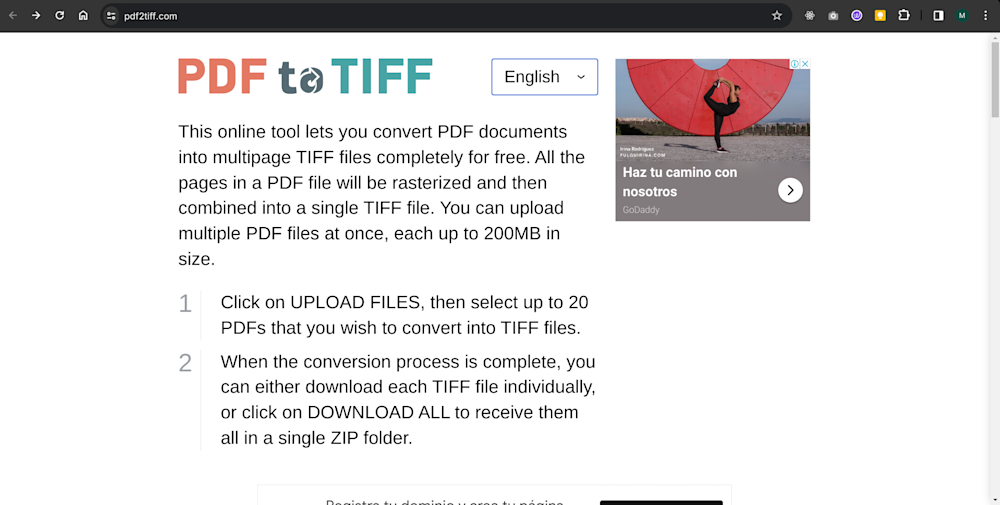
2. Start the conversion and wait for the tool to process your PDF(s) into multi-page TIFF format.
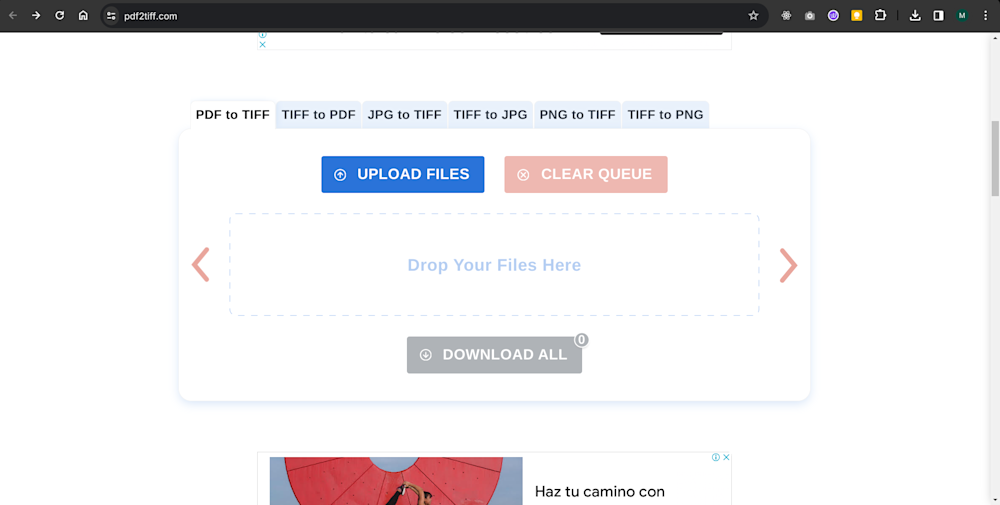
3. Download the results once the conversion is complete. The files will be provided in a single .zip archive.
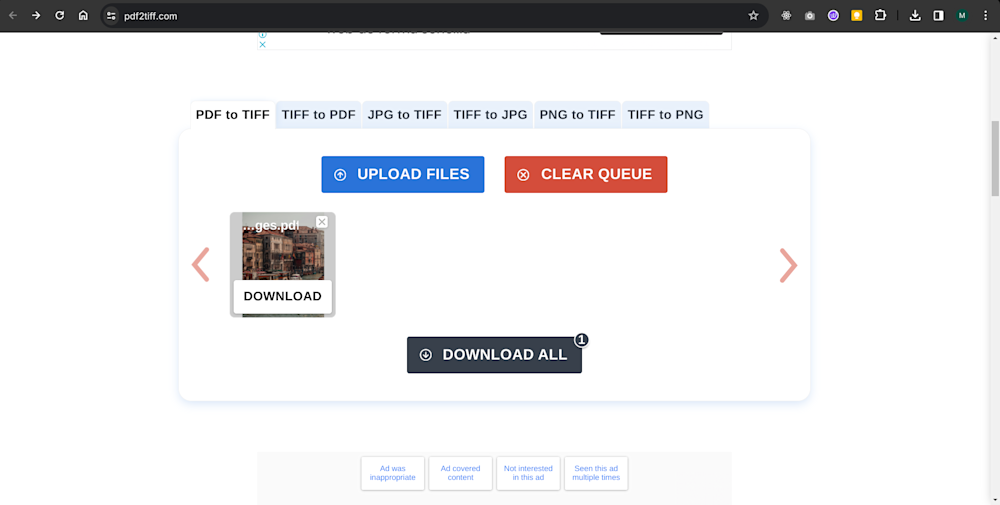
4. Extract your TIFF files from the .zip folder and save them to your device for editing, printing, or sharing.
Converting PDF to TIFF with Cloudinary
Cloudinary is a cloud-based media management platform offering an API-driven image and video manipulation approach. Cloudinary provides extensive capabilities for resizing, transforming, enhancing, and converting images from one format to another.

Setting Up the Node.js Application
In this tutorial, we’ll show you how to use Cloudinary Node.js SDK to convert PNG files to SVG in a Node.js application. This tutorial will show you how to use Cloudinary’s image transformation API to convert images from one format to another.
Before you proceed, we assume you are familiar with JavaScript and Node.js – you can also check out the available SDKs on the Cloudinary Platform if you’d like to learn how to achieve the same thing in another language of your choice.
Also, you’ll need to sign up for a Cloudinary account in order to get an API Key and use other features. You can create one here for free.
Initialize a Node Project
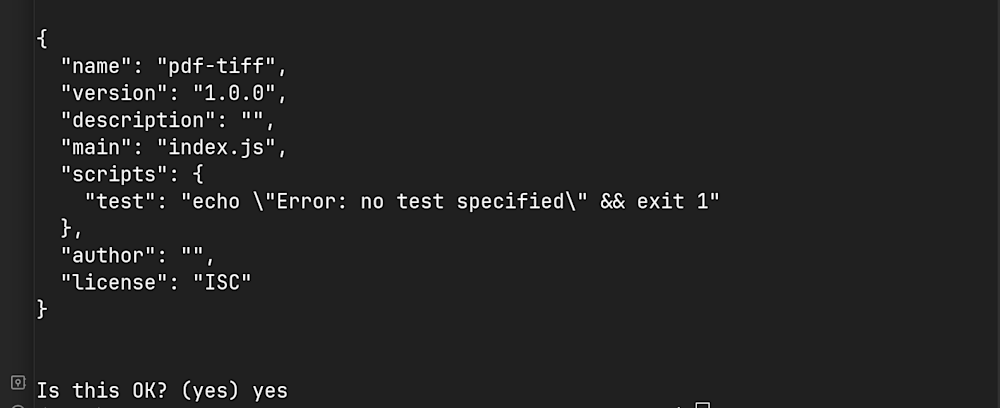
To get started, create a new folder on your computer where you’d like to have this project. Next, run the following command in that directory to initialize a Node.js project:
npm init
After running the above command, the NPM command line utility will take you through a few prompts to configure the app. Answer the prompts correctly, and set index.js as the application’s entry point.
Install the Necessary Packages
Next, we’ll install the packages we’ll use to build our application. Run the command below to install the packages:
npm i express multer cloudinary
- Express – A popular and minimalist Node.js web framework for building servers and RESTful APIs.
- Multer – A Node.js middleware for handling multipart/form-data.
- Cloudinary – A library of functions and utilities for interacting with the Cloudinary Platform.
After the installation is complete, add the following code to index.js to create an express server:
const express = require('express')
const app = express();app.get('/', (req, res) => {
 res.send("Welcome to the homepage!")
})
app.listen(3000, () => {
    console.log('App is running!')
})
Next, edit the scripts field in package.json to the following:
..."scripts": { "dev": "node --watch --env-file=.env index.js" },...
Now, run npm run dev in the terminal and you should see the message App is running! logged to the console indicates that our server is up and ready to use!
Adding Your Cloudinary Credentials
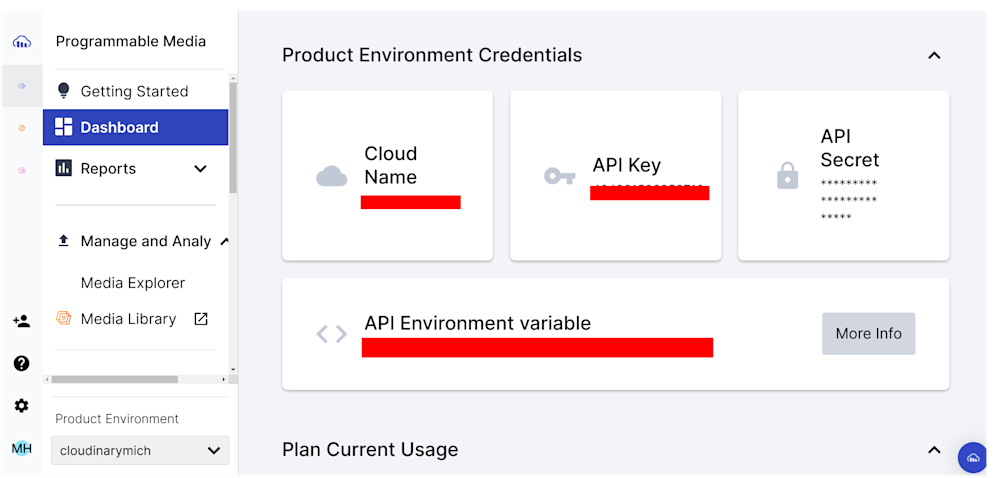
To use Cloudinary, you’ll need to authenticate your requests using credentials from your Cloudinary account. These include your API Key, API Secret, and Cloudinary Cloud Name.
To get your credentials, follow these steps:
- Log into your Cloudinary account. If you don’t already have an account, you can sign up for free.
- Navigate to the Dashboard menu and copy your cloud name, API Key, and API Secret.
Next, create a .env file in the project root directory and update it with your Cloudinary credentials as follows:
CLOUDINARY_API_KEY =
<YOUR_CLOOUDINARY_API_KEY>CLOUDINARY_CLOUD_NAME =
<YOUR_CLOUDINARY_CLOUD_NAME>CLOUDINARY_API_SECRET =
<YOUR_CLOUDINARY_API_SECRET>
Writing the Conversion Code
In this step, we’ll write the actual code to convert any PDF file uploaded to Cloudinary into a TIFF format.
Open index.js and edit its content to the following code:
const express = require('express')
const multer = require("multer");const path = require('node:path');const cloudinary = require('cloudinary').v2;cloudinary.config({
    cloud_name: process.env.CLOUDINARY_CLOUD_NAME,    api_key: process.env.CLOUDINARY_API_KEY,    api_secret: process.env.CLOUDINARY_API_SECRET,    secure: true,});const app = express();app.get('/', (req, res) => {
    res.send("Welcome to the homepage!")
});// A function to check if the uploaded file extension is PDFconst fileFilter = (req, file, cb) => {
    const extname = path.extname(file.originalname).toLowerCase();    if (extname === '.pdf') {
      return cb(null, true);    }
    const error = new Error('Only PDF files are allowed!');    error.status = 400;    cb(error, false);  }
const upload = multer({ dest: 'uploads/', fileFilter });// The endpoint to upload the PDF fileapp.post('/upload', upload.single('pdf'), async function (req, res, next) {
    if (req.file !== undefined) {
        try {
            const pdfFile = await cloudinaryPDFUpload(req.file.path);            const tiffFile = convertToTIFF(pdfFile);            res.status(200).json({
                success: true,                file: tiffFile,            });        } catch (error) {
            res.status(400).json({
                success: false,                error,            });        }
    } else {
        res.status(400).json({
            success: false,            error: "No PDF file was uploaded",        });    }
});// A function to upload the PDF file to Cloudinary for preocessingconst cloudinaryPDFUpload = (file) => {
    return new Promise((resolve, reject) => {
        cloudinary.uploader        .upload(file)
        .then((result) => {
            resolve(result.public_id);        })
        .catch((error) => {
            reject(error);        });    });};// Function to convert the PDF file to TIFFconst convertToTIFF = (pdf) => cloudinary.url(pdf, { format: "tiff" });app.listen(3000, () => {
    console.log('App is running!')
})
Let’s go through what is happening above.
- Firstly, we import the necessary packages and set up Cloudinary with the required authentication credentials for file upload in the first few lines.
- We also created a
fileFilterfunction that checks if the file we want to upload on the server is a PDF. - Next, we configure Multer with the
uploadvariable and thefileFilteroption to save the images that are sent to the server to anuploadsfolder in the root directory. - After that, we specify a POST endpoint,
/upload, to receive a single image file calledpdf(the PDF file to be converted). - After the PDF file has been sent to Cloudinary via the
cloudinaryIPDFUploadfunction, theconvertToTIFFfunction converts the uploaded file to TIFF format. - Lastly, the server replies with an error message or a JSON object with a link to download the TIFF file and a success status message.
Trying It Out
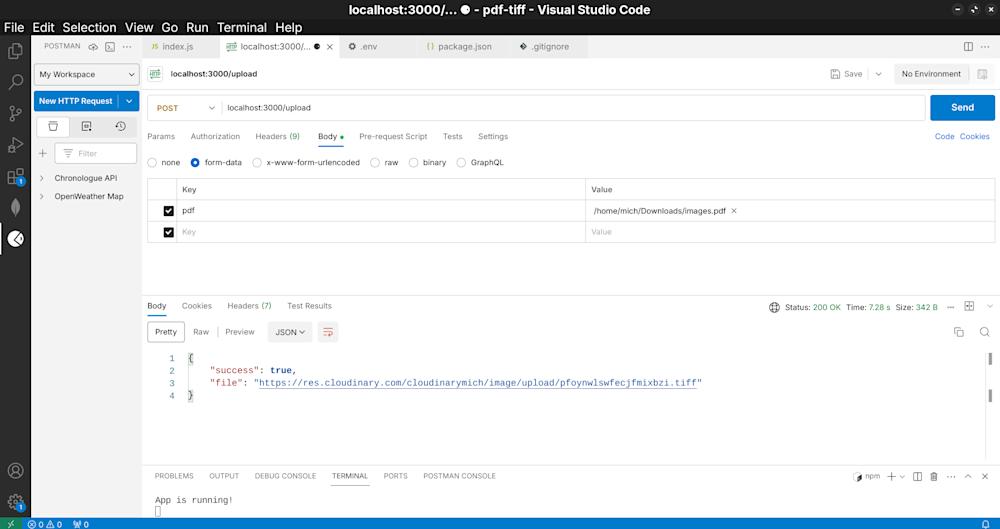
You can download the Postman extension to test the application if you’re using VS Code as your code editor. The Postman extension allows us to test and make HTTP or API requests inside VS Code.
Make sure to configure the request parameters as shown in the image below, and you should get a link to download the SVG result of any PNG you upload to the endpoint.
Final Thoughts
In this article, we talked about how you can convert PDF files to TIFF format using various software and online tools. We also walked you through how to use the Cloudinary Platform to achieve the same thing.
Unlock the full potential of your digital assets with Cloudinary! Streamline your media management, enhance your images and videos effortlessly, and deliver content seamlessly across all platforms.
Start revolutionizing your digital experience today – Join Cloudinary now and elevate your online presence!

