Adopted by Apple, High Efficiency Image Container (HEIC) is the default image format for all Apple devices since iOS 11. But why did Apple choose this format? It’s not just about high efficiency in name but in function too. With its advanced compression techniques, HEIC offers smaller file sizes without compromising image quality, often outperforming JPEG/JPG. Think of it as getting more visual bang for your storage buck.
Before diving into conversion methods, it’s worth noting that there are multiple approaches to dealing with HEIC files, from built-in tools like Preview on macOS to simple settings changes on your iPhone and even third-party apps for batch processing and offline solutions for those prioritizing privacy. Options like DocuFreezer and ImageMagick cater specifically to users looking for flexible and robust conversion tools that don’t rely on an internet connection. Additionally, tools like Canva let you edit and enhance photos before converting, adding even more versatility to your workflow.
But here’s a pertinent question: if it’s so efficient, why do we ever need to convert HEIC to JPG? And when we do, what are the best ways to ensure a seamless transition between these formats? This article will guide you on a journey to understand the nuances of the HEIC file format, its distinct advantages, and the pragmatic reasons behind converting it to the universally recognized JPG format. Plus, for all the Mac users out there, we’ve got some tailored advice just for you.
In this article:
- What is a HEIC file?
- Why convert a HEIC file to JPG?
- How to Convert HEIC to JPG
- Automatically convert HEIC to JPG with Cloudinary
What is a HEIC file?
HEIC was created by the Moving Picture Experts Group (MPEG) and was adopted by Apple as their go-to image format for devices starting from iOS 11.
But what makes HEIC stand out in the vast ocean of image formats? It’s uncanny ability to combine compression with quality. Imagine fitting a vast, detailed landscape into a compact suitcase without wrinkling or losing a single detail. That’s HEIC for you – storing brilliant images in a fraction of the space. No more fretting over storage space or compromising on image quality!
Learn more about HEIC in the video below.
Why convert a HEIC file to JPG?
While the HEIC format boasts excellent compression and quality, it’s not as universally accepted as JPG. Here are some reasons to convert HEIC to JPG:
- Universality and Compatibility. While HEIC is very performant, it’s still relatively new. JPG, on the other hand, has a long history and has established itself as the go-to image format. It’s compatible with nearly everything from classic photo viewers on older computers to most websites you might upload to. Until HEIC gains broader support, switching your images to JPG makes sure they’ll work just about anywhere.
- Ease of Sharing. Because HEIC isn’t as widely adopted, it is more difficult to share or use it on other devices. Switching to JPG ensures your photos can be shared and used as much as you need to without worrying about compatibility issues.
- Editing and Tools. Although several contemporary editing tools now support the HEIC format, compatibility is not yet universal. For professionals such as artists, designers, or photography enthusiasts who frequently edit their images, converting to JPG often presents a more practical solution. Moreover, platforms like Canva provide robust editing capabilities prior to conversion, making them a preferred choice among creative professionals.
- Proactive Camera Settings. If you often need JPGs, you can save yourself the trouble of converting later by changing your iPhone settings. Go to Settings > Camera > Formats and select Most Compatible. This ensures your photos are saved in JPG format directly.
While HEIC has its clear advantages, it still has a lot of catching up to do when compared to older image formats. Especially when compared to JPG, HEIC still seems too new to be widely used, but that won’t last forever.
Pro Tip! Transform Images On-The-Fly
Manually transforming a large number of images can be tasking and time-consuming. Cloudinary allows you to easily transform your images on the fly to any required format, style and dimension, and apply effects and other visual enhancements.
How To Change HEIC to JPG
Because of the lack of widespread adoption of HEIC files, converting them to JPG is fairly common. We’re going to show you several easy ways you can convert HEIC to JPG, so you don’t get left in the dust.
Convert HEIC to JPG on MacOS using Preview
Converting HEIC files to JPG on a Mac is straightforward with the built-in Preview application:
- Open the HEIC file. Navigate to the HEIC image you wish to convert. Right-click and choose ‘Open with’ > ‘Preview.’
- Export as JPG. In Preview, click on ‘File’ in the menu bar, then select ‘Export. ‘
- Choose the Format. In the pop-up window, you’ll see a drop-down menu labeled ‘Format.’ Choose ‘JPEG’ from this list.
- Save. Choose your desired save location and click the ‘Save’ button.
Convert HEIC to JPG using Apple Photos
Similarly, converting with the default Photos program is easy:
- Open the image. Launch the Photos app and locate the HEIC photo you want to convert.
- Initiate Export. Click on the ellipsis icon (three dots).
- Choose Save as. From the dropdown, select ‘Save as’.
- Change the File Type. Modify the ‘Save as type’ field to .jpg or .jpeg, then proceed to save.
Converting HEIC to JPG on Windows 10 and 11
For Windows users, there are specific methods to handle HEIC files:
- Windows 11 – Open the image in the Photos app, click the … (ellipsis) icon, then choose ‘Save as’. Change the ‘Save as type’ field to .jpg or .jpeg and click ‘Save’.
- Windows 10 and 11 – If you have multiple HEIC images, you can easily convert them. Open a folder containing the HEIC images, hold Ctrl, then right-click on one of the selected files. Choose ‘Convert to JPEG With CopyTrans’.
Converting HEIC to JPG using iCloud
Another method for Mac and iOS users involves iCloud:
- Choose ‘File’, then ‘Open With’, then ‘Preview’.
- Select ‘File’, then ‘Export’.
- From the Format menu, choose ‘JPG’.
Other Conversion Methods
- Using Cloudinary. Import HEIC image and automatically change it to JPG or any other format! Jump directly to that solution.
- Using Canva. Choose ‘Uploads’ on the left sidebar, then either select your image from your device or drag and drop the HEIC photo onto the converter. Once uploaded, you can download it in the JPG format.
- Using Convertio. Simply upload the HEIC files to Convertio, choose to convert to jpg, and then download the JPG file.
- Using CloudConvert. A versatile online conversion platform, CloudConvert supports multiple formats including PNG, JPG, GIF, WEBP, and, of course, HEIC. Upload your HEIC file and select JPG as the desired output format.
- iMobie HEIC Converter. For a dedicated conversion tool choose the file format and image quality, add the HEIC files, and then save the converted photos.
- Email the HEIC file. A quick and easy option is to email the HEIC image to yourself from your iPhone. iOS will automatically convert it to JPG during the process. Download the JPG from your email to your computer.
- Batch Conversion Tools. For converting multiple HEIC files at once, tools like EaseUS MobiMover, iMazing HEIC Converter, and CopyTrans HEIC for Windows make the process simple and efficient.
- DocuFreezer. An offline solution that supports batch conversion of HEIC files to JPG, perfect for users prioritizing privacy or dealing with multiple files.
- ImageMagick. A free, open-source tool ideal for commercial use. Developers and enterprises often rely on its powerful command-line capabilities for handling various file formats, including HEIC to JPG.
Converting HEIC to JPG on an iPhone
To convert HEIC to JPG directly on an iPhone, navigate to the HEIC photo you wish to convert. Then,use the ‘Share’ button and opt to copy the photo. It will then be copied to the JPEG folder on your iPhone as a JPG.
How to save HEIC to JPG on your Mac
If you wish to have your iPhone or iPad save images as JPGs instead of HEICs when transferring them to your Mac, follow these steps:
- Connect your device to your Mac and open the Photos app.
- Click on the device’s name under ‘Devices’ in the sidebar.
- On the top, click on ‘Photos’ > ‘Preferences’.
- Navigate to the ‘General’ tab.
- In the ‘Importing’ section, check the box next to ‘Import photos as JPG‘.
Automatically convert HEIC to JPG with Cloudinary
Cloudinary is a robust cloud-based service tailored for image and video management. It’s not just about storing your media; its engineered to transform, optimize, and deliver your content seamlessly. And you can easily convert HEIC to JPG without breaking a sweat.
Sign Up & Log In
If you’re new to Cloudinary, the first step is to create an account. The user-friendly website will guide you through the process. Once you have an account, simply log in to access your dashboard.
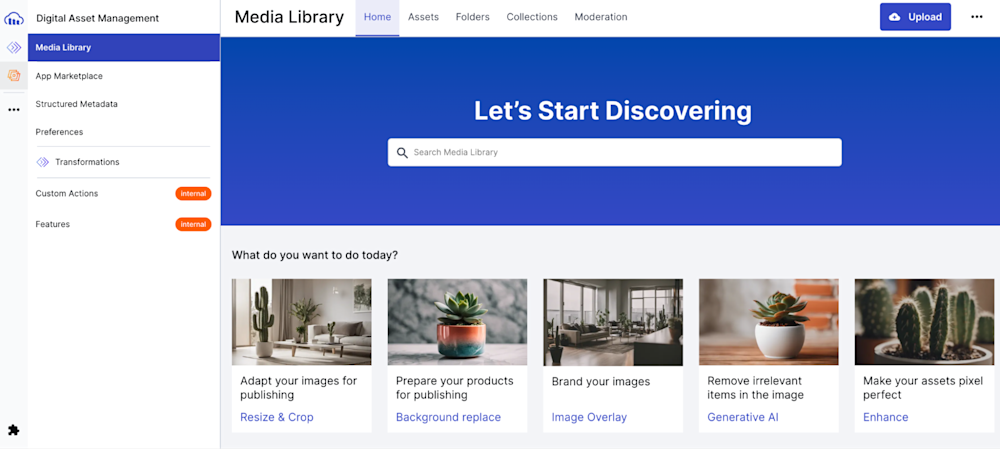
Navigate to the Media Library
Once inside your dashboard, look for the ‘Media Library‘ tab. This is your personal space where all your uploaded images and videos reside.
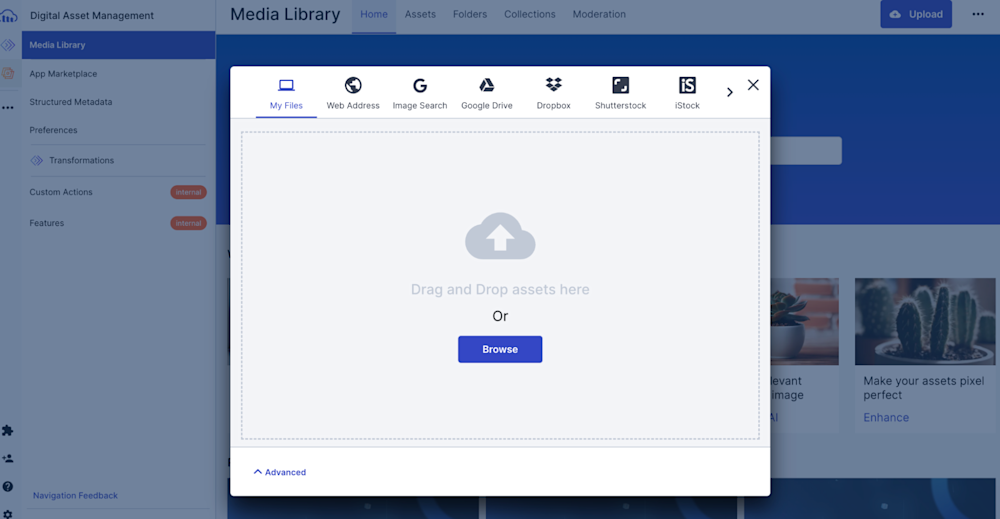
Upload Your HEIC Images
Click on the ‘Upload’ button, found at the top or corner of the Media Library. You can either drag and drop your HEIC files or use the file picker to select and upload them.
Automatic Detection & Conversion
One of Cloudinary’s strengths is its intuitive nature. Upon uploading, it detects the format of your image. To convert HEIC to JPG, all you need to do is deliver or fetch the image via a URL and set the format to ‘.jpg’. Cloudinary does the rest, transforming the file on-the-fly.
Access & Download the Converted Image
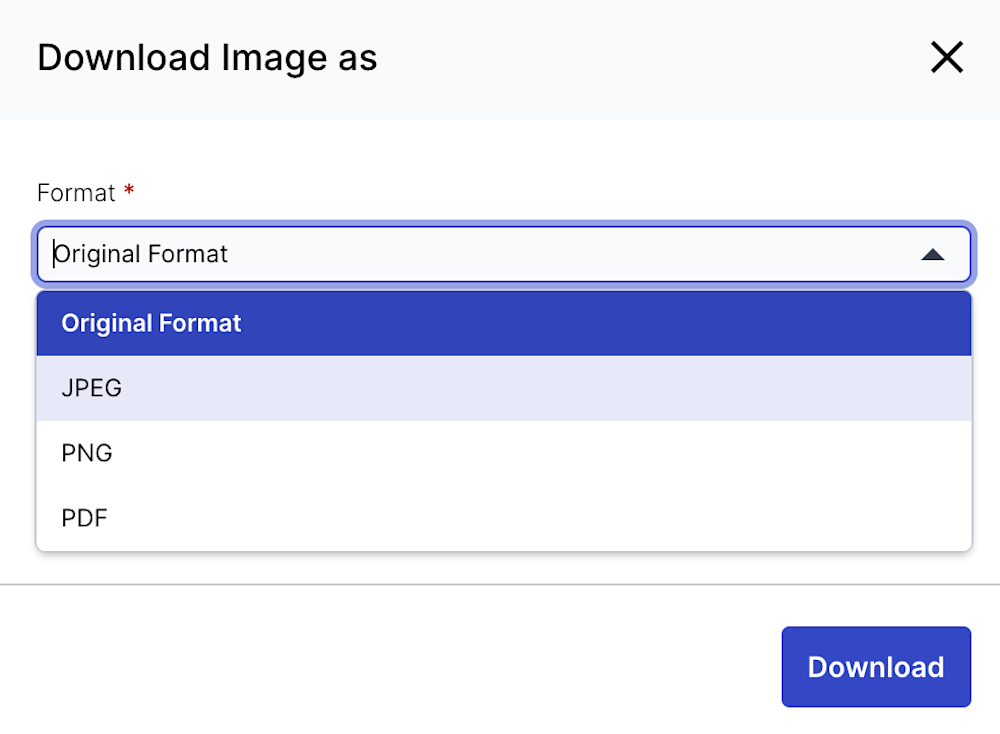
Your converted JPG image will now be available in the Media Library. Click on the image thumbnail for a detailed view. From here, you can either share a direct URL or download the converted image to your device.
For those wanting more granular control, Cloudinary offers transformation and optimization settings. This means you can resize, crop, adjust quality settings, and apply effects even as you convert from HEIC to JPG, ensuring the output is tailored to your needs.
