In an era where Java continues to be a dominant force in the software development industry, with StackOverflow reporting over 30% of developers using it in the last year, the need for efficient and effective solutions to common programming tasks is more important than ever.
One such task, converting PDF files to JPG format, is a frequent requirement in many business and academic settings. This article will guide you through the process of converting PDF to JPG using Java and Cloudinary, providing a practical solution to a common programming challenge.
In this article:
The Need for PDF to JPG Conversion
The need to convert PDF files to JPG images can pop up more often than you may think. Working with PDFs is essential for many businesses, but handling them can sometimes feel clunky and obtuse. Here are some scenarios where this conversion might be necessary:
- Image Extraction – There might be instances where you need to extract images from a PDF document for use in a presentation or report. These could be diagrams, charts, or any visual representation that supports your data.
- Device Compatibility – Not all devices support PDF viewing. Converting a PDF to an image format can make it easier to view the content across different devices.
- Consistent Rendering – Unlike PDFs, which can appear differently depending on the software used to view them, images ensure consistent rendering across different platforms. This is particularly important when the layout and visual appearance are as important as the content itself.
- Web Use – When it comes to web use, images are often a better choice than PDF files. They are easier to scale and manipulate, making them ideal for responsive web design.
- Preview Generation – Converting PDFs to images can be useful for generating thumbnails or previews of the PDF content. This lets users get a quick overview of the content without opening the entire document.

Benefits of JPG Format
The JPG format, also known as JPEG, is a popular choice for storing and transmitting photographic images on the web, and here’s why:
- Compression – One key benefit of the JPG format is its ability to compress files without a significant loss of quality. This makes it ideal for web use, where file size and download speed are important considerations.
- Wide Support – JPG files are widely supported across different platforms and devices. This ensures that your images can be viewed by a broad audience, regardless of their device or browser.
- Easy Manipulation – JPG files can be easily manipulated with a wide range of software. This allows for adjustments such as resizing, cropping, and color correction, making them a versatile choice for web developers.
- Exif Metadata – The JPG format supports Exif metadata, which can include data such as the camera settings used to take a photo, the date and time it was taken, and geolocation information. This can be particularly useful for photographers and digital marketers who want to track and analyze the performance of their images.
Converting PDF to JPG in Java Using Cloudinary
Cloudinary is a robust media management platform that supports converting PDF files to various image formats. It allows you to convert your PDFs, including multi-paged PDFs, to JPGs, PNGs, and other image formats. This conversion can be as simple as changing the URL’s extension from PDF to the desired image format.
Cloudinary’s support for PDF-to-image conversion extends to several programming languages. Whether you’re working with Node.js, Python, PHP, Java, Ruby, or jQuery, you can leverage Cloudinary’s capabilities to convert PDFs to images.
Prerequisites
Before we begin creating a PDF to JPG converter using Java and Cloudinary, you will need to have Java installed on your System. If you don’t have Java installed, head over to Oracle and install the latest Java JDK.
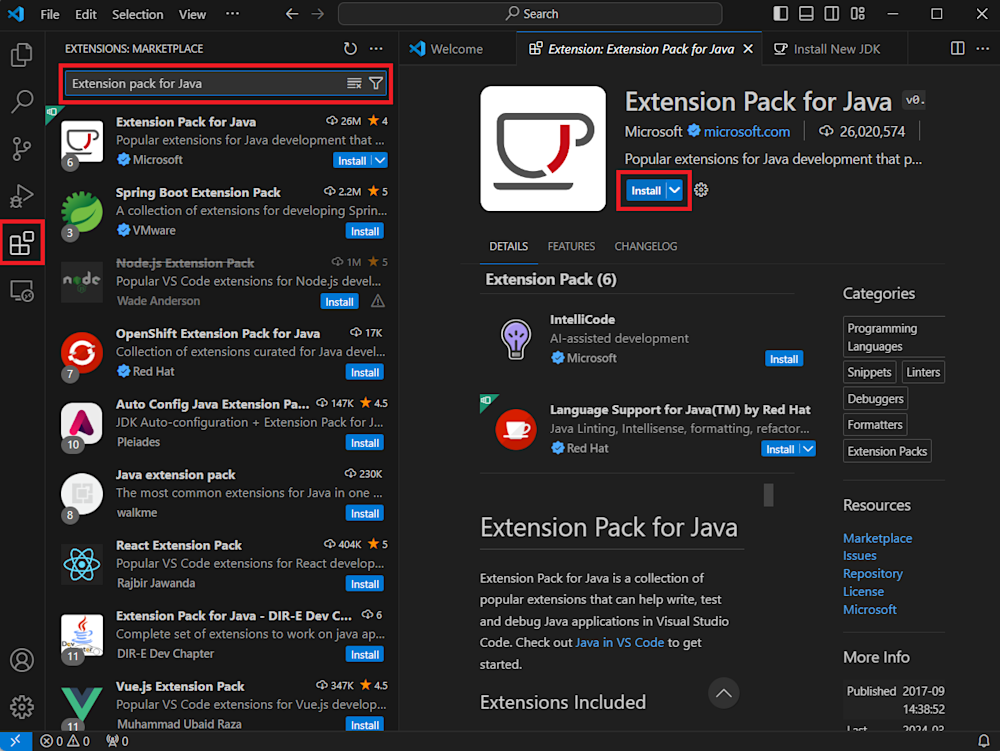
Once you have Java installed, you will need to set up Maven to build your Java projects. Intellij makes it easy to create and set up your Java projects. However, if you prefer VS Code, all you need to do is install the Extension Pack for Java. To do this, open VS Code and head over to the Extensions tab. Here, search for “Extension Pack for Java” and click on Install.
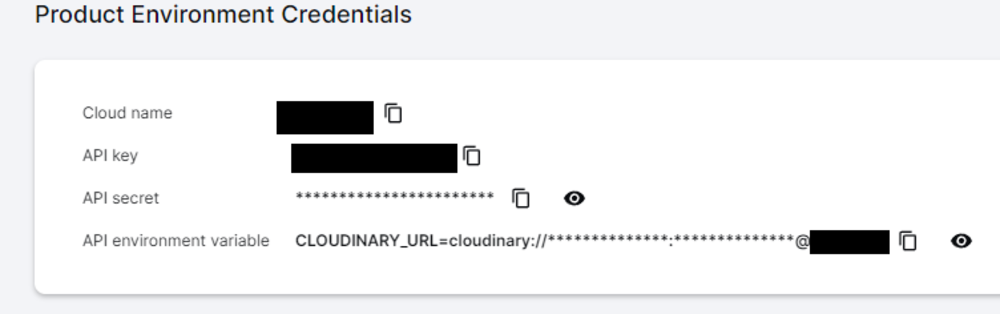
Finally, you need a Cloudinary account to convert your PDFs to JPGs. If you don’t have one, you can sign up for free. For this tutorial, we’ll require our Cloudinary API credentials. So head over to the Cloudinary website and log in to your account.
Next, navigate to the Programmable Media Dashboard by clicking the Programmable Media button shown below. There, you’ll find details such as your Cloud Name, API Key, and API Secret. Copy these to your clipboard, as we’ll use them later in the tutorial.
Before we can add code, there is one more important setting that we need to adjust. By default, Cloudinary does not allow free users to deliver files in PDF format. So, to enable PDF deliveries, head over to your Cloudinay account settings by clicking on the gear icon on the bottom left corner of your page. Here, we will navigate to the Security tab and scroll down to find the “Allow delivery of PDF and Zip files” checkbox. We will tick the checkbox and click on Save to save our settings.

With this, we are now ready to create our Java Project.
Setting up our Java Project
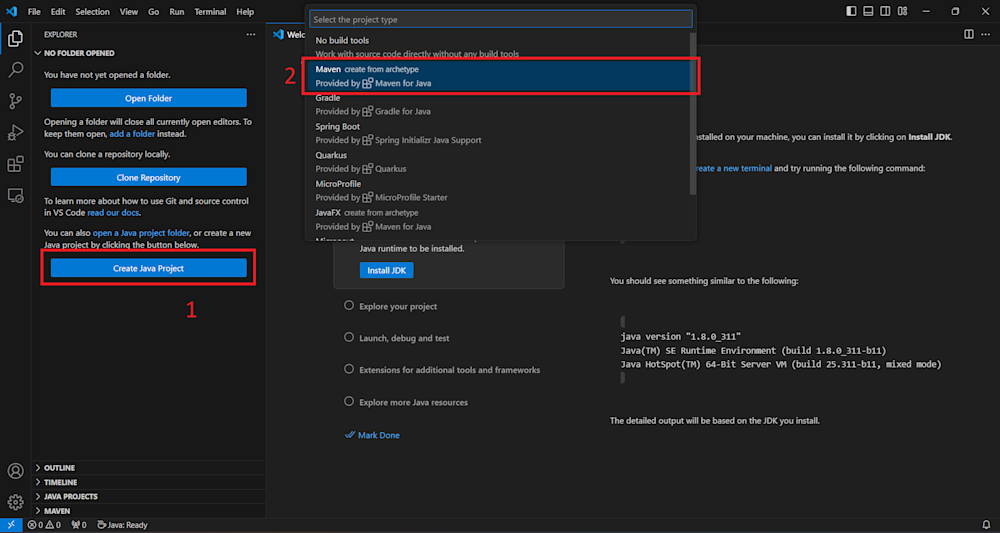
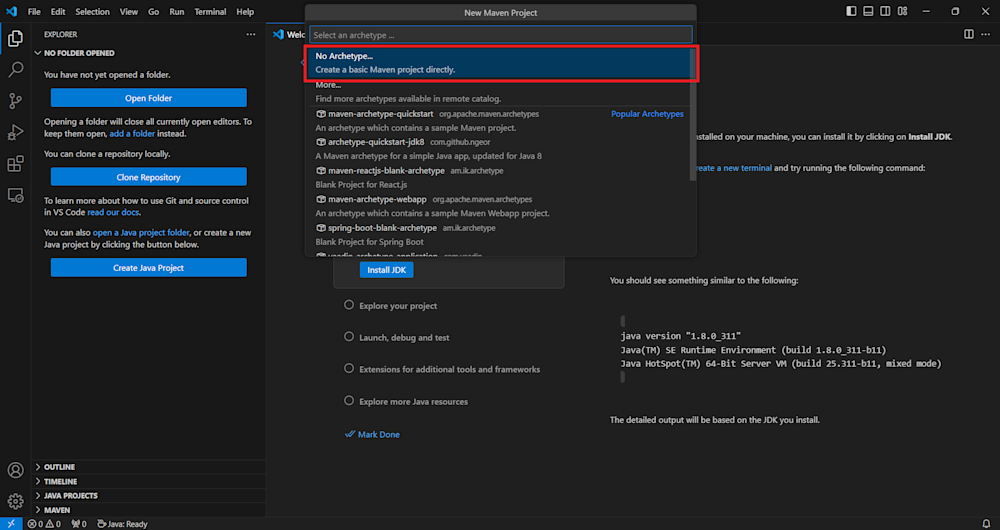
Let’s start by creating our project. Open up a new window in Visual Studio Code. If your extensions are installed correctly, you will be prompted to create a new Java project. Start by clicking on the Create Java Project button and selecting Maven as the project type:
Next, select No Archetype…. This will create a new basic Maven project directly for you to build:
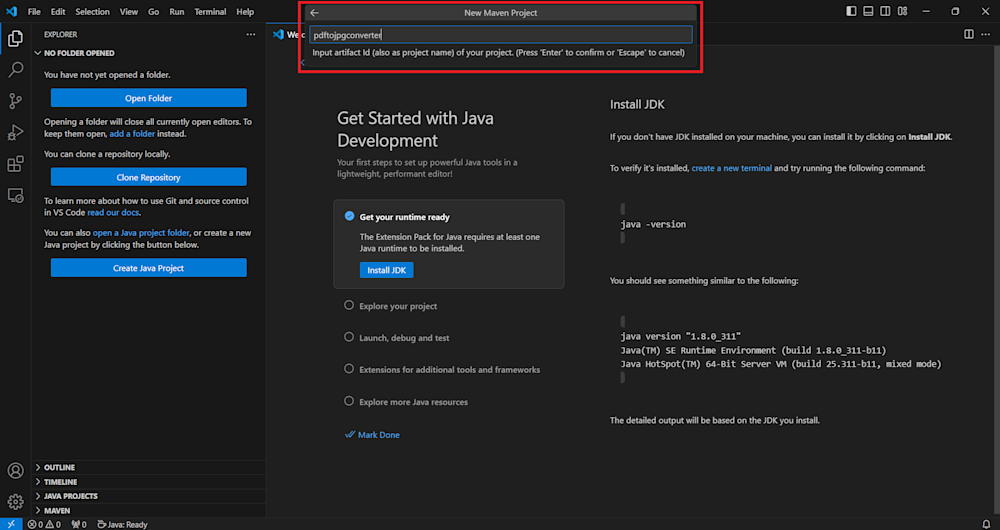
Now, give your project a group id. A group id is used to uniquely identify your project across all projects, helping you keep track of your project:

Next, add in the artifact id, essentially your project’s name. Here, we have named our project “pdftojpgconverter”:
Finally, choose the directory where you want to save your project:

With this, we can begin coding our Java application.
Creating our PDF to JPG Converter
Before we start adding code to our project, we need to import the necessary modules that will help us convert our PDF to JPGs.
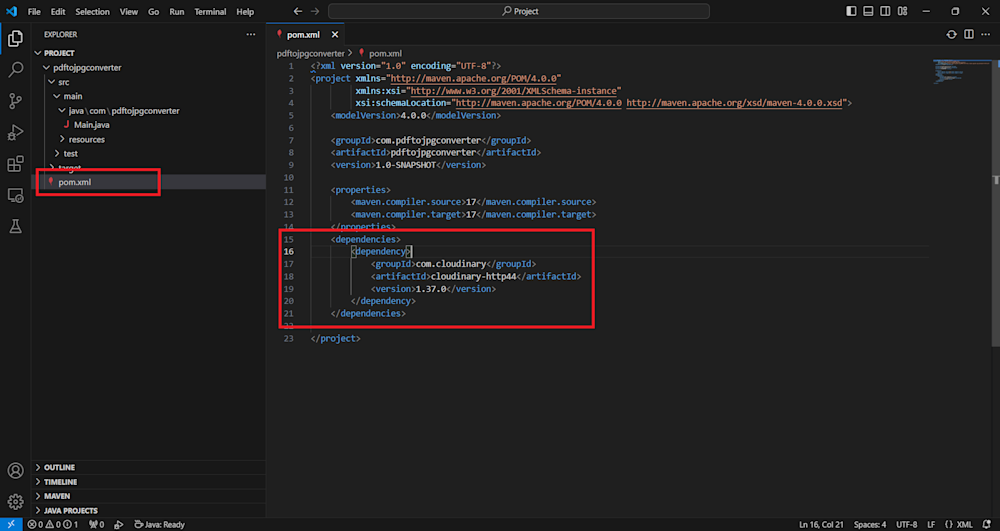
To do this, navigate to the pom.xml file in our project’s main directory. Here, we will add a <dependency> tag and add the Cloudinary Java SDK as a dependency of our project:
<dependencies>
        <dependency>
            <groupId>com.cloudinary</groupId>
            <artifactId>cloudinary-http44</artifactId>
            <version>1.37.0</version>
        </dependency>
</dependencies>
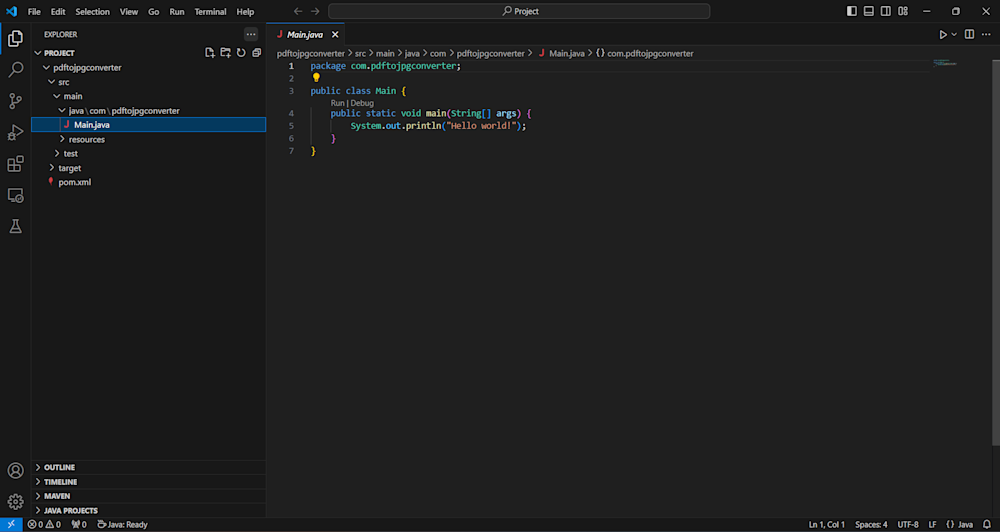
With this, we can begin coding our application. So head over to Main.java, located in the srcmainjavacompdftojpgconverter directory:
Here, we will begin by adding some imports from the Cloudinary SDK, as well as imports that will help us open our PDF files:
// Import necessary libraries
import com.cloudinary.Cloudinary;
import com.cloudinary.Transformation;
import com.cloudinary.transformation.Layer;
import com.cloudinary.transformation.TextLayer;
import com.cloudinary.utils.ObjectUtils;

import java.io.File;
import java.io.IOException;
import java.util.Map;
Next, we will code the main() function by initializing the Cloudinary API using our account credentials:
public class Main {
    public static void main(String[] args) {
        // Initialize Cloudinary with your cloud name, API key, and API secret
        Cloudinary cloudinary = new Cloudinary(ObjectUtils.asMap(
                "cloud_name", "your_cloud_name",
                "api_key", "your_api_key",
                "api_secret", "your_api_secret"));
Next, we will create a new File variable and specify a PDF file that we want to upload. We will also define a Map variable called uploadResult, which will store the result of our API call:
...
        // Specify the file to upload
        File toUpload = new File("path/to/your/pdf");
        Map<String, Object> uploadResult = null;
...
Now, we create a try-catch block, where we use the cloudinary.uploader() function to upload our PDF file to the Cloudinary cloud. Note that we want to convert our PDF to JPG images, so we define the resource_type parameter as an image.
This will required to convert our image later, as given in Cloudinary’s documentation. Next, we use the uploadResult variable to retrieve and store the public ID of our PDF in a String variable.
Finally, we generate a new URL that transforms our PDF into a JPG and retrieves its URL. We then print this new URL in the console. Here is what our complete Main.java file looks like:
package com.pdftojpgconverter;

// Import necessary libraries
import com.cloudinary.Cloudinary;
import com.cloudinary.Transformation;
import com.cloudinary.transformation.Layer;
import com.cloudinary.transformation.TextLayer;
import com.cloudinary.utils.ObjectUtils;

import java.io.File;
import java.io.IOException;
import java.util.Map;

public class Main {
    public static void main(String[] args) {
        // Initialize Cloudinary with your cloud name, API key, and API secret
        Cloudinary cloudinary = new Cloudinary(ObjectUtils.asMap(
                "cloud_name", "your_cloud_name",
                "api_key", "your_api_key",
                "api_secret", "your_api_secret"));

        // Specify the file to upload
        File toUpload = new File("path/to/your/pdf");
        Map<String, Object> uploadResult = null;

        try {
            // Upload the file to Cloudinary and store the result
            uploadResult = cloudinary.uploader().upload(toUpload, ObjectUtils.asMap("resource_type", "image"));

            // Get the public ID of the uploaded file
            String publicId = (String) uploadResult.get("public_id");

            // Generate a URL for the uploaded image with no transformations
            String transformedImage = cloudinary.url().format("jpg").generate(publicId);

            // Print the URL of the transformed image
            System.out.println(transformedImage);

        } catch (IOException e) {
            // Print the stack trace for any IOExceptions
            e.printStackTrace();
        }
    }
}
Now, all we need to do is to run our project. To do this, simply press Crtl+F5 on your keyboard or click the Play button at the top-right corner of your screen. This will generate your image URL:
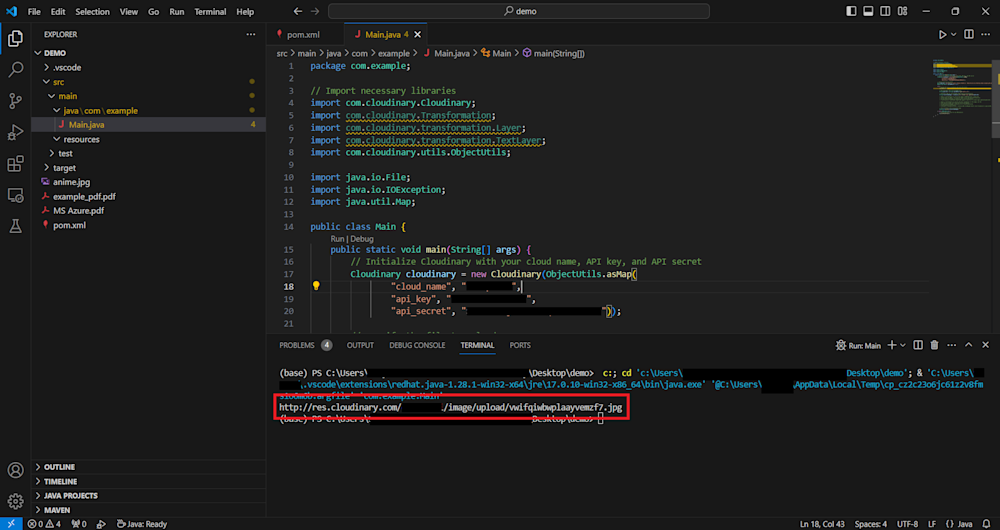
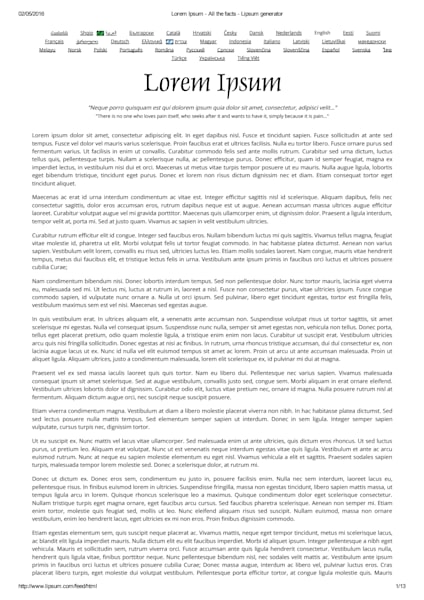
Here is what our image looks like:
Applying Different Transformations to Our PDF
So far, in this tutorial, we have seen how to convert our PDF to a JPG. However, this doesn’t give us any flexibility or control over our image files. Thankfully, Cloudinary provides extensive transformations that can be applied to our image files to make them more appealing.
With Cloudinary, you can select the page you want to convert to a JPG. For example, if we want to resize the second page of our image, we can use the .page() method to specify the page number, along with .width() and .height() methods to resize our image:
String transformedImage = cloudinary.url().transformation(new Transformation().width(200).height(250).page(2).crop("fill")).format("jpg").generate(publicId);
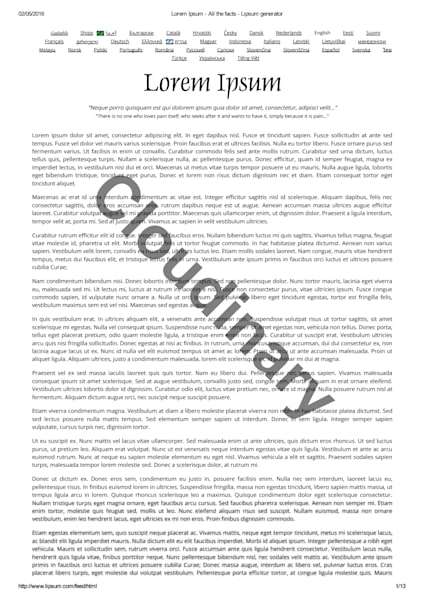
Here is the thumbnail of the third page of the pdf in jpg image extension:

Additionally, if you want to add watermarks to your images, you can simply use Cloudinary’s .overlay() method to overlay a text or image over your PDF’s JPG file. Here is how you would do it:
String transformedImage = cloudinary.url().transformation(new Transformation().overlay(new TextLayer().fontFamily("Arial").fontSize(180).fontWeight("bold").text("Cloudinary")).opacity(50).angle(45)).format("jpg").generate(publicId);
In addition to a text overlay, here we are using the .opacity() method to define an opacity of 50% and change the angle of our text overlay using the .angle() method. Here is what our image looks like:
Wrapping Up
The ability to convert PDF to JPG using Java and Cloudinary is a valuable skill and a necessity in today’s digital world. As we transition towards a more digitalized environment, the demand for such functionalities in applications is rapidly growing. Converting PDF to JPG is a common requirement in many areas, such as digital marketing, content creation, and data analysis. It allows for easier sharing, editing, and storage of document content.
Cloudinary emerges as a critical player in this context. It allows for converting PDF files to JPG and offers a wide range of transformations on the converted images. This includes resizing, cropping, adjusting brightness, contrast, saturation, and much more. It also allows for more advanced transformations, such as adding filters, effects, or watermarks to your converted images.
So, why wait? Sign up for a Cloudinary account today to convert PDFs to JPGs and explore other media transformations that will take your applications to the next level.
More from Cloudinary:
Image Opacity Transformation and Dynamic Watermark Generation
How to Create a Thumbnail Image for Office Files using Cloudinary and Aspose

