
According to Instagram, the engagement on the platform has ballooned to an average of 30 minutes per day since the introduction of stories. It enables users to post and view highlights about their activities. Stories are so popular that they are used on major social media platforms like Facebook, WhatsApp, LinkedIn, and Twitter.
This post will discuss how to quickly build an Instagram stories experience using Cloudinary and Nuxt.js. At the end of this tutorial, we will learn how to serve images using Cloudinary in Nuxt.js.
Nuxt.js is a vue-based frontend development framework that enables functionalities like server-side rendering, static site generation, file-system routing, components auto-import, and API endpoints for backend features.
Cloudinary offers a robust visual media platform to upload, store, manage, transform, and deliver images and videos for websites and applications.
We completed this project in a CodeSandbox, and you can fork it to run the code.
Github link here.
The following steps in this post require JavaScript and Vue.js experience. Experience with Nuxt.js isn’t a requirement, but it’s nice to have.
We also need a Cloudinary account to store the media files. Signup is completely free.
We need to create a Nuxt.js starter project by navigating to the desired directory and running the command below in our terminal.
npx create-nuxt-app insta_stories && cd insta_stories
This command will ask us some questions on how to configure our application. We can answer the questions as shown below:
    Ok to proceed? (y) < PRESS "y" and hit ENTER>
    project name: <PRESS ENTER>
    programming langauge: <JAVASCRIPT>
    package manager: <NPM>
    UI framework: <TAILWIND CSS>
    Nuxt.js modules: <AXIOS - PROMISE BASED HTTP CLIENT>
    Linting tools: <ESLINT, PRETTIER>
    Testing framework: <NONE>
    Rendering mode: <UNIVERSAL (SSR/STATIC)
    Deployment target: <STATIC/JAMSTACK HOSTING>
    Deployment tools: <JSCONFIG.JSON>
    Continous integration: <NONE>
    Version control system: <GIT>
Code language: PHP (php)
The command creates a Nuxt.js project with TailwindCSS called insta_stories, and navigates into the project directory.
TailwindCSS is a utility-first CSS framework packed with classes to help us style our web page.
We proceed to install @nuxtjs/cloudinary and vue-insta-stories ****dependencies with:
npm install @nuxtjs/cloudinary vue-insta-stories @vue/composition-api
@nuxtjs/cloudinary is library for integrating Cloudinary with Nuxt.js.
vue-insta-stories is a customizable component for creating stories.
@vue/composition-api is a library for composing components. It’s a required dependency for vue-insta-stories.
Configuring Cloudinary in Nuxt.js
First, we need to modify the nuxt.config.js file by adding @nuxtjs/cloudinary as a module in the modules section:
    modules: [
        '@nuxtjs/cloudinary', //add this
      ],
Code language: JavaScript (javascript)
Next, we need to configure Cloudinary by adding a cloudinary section below the modules section as shown below:
    modules: [
        '@nuxtjs/cloudinary',
      ],

    //add this
    cloudinary: {
        cloudName: '<your-cloud-name>',
        useComponent: true,
      },
Code language: JavaScript (javascript)
The useComponent flag set to true lets us use the built-in Cloudinary components. Our cloud name is obtained from our Cloudinary dashboard.
Next, we need to upload sample images from Unsplash to create our Instagram stories.
Stories Photos url
- https://images.unsplash.com/photo-1539096567589-dbfe6d0beee2?ixlib=rb-1.2.1&ixid=MnwxMjA3fDB8MHxwaG90by1wYWdlfHx8fGVufDB8fHx8&auto=format&fit=crop&w=689&q=80
- https://images.unsplash.com/photo-1472496175377-b5d7625d4ba9?ixlib=rb-1.2.1&ixid=MnwxMjA3fDB8MHxwaG90by1wYWdlfHx8fGVufDB8fHx8&auto=format&fit=crop&w=880&q=80
- https://images.unsplash.com/photo-1506202687253-52e1b29d3527?ixlib=rb-1.2.1&ixid=MnwxMjA3fDB8MHxwaG90by1wYWdlfHx8fGVufDB8fHx8&auto=format&fit=crop&w=1470&q=80
- https://images.unsplash.com/photo-1572971916307-8cf6b4f5200d?ixlib=rb-1.2.1&ixid=MnwxMjA3fDB8MHxwaG90by1wYWdlfHx8fGVufDB8fHx8&auto=format&fit=crop&w=1470&q=80
- https://images.unsplash.com/photo-1459260216545-994dda21d51a?ixlib=rb-1.2.1&ixid=MnwxMjA3fDB8MHxwaG90by1wYWdlfHx8fGVufDB8fHx8&auto=format&fit=crop&w=1470&q=80
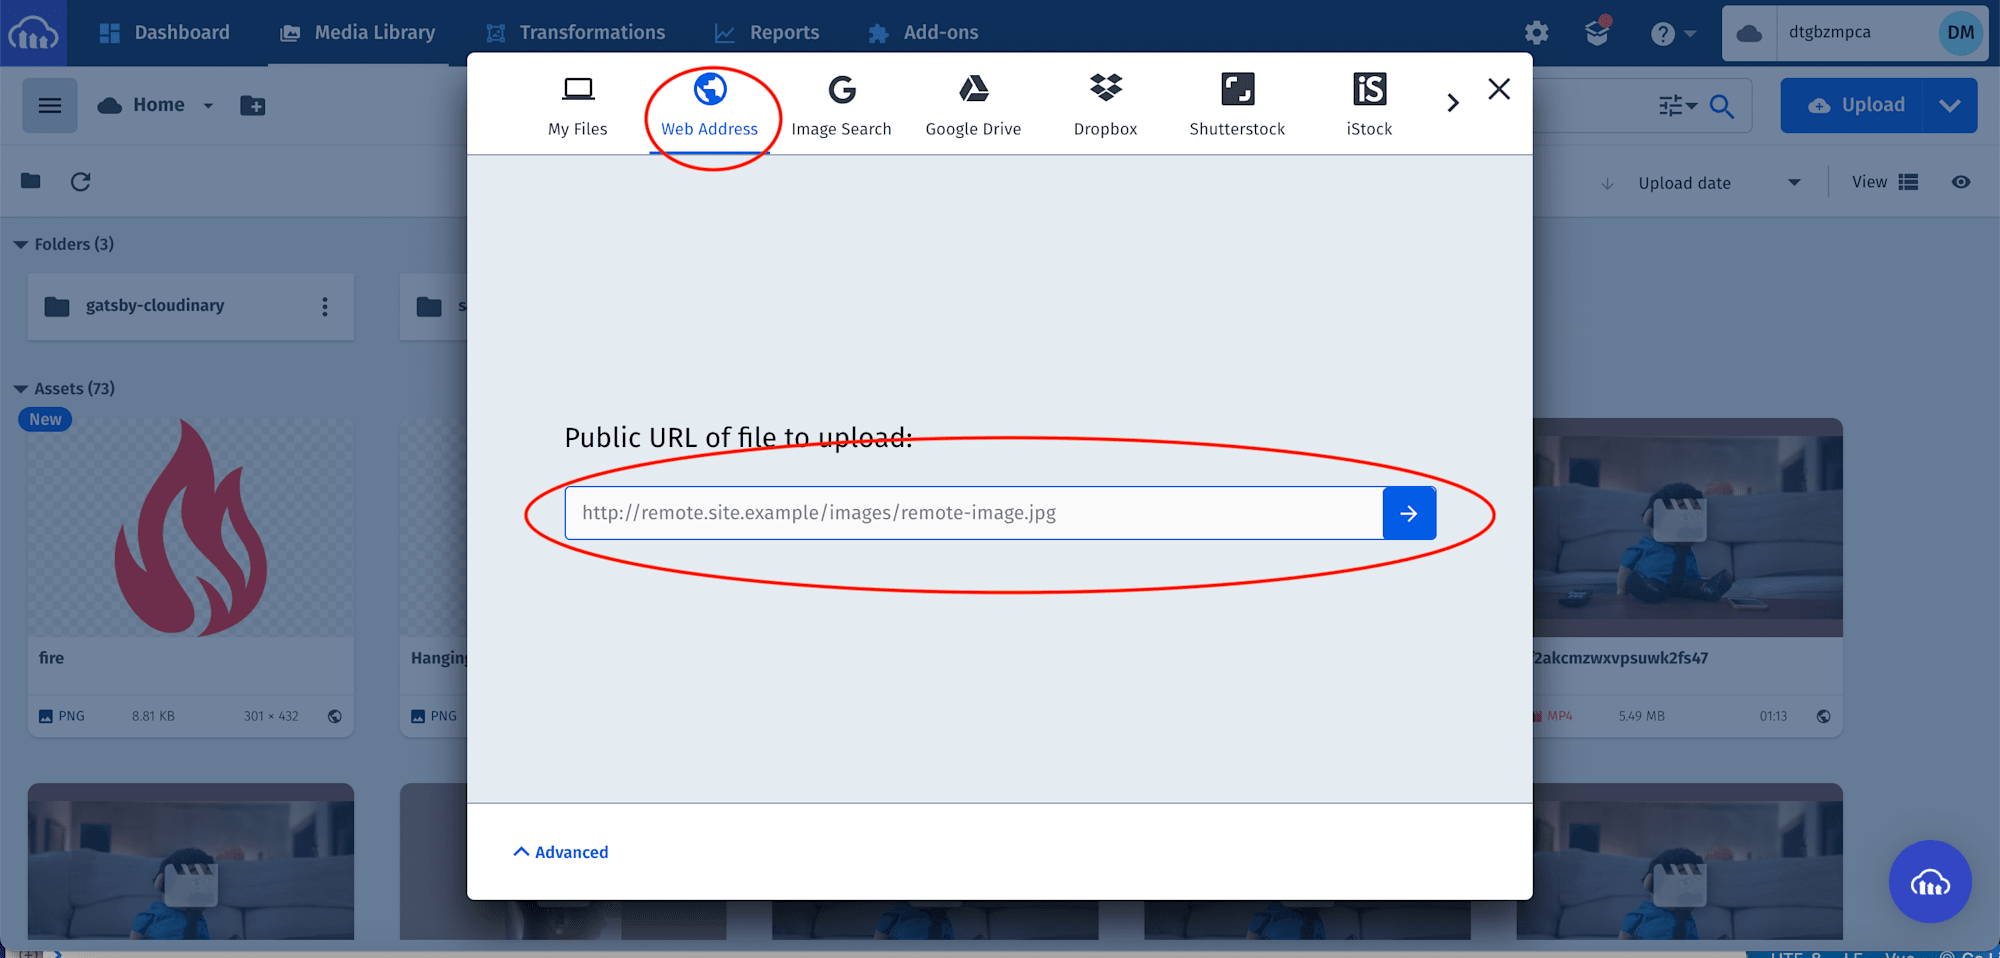
In our Cloudinary dashboard, we uploaded the images by clicking on the Media Library tab, clicking on Upload, selecting Web Address option, input the url, and clicking on the Arrow Button to upload.

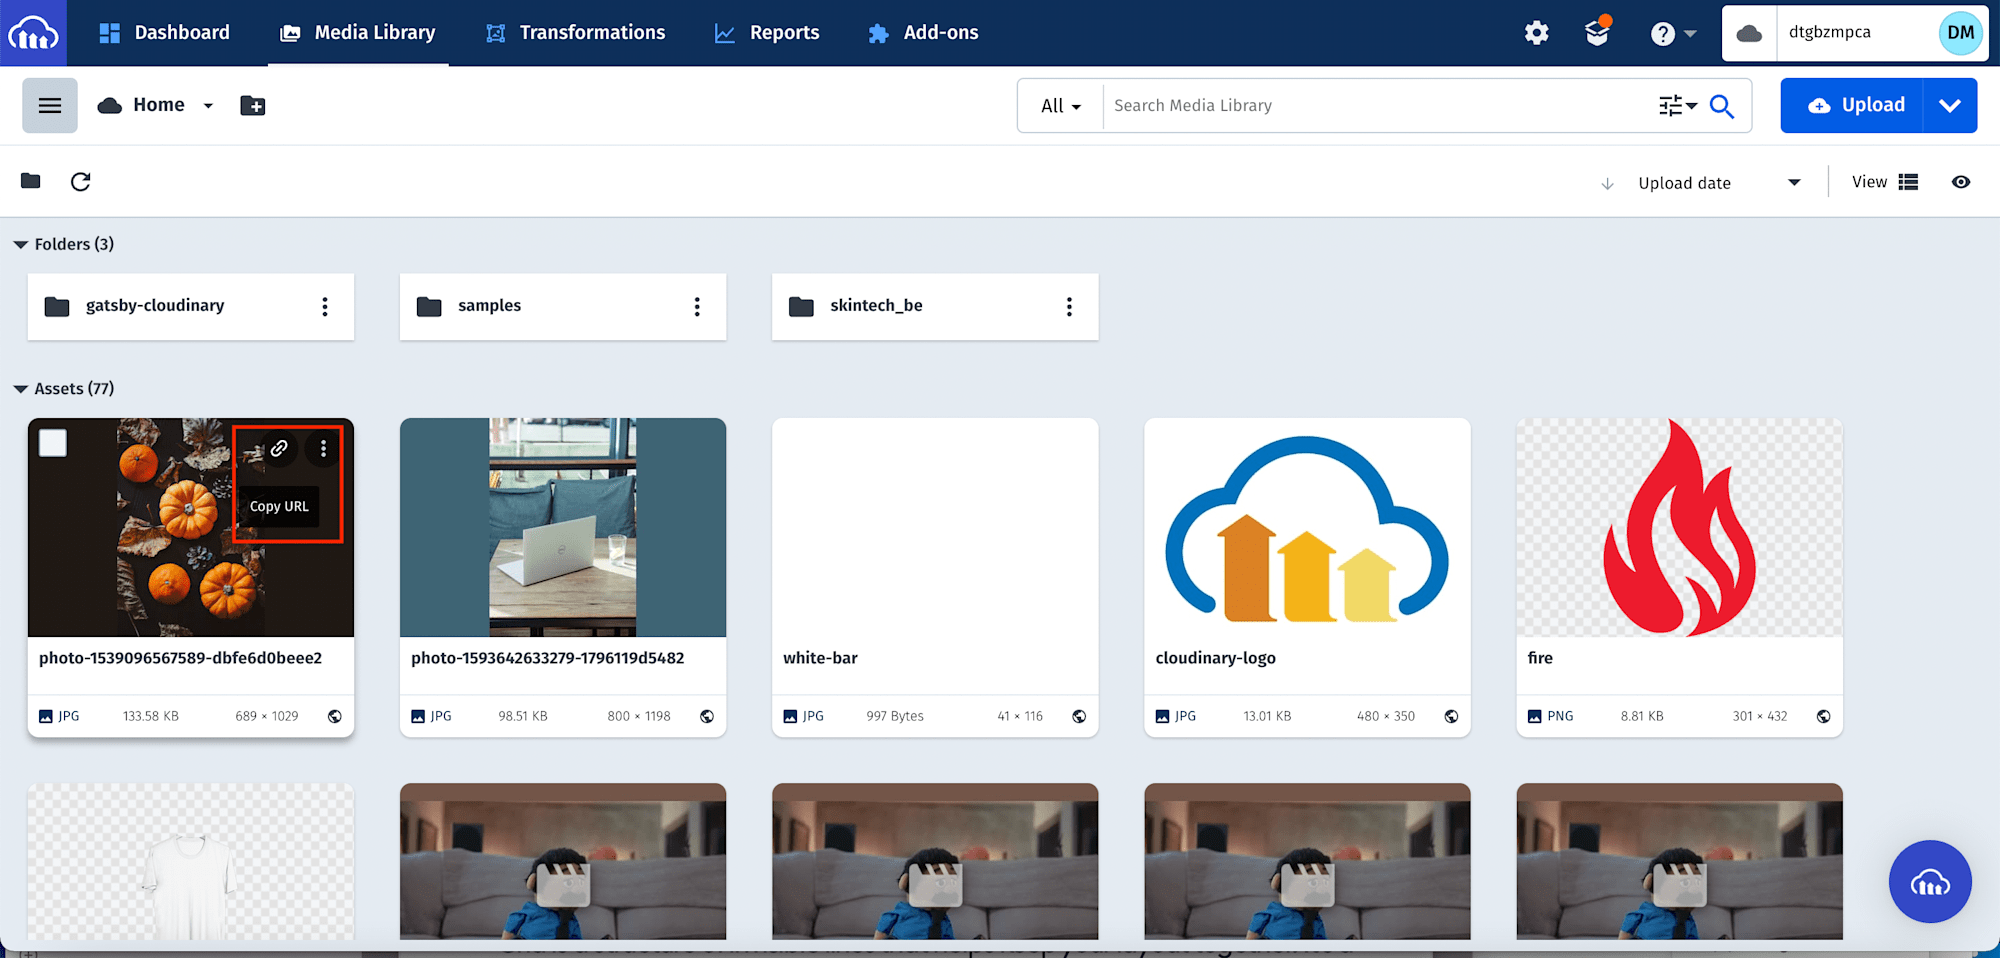
After uploading all the images, we will see them displayed on the console. To get the image URL, mouse hover on the image and click on the link icon. These URLs will come in handy when populating the image collection.
Next, we need to create a utils folder in the project root directory. In this folder, we create a stories.json file. This file contains image data for the stories.
stories.json
[
    "<REPLACE THIS WITH YOUR IMAGE URL>",
    "<REPLACE THIS WITH YOUR IMAGE URL>",
    "<REPLACE THIS WITH YOUR IMAGE URL>",
    "<REPLACE THIS WITH YOUR IMAGE URL>",
    "<REPLACE THIS WITH YOUR IMAGE URL>"
]
First, we need to navigate to the components folder, and in this folder, create an Info.vue file and add the code snippet below:
<template>
<div class="text-sm w-full lg:w-2/3">
<section class="flex items-center mb-4">
<h1 class="font-normal mr-6">Estelle_</h1>
<button
class="border border-gray-200 py-1 md:px-10 font-bold text-sm rounded-md"
>
Message
</button>
</section>
<div class="flex mb-4">
<div class="md:flex md:space-x-1 mr-8">
<p class="font-bold text-sm">13</p>
<p class="text-sm font-medium text-gray-400">posts</p>
</div>
<div class="md:flex md:space-x-1 mr-8">
<p class="font-bold text-sm">194</p>
<p class="text-sm font-medium text-gray-400">followers</p>
</div>
<div class="md:flex md:space-x-1 mr-8">
<p class="font-bold text-sm">182</p>
<p class="text-sm font-medium text-gray-400">following</p>
</div>
</div>
<p>
An online store 🏬 we deal on all kinds of footwear 👠👞 for both male and
female. Contact us ☎{" "}
<span class="text-blue-600">@08141703050</span>. Worldwide delivery 🌍
<span class="text-blue-600">@Owerri</span>, Nigeria
</p>
<p class="text-xs py-5">
followed by <span class="font-bold">dpkreativ</span>
</p>
</div>
</template>
<script>
export default {}
</script>
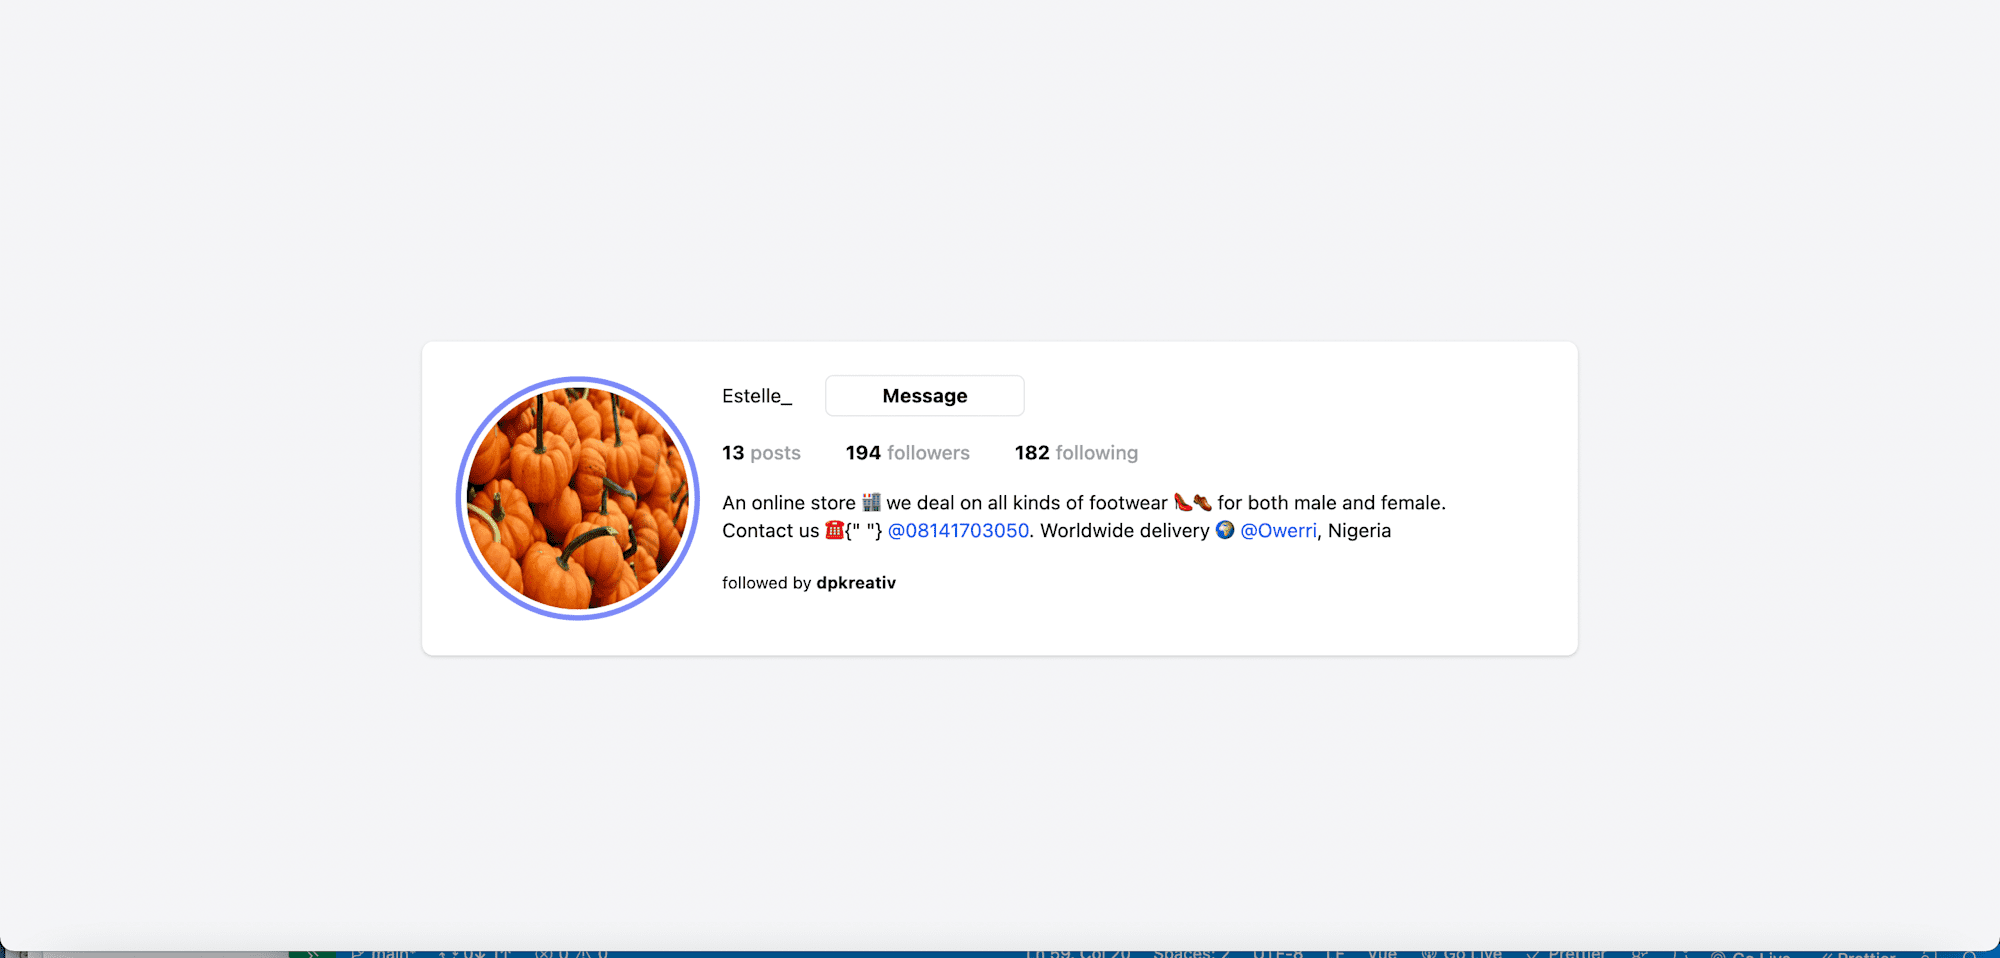
Code language: HTML, XML (xml)The snippet above contains a placeholder for posts, numbers of followers, following and details just as we have it on Instagram.
Next, we modify the index.vue file in the pages folder to the following:
<template>
<div
class="relative flex items-top justify-center min-h-screen bg-gray-100 sm:items-center sm:pt-0"
>
<div class="max-w-4xl mx-auto sm:px-6 lg:px-8">
<div
class="flex flex-col lg:flex-row items-center mt-8 bg-white overflow-hidden shadow sm:rounded-lg p-6"
>
<div
class="w-44 h-44 flex items-center justify-center border-indigo-400 border-4 mr-4 rounded-full cursor-pointer"
role="button"
@click="toggleStory"
>
<cld-image
:public-id="images[0]"
class="rounded-full w-40 h-40"
></cld-image>
</div>
<Info />
</div>
</div>
<div
v-if="showStory"
class="absolute h-screen w-screen bg-black bg-opacity-70 top-0 h-100vh"
>
<section class="flex justify-end p-4">
<button
@click="toggleStory"
class="px-4 py-2 rounded-lg shadow-md bg-indigo-700 font-semibold text-white capitalize"
>
close
</button>
</section>
<section class="flex items-center justify-center">
<Stories
v-if="showStory"
:stories="images"
class="absolute top-10 left h-4/5 w-2/4"
/>
</section>
</div>
</div>
</template>
<script>
import { Stories } from 'vue-insta-stories'
import images from '@/utils/stories.json'
export default {
components: { Stories },
data() {
return {
images,
showStory: false,
}
},
methods: {
toggleStory() {
this.showStory = !this.showStory
},
},
}
</script>
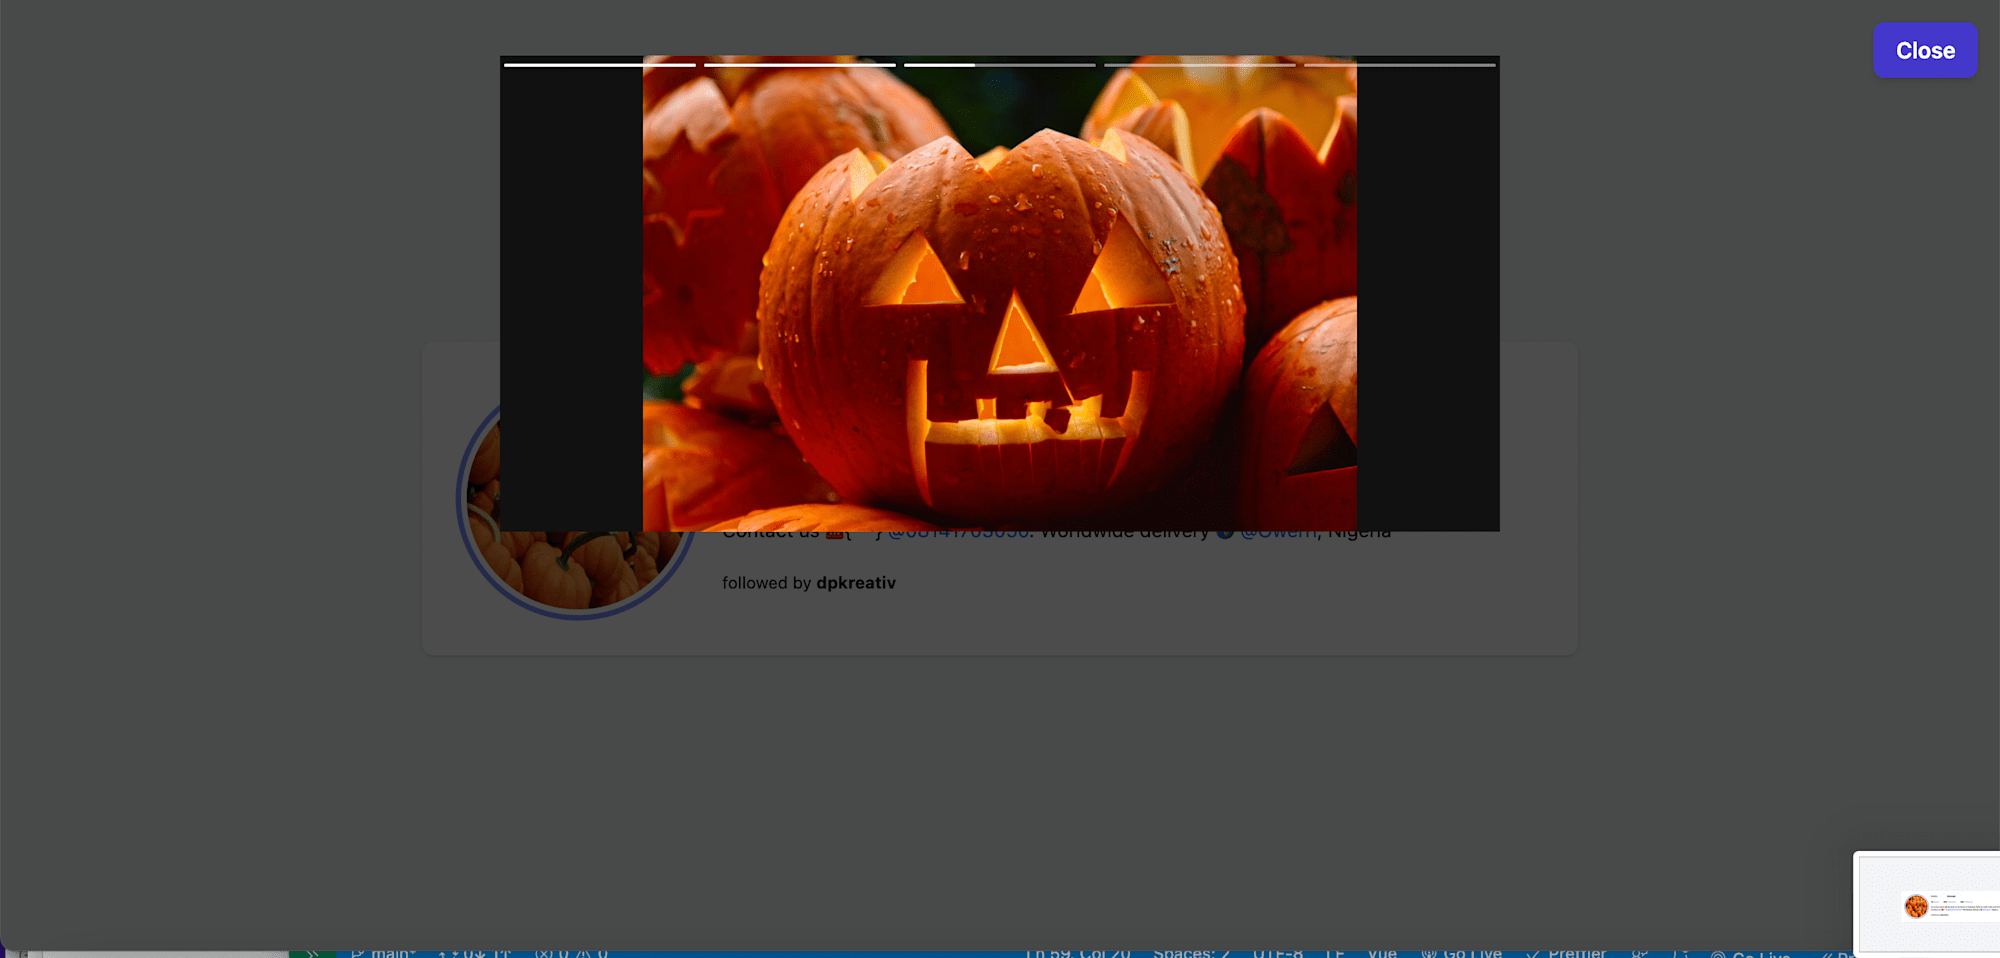
Code language: HTML, XML (xml)The snippet above does the following:
- Imports the image collection and
Storiescomponent - Creates
dataproperties to manage imported image collection and conditionally show the story. - Creates the
toggleStorymethod to toggle story visibility. - Markup to show a profile picture using Cloudinary and
Infocomponent. - Markup for the
Storiescomponent. The markup also configured theStoriescomponent to render conditionally and passed the importedimagesas props.
With that done, we can start a development server using the command below:
npm run dev
This post discussed how to build an instagram stories experience using Cloudinary and Nuxt.js.
You may find these resources helpful: