
Picture yourself developing an e-commerce website where users can upload product images and videos. You’re handling a substantial volume of media files, potentially thousands, as these visual assets play a critical role in attracting buyers and effectively showcasing your products. However, managing an extensive media library can pose complex challenges and demand considerable resources.
In this article, we’ll unveil transformative techniques for managing media files in Django with Cloudinary to make your life easier as a developer.
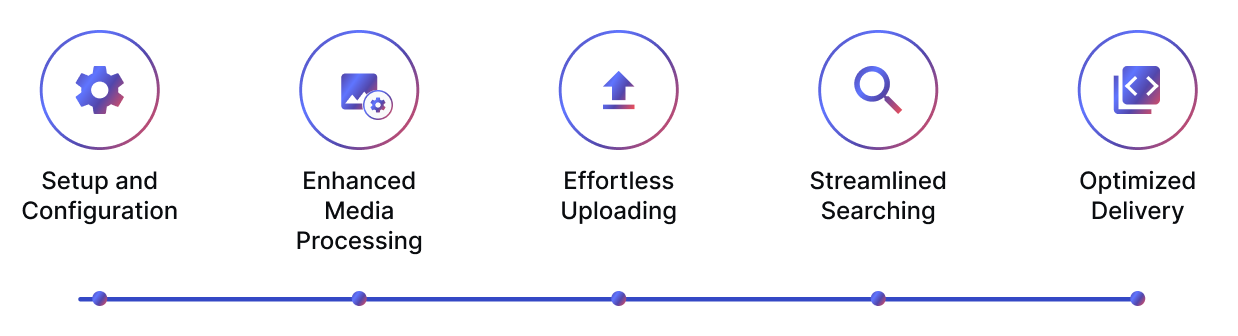
Before we delve into the practical side, let’s highlight the key advantages of optimizing media management:
- Enhanced media processing. Streamlining media handling with AI-driven editing and auto-tagging via upload presets saves time and simplifies content management.
- Effortless uploading. Simplifying media uploads eliminates the need for complex server-side code and reduces time spent on uploads.
- Streamlined searching. Advanced search capabilities eliminate manual tasks and database queries, making it easy to find the media you need.
- Optimized delivery. Delivering content efficiently with dynamic transformations ensures a superior user experience without pre-processing hassles.
All this is made possible with Cloudinary. Storing your media in Cloudinary eliminates the need for a database and allows for flexible image adaptation based on user preferences, device types, or responsive design, providing on-the-fly, well-optimized content delivery.
Managing media files in Django becomes more manageable with these steps, which we cover next (tap the icons to navigate to the related section):
Before we dive into the specifics of media management with Python and Django, you’ll need to sign up for Cloudinary. It’s quick and straightforward.
To get started with Cloudinary in your Python/Django app, follow these steps:
- Install the Cloudinary Python library using
pip install cloudinary. - Configure Cloudinary in your
settings.pywith your credentials, ensuring they remain secure.
# settings.py
import cloudinary
import cloudinary.uploader
import cloudinary.api
cloudinary.config(
  	cloud_name = "your_cloud_name",
  	api_key = "your_api_key",
  	api_secret = "your_api_secret"
)Code language: PHP (php)Replace your_cloud_name, your_api_key, and your_api_secret with your actual Cloudinary credentials, which you can find on the API keys page of the Console Settings.
With these two steps, you’ve successfully integrated Cloudinary into your Django project, and you’re ready to leverage its powerful media management capabilities.
Upload presets in Cloudinary enforce a variety of upload behavior to set the stage for simplified content management. In this article, we’ll focus on two essential upload options that you can enjoy. You can learn about many others by visiting the documentation.
Set the default transformation settings for your uploaded images to automate resizing, filters, overlays, quality optimization, and AI-powered enhancements like background and object removal. Streamline content management and ensure consistent adherence to predefined settings. Here’s a glimpse of the possibilities:


Enhance content organization by adding relevant tags based on image content. Increase searchability and content discovery, and simplify the process of organizing and categorizing your media assets.
Computer Vision Image Analysis for Your E-commerce Website to see Cloudinary in action, returning information about the content it identifies in your images.
To create an upload preset with the desired options, you can use the cloudinary.api.create_upload_preset method from the SDK. Here’s an example:
# Define the upload preset details
upload_preset_name = "my_preset"
upload_preset_options = {
    "unsigned": False,
    "folder": "my_folder",
    "tags": "my_tags",
    "transformation": [
        {"width": 500, "height": 500, "crop": "fill"},
        {"effect": "grayscale"},
    ],
    "categorization": "aws_rek_tagging",
    "auto_tagging": 0.9
}

# Create the upload preset using the SDK
upload_preset = cloudinary.api.create_upload_preset(
    name=upload_preset_name,
    settings=upload_preset_options
)

# Check if the upload preset was created successfully
if upload_preset.get("name") == upload_preset_name:
    print("Upload preset created successfully.")
else:
    print("Failed to create upload preset.")
Code language: PHP (php)
You can now use this upload preset when uploading media files using the Cloudinary Python SDK. Specify the name of the preset in your upload request, and the associated behavior you configured will be applied to your uploads.
Uploading media files is the most essential step in content management. Let’s explore how Cloudinary’s upload methods simplify this process and when you’ll want to use each type of upload.
The Cloudinary Upload Widget simplifies media file uploads, seamlessly integrated into your Django project via HTML and JavaScript. It’s ideal for providing a user-friendly interface for file uploads from users.
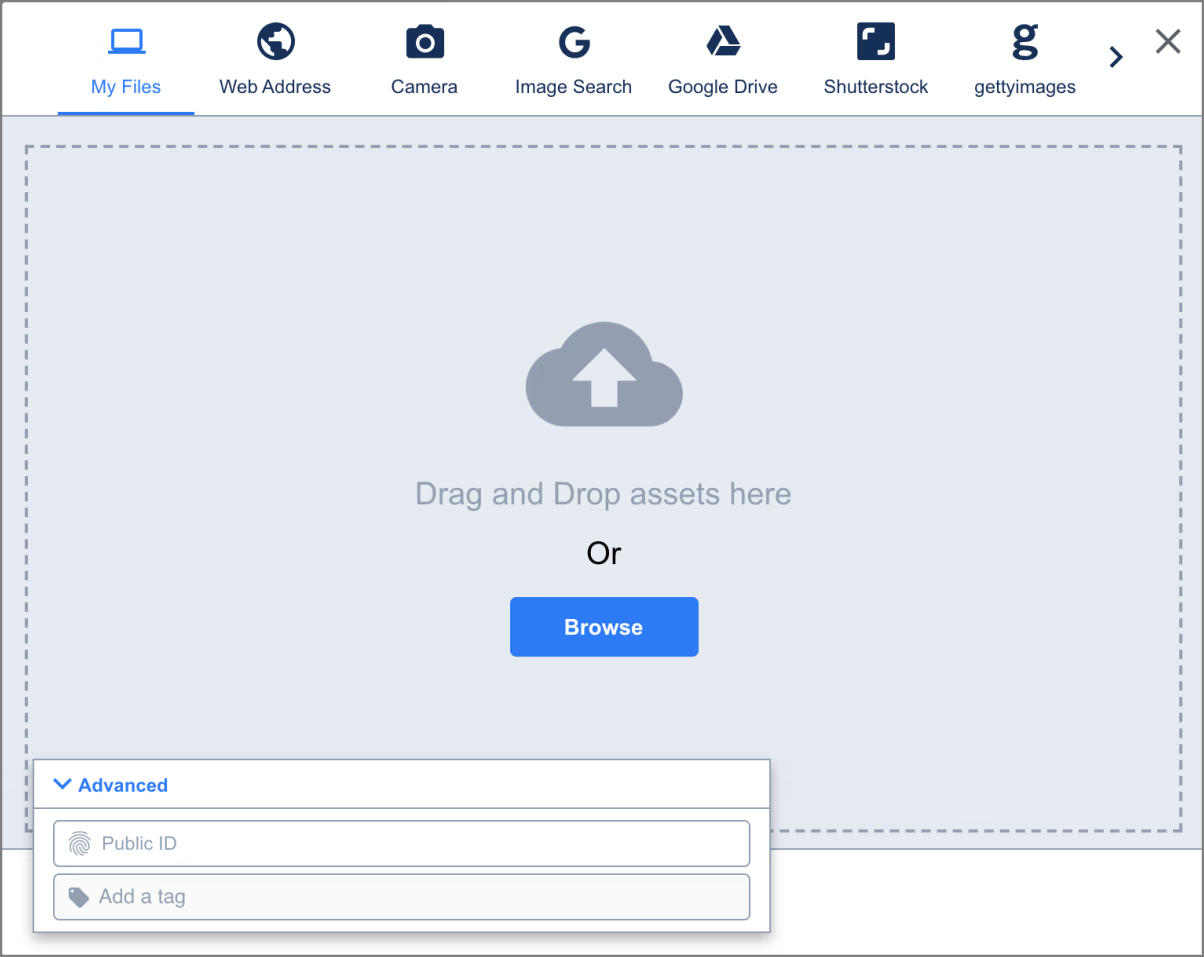
In an e-commerce site, enable users to upload product images and videos with the Cloudinary Upload Widget, ensuring a smooth experience for sellers to enhance their listings with high-quality, optimized images and transformations.


To implement the Cloudinary Upload Widget in your Django app, follow these steps:
- Create a Django view in your Django app to display the HTML page with the Cloudinary Upload Widget:
# media_app/views.py
from django.shortcuts import render
def upload_media(request):
return render(request, 'media_app/upload_media.html')Code language: PHP (php)- Create a template for the HTML page that includes the Cloudinary Upload Widget code. In your app’s templates directory, create a folder named
media_appif it doesn’t already exist, and then create a new HTML template file, e.g.,upload_media.html.
<!-- media_app/templates/media_app/upload_media.html -->
<!DOCTYPE html>
<html>
<head>
    <title>Media Upload Page</title>
</head>
<body>
    <button id="upload_widget" class="cloudinary-button">Upload files</button>

    <script src="https://upload-widget.cloudinary.com/global/all.js" type="text/javascript"></script>

    <script type="text/javascript">
        var myWidget = cloudinary.createUploadWidget({
            cloudName: 'my_cloud_name',
            uploadPreset: 'my_preset'
        }, (error, result) => {
            if (!error && result && result.event === "success") {
                	   // Access the delivery URL of the uploaded image
   var imageUrl = result.info.secure_url;
   // Save imageUrl to your database
   // You can use an AJAX request to send this data to your server
   console.log('Done! Here is the image info: ', result.info);
            }
        })

        document.getElementById("upload_widget").addEventListener("click", function(){
            myWidget.open();
        }, false);
    </script>
</body>
</html>Code language: HTML, XML (xml)- Configure the URL pattern in your Django app’s
urls.pyto map to the view you created. Here’s an example:
# media_app/urls.py
from django.urls import path
from . import views

urlpatterns = [
    path('upload-media/', views.upload_media, name='upload_media'),
]Code language: PHP (php)
Now, when you navigate to http://your-django-app.com/upload-media/, you’ll see the HTML page with the Cloudinary Upload Widget, and users can use it to upload media files. Adjust the URL and view names as needed to fit your project’s structure.
Server-side uploads offer automation, security, and scalability for media management, ideal for applications requiring efficient, hands-free handling.
Consider news and content curation platforms that compile images, videos, and audio related to current events from various news agencies and social media posts. By utilizing Cloudinary for server-side uploads, they can automate processes like data analysis (tagging, captioning, object detection, etc.) and content moderation. This automation not only enhances data quality but also ensures a safer and more efficient user experience.
Here’s how to do it:
# Uploading media from the server
def upload_file_to_server(file_path):
    result = cloudinary.uploader.upload(file_path, upload_preset="my_upload_preset")
    return result['secure_url']Code language: PHP (php)
And that’s it! Your media files are uploaded and ready to go, all thanks to Cloudinary.
If you’ve applied auto-tagging on upload and are managing your assets on Cloudinary, you can utilize Cloudinary’s efficient search capabilities. Imagine finding your asset quickly whenever you need it. Gone are the days of manual media file searching. Enter, efficient and streamlined search.
# Efficiently searching for media files
def search_media_by_tags(tags):
return cloudinary.Search().expression(f'tags:{tags}').execute()Code language: PHP (php)If you’re managing your media assets in Cloudinary, you can effortlessly apply additional transformations to your content upon delivery using Django template tags. Here’s an example of how to set a custom image size dynamically:
{% load cloudinary %}
<img src="{% cloudinary 'public_id' width=width height=height crop='fill' %}" alt="Your Image">Code language: HTML, XML (xml)
These dynamic URL-based transformations empower you to deliver media files in the most efficient format and quality tailored to your users, all powered by Cloudinary.
For a comprehensive guide on delivering responsive images, see Responsive images using HTML and dynamic image transformations.


For more information on delivering videos with Cloudinary, read Managing and delivering videos at scale.
In a nutshell, the methods we’ve explored for managing media files in Django are your secret weapons as a developer. They turn challenging uploads, transformations, and content searches into a breeze, freeing up your time to create a stellar user experience. Find out all the ways Cloudinary is built for developers, helping you deliver beautiful web experiences faster.


