
A persistent issue facing businesses online is attracting, engaging, and delighting their audience in the few seconds you have their attention. A modest deterioration in user experience may lower conversion rates on websites and platforms, especially for media content such as videos and photos.
This post will show us how to improve the user experience of video content on our website utilizing the autoplay video functionality and the Intersection Observer web API in Nuxt.js.
This project was completed in a Codesandbox. To get started quickly, fork the Codesandbox to run the project.
https://github.com/Olanetsoft/Autoplay-video-with-Intersection-Observer-in-Nuxt.js
The knowledge of JavaScript and Vue.js is needed to follow along in this tutorial. The knowledge of Nuxt.js is not required, but preferred.
Nuxt.js is the bedrock of our Vue.js project, providing structure and flexibility while allowing us to scale with confidence.
It is extensible, with a robust module ecosystem and hooks engine that makes it simple to integrate your REST or GraphQL endpoints, favorite CMS, CSS frameworks, and other third-party applications.
To create a new project, we will use the command below to scaffold a new project:
    npx create-nuxt-app <project-name>
Code language: HTML, XML (xml)
A series of prompts will appear as a result of the command. Here are the defaults we recommend:

Next, we need to navigate into the project directory and start the development server using the command below
    cd <project name> && yarn dev
Code language: HTML, XML (xml)
Nuxt.js will start a hot-reloading development environment accessible by default at http://localhost:3000
We will use the Cloudinary Video Player to detect and respond to a video player’s state changes.
Cloudinary video player is a JavaScript-based HTML5 video player that comes with a slew of useful customization and integration features, as well as monetization and analytics support.
The video player artifacts (JS and CSS) will be added to our nuxt.config.js in the link and script section of the file using the following snippet:
    // nuxt.config.js

    export  default  {
      head:  {
          ...
      link: [
          ...
      {
        rel:  'stylesheet',
        href:  'https://unpkg.com/cloudinary-video-player@1.5.9/dist/cld-video-player.min.css'
      }
            ],
      script:  [
      {
      src:  'https://unpkg.com/cloudinary-core@latest/cloudinary-core-shrinkwrap.min.js'
      },
      {
      src:  'https://unpkg.com/cloudinary-video-player@1.5.9/dist/cld-video-player.min.js'
      },
              ],
      },
    };
Code language: JavaScript (javascript)
We need to save our Cloudinary cloud name so that we can refer to it from any file. It will be saved as an environment variable in a global .env file at the project’s root in the following step.
You can get your cloud name from your Cloudinary dashboard by signing up for a Cloudinary account.
Create a .env file in the project’s root directory with the command touch .env and update it with the following snippet:
    NUXT_ENV_CLOUDINARY_CLOUD_NAME=<cloudinary-cloud-name>
Code language: HTML, XML (xml)
We can now create our video player by updating pages/index.vue with the following code snippet:
    <template>
      <div class="container">
        <h2
          class="flex justify-center items-center h-screen space-x-5 px-18 font-bold text-4xl"
        >
          Autoplay video with Intersection Observer in Nuxt.js
        </h2>

        <div class="flex justify-center items-center h-screen space-x-10">
          <div class="rounded overflow-hidden shadow-lg mb-4 content-center">
            <div class="px-6 py-4 pb-2">
              <div class="pb-4 pt-8"></div>

              <video
                id="video-player"
                controls
                width="800px"
                class="width-full"
                ref="theVideo"
                muted
              ></video>
            </div>
          </div>
        </div>
      </div>
    </template>

    <script>
    export default {
     data() {
        return {
          cld: null,
          player: null,
          video: "/samples/animals/dancing-cat",
        };
      },

      mounted() {
        this.cld = cloudinary.Cloudinary.new({
          cloud_name: process.env.NUXT_ENV_CLOUDINARY_CLOUD_NAME,
          secure: true,
        });

        this.player = this.cld.videoPlayer("video-player", {
          analytics: {
            events: ["play", "pause"],
          },
        });

        this.player.source(this.video);

        this.onElementObserved();
      },
      name: "IndexPage",
    };
    </script>
Code language: HTML, XML (xml)
We created a Cloudinary instance, utilized it to initialize the video player, and set up the video source in our mounted lifecycle hook in the code snippet above.
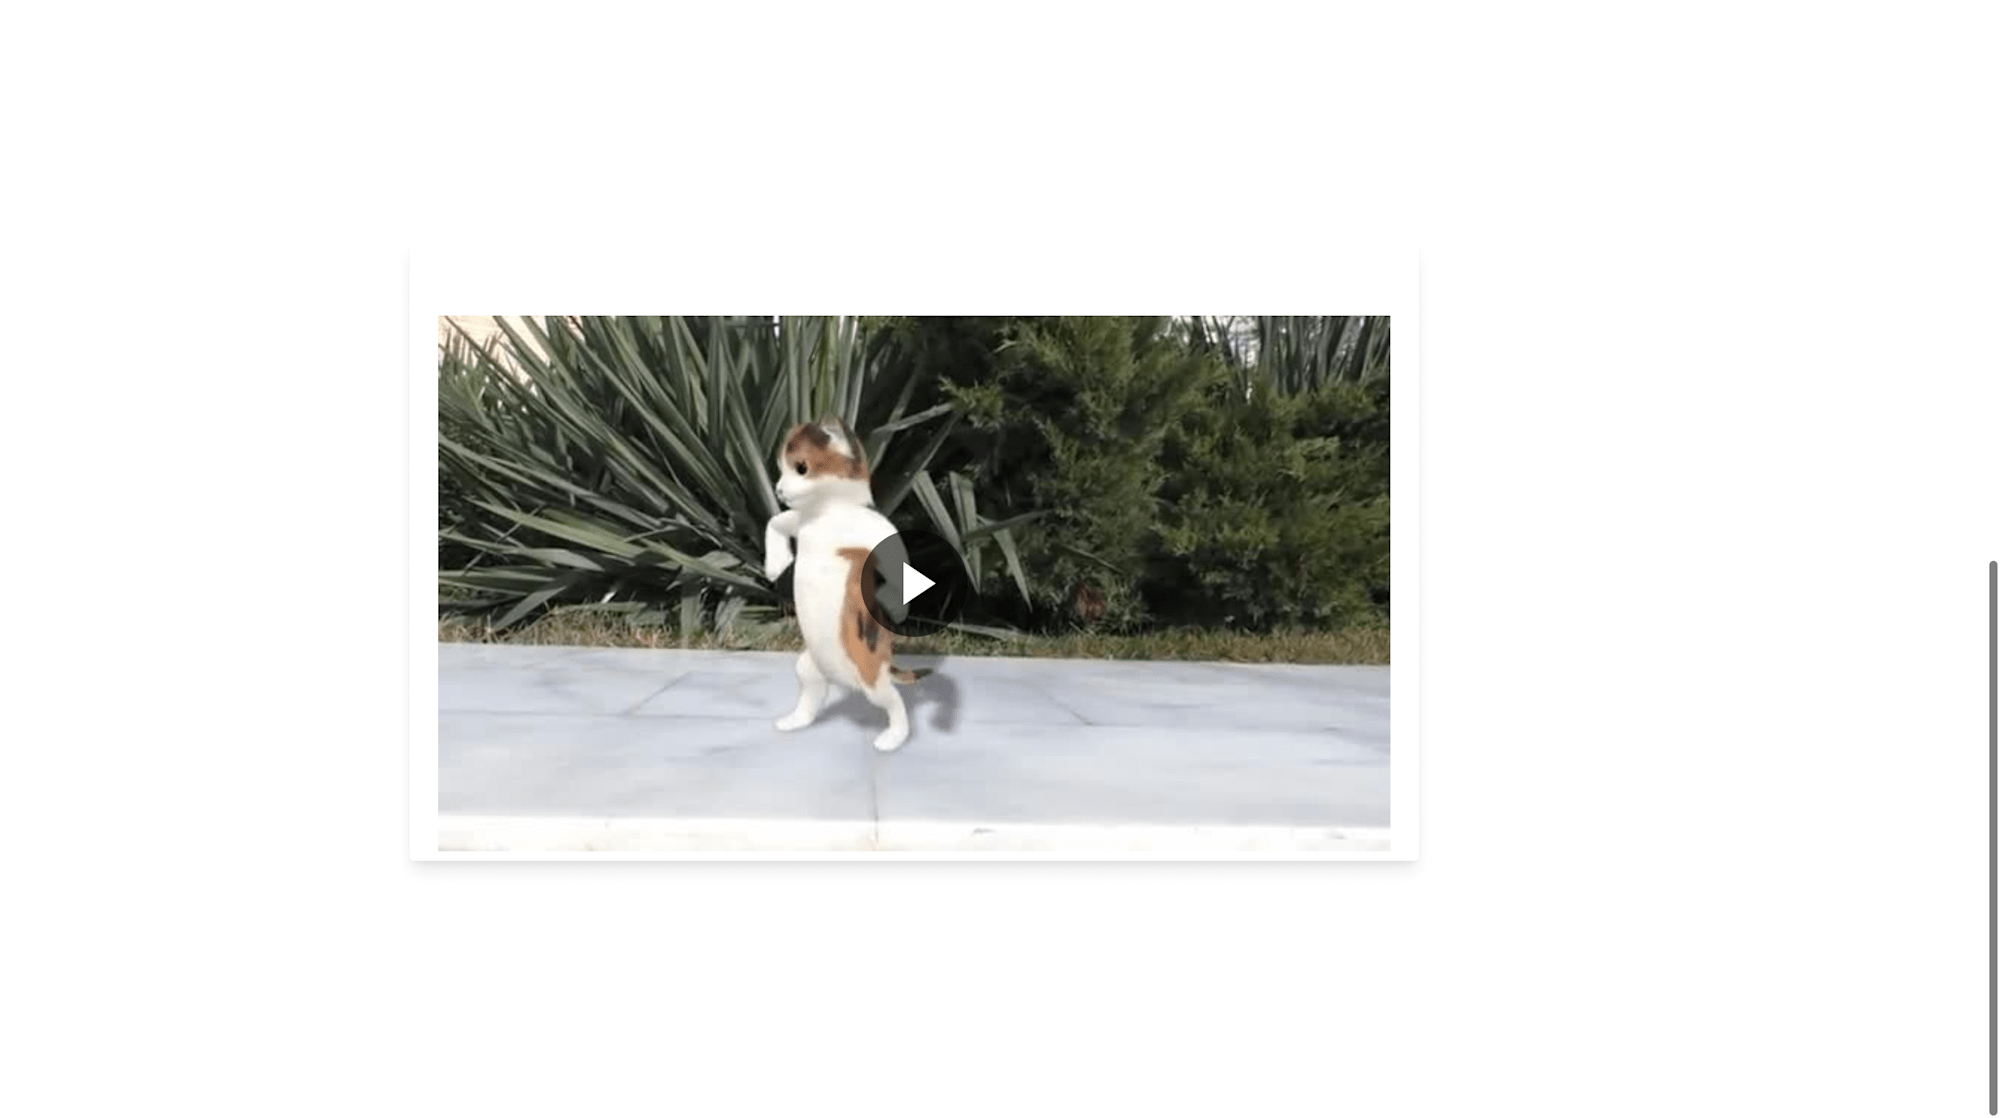
We should have something similar to this below.
On scrolling down, we should see the rendered video looking like this.
In this section, we will use the intersection observer API to detect the changes of our video tag’s position relative to the viewport of our website.
The Intersection Observer API allows you to asynchronously monitor changes in a target element’s intersection with a parent element or a top-level document’s viewport.
Next, We will update the pages/index.vue with the code snippet below:
    export default {
      data() {
        //...
      },

      mounted() {
         //...

        this.onElementObserved();
      },

      methods: {
        onElementObserved() {
          const observer = new IntersectionObserver((entries) => {
            entries.forEach((entry) => {
              if (entry.intersectionRatio > 0) {
                this.player.play();
              } else {
                this.player.pause();
              }
            });
          });
          observer.observe(this.$refs.theVideo);
        },
      },

      name: "IndexPage",
    };
    </script>
Code language: PHP (php)
In the code snippet above:
- We added the
onElementObservedmethod. - We created an IntersectionObserver instance and iterated through the entries, checking if
entry.intersectionRatiois greater than 0. - If it’s greater than zero, we set the trigger for the video to start playing, and if not, we pause the video.
- Finally, the
observemethod monitors the video element by passingthis.$refs.theVideo, which references the video element in view.
After testing our application, we should get something similar to what we have below.
https://www.loom.com/share/aa03ff4633984a55b3dd2b10c5925ad9
PS: We muted the video using the muted attribute to prevent the following error:
Uncaught (in promise) DOMException: play() failed because the user didn't interact with the document first.
This is due to Chrome’s autoplay policies changed in April of 2018. You can learn more about the policy.
This article explained how to autoplay a video using the intersection observer in nuxt.js to enhance user experience.
You may find these resources useful.