
Once upon a time, if you wanted to play audio on the web, you will require Flash, Quicktime, or another plugin. Then came the HTML5 audio tag which allowed you to play audio without requiring any plugins and some other functionalities. Essentially, if you wanted to embed sound on a web page, or stream audio using the MediaStream API; the HTML5 audio tag could handle that.
However, as technology keeps advancing and the demand for web browsers and applications to handle more complex functionalities, the audio tag is very limited. Hence, the Web Audio API.
The Web Audio API provides a system for controlling audio on the Web, allowing us to choose audio sources, add audio effects, audio visualizations, apply spatial effects and much more. Some of the features of this high level web API are:
- Processing of audio sources from an audio or video media element.
- Processing live audio input using a MediaStream from getUserMedia().
- Spatialized audio supporting a wide range of 3D games and immersive environments
- A wide range of very high quality room effects including:
- Small / large room
- Cathedral
- Concert hall
- Cave
- Tunnel e.t.c
- Modular routing for simple or complex mixing/effect architectures.
We now have an overview of the web audio api, let’s see how it’s used.
It’s important to know that the Web audio API doesn’t replace the audio tag, rather it complements it. It depends on the context you’re working with, for instance if you want to control audio playback (operations such as volume, play/pause, previous/next), the audio tag is recommended. On the other hand, if you want to perform complex audio operations such as adding audio effects, streaming live audio input, and also playback, the audio API is best suited to handle those operations.
Let’s briefly illustrate how the API works:
- Firstly, create an Audio context. The Audio context gives us full access to the features and functionalities of the Web Audio API.
//javascript
const audioContext = new AudioContext();
Code language: JavaScript (javascript)- Next, we will create an audio source and pass it into the audio context.
//javascript
<audio src="newTrack.mp3" id="audio"></audio>
// get the audio element
const audioElement = document.getElementById('audio');

// pass it into the audio context
const track = audioContext.createMediaElementSource(audioElement);
Code language: PHP (php)
The createMediaElementSource() here is used to create a new MediaElementAudioSourceNode object, given an existing HTML <audio> or <video> element, the audio from which can then be played and manipulated.
- Next, we can now create effect node to the audio such as reverb, panner, e.t.c
//javascript
const pannerOptions = { pan: 0 };
const panner = new StereoPannerNode(audioCtx, pannerOptions);
Code language: JavaScript (javascript)- Finally, we have to connect our audio source/input to a destination preferably our speakers.
//javascript
track.connect(audioContext.destination);
Code language: JavaScript (javascript)
Now we’ve understood how the web audio API works, let’s go ahead to building a web app that requires audio functionality.
- Knowledge of JavaScript and React
- Node >v14 installed
- A Cloudinary account. Sign in here
- A Supabase account. Create one here.
- A code editor VS Code preferably
The complete code for this tutorial is on Codesandbox.
Let’s start by setting up a react project with create-react-app. Run this command:
#bash
npx create-react-app music-app
Code language: CSS (css)
When it’s done installing, change directory to music-app and open it on your code editor. Go ahead and install the following packages:
npm i @chakra-ui/react @emotion/react @emotion/styled framer-motion
Code language: CSS (css)
This adds chakra ui to your project dependencies, and go ahead to update your index.js to look like this:
#src/index.js
import React from 'react';
import ReactDOM from 'react-dom/client';
import App from './App';
import { ChakraProvider } from '@chakra-ui/react'

const root = ReactDOM.createRoot(document.getElementById('root'));
    root.render(
      <ChakraProvider>
        <React.StrictMode>
          <App />
        </React.StrictMode>
      </ChakraProvider>
    );

Code language: PHP (php)
Let’s go ahead and create our components. Firstly, create a components folder in the src directory and add these files Upload.js, MusicList.js, MusicPlayer.js.
We will be using cloudinary upload widget to add songs to our music list. We will make use of the CDN to integrate the upload widget into our app. We will add this CDN using React Helmet. Helmet is a reusable React component will manage all of your changes to the document head.
Install helmet by running npm i react-helmet
Go ahead and modify your App.js to look like this:
//javascript
import { Box } from "@chakra-ui/react";
import MusicList from "./components/music";
import "./App.css";
import { Helmet } from "react-helmet";
import Upload from "./components/Upload";

export default function App() {
    return (
        <Box width="1200px" margin="auto" padding="2rem">
            <Helmet>
                <meta charset="UTF-8" />
                <script src="https://widget.Cloudinary.com/v2.0/global/all.js"
                    type="text/javascript"
                ></script>
            </Helmet>
            <Upload />
            <MusicList />
        </Box>
    );
}
Code language: JavaScript (javascript)
The widget requires your cloudinary upload_preset and cloud_name. Head over to Cloudinary Settings and click on the Upload tab, and scroll down to upload presets to create one.
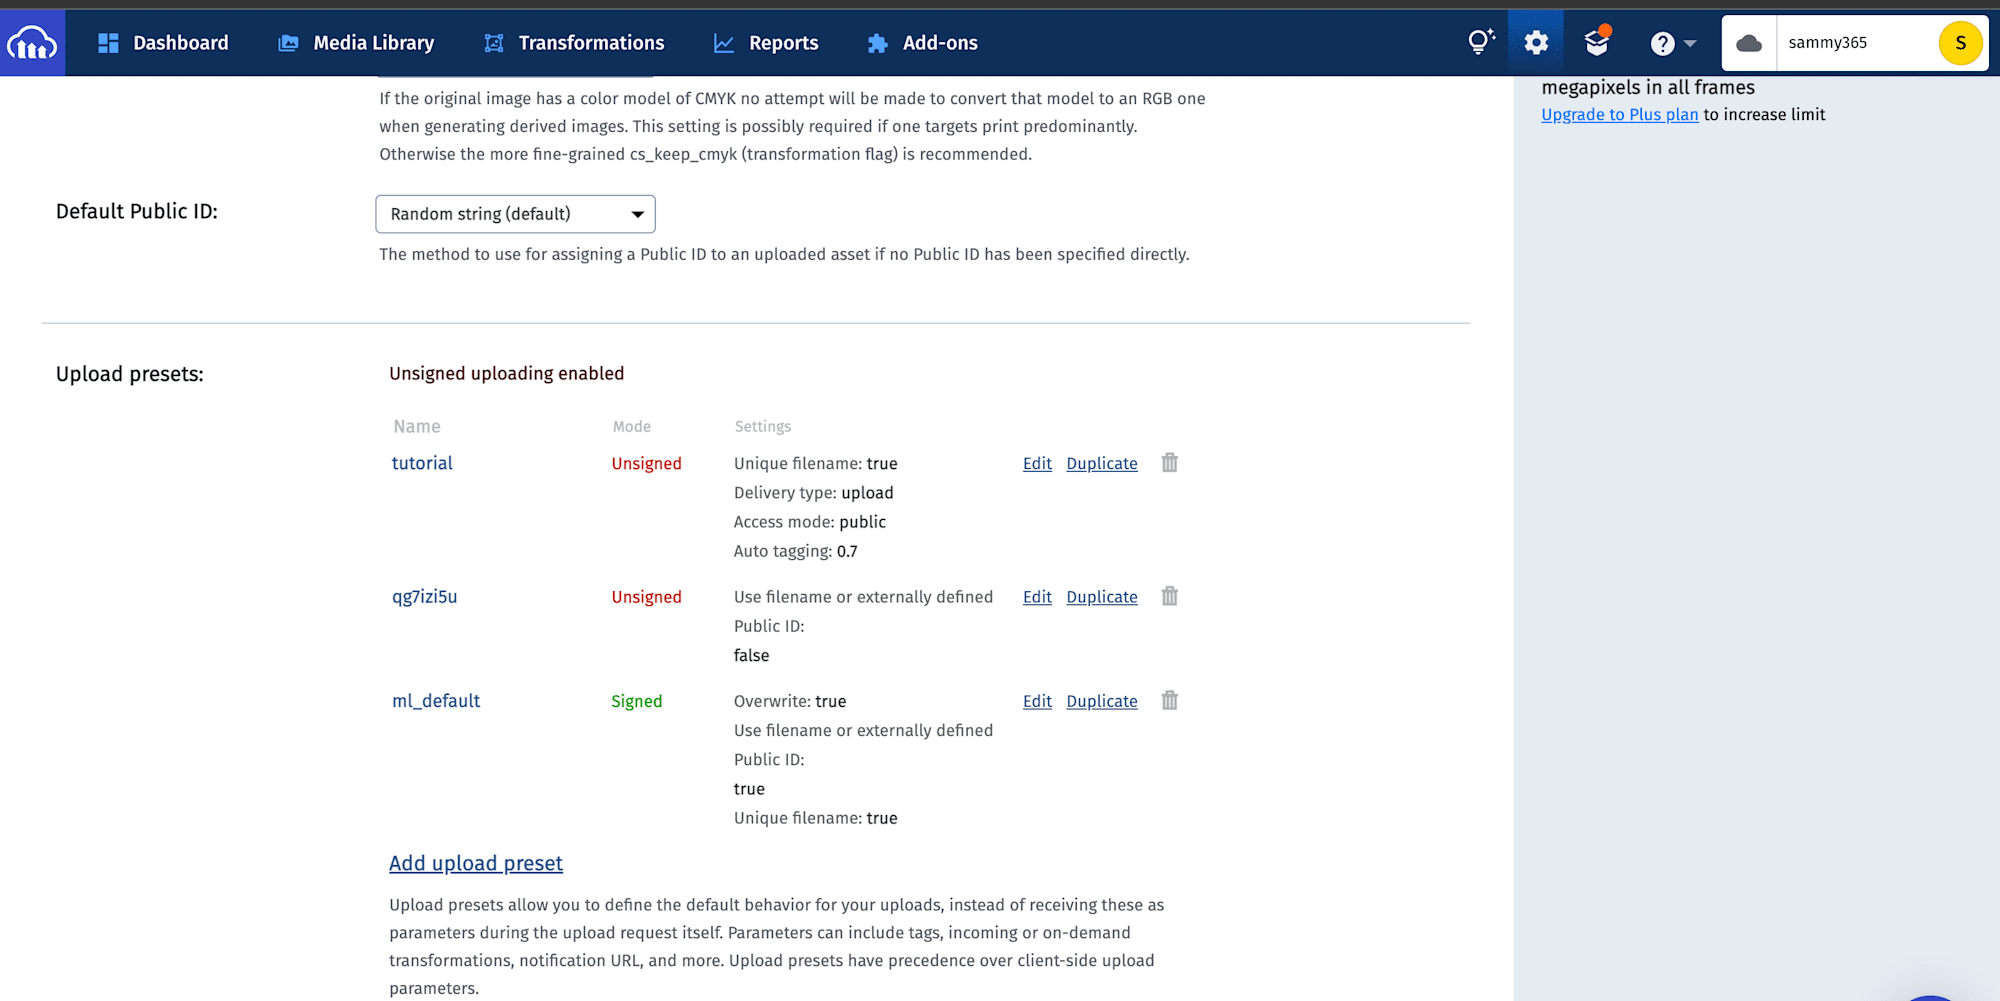
I have already created some for myself, you can go ahead to create an upload preset by clicking on the Add upload preset link. Take note of the preset name, we’ll be using it soon. You can find your cloudinary cloud name on the Dashboard tab.

Now go ahead to update your Update.js fie with the following lines of code:
//src/components/Upload.js

import { Box, Button } from "@chakra-ui/react";
import { useState } from 'react';

export default function Upload() {
const [title, setTitle] = useState("");
const [url, setUrl] = useState("");

const openWidget = () => {
            // create the widget
    const widget = window.cloudinary.createUploadWidget(
        {
            cloudName: "<your cloud name>",
            uploadPreset: "<your upload preset>"
        },
        (error, result) => {
            if (result.event === "success") {
                if (result.info.is_audio === true) {
                    console.log(result)
                }
            } else {
                console.log(error)
            }
        }
    );
    widget.open(); // open up the widget after creation
};


return (
    <Box
    p="3"
    px="4"
    mb="3"
    >
        <Button
            onClick={() => openWidget()}
            variant="solid"
            width="10rem"
            padding=".5rem"
            colorScheme='teal'
        >
            Upload Song
        </Button>
    </Box>
)
}

Code language: JavaScript (javascript)
Here, we have a button that triggers our upload widget open. Save and run the app. You should see something like this when you click the upload button.

Awesome. Right now we can use the upload widget but we have not yet added functionality on our app. Let’s go ahead to save the music we will be uploading with a supabase db.
Supabase claims to be the open source version of Firebase. It provides all the backend services you need to build a product. For the purpose of our article, we’ll be using the DB service only. Go ahead and install the JavaScript package with npm i @supabase/supabase-js.
Ensure you’ve created a supabase account. Follow these steps:
- Create a new project
- Copy the
annonpublickey - Copy the URL
Create a src/client.js file and add these lines of code:
// src/client.js
import { createClient } from "@supabase/supabase-js";
const URL = process.env.REACT_APP_SUPABASE_URL;
const PUBLIC_SECRET =process.env.REACT_APP_SUPABASE_PUBLIC_SECRET;
export const supabase = createClient(URL, PUBLIC_SECRET)
Code language: JavaScript (javascript)
Create a .env file and add the required values.
Create a table in supabase and call it any name of your choice, i called mine audio-player. Also create columns for url and title.
You should have a screen that looks like this:

Now, we will go ahead and update our components/Upload.js file to look like
// src/components/Upload.js

import { Box, Button } from "@chakra-ui/react";
import { supabase } from "../client";
import { useState } from 'react';

export default function Upload() {
    const [title, setTitle] = useState("");
    const [url, setUrl] = useState("");
    const openWidget = () => {
            // create the widget
        const widget = window.cloudinary.createUploadWidget(
            {
            cloudName: "sammy365",
            uploadPreset: "tutorial"
            },
            (error, result) => {
            if (result.event === "success") {
                if (result.info.is_audio === true) {
                    setUrl(result.info.secure_url);
                    setTitle(result.info.original_filename);
                        console.log(result)
                }
            } else {
                console.log(error)
            }
        }
    );
    widget.open(); // open up the widget after creation
};

const createSong = async () => {
    await supabase
        .from("audio-player")
        .insert([
            {
            url, title
            }
        ]).single();
    }

if (url && title) {
    createSong();
    }

return (
    <Box
    p="3"
    px="4"
    mb="3"
    >
        <Button
        onClick={() => openWidget()}
        variant="solid"
        width="10rem"
        padding=".5rem"
        colorScheme='teal'
        >
            Upload Song
        </Button>
    </Box>
)
}
Code language: JavaScript (javascript)
Here, we have a createSong() function inserts the value of url and title to the table. Let’s now go ahead to create our component that retrieves and displays the songs we saved in our db. Naviage to your MusicList.js and add these lines of code:
// src/components/MusicList.js

import { Box, Center, Heading } from "@chakra-ui/react";
import MusicPlayer from "./MusicPlayer";
import { supabase } from "../client";
import { useState, useEffect } from 'react';

export default function Music() {
    const [music, setMusic] = useState([]);
    const fetchSongs = async () => {
        const { data } = await supabase.from("audio-player").select();
            setMusic(data);
    }

useEffect(() => {
    fetchSongs()
}, []);

return (
    <>
        <Heading as="h2"> Uploaded Songs </Heading>
            <Box display="grid" gridTemplateColumns='repeat(3, 1fr)' gridGap={4} mt="8">
                {music.map((m, key) => (
                        <MusicPlayer music={m} index={key} />
                ))}
            </Box>
            <Center>
                {
                music.length === 0 ?
                    <Box>
                        <Heading as="h6" size="lg"> No song has been uploaded</Heading>
                    </Box>
                    : ""
                }
            </Center>
    </>
)
}
Code language: JavaScript (javascript)
Here, we are simply fetching music data from our supabase table and passing it to a MusicPlayer component. Let’s go ahead to create the MusicPlayer component. Add the following lines of code in components/MusicPlayer.js
// components/MusicPlayer.js

import moment from "moment";
import { Box, Heading, Spacer } from "@chakra-ui/react";

export default function MusicPlayer({ music, index }) {
    return (
        <Box key={index} border='1px' borderColor='gray.200' boxShadow='lg' p="6" >
            <Box>
            <Spacer mt="6">
                {moment(music.created_at).format("MMMM Do YYYY")}
            </Spacer>
            </Box>
            <Box mt="8">
                <Heading as="h3" size="lg" mb="4"> {music.title} </Heading>
                    <audio
                    src={music.url}
                    controls
                    volume={0.5}
                />
            </Box>
        </Box>
        )
    }
Code language: JavaScript (javascript)
Here, we are retrieving data from our db table. If you also recognize, we use the HTML5 audio tag as our music player.
You can now go ahead to save and run the app.
https://www.dropbox.com/s/ablauh3ezea0rpx/screencast-nimbus-capture-2022.07.19-16_05_21.webm?dl=0
Awesome. If you notice they are two problems:
- On our supabase table, 2 rows are created instead of ome
- When we click on Done on cloudinary, our app should show the uploaded files, instead of refreshing manually to see the uploaded files.
I’ll encourage you to take a look at these problems and solve them.
While our focus has been primarily on utilizing the Web Audio API and Supabase for our music app, there are several other potent APIs and services available for audio and video streaming. For instance:
- TheAudioDB: A community-driven platform offering rich audio metadata.
- YouTube Video Info: Extract essential information from YouTube videos, including their audio and video streams.
- Audio File Stream Services: Enables parsing of streamed audio files as they are received on the user’s end.
If you’re looking to explore live streaming further, consider diving into these APIs:
- Video SDK
- Mux
- Agora
- api.video
- AWS IVS
- 100ms
- DaCast
- Wowza
- Vonage
- Dolby.io
Each of these provides unique features and functionalities tailored for different use cases, from basic audio streaming to comprehensive live broadcasting.
In this post, we learned about the Web audio API, and how it works. We then went on to build a music app with Reactjs and Cloudinary. I hope you’ve learned something valuable from this piece.
Happy Coding!
