
Even though Node is fun, easy and cheap to work with, we spend a lot of time writing boilerplate codes because structure and organization is missing.
What happened to Convention Over Configuration?
While Node is simple, it requires you to make a lot of decisions, which ultimately causes confusion because it leaves you with several options. Languages like PHP, Ruby, C# and Python have one or more Molde-View-Controller (MVC) frameworks, such as Laravel, Rails, ASP.Net and Django. These help developers to achieve structure and write maintainable code with these languages. That was not the case for Node until AdonisJs was introduced.
AdonisJs can help with these challenges. AdonisJs is an MVC framework for Node that is modeled after the popular PHP’s Laravel framework with a few concepts from Rails as well.
Now, let’s look at how you can use Adonis to create a simple content management system (CMS) performing CRUD (create, read, update and delete) operations.
Before we write example code, we need to get Adonis on our machines and review a typical Adonis application files structure.
Adonis has a command-line interface (CLI) that makes most utility tasks easy. We can use npm to install the CLI globally:
$ npm install -g adonis-cli
Node v4.0.0 and npm are the only requirements for installing Adonis to your computer.
With Adonis installed and the Adonis command available, we can use it to create a new project:
$ adonis new simple-blog
$ cd simple-blog
$ npm start
The new command creates a new Adonis project with all the necessary files and content to get us started. It also installs the npm dependencies into the node_modules folder, so there is no need to run npm install.
You can create an Adonis project without using the CLI command. This option is considered manual and can be achieved by getting the boilerplate from GitHub and installing the dependencies:
$ git clone https://github.com/adonisjs/adonis-app simple-blog

$ cd simple-blog

$ npm install

$ npm start
The purple screen at localhost:3333 indicates that a new app was successfully created:
The directory structure of an Adonis project can be intimidating at first. But, that’s the case with any framework that implements the MVC architecture. With time, you will understand how to navigate it. Here’s a top-level overview for your reference:
├── app # Your code's home
│   ├── Commands # Ace Commands
│   ├── Http # Controllers and Routes
│   ├── Listeners # Event Listeners
│   ├── Model # Database Models
├── bootstrap # Application setup logistics
├── config # All Configuration lives here
├── database
│   ├── migrations # Database Migrations
│   └── seeds # Dummy data
├── providers # Service Providers
├── public # Client files
├── resources
│   └── views # Application views
├── storage # Temporary Logs and Sessions
The Sqlite database is a good choice for development purposes and very small scale applications. We can make use of it by installing via npm and telling Adonis to use it as our default database via the database config.
npm i --save sqlite3
The above command runs the installation process for sqlite3. Now we must tell Adonis to make use of the database we just installed. Conveniently, Adonis already uses sqlite3 as the default database:
// ./config/database.js
module.exports = {
    // Use Connection defined in .env file or
    // sqlite if none
    connection: Env.get('DB_CONNECTION', 'sqlite'),
    // sqlite configuration
    sqlite: {
      client: 'sqlite3',
      connection: {
        filename: Helpers.databasePath('development.sqlite')
      },
      useNullAsDefault: true
    },
    ...
 }
Code language: JavaScript (javascript)
Migration is not a core MVC architecture concept, but it makes it easy to share schemas in a declarative manner. Rather than defining the schema in our databases directly, we define them in a file. This file can then be shared among team members.
To create a posts migration, run:
./ace make:migration posts --create=posts
The command will create a migration class file named [TIMESTAMP]_posts.js in database/migrations.
The class has an up and down method. up is called when we run migrations to create the database table, while down is called when we want to tear down the table.
Currently, the schema is defined with nothing but methods that will create the primary key (increments()) and another to create timestamps (timestamps()). Let’s add something that a post should have:
// ./database/migrations/[TIMESTAMP]_posts.js
...
up () {
    this.create('posts', (table) => {
      table.increments();
      table.timestamps();
      // New columns' methods
      table.string('title');
      table.string('body');
      table.string('image');
    })
  }
...
Code language: JavaScript (javascript)
We are calling the string method on the table, which was passed in to the create closure. This method will create a column of string type (or varchar, as the case may be) and the column will be named after whatever value was passed in.
You can then execute the migration run command to begin migration:
./ace migration:run
After a successful migration, you should get a message in the console saying so:
✔ Database migrated successfully in 120 ms
Now let’s focus on the M in MVC, which stands for Models. Models are stored in the app/Model folder and can be created using the ace command as well:
./ace make:model Post
Note: Convention over configuration is a software engineering paradigm in which developers are not required to make too many decisions. Each Model needs to be mapped to a migration. Adonis uses this paradigm, so rather than defining it manually, it helps you make the decision. A Post will map to a posts migration, which is a plural lowercase. We are never compelled to define a config of what model maps to what migration.
Here’s what our model looks like:
// ./app/Model/Post.js
const Lucid = use('Lucid')

class Post extends Lucid {

}

module.exports = Post
Code language: JavaScript (javascript)
Lucid is the library that Adonis uses to manage Models.
The above Post model might seem empty. However, because it will eventually be mapped to our posts migration, we still gain access to the table’s columns. We will discuss this later in the article.
Now that Migrations and Models have been taken care of, we have a store. Henceforth, we will be playing with HTTP requests and responses using routes, controllers and views.
Our first two routes are going to handle creating new posts:
// ./app/Http/routes.js

//GET route to send the new post form
Route.get('/new', 'PostController.new');
//POST route to send form data to the server
Route.post('/create', 'PostController.create');
Code language: JavaScript (javascript)
The route method takes two arguments – the route URL and the controller actions. We now need to create the controllers with the new and create action methods:
// Import Model
const Post = use('App/Model/Post');

class PostController {
    // New action method
    * new(request, response) {
        // Send a view
        yield response.sendView('post/new'); // ./resources/views/post/new.njk
    }

    // Create Action method
    * create(request, response) {
        // Filter relevant post data
        const postData = request.only('title', 'body');
        // Create and store post
        yield Post.create(postData);
        // Redirect to home page
        response.redirect('/');
    }
}

module.exports = PostController
Code language: JavaScript (javascript)- We first import the
PostModel to our controller. This is because, thecreateaction method will make use of this Model to create and store new posts. - The first controller action –
new– sends aNunjucksview that contains a template for the post form. The syntax is known asNunjuckswith an.njkextension and that is what Adonis uses for templates. - The second controller action –
create– receives data from the browser through the form and stores it using thePostModel.
The * ... yield syntax is an EcmaScript upcoming feature called Generators. They are a different kind of function and Adonis uses it to simplify a lot of async tasks.
Here is what the form in the view looks like:
{% extends 'master' %}
{% block content %}
<h2>New Post</h2>
{{ form.open({action: 'PostController.create'}) }}
{{ csrfField }}
<div class="ui form">
<div class="field">
{{ form.label('Post Title') }}
{{ form.text('title', null) }}
</div>
<div class="field">
{{ form.label('Body') }}
{{ form.textarea('body', null) }}
</div>
{{ form.submit('Create', 'create', { class: 'ui blue button' }) }}
</div>
{{ form.close() }}
{% endblock %}
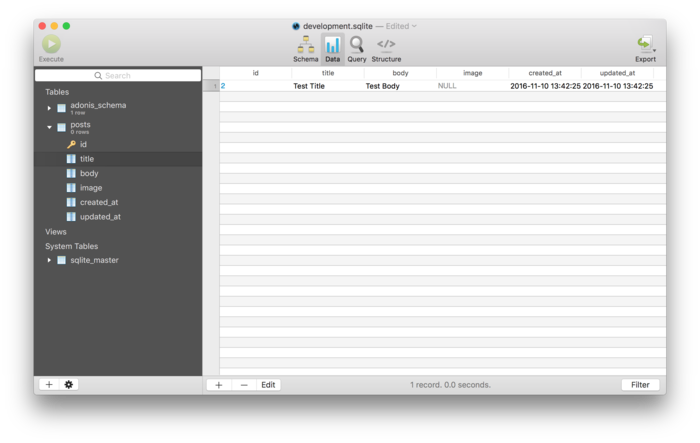
Code language: HTML, XML (xml)You can visit the /new route to create a new post. This is what our data looks like in the database viewer:
Here we introduced Adonis and some of its basic concepts. In the second part of this article, we’ll share how easy it is to handle image uploads when creating a new post, how to read/update existing posts and display them, and how to delete posts from the store.
 |
Christian Nwamba is a code beast, with a passion for instructing computers and understanding it’s language. In his next life, Chris hopes to remain a computer programmer. |