
Rise Above Research estimates that 1.6 trillion photos were taken in 2023, a 7.5% increase over 2022. Given the sheer volume of photos generated these days, indexing them by the person in the image has become humanly impossible.
In this blog post, I’ll show you how to “train” and tag faces by using Cloudinary and AWS Rekognition. (This post builds upon a previous one that introduced the same idea.)
You can identify and search based on the person in an image to save time and organize your image assets better.
Use cases:
- You’re an e-commerce company that works with influencers or models.
- You’re a platform hosting marketing content or training material. The presenters and trainers are known.
- You’re a sports agency and want to identify athletes in images.
AWS Rekognition can help you tag and group faces. Cloudinary’s DAM then hosts your images. By combining the two, you can identify, tag, and offer search capability.
Here’s how you can set up the solution:
- Set up AWS Lambda code to trigger from Cloudinary’s webhook notifications.
- Create a structured metadata field for a person’s name.
- Add known people’s names.
- Train images for each person, which requires two to three images per person.
- Analyze each new uploaded image and add the person’s name, if their face is recognized.
In this blog post, steps 2, 3, and 4 use the DAM UI. It can be accomplished using metadata APIs as well. Let’s look at each step in detail.
This code requires AWS Lambda and AWS Secrets Manager. Secrets manager is necessary for storing Cloudinary’s API credentials on AWS without exposing it to the Lambda code.
Using AWS Secrets Manager, create a secret. It should look like this:
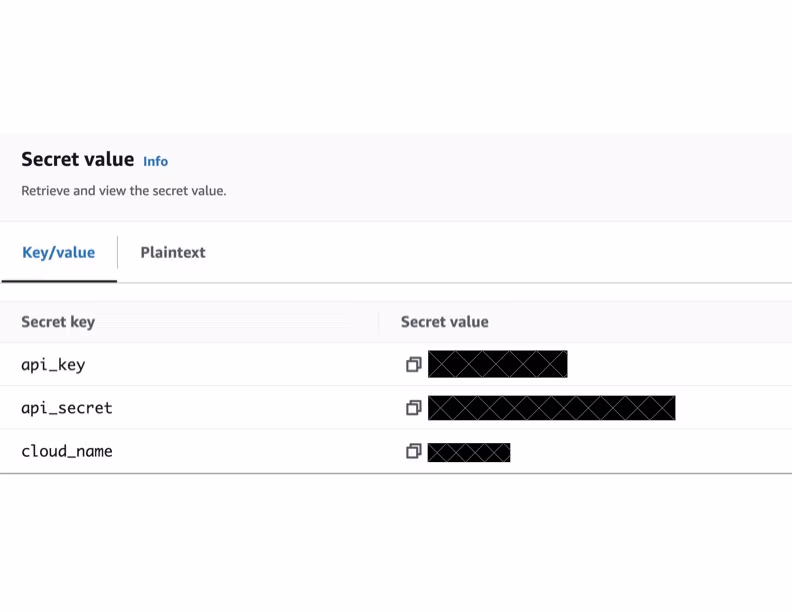
Copy the ARN and keep it handy.
Clone the repo: https://github.com/CloudinarySolutions/cld-face-rekognition
git clone https://github.com/CloudinarySolutions/cld-face-rekognition
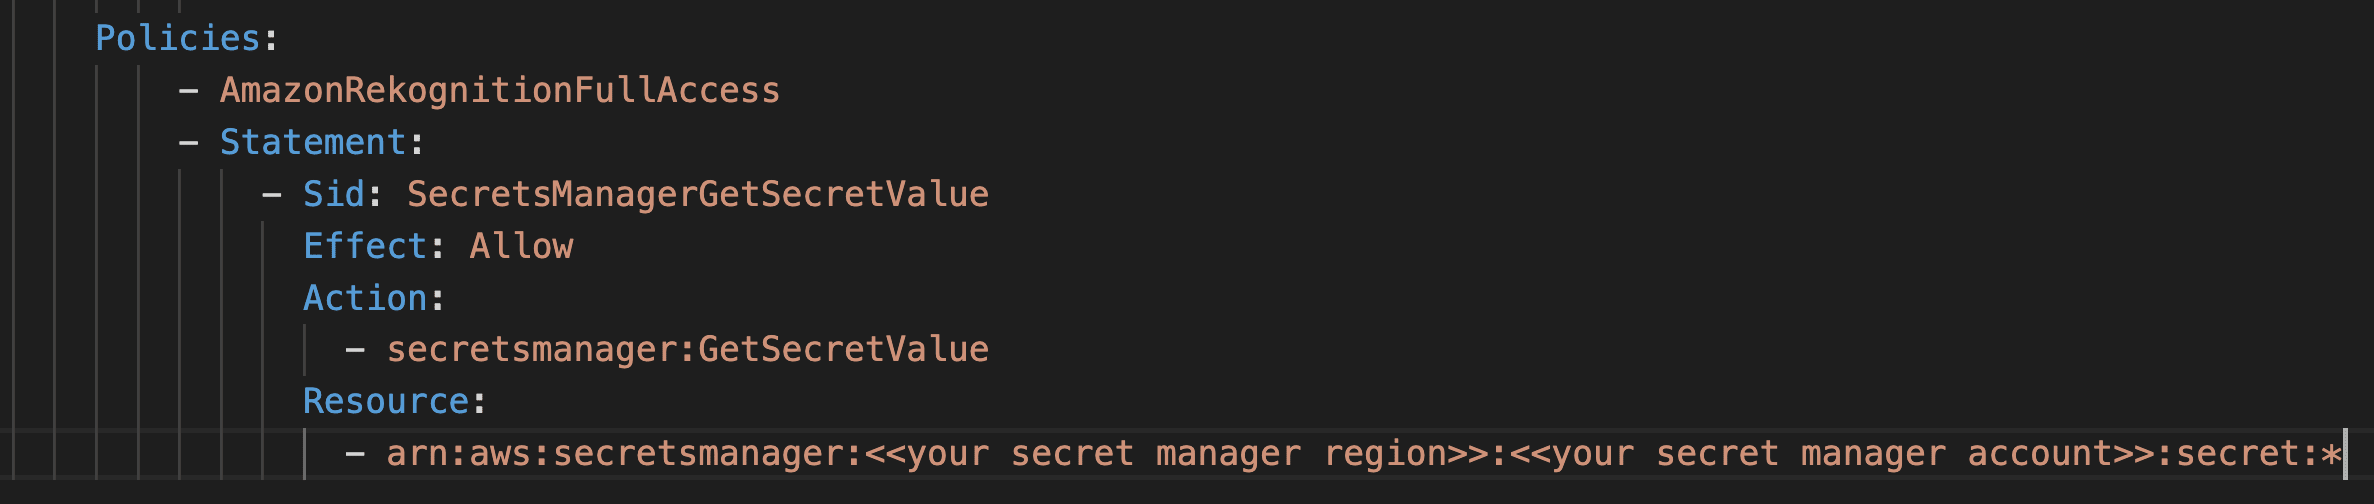
Once cloned, edit the file template.yaml. In the last line, copy and paste the ARN of your secret that you copied in the previous step.
Now, we can build the code. The code can be deployed using AWS Sam. The deployment process is as follows:
Build the code locally by installing the dependencies. The code is then packaged into a ZIP file.
sam build -m lambda/requirements.txt
Once built, it can be deployed with the following command:
sam deploy --guided --profile my_profile
This will deploy the code by creating a Lambda and setting up an AWS gateway.
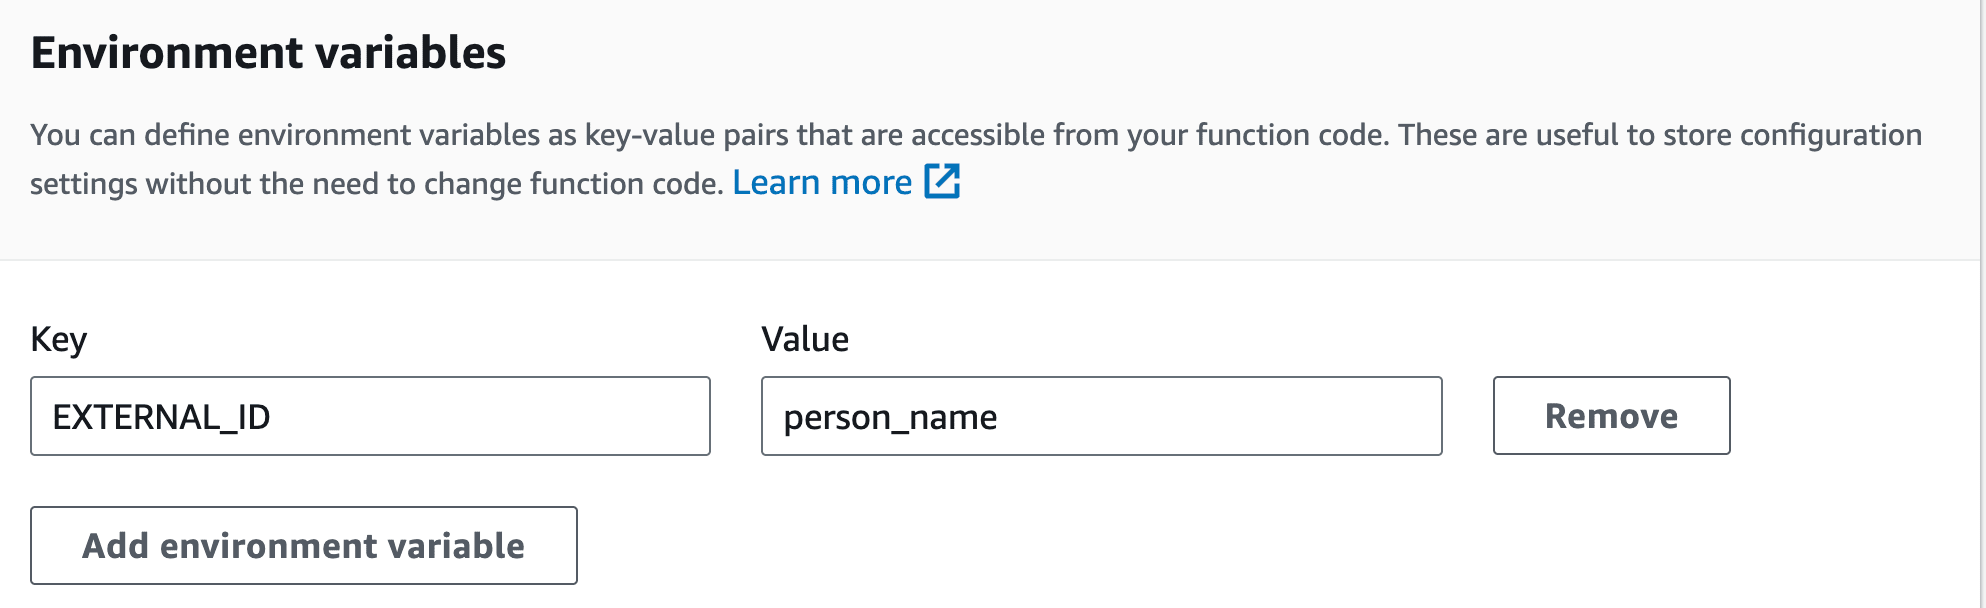
All the configurable parameters are defined in the file lambda/params.py. To set up your Lambda, you may want to override the defaults and use Lambda’s environment variables.
In my case, I’ll use one override for the field EXTERNAL_ID. This is the name of the metadata field that will hold the person’s name. I’ll set up this value to person_name. I’ll create this metadata field after the next step.
Once the Lambda and API gateway are set up, copy the URL for the API gateway. We’ll need it for the next step. Alternatively, you can set this up as a Lambda function and not require the use of API Gateway.
Navigate to Settings > Webhook Notifications. Enter the API Gateway URL and enable the notifications for two events: Upload and Resource Metadata Changed.
Here’s a video on how to set this up.
Once the code is ready and the integration between Cloudinary and Lambda is completed, we can create the metadata and add people’s names.
Here’s how to create a Structured Metadata field as a single-select value. It means that a single image can be associated with one person.
At this point, we’ve finalized the Lamba code, webhook notifications, metadata field, and people’s names.
You can now train by uploading a few sample images. Based on my tests, you’ll need at least three images per person. Here’s how you can train:
- Add the person’s name (if it isn’t already added).
- Identify the folder marked for training. This is controlled by the
TRAIN_PATHenvironment variable. The default istest/rekognition. - Upload images to the folder marked as “Training”.
- Select an image or images.
- Set the Person Name field to your desired value.
The webhook notification will send a message to Lambda. When it executes, it will invoke and add this face to the faces collection. Here’s the training process in action:
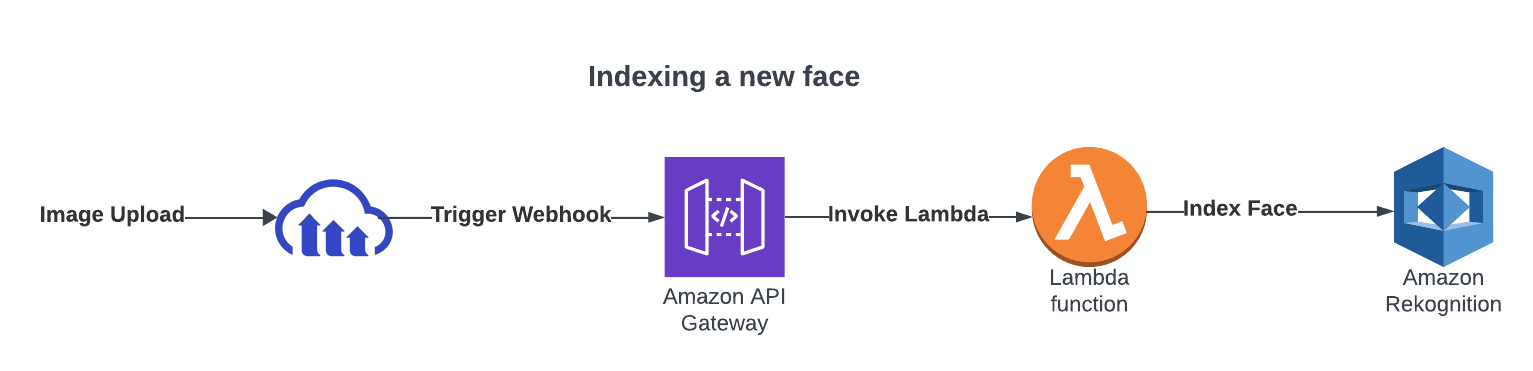
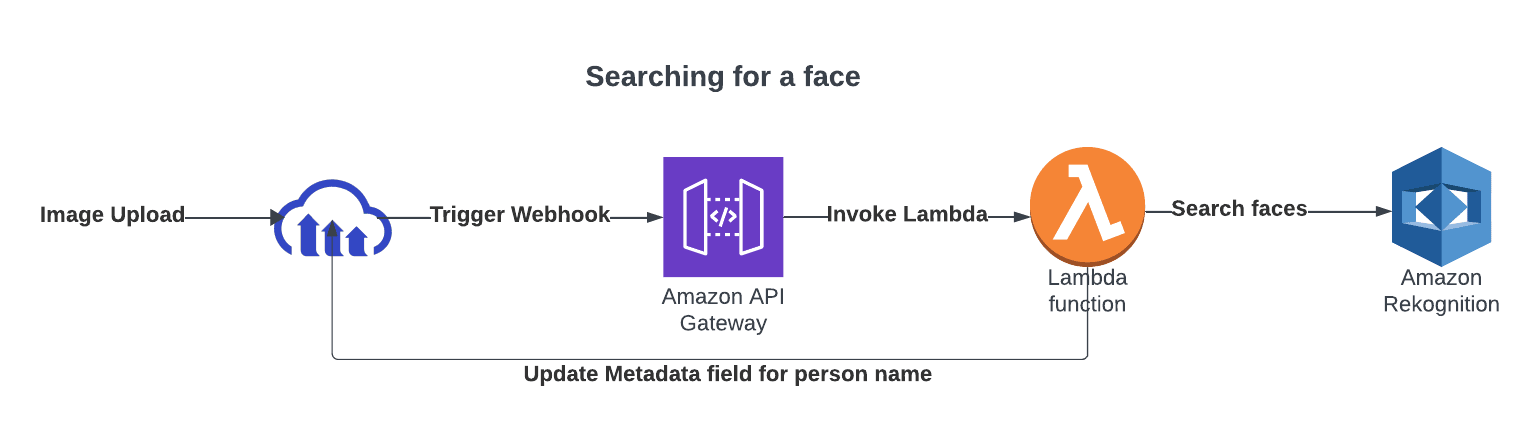
When you upload a new image, it’s automatically analyzed by the Lamda code. Cloudinary will fire a webhook notification that triggers Lambda. Afterwards, it will:
- Verify the notification is for an image upload.
- Verify that the uploaded image isn’t in the same folder as training images.
- Pass the image to Rekognition for face identification.
If a known face is found, invoke the metadata to update the metadata for the image.
Once images are updated with the face metadata, searching becomes easier. Here’s how to test the new face being indexed and to also search for the images based on the person’s name.
In this video, I used the upload interface from Cloudinary’s portal. To check the metadata status, I used Cloudinary’s CLI. Within the CLI, I used the Admin API’s Get Details of Single Resource endpoint.
That wraps up how to set up Lambda code, webhook notifications, training images for new faces, and automatically identifying and enriching newly uploaded images with face information. Now it’s your turn to try it out!
I wrote the code for Python 3.10 runtime. Here’s an overview of the files:
main.py. The entry-point for lambda handler, it orchestrates the execution and decides if a request is for training or inference.awsutils.py. Currently, it’s used for accessing the Cloudinary’s secrets from AWS Secrets Manager and returning back the values.facerecog.py. Handles AWS Rekognition API calls, including creating a face collection, adding a new face to the collection, and extracting face match for a new image.cld_utils.py. Works with Cloudinary’s APIs to update the existing asset if a face match is found.params.py. Holds some basic defaults. All the values specified in this file can be superseded by setting environment variables in the Lambda environment.
For more in-depth details, please refer to the README file in the GitHub repository.