
There are a lot of new JAMStack frameworks that are appearing on the scene. You have NextJS, Eleventy, React Static, and a bunch of others. One thing that’s missing from these frameworks is the ability to work with databases in your web app.
That’s where RedwoodJS comes in. It’s a framework that lets you do full-stack JAMStack development. It uses React, GraphQL, and Prisma. One of the cool things about this framework is that if you have an existing React project, it’s not terribly complicated to port it over.
This tutorial is just going to give you an idea for one of the things you can do with a full-stack JAMStack application. We’re going to upload images submitted by users to a PostgreSQL database. We’ll go over how to set up your RedwoodJS app and start accepting images from users and displaying them back.
You can clone a working version of this from Github or just follow along with the tutorial.
Create a new directory for your app called redwood, and go to that folder in a terminal. Then, run the following command.
yarn create redwood-app ./redwood-image-uploader
This will start a chain of events that creates the skeleton for your entire project, including the back-end. Once the setup process is finished, go to the redwood-image-uploader directory in your terminal.
You’ll notice a number of directories and files were created. The api folder is where all of the Primsa and GraphQL files live. The web directory is where the React code lives.
Redwood handles a lot of things behind the scenes for you, but they keep things clear enough to find the right files to edit if you want to do things manually. If you want to learn more about the details, make sure to go check out their docs.
From here, we can actually start our app with the following command.
yarn rw dev
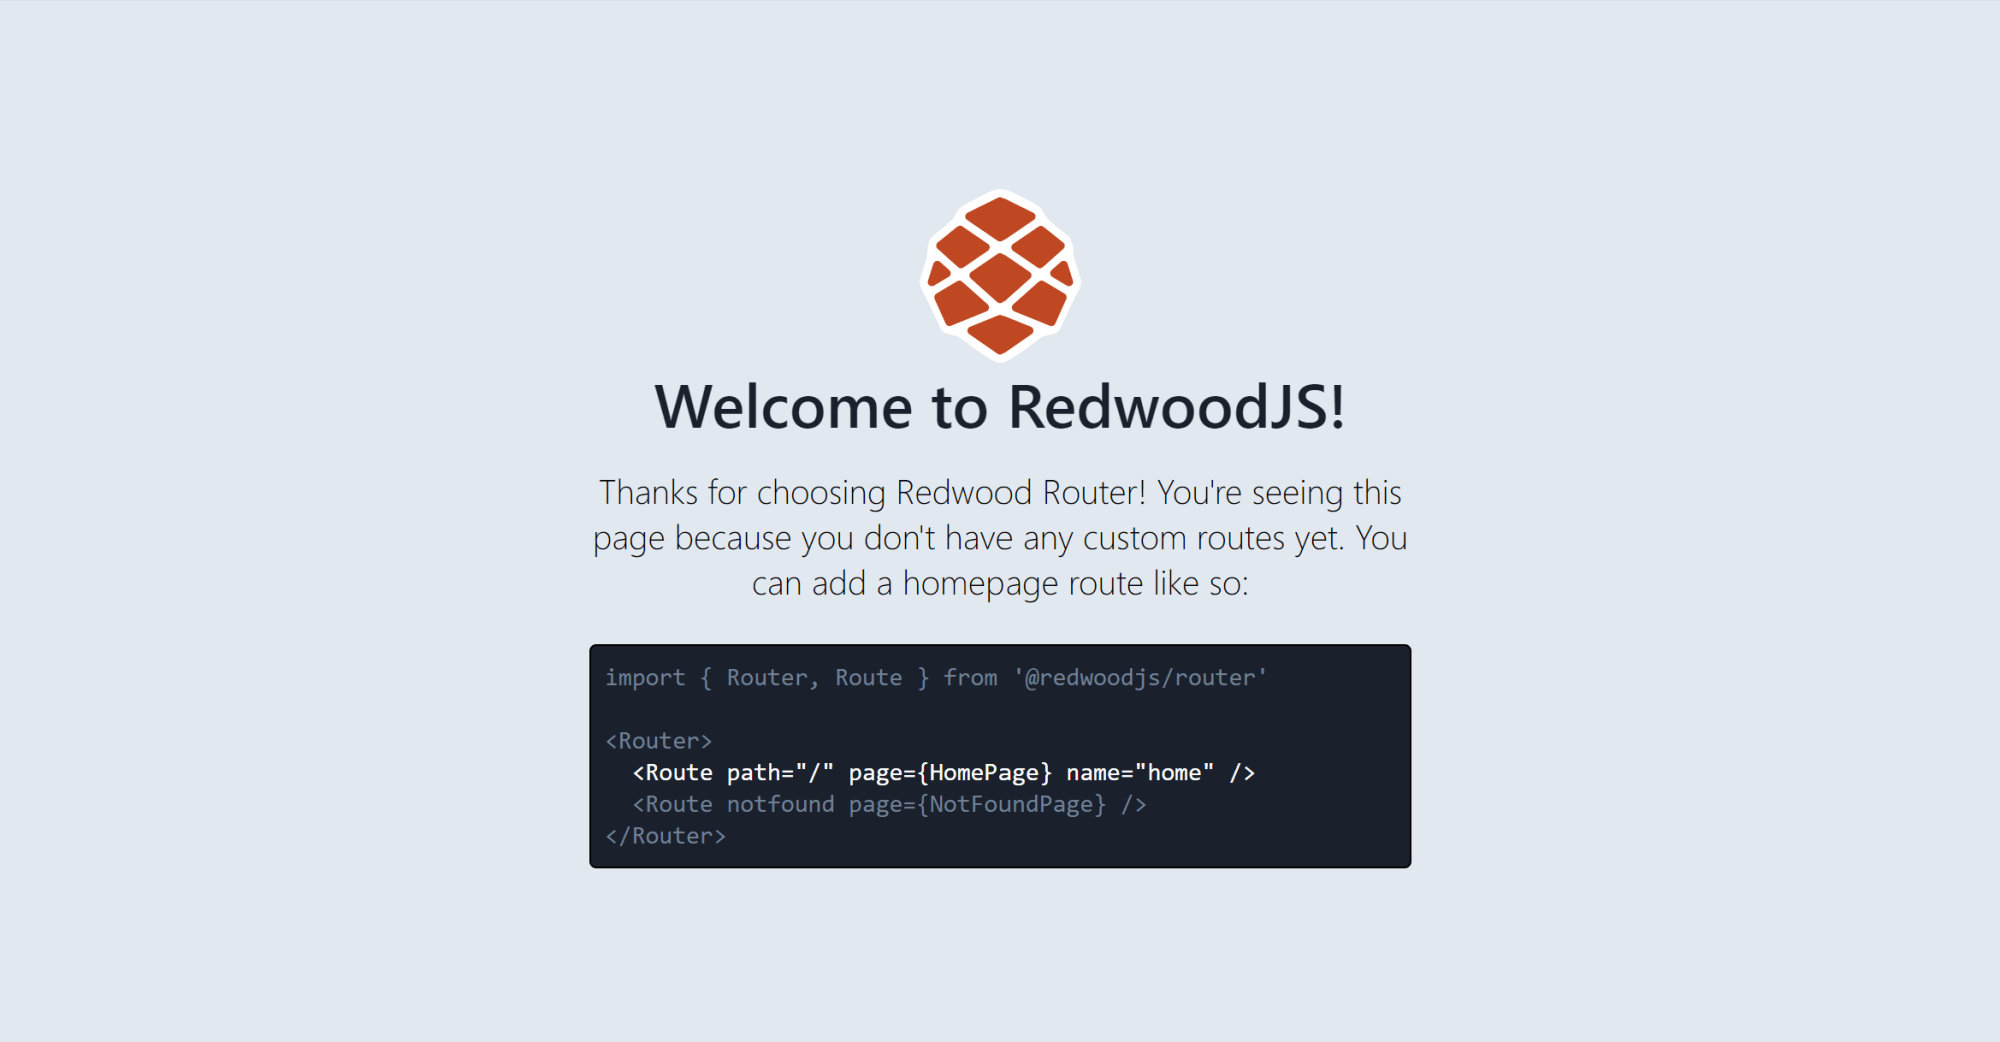
You’ll see the following page once it’s running.
Now that the Redwood app is up and running, we can start working on the front-end code.
To get started, we’re going to install a few packages in the web directory. We’re going to install the styled-components and react-images-upload packages. So make sure you’re in the web directory in your terminal, and then run the following.
yarn add styled-components react-images-upload
This gives us an upload component so we don’t have to spend a lot of time handling states and styling. Next, go to the root directory, and run the following.
yarn rw generate page home /
This creates a bunch of new files that automatically route to a template home page. We’ll be adding all of our code to this HomePage.js file. You can delete all of the existing code in the file, and start fresh by adding a few imports.
import { useState } from 'react'
import ImageUploader from 'react-images-upload'
import styled from 'styled-components'
Code language: JavaScript (javascript)
Next we’ll start on our HomePage component.
In our component, we start by creating a new state that will hold the information for the images we want to upload. Then, we return a view with a few components, the main one being the ImageUploader.
The props we pass to it let us display the icon to a user, show a preview of the image when it’s uploaded, set some restrictions on files, and start the process of uploading images. The prop we’ll pay the most attention to is what we have in onChange.
const HomePage = () => {
  const [uploadedPictures, setUploadedPictures] = useState([])

  return (
    <>
      <h1>Put your pictures here.</h1>
      <p>This is important...</p>
        <ImageUploader
          withIcon={true}
          withPreview={true}
          buttonText="Choose images"
          onChange={(image) => onDrop(image)}
          singleImage={true}
          imgExtension={['.jpg', '.gif', '.png', '.gif']}
          maxFileSize={5242880}
        />
    </>
  )
}

export default HomePage
Code language: JavaScript (javascript)
If you run the project again with yarn rw dev in the root directory, you should see this when the page loads.

Now, we’ll do a little layout clean up with a few styled components. These have CSS that we need to apply to our component.
const Button = styled.button`
  background-color: #34feac;
  padding: 10px 12px;
  border-radius: 20px;

  &:hover {
    cursor: pointer;
    background-color: rgba(52, 254, 172, 0.5);
  }
`

const Container = styled.div`
  margin: auto;
  width: 500px;
`
Code language: JavaScript (javascript)Here’s what the updated component should look like. This adds some formatting to the uploader, but the main thing it adds is a submit button for users to save their images in the PostgreSQL database.
const HomePage = () => {
  const [uploadedPictures, setUploadedPictures] = useState([])

  return (
    <>
      <h1>Put your pictures here.</h1>
      <p>This is important...</p>
      {uploadedPictures.length !== 0 && (
        <Button onClick={submitPictures}>Save your pictures now</Button>
      )}
      <Container>
        <ImageUploader
          withIcon={true}
          withPreview={true}
          buttonText="Choose images"
          onChange={(image) => onDrop(image)}
          singleImage={true}
          imgExtension={['.jpg', '.gif', '.png', '.gif']}
          maxFileSize={5242880}
        />
      </Container>
    </>
  )
}
Code language: JavaScript (javascript)
Now, we’ll add the functions that are used in the different components.
The onDrop function is how we will store the information for the images we want to upload to the database. It sets the state to an array of images.
The submitPictures function is where we’re actually going to upload the image data to PostgreSQL. There are still a few back-end things we need to set up, but this has most of the functionality in place.
When a user submits images to be uploaded to the database, we take all of the images in the uploadedPictures state, create new FileReader objects for them, and upload the image as a base64 string.
  const onDrop = (picture) => {
    setUploadedPictures([...uploadedPictures, picture])
  }

  const submitPictures = () => {
    uploadedPictures.map((picture) => {
      const reader = new FileReader()

      reader.readAsDataURL(picture[0])

      reader.onload = function () {
        const base64Url = reader.result
      }
    })
  }
Code language: JavaScript (javascript)
Now that we have our front-end mostly finished, let’s switch to some back-end business.
Storing Images as BLOBs in PostgreSQL
Another approach to storing images in a PostgreSQL database is by using Binary Large Objects (BLOBs). This method involves converting the image file into a binary format and then storing it directly in the database.
For those who might be using Java in their backend, here’s a simple way to insert an image:
File file = new File("myimage.gif"); FileInputStream fis = new FileInputStream(file); PreparedStatement ps = conn.prepareStatement("INSERT INTO images VALUES (?, ?)");
Additionally, if you’re considering storing images in a separate database, PostgreSQL offers the DBlink functionality. This allows you to connect and run queries across different PostgreSQL databases. It can be particularly useful if you want to segregate your image storage from other data.
Another useful datatype in PostgreSQL for image storage is bytea (BYTE Array), which can be handy for caching thumbnail images. This datatype allows for the storage of binary strings, making it suitable for smaller images or thumbnails.
If you don’t have PostgreSQL installed locally, you can download it for free here: https://www.postgresql.org/download/ This will also work if you have an instance of PostgreSQL in the cloud.
In the api directory, update the schema.prisma to use postgresql instead of sqlite for the provider. Then, you can delete the UserExample model, and add the following.
model Picture {
  id        Int    @id @default(autoincrement())
  file      String
  file_name String
}
Code language: JavaScript (javascript)
You’ll need to rename the .env.example file in the root directory to .env. Then edit it to uncomment the DATABASE_URL. This is where you put your connection string to the PostgreSQL database. It might look something like this: postgres://postgres:admin@localhost:5432/pictures
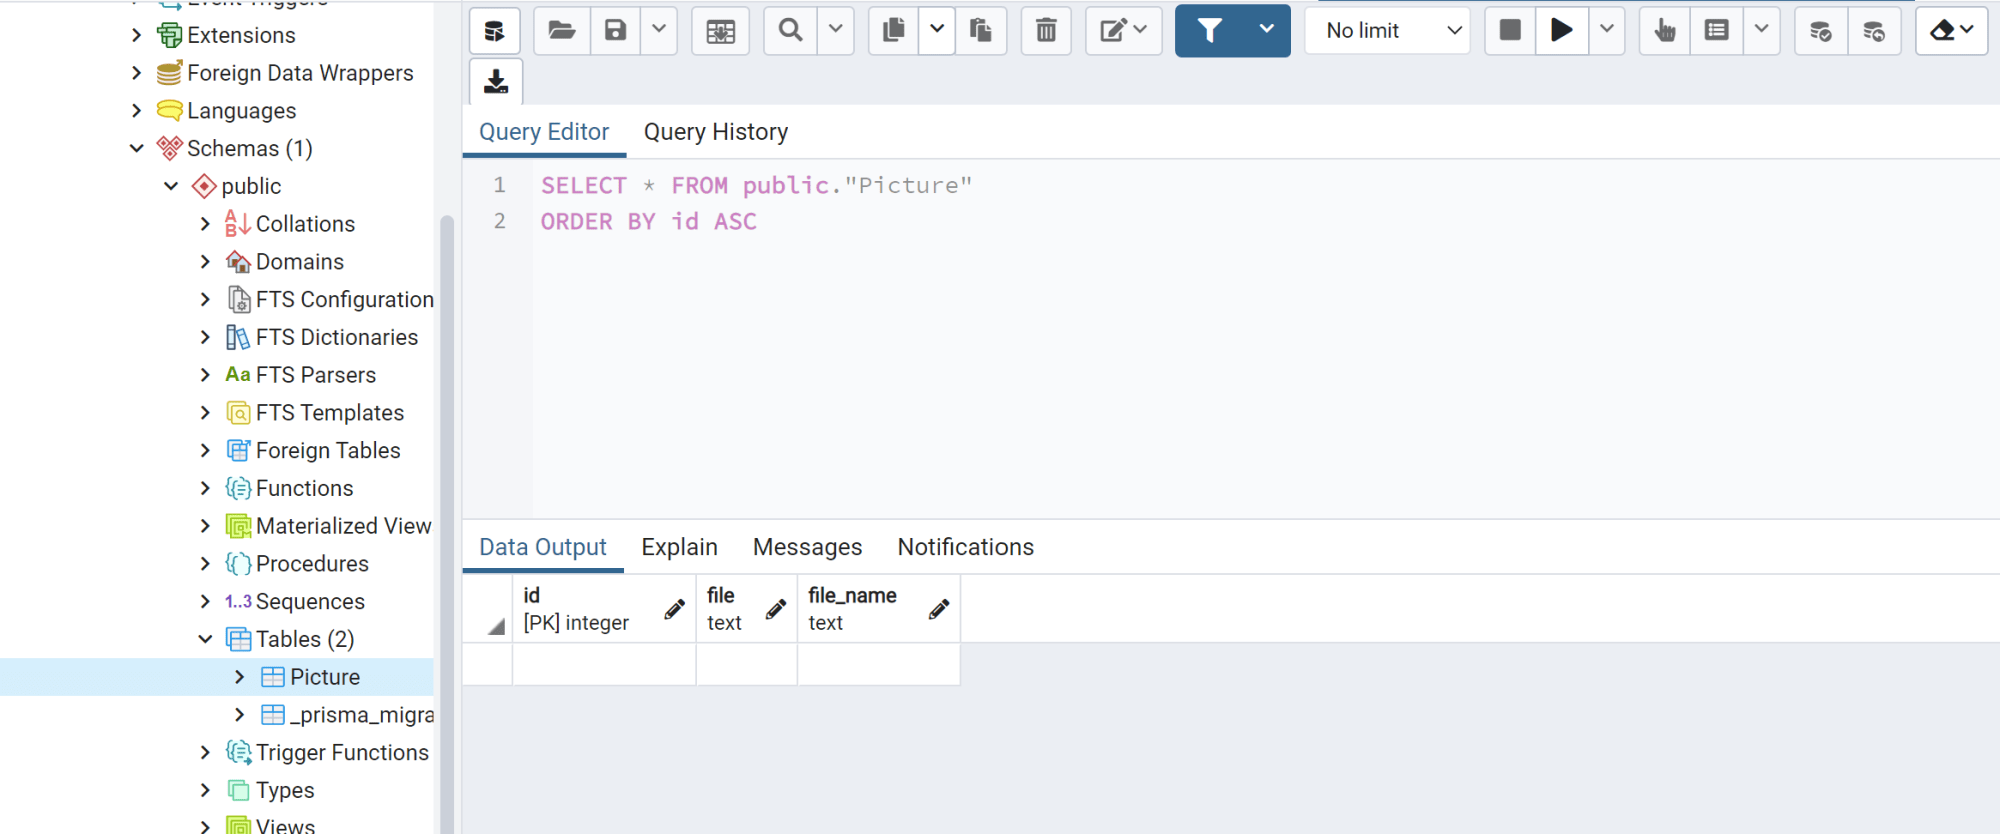
Now, you’ll need to run a migration to get the table in place in PostgreSQL. Do that with the following command in the root directory.
yarn rw prisma migrate dev
You’ll need to write a name for the migration at some point in the process, so make sure it describes what you’re migrating. Once your migration is finished, you can go to the pgAdmin for your PostgreSQL instance, and you should see something similar to this.
We have our front-end and database set up, so now we need to handle the back-end part with GraphQL. This is something else that Redwood makes super fast to do. If you run yarn rw g sdl pictures --crud, it will generate all of the GraphQL types, queries, and mutations based the pictures schema you defined in the schema.prisma file.
You can take a look at the generated files in the api/src/graphql and api/src/services directories. The graphql directory has all of your types defined, and the services directory has all of your mutations and queries defined. Now, all we have to do is add these methods to the front-end and we’ll be finished!
First, we’ll go through each of the autogenerated files just so you know where everything is defined.
This file was autogenerated as part of the yarn rw g sdl pictures --crud command. This is the GraphQL schema that is based on the model we defined in the schema.prisma file. Redwood creates all of the types we need to do all of the basic CRUD operations, but we’ll be focusing on the create (mutation) and read (query) operations.
export const schema = gql`
  type Picture {
    id: Int!
    file: String!
    file_name: String!
  }

  type Query {
    pictures: [Picture!]!
    picture(id: Int!): Picture
  }

  input CreatePictureInput {
    file: String!
    file_name: String!
  }

  input UpdatePictureInput {
    file: String
    file_name: String
  }

  type Mutation {
    createPicture(input: CreatePictureInput!): Picture!
    updatePicture(id: Int!, input: UpdatePictureInput!): Picture!
    deletePicture(id: Int!): Picture!
  }
`
Code language: JavaScript (javascript)Another nice thing Redwood does for us is autogenerate all of the GraphQL resolvers for the CRUD operations. These connect directly to the PostgreSQL instance you defined in the .env.
import { db } from 'src/lib/db'

export const pictures = () => {
  return db.picture.findMany()
}

export const picture = ({ id }) => {
  return db.picture.findUnique({
    where: { id },
  })
}

export const createPicture = ({ input }) => {
  return db.picture.create({
    data: input,
  })
}

export const updatePicture = ({ id, input }) => {
  return db.picture.update({
    data: input,
    where: { id },
  })
}

export const deletePicture = ({ id }) => {
  return db.picture.delete({
    where: { id },
  })
}
Code language: JavaScript (javascript)Back in our HomePage component, we need to add the calls to GraphQL that will let us save images uploaded by users, and reload them on the page. To do that, we’ll start by adding the following import statement.
import { useMutation, useQuery } from '@redwoodjs/web'
Code language: JavaScript (javascript)
Next we need to define how we want the data returned from GraphQL. We’re using the GraphQL language to define our query and how we want the picture data returned with GET_PICTURE.
In CREATE_PICTURE, we’re defining how we should pass data to the database, and what values should be returned after a successful creation.
const GET_PICTURE = gql`
  query {
    pictures {
      id
      file
      file_name
    }
  }
`
const CREATE_PICTURE = gql`
  mutation createPicture($file: String, $file_name: String) {
    createPicture(input: { file: $file, file_name: $file_name }) {
      id
      file_name
    }
  }
`
Code language: PHP (php)Finally, we’ll use our imported methods to help us work with these GraphQL queries. This goes inside of the HomePage component below our state.
The create method is what we’ll be using to upload pictures to the database and the data object will give us the information we need to display saved images to users.
const [create] = useMutation(CREATE_PICTURE)
const { data } = useQuery(GET_PICTURE)
Code language: JavaScript (javascript)
Now we need to update the submitPictures function to use the create method. When a user clicks this button now, it will upload their image to the database in base64 format and reload the page to display the saved images.
  const submitPictures = () => {
    uploadedPictures.map((picture) => {
      const reader = new FileReader()

      reader.readAsDataURL(picture[0])

      reader.onload = function () {
        const base64Url = reader.result

        create({ variables: { file: base64Url, file_name: picture[0].name } })

        location.reload()
      }
    })
  }
Code language: JavaScript (javascript)This is what your HomePage component should look like now.
The last thing we need to do is show saved images to users. We’ll do that by using the data object. We’ll create a couple of styled components to make things a little clearer in the view.
const Flex = styled.div`
  display: flex;
`

const Img = styled.img`
  padding: 24px;
  height: 200px;
  width: 200px;
`
Code language: JavaScript (javascript)
Now we can loop through the saved images, and display them with the following addition to the component.
  <Flex>
    {data?.pictures &&
      data.pictures.map((picture) => <Img src={picture.file} />)}
  </Flex>
Code language: HTML, XML (xml)We’re done! Now, when a user uploads an image through this interface, you’ll be able to store and retrieve it from a Postgres database. Hopefully this has given you an idea of how to work with a full-stack JAMStack app using Redwood. There are a number of other ways you can handle images as well. You could upload them to S3 buckets, or use a service like Cloudinary.