
In this media jam, we will discuss how to build an ecommerce app in React using Airtable, Cloudinary and Snipcart.
We will use Airtable to store product data and use Cloudinary’s Product Gallery to showcase different product images. In this tutorial, we will build an ecommerce site for a cake shop named Sweet Tooth and use various cakes as products.
If you want to jump right into the code, check out the GitHub Repo here.
Run the following command to create the initial React app with CRA (create-react-app) template.
npx create-react-app react-ecommerce-app
cd react-ecommerce-app
npm start
The last command, npm start, will start the development server on your system’s port 3000. You can stop the server by hitting CTRL+C in the terminal.
The next step is to install the dependencies that you will need in this project. Run the following command to install them.
npm i airtable cloudinary-react
In this project, you will use Tailwind CSS to style the ecommerce app. Its installation and configuration are beyond the scope of this media jam; you can refer to the official documentation to install Tailwind CSS before proceeding further.
Run the following command to create a file named .env to store your API keys securely.
touch .env
Code language: CSS (css)
Head over to https://app.snipcart.com/register in your browser and create a free account on Snipcart.

After creating the Snipcart account, head over to account settings and copy the PUBLIC TEST API KEY under Credentials.

Login into your https://cloudinary.com/ and copy the Cloud Name from your dashboard. All the product images will be stored in Cloudinary.

Create a folder named sweet-tooth in your Cloudinary account and upload Butter Cake’s image into it. You can download the image from here. After uploading the image, copy its public_id.

You will use Airtable to store the product’s data. Create an account on Airtable if you haven’t already.

Every product will at least have the following fields:
-
id– Unique ID of the product. –Number -
name– Name of the product. –Single Line Text -
description– Short description of the product. –Long Text -
price– Price of the product. –Currency -
public_id– Public Id of product’s image copied from Cloudinary. –Single Line Text
You can add more fields like stock, ratings, feedback, etc. if you want.
Create a workspace named Sweet Tooth in Airtable and a base named cakes inside the Sweet Tooth workspace. Add the following data of Butter Cake to it.
-
id– 1 -
name– Butter Cake -
description– A butter cake is a cake in which one of the main ingredients is butter. -
price– $30.00 -
public_id– sweet-tooth/{YOUR-PRODUCT’S-PUBLIC-ID}
You can copy the data used in this project from https://airtable.com/shre2MWIyxJgAepfC.
After adding the record for Butter Cake, head over to https://airtable.com/api and select the base you just created, i.e., Sweet Tooth, copy the base’s id from the introduction section.

Navigate to https://airtable.com/account and copy your Airtable API Key.

Paste all the API Keys in the .env file.
REACT_APP_CLOUDINARY_CLOUD_NAME =''
REACT_APP_AIRTABLE_BASE_ID = ''
REACT_APP_AIRTABLE_API_KEY =''
REACT_APP_SNIPCART_KEY=''
Update your index.html to include Cloudinary’s Product Gallery JavaScript file and Snipcart’s CSS and JavaScript like this.
<!DOCTYPE html>
<html lang="en">

<head>
    <meta charset="utf-8" />
    <link rel="icon" href="%PUBLIC_URL%/favicon.ico" />
    <meta name="viewport" content="width=device-width, initial-scale=1" />
    <meta name="theme-color" content="#000000" />
    <meta name="description" content="React Ecommerce App" />
    <link rel="apple-touch-icon" href="%PUBLIC_URL%/logo192.png" />
    <link rel="manifest" href="%PUBLIC_URL%/manifest.json" />
    <link rel="preconnect" href="https://app.snipcart.com">
    <link rel="preconnect" href="https://cdn.snipcart.com">
    <link rel="stylesheet" href="https://cdn.snipcart.com/themes/v3.2.0/default/snipcart.css" />
    <script src="https://product-gallery.cloudinary.com/all.js" type="text/javascript"></script>

    <title>Sweeth Tooth</title>
</head>

<body>
    <noscript>You need to enable JavaScript to run this app.</noscript>
    <div id="root"></div>
    <script async src="https://cdn.snipcart.com/themes/v3.2.0/default/snipcart.js"></script>
    <div hidden id="snipcart" data-api-key="%REACT_APP_SNIPCART_KEY%" data-config-modal-style="side"></div>
</body>

</html>
Code language: HTML, XML (xml)In this section, you will fetch the data from Airtable using the airtable javascript library and then display it on the app. To display the product image, you will use the Image component from the cloudinary-react package.
Modify src/App.js like this.
import React, { useEffect, useState } from "react";
import { Image, Transformation } from "cloudinary-react";
var Airtable = require("airtable");

var base = new Airtable({
  apiKey: process.env.REACT_APP_AIRTABLE_API_KEY,
}).base(process.env.REACT_APP_AIRTABLE_BASE_ID);

function App() {
  const [cakes, setCakes] = useState({});

  useEffect(() => {
    base("cakes")
      .select({
        view: "Grid view",
      })
      .firstPage( (err, records)=> {
        if (err) {
          console.error(err);
          return;
        }
        setCakes(records);
      });
  }, []);

  return (
    <div className="bg-pink-100 min-h-screen">
      <div className="container px-3  mx-auto">
        <h1 className=" text-5xl md:text-7xl text-red-800 px-4 pt-2 leading-normal mb-2">
          Sweet Tooth
        </h1>
        {cakes && console.log(cakes)}
      </div>
    </div>
  );
}

export default App;
Code language: JavaScript (javascript)
You start by importing useState() and useEffect() hooks. You also import Image and Transformation components from cloudinary-react; these components display the product’s image on the app.
You create an instance of airtable and pass your Airtable API Key and base’s id to it. Using the useState() hook, you create a state named cakes with an initial value of an empty array. This state will store the data fetched from Airtable.
To fetch the data, you use the select method to retrieve the data in cakes. The select returns a query object. To fetch the records matching that query, you use the firstPage method of the query object. If a successful response is returned from the firstPage method, you store the fetched records in the cakes state using the setCakes() method.
You create a simple layout for your ecommerce app using Tailwind CSS and logs the cakes state in the console using the JavaScript expression {cakes && console.log(cakes)}.
Start your development server and navigate to http://localhost:3000/ in your browser. Here is how your app will look like.

Here is how the product data stored in the cakes array looks like.
{
  "_table": {
    "_base": {
      "_airtable": {},
      "_id": "app2dz674vyBaqHT8"
    },
    "id": null,
    "name": "cakes"
  },
  "id": "recxVHtospJjb0tYP",
  "_rawJson": {
    "id": "recxVHtospJjb0tYP",
    "fields": {
      "price": 30,
      "description": "A butter cake is a cake in which one of the main ingredients is butter. \n",
      "id": 1,
      "name": "Butter Cake",
      "public_id": "sweet-tooth/bl7idqn4103cdpmctau7"
    },
    "createdTime": "2021-05-23T09:50:03.000Z"
  },
  "fields": {
    "price": 30,
    "description": "A butter cake is a cake in which one of the main ingredients is butter. \n",
    "id": 1,
    "name": "Butter Cake",
    "public_id": "sweet-tooth/bl7idqn4103cdpmctau7"
  }
}
Code language: JSON / JSON with Comments (json)
Now that you have the product’s data, the next step is to iterate over the data array or cakes array and display them on the app. For this, you will create a Product card and reuse it with different product’s data.
Remove the JavaScript expression {cakes && console.log(cakes)}. Add the following code under the title, Sweet Tooth or the <h1> tag.
<div className="container flex flex-wrap -mx-2 px-4 overflow-hidden">
  {cakes.length > 0 &&
    cakes.map((cake) => (
      <div
        className="my-2 px-2 w-full overflow-hidden sm:w-full md:w-1/2 lg:w-1/3 xl:w-1/3 rounded-xl shadow-4xl"
        key={cake.fields.id}
      >
        <Image
          className="rounded-t-xl"
          cloudName={process.env.REACT_APP_CLOUDINARY_CLOUD_NAME}
          publicId={cake.fields.public_id}
          format="webp"
          secure="true"
        >
          <Transformation quality="60" />
        </Image>
        <div className="-mt-1 rounded-b-xl bg-white px-4 py-3">
          <div className="px-1">
            <button className="text-4xl text-gray-600 font-medium underline hover:text-pink-600">
              {cake.fields.name}
            </button>
            <p className="text-md py-4 leading-6 overflow-ellipsis text-gray-600">
              {cake.fields.description}
            </p>
          </div>

          <div className="px-6 py-3">
            <p className="text-3xl inline-block  px-2 text-gray-800">
              {cake.fields.price}$
            </p>

            <button
              className="snipcart-add-item text-white float-right flex flex-auto justify-center items-center uppercase text-md px-2 bg-green-400 hover:bg-green-500  w-36  h-12 border-transparent font-medium rounded-3xl"
              data-item-id={cake.fields.id}
              data-item-price={cake.fields.price}
              data-item-url="/"
              data-item-description={cake.fields.description}
              data-item-image={`https://res.cloudinary.com/${process.env.REACT_APP_CLOUDINARY_CLOUD_NAME}/image/upload/q_10/${cake.fields.public_id}`}
              data-item-name={cake.fields.name}
            >
              <svg
                xmlns="http://www.w3.org/2000/svg"
                className="h-7 w-7 mr-1"
                fill="none"
                viewBox="0 0 24 24"
                stroke="currentColor"
              >
                <path
                  strokeLinecap="round"
                  strokeLinejoin="round"
                  strokeWidth={2}
                  d="M3 3h2l.4 2M7 13h10l4-8H5.4M7 13L5.4 5M7 13l-2.293 2.293c-.63.63-.184 1.707.707 1.707H17m0 0a2 2 0 100 4 2 2 0 000-4zm-8 2a2 2 0 11-4 0 2 2 0 014 0z"
                />
              </svg>
              buy now
            </button>
          </div>
        </div>
      </div>
    ))}
</div>
Code language: HTML, XML (xml)
You start by creating a responsive flex div with Tailwind CSS and then map over the cakes array inside it. You display the product’s image using the Image component and reduce its quality using the Transformation component. You pass the public_id of the product’s image stored in Cloudinary and your Cloudinary cloud name to the Image component.
<Image
  className="rounded-t-xl"
  cloudName={process.env.REACT_APP_CLOUDINARY_CLOUD_NAME}
  publicId={cake.fields.public_id}
  format="webp"
  secure="true"
>
  <Transformation quality="60" />
</Image>
Code language: HTML, XML (xml)
You display the product’s name inside a button; in the next section, you will use it to open a modal containing the respective product’s gallery. You also display the product’s description and price in the product’s card.
Here is how your ecommerce app will look like.
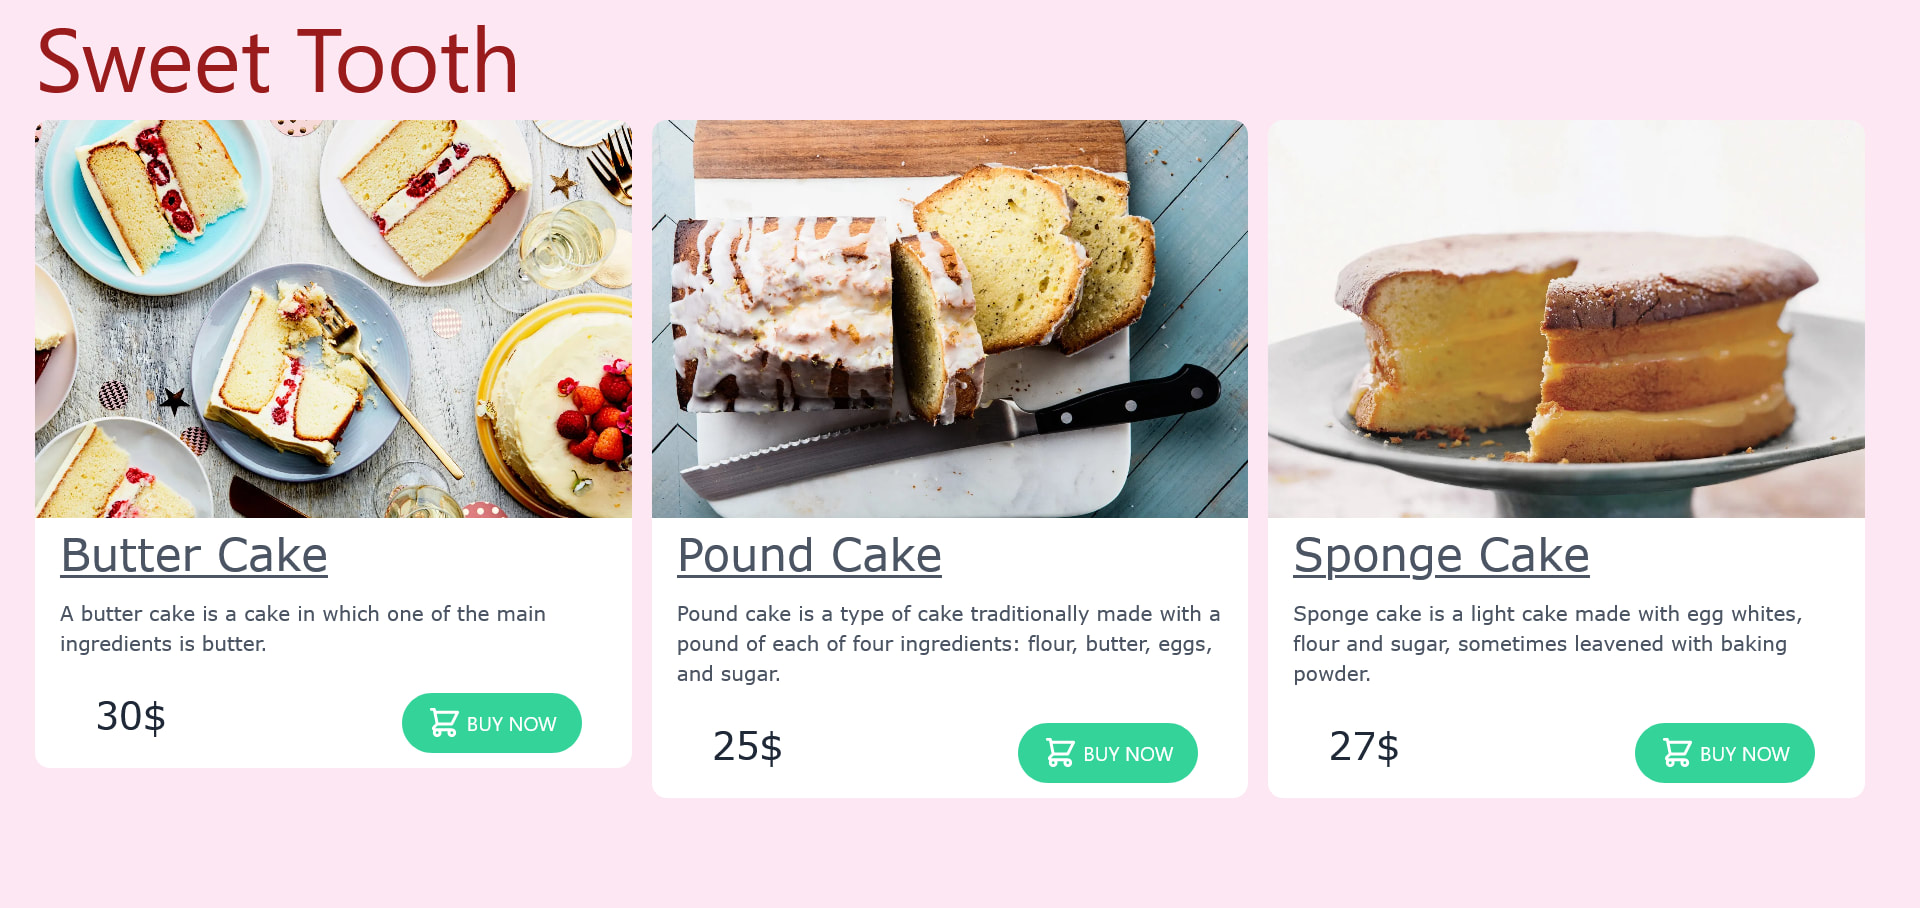
In the buy now button, you pass the product’s data required by Snipcart. You also pass your product’s image URL generated with your Cloudinary cloud name and the public_id of the image. to Snipcart.
<button
  className="snipcart-add-item text-white float-right flex flex-auto justify-center items-center uppercase text-md px-2 bg-green-400 hover:bg-green-500  w-36  h-12 border-transparent font-medium rounded-3xl"
  data-item-id={cake.fields.id}
  data-item-price={cake.fields.price}
  data-item-url="/"
  data-item-description={cake.fields.description}
  data-item-image={`https://res.cloudinary.com/${process.env.REACT_APP_CLOUDINARY_CLOUD_NAME}/image/upload/q_10/${cake.fields.public_id}`}
  data-item-name={cake.fields.name}
>
  buy now
</button>
Code language: HTML, XML (xml)
When the user clicks the buy now button, the Snipcart cart comes into action. Users can use this cart to modify products in their cart and proceed to checkout.

In this section, you will integrate Cloudinary’s product gallery with your ecommerce app. Before using the product gallery, make sure the Settings → Restricted media types → Resource list is not selected in your account settings.

Your product gallery will need different images of the product, i.e., cakes. You will need to upload few pictures related to the product in your Cloudianry’s account sweet-tooth folder. One way is to use the Upload Widget, search for the images online, and then upload them. You will also need to tag all the pictures with their respective product’s name, as shown below.

In the App.js file, you will create two functions, openGallery(), which opens the product gallery, and closeGallery, which closes the product gallery. Since the product gallery will render inside a modal, you will need to define a state named showModal to show or hide the modal. You will also need to define another state, currentProduct, to track which product the user has selected.
The currentProduct state has an initial value of Butter Cake since you cant render the product gallery with empty strings, or your app will crash.
Add the following code after the initialization of cakes state in the App.js file.
const [showModal, setShowModal] = useState(false);
const [currentProduct, setCurrentProduct] = useState("Butter Cake");

const myWidget = window.cloudinary.galleryWidget({
  cloudName: process.env.REACT_APP_CLOUDINARY_CLOUD_NAME,
  mediaAssets: [{ tag: currentProduct }],
  secure: true,
  aspectRatio: "16:9",
  container: "#my-gallery",
});
myWidget.render();

const openGallery = (selectedProduct) => {
  setCurrentProduct(selectedProduct);
  myWidget.update({ mediaAssets: [{ tag: currentProduct }] });
  setShowModal(true);
};

const closeGalllery = () => {
  myWidget.destroy();
  setShowModal(false);
};
Code language: JavaScript (javascript)
You use the cloudinary.galleryWidget() method to initialize your product gallery with the following configuration.
-
cloudName– Name of your Cloudinary cloud. -
mediaAssets– An array of assets. The individual assets in the array can be described either by an Asset object withtagof the images or by a PublicID string. -
container– The containing element on the page for the Product Gallery widget. Here it is a div withid="my-gallery"inside the modal. -
aspectRatio– The aspect ratio of the main viewer.
Since the modal will appear only when the button or product’s name is clicked, you will not see the gallery although it has been rendered.
In the openGallery() function, you set the state of the currentProduct to selectedProduct, i.e., the product’s name passed when the user clicks the respective product. You then update the gallery with the current product using the gallery’s .update() method. Finally, the showModal state is set to true to display the modal and the gallery.
In the closeGallery() function, you destroy the product gallery with the .destroy() method and then close the modal by setting the showModal state to false. You can read more about Cloudinary product’s gallery methods here.
The next step is to add the openGallery() function to the onClick event of the buy now button. Update the buy now button like this.
<button
  className="text-4xl text-gray-600 font-medium font-product-title underline hover:text-pink-600"
  onClick={() => openGallery(cake.fields.name)}
>
  {cake.fields.name}
</button>
Code language: HTML, XML (xml)
The last step is to create the modal where the gallery will be shown. Add the following code before the third closing div at the bottom.
{
  showModal ? (
    <>
      <div className="justify-center items-center flex overflow-x-hidden overflow-y-auto fixed inset-0 z-50 outline-none focus:outline-none">
        <div className="absolute w-4/6 my-8 mx-auto">
          <div className="border-0 rounded-lg shadow-lg relative flex flex-col w-full bg-white outline-none focus:outline-none">
            <div className="flex items-start justify-between p-4 border-b border-solid border-blueGray-200 rounded-t">
              <h3 className="text-3xl text-pink-800 font-medium">
                {currentProduct} Gallery
              </h3>

              <button
                className="p-1 bg-transparent ml-auto border-0 text-red-600 float-right text-3xl leading-none font-semibold outline-none focus:outline-none"
                onClick={() => {
                  closeGalllery();
                }}
              >
                X
              </button>
            </div>
            <div className="p-4" id="my-gallery"></div>
            <div className="flex items-center justify-end p-4 border-t border-solid border-blueGray-200 rounded-b">
              <button
                className="text-red-500 background-transparent font-bold uppercase px-6 py-2 text-md outline-none focus:outline-none mr-1 mb-1 ease-linear transition-all duration-150"
                type="button"
                onClick={() => {
                  closeGalllery();
                }}
              >
                Close
              </button>
            </div>
          </div>
        </div>
      </div>
      <div className="opacity-25 fixed inset-0 z-40 bg-black"></div>
    </>
  ) : null
}
Code language: JavaScript (javascript)
In the above code, the modal appears according to the state showModal. Inside the modal, you have created the div with id="my-gallery", where the product gallery is rendered. You have also created two buttons to close the modal, namely X and CLOSE; when these buttons are clicked, the closeGallery() function is executed, hiding the modal and destroying the product gallery to avoid memory leakage and performance issues.

In this media jam, we discussed how to build an ecommerce app in React using Airtable, Cloudinary, and Snipcart. We also saw how to integrate Cloudinary’s product gallery with a react application.
In this tutorial, we used Tailwind CSS to style our app; you can use any React UI library like Chakra UI, Material UI, React Bootstrap, etc.
Here are some additional resources that can be helpful:
Happy coding!