
In this media jam, we will build a discord bot that sends GIFs to the user. We will use Node.js and Discord.js to create the bot. We will also use node-fetch to fetch the GIFs from Giphy.com.
If you want to jump right into the code, check out the GitHub Repo here.
You can join the dummy server, Discord Bot Tutorial Server to explore and play with the bot. For example, type !gif followed by the search query in the general channel of the server and hit enter.
You can also explore the code and preview the bot with the CodeSandbox.
The following CodeSandbox contains an embed of a dummy Discord Server where the discord bot, built in this jam, is installed. Make sure you have the Discord App opened before exploring the CodeSandbox. There might be a few seconds delay between sending queries and receiving GIFs.
You will use Node.js and Discord.js to build the bot. Run the following command in the terminal to initialize a new Node.js project.
npm init -y
This command will create a package.json in your root directory. Run the following commands to install the dependencies.
npm install discord.js node-fetch
npm install -D dotenv nodemon
Code language: CSS (css)
The discord.js module makes interacting with Discord API much more effortless. The node-fetch package helps in making GET requests to the Giphy API to retrieve the GIFs.
dotenv lets you store API Keys securely as environment variables. nodemon restarts the server with every change in the code.
Update the package.json file like this to add two scripts, start, and dev, in the scripts field.
{
    "name": "discord-bot-gif",
    "version": "1.0.0",
    "description": "",
    "main": "index.js",
    "scripts": {
        "start": "node index.js",
        "dev": "nodemon index.js"
    },
    "keywords": [
        "discord-bot",
        "giphhy"
    ],
    "author": "",
    "license": "ISC",
    "devDependencies": {
        "dotenv": "^10.0.0",
        "nodemon": "^2.0.7"
    },
    "dependencies": {
        "discord.js": "^12.5.3",
        "node-fetch": "^2.6.1"
    }
}
Code language: JSON / JSON with Comments (json)
The next step is to create an app on Giphy Developers and retrieve the API key. Head over to Giphy.com and create an account if you haven’t already.
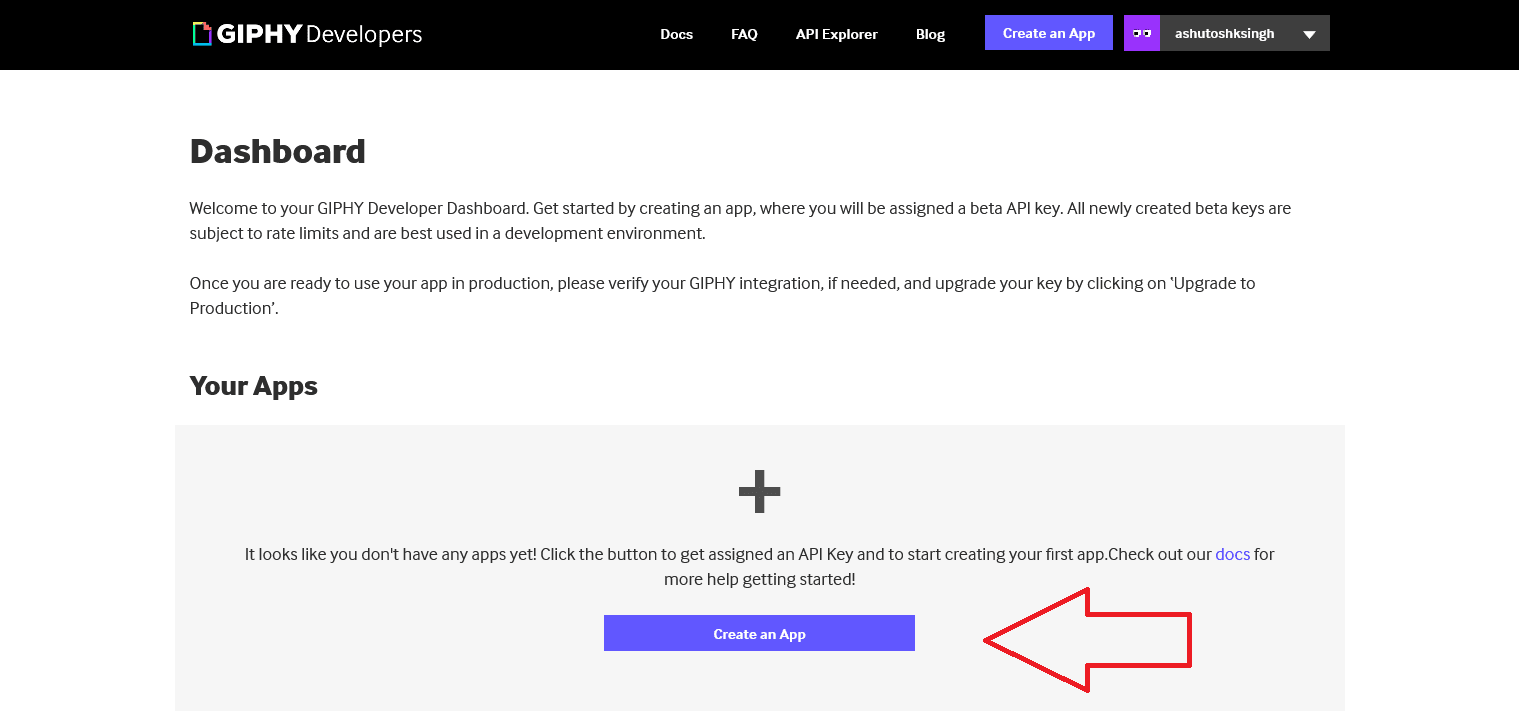
Navigate to https://developers.giphy.com/dashboard/ and click on Create an App button.
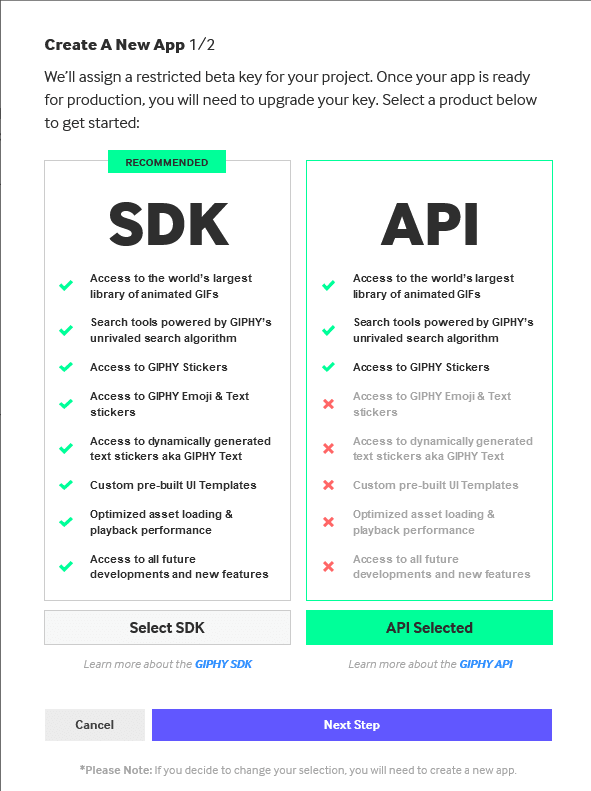
When prompted, select the API product and click on Next Step.
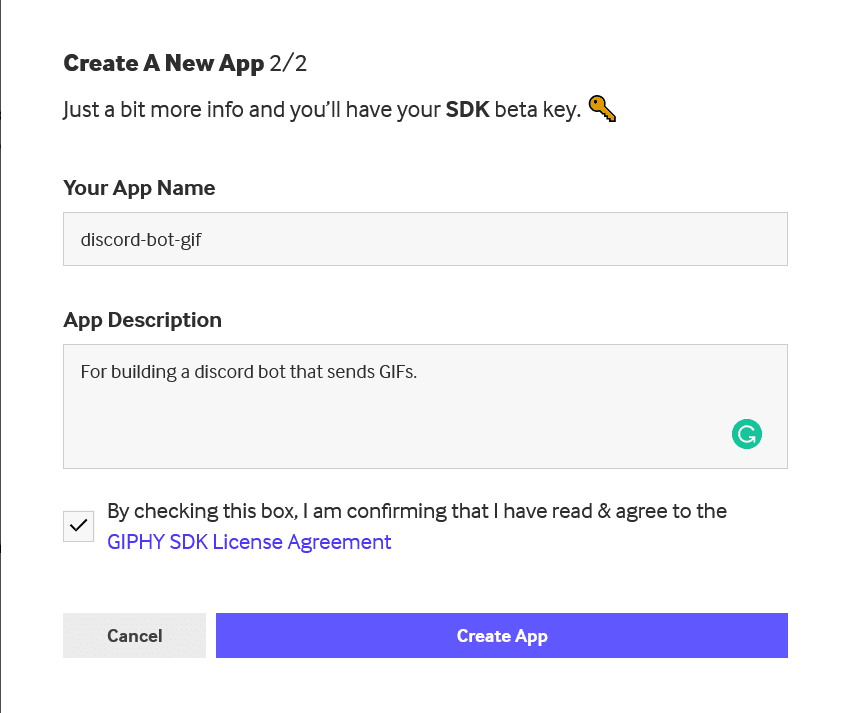
Enter your App Name and Description and hit Create App.
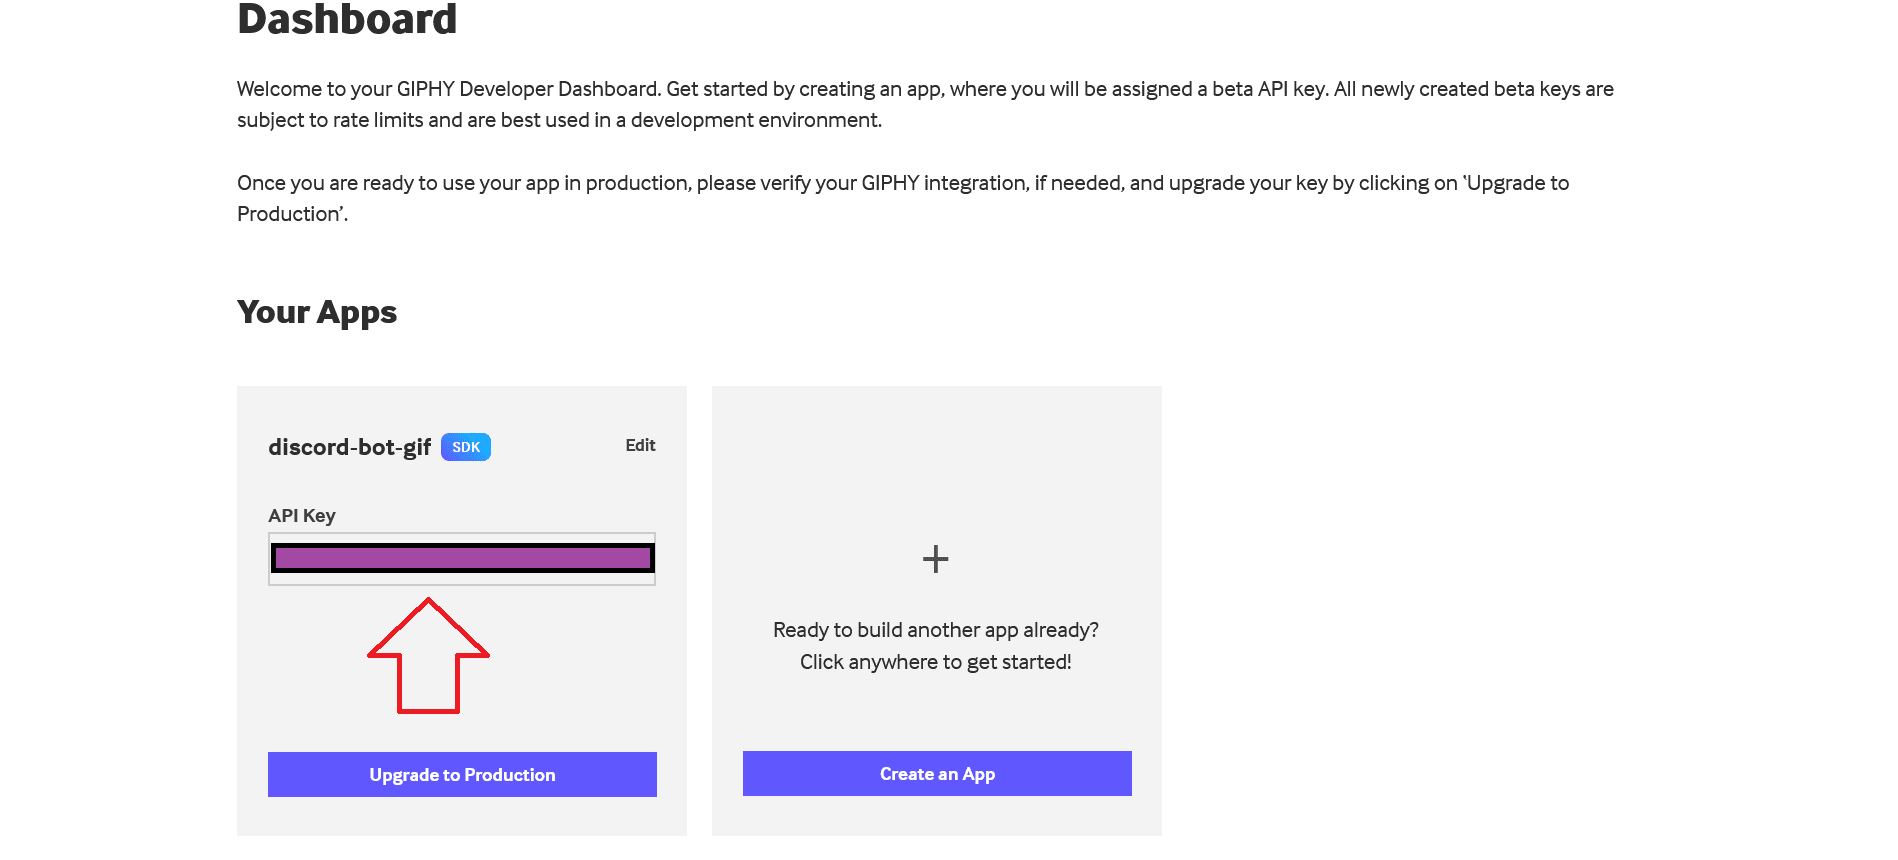
Copy your API Key from the Giphy developer dashboard.
Create a new file named .env in the root directory of your project by running the following command.
touch .env
Code language: CSS (css)
Paste the Giphy API Key in the .env file.
GIPHY_API_KEY = <YOUR-API-KEY>
In this section, you will create a new Discord App and retrieve the API Token for the bot. Before proceeding further, make sure you have created a Discord account. You can create one here.
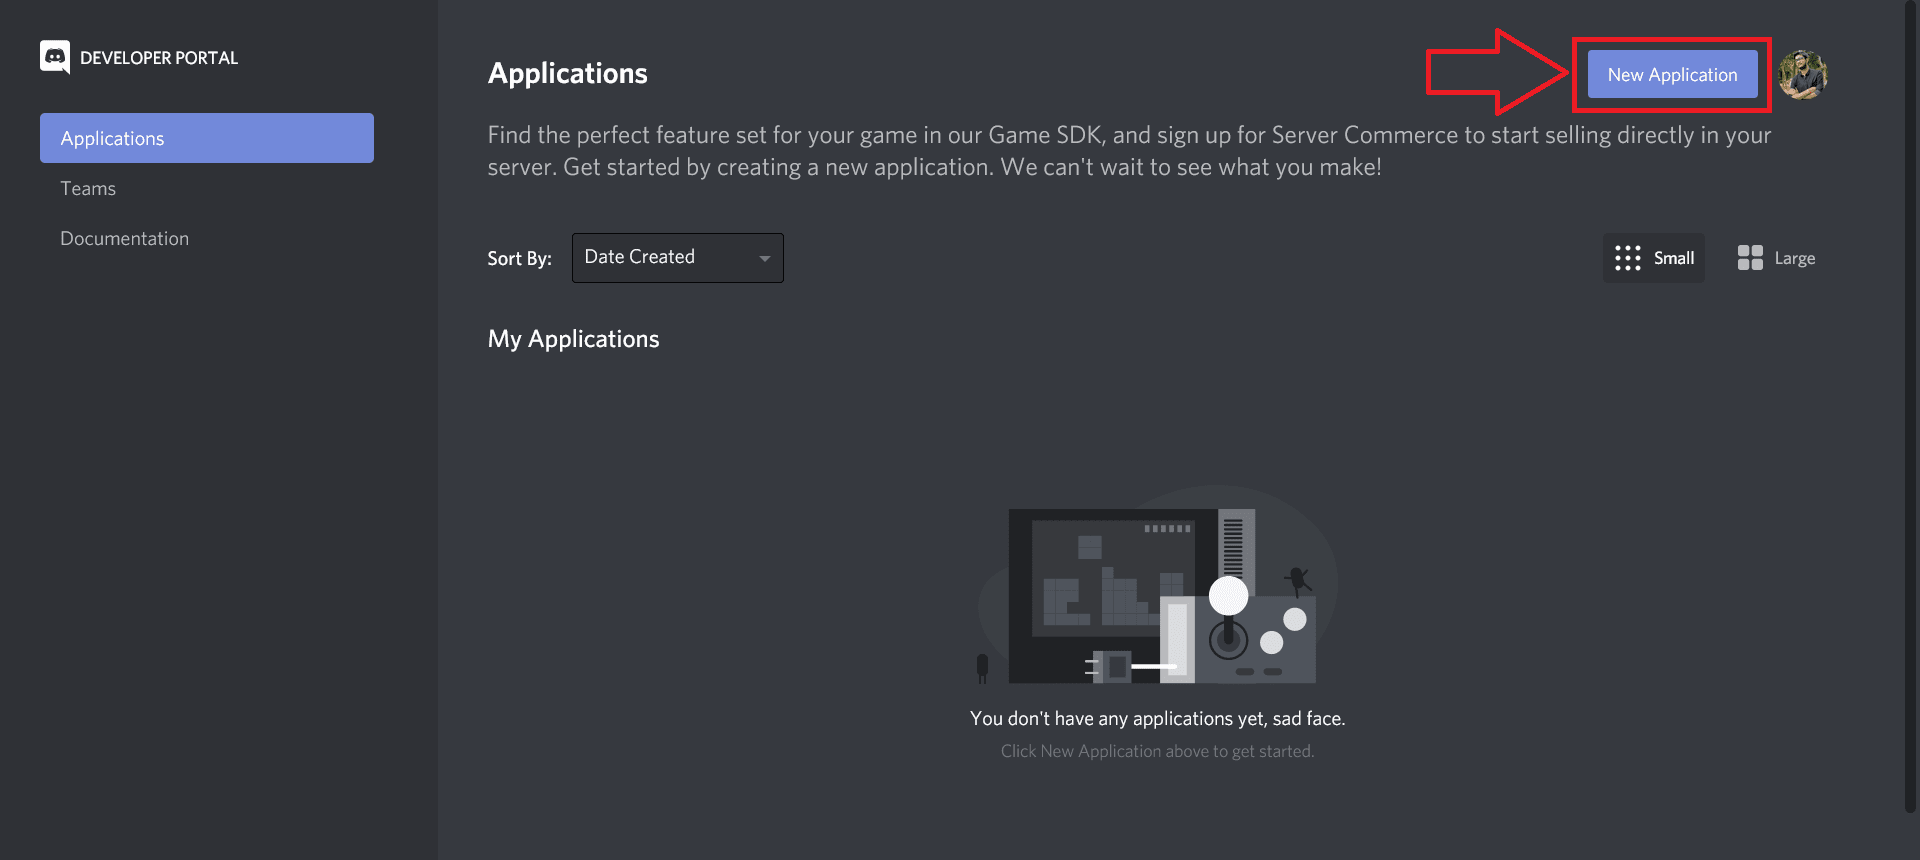
Navigate to Discord’s developer page in the browser and click on New Application.
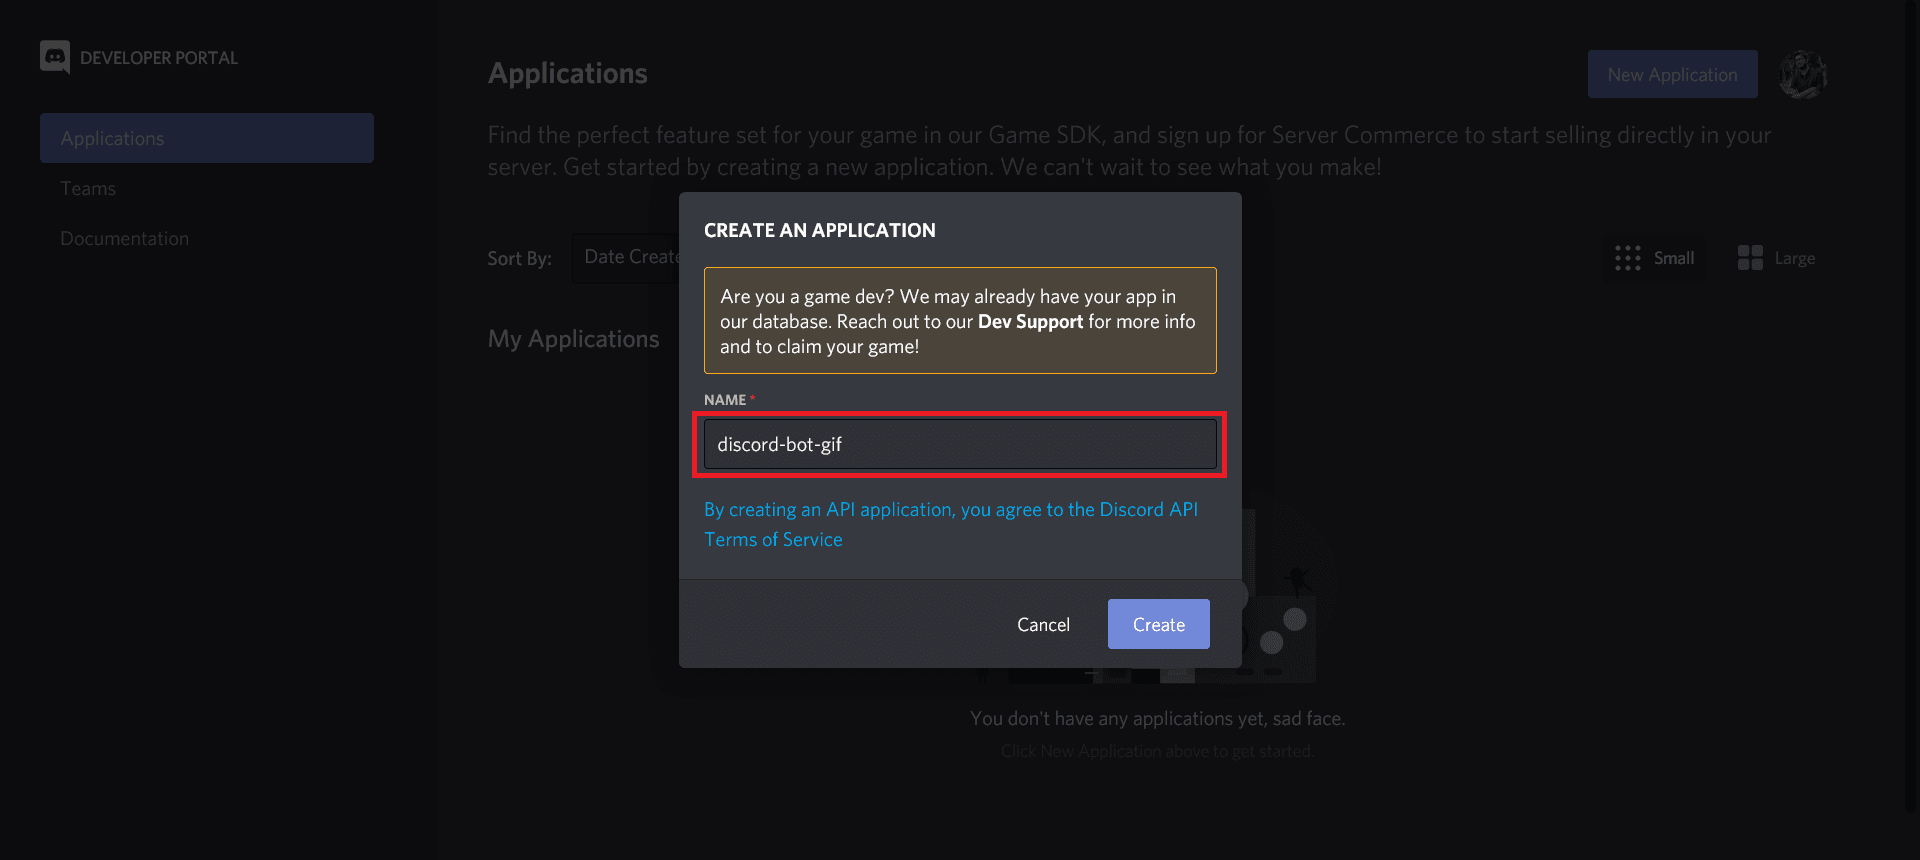
Name your application and click on the Create button.
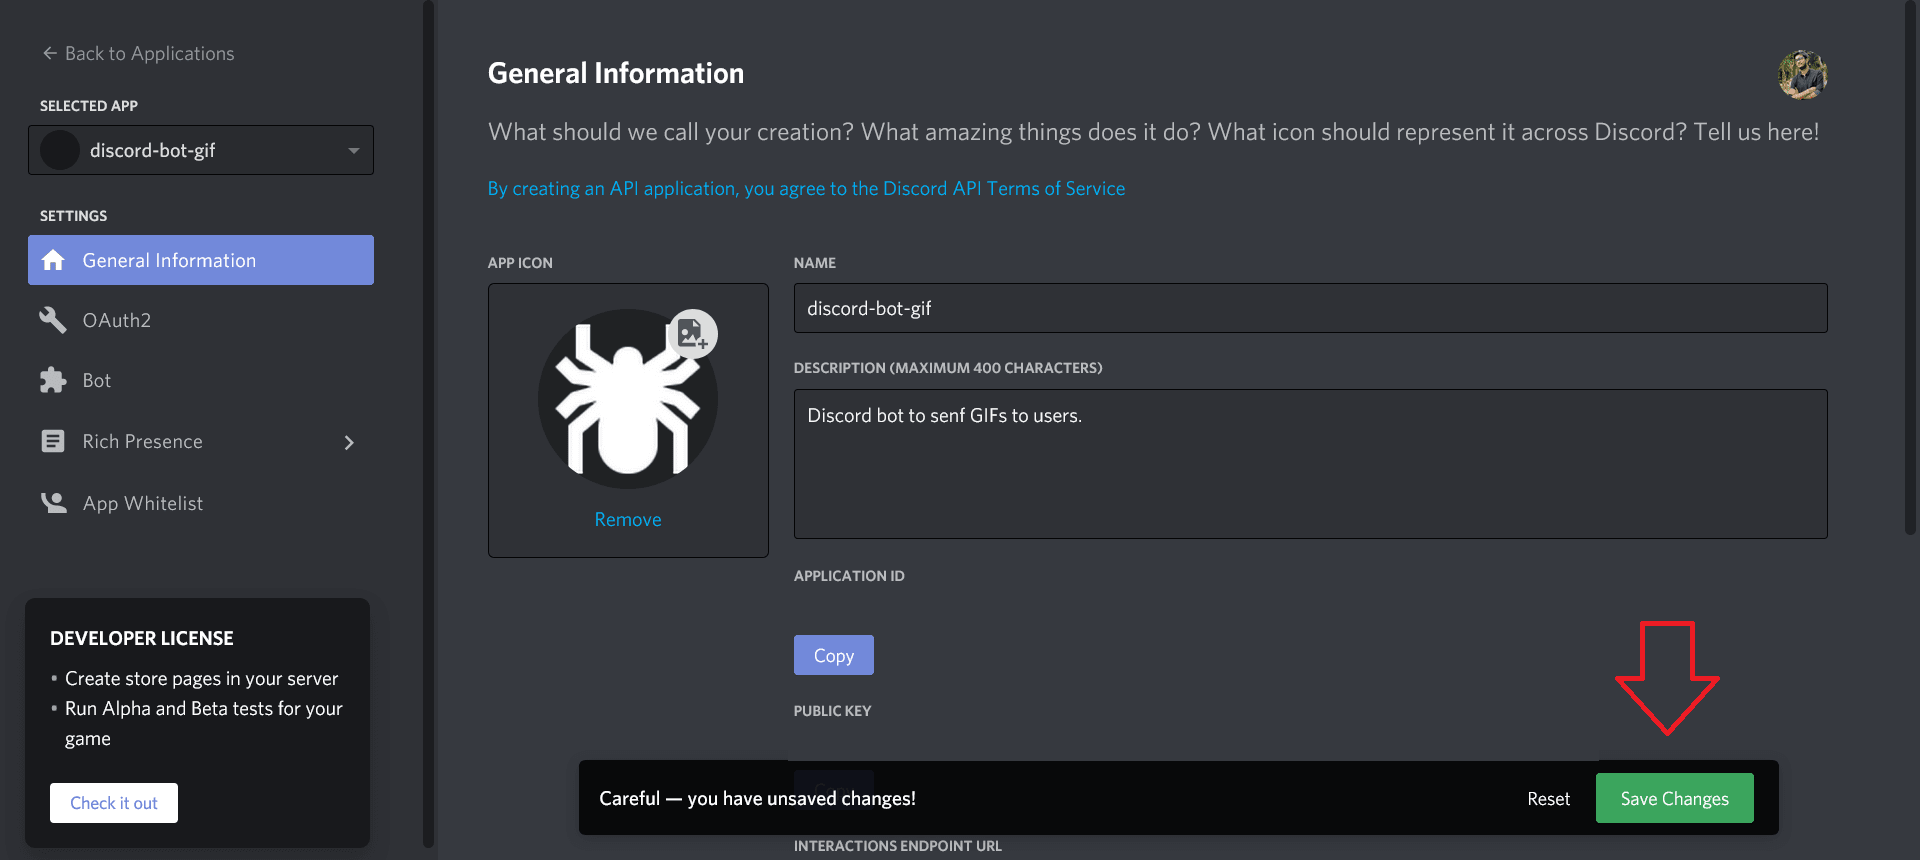
You can add general information like a description or an icon to your bot. Then, click on the Save Changes button to save the icon or description.
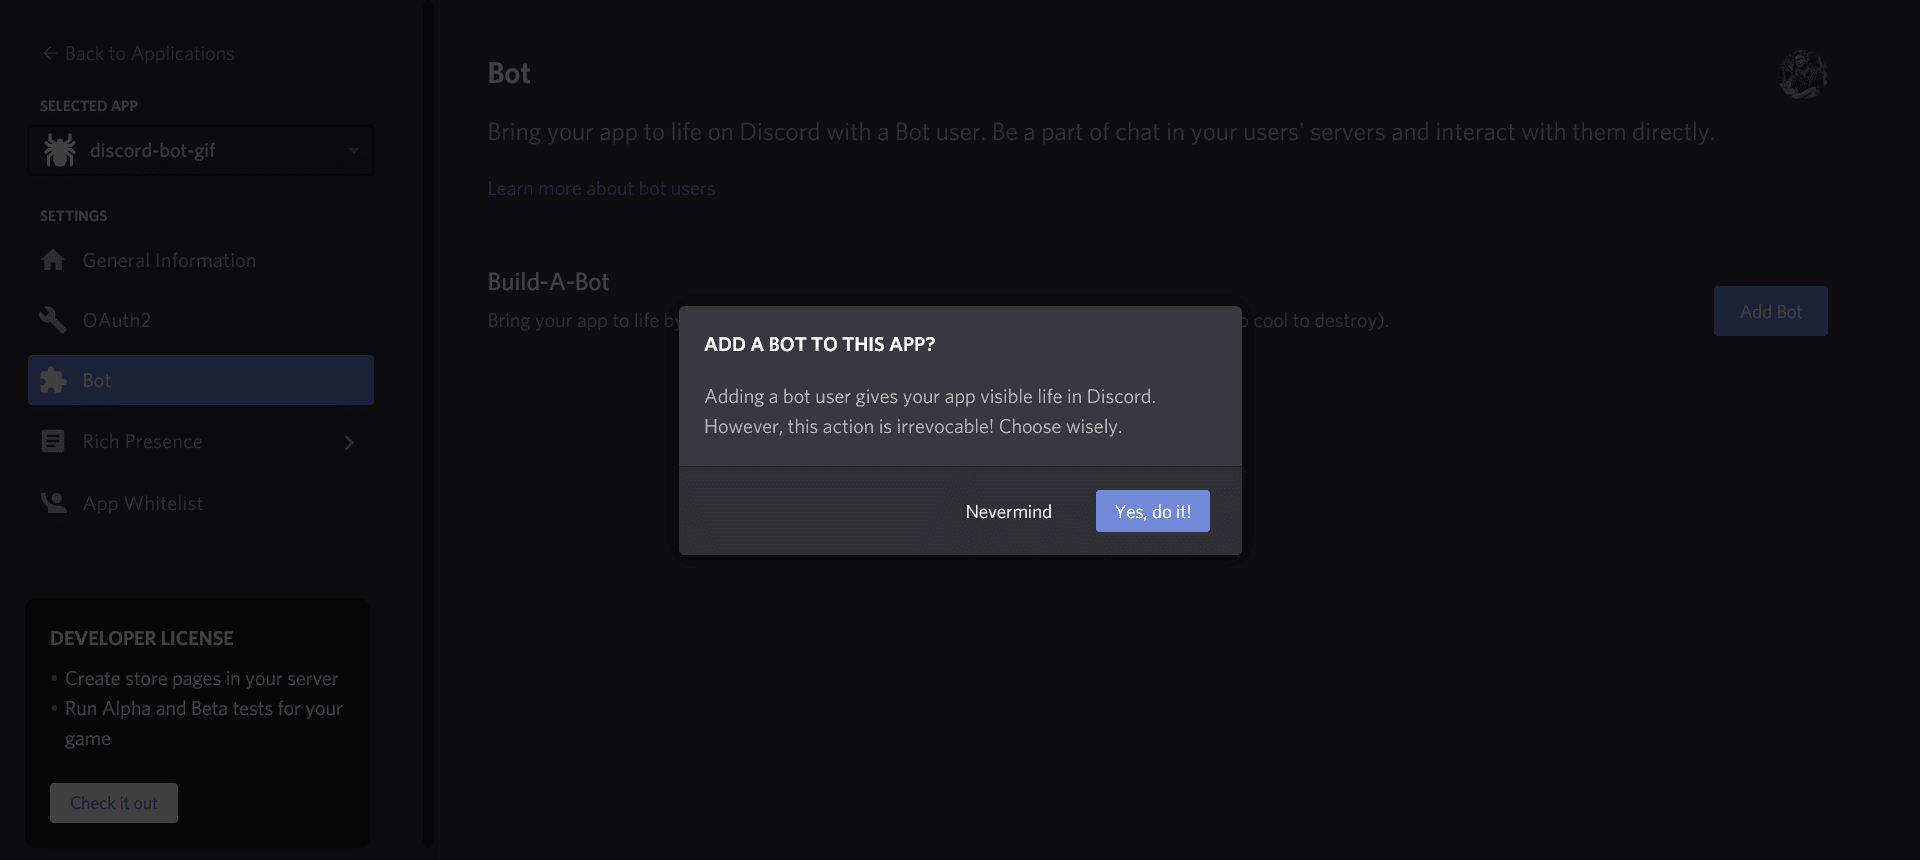
Click on the Bot tab in the left menu. Then, on the Bot page, click on Add Bot.

Yow will be prompted to confirm; click on Yes, do it!.
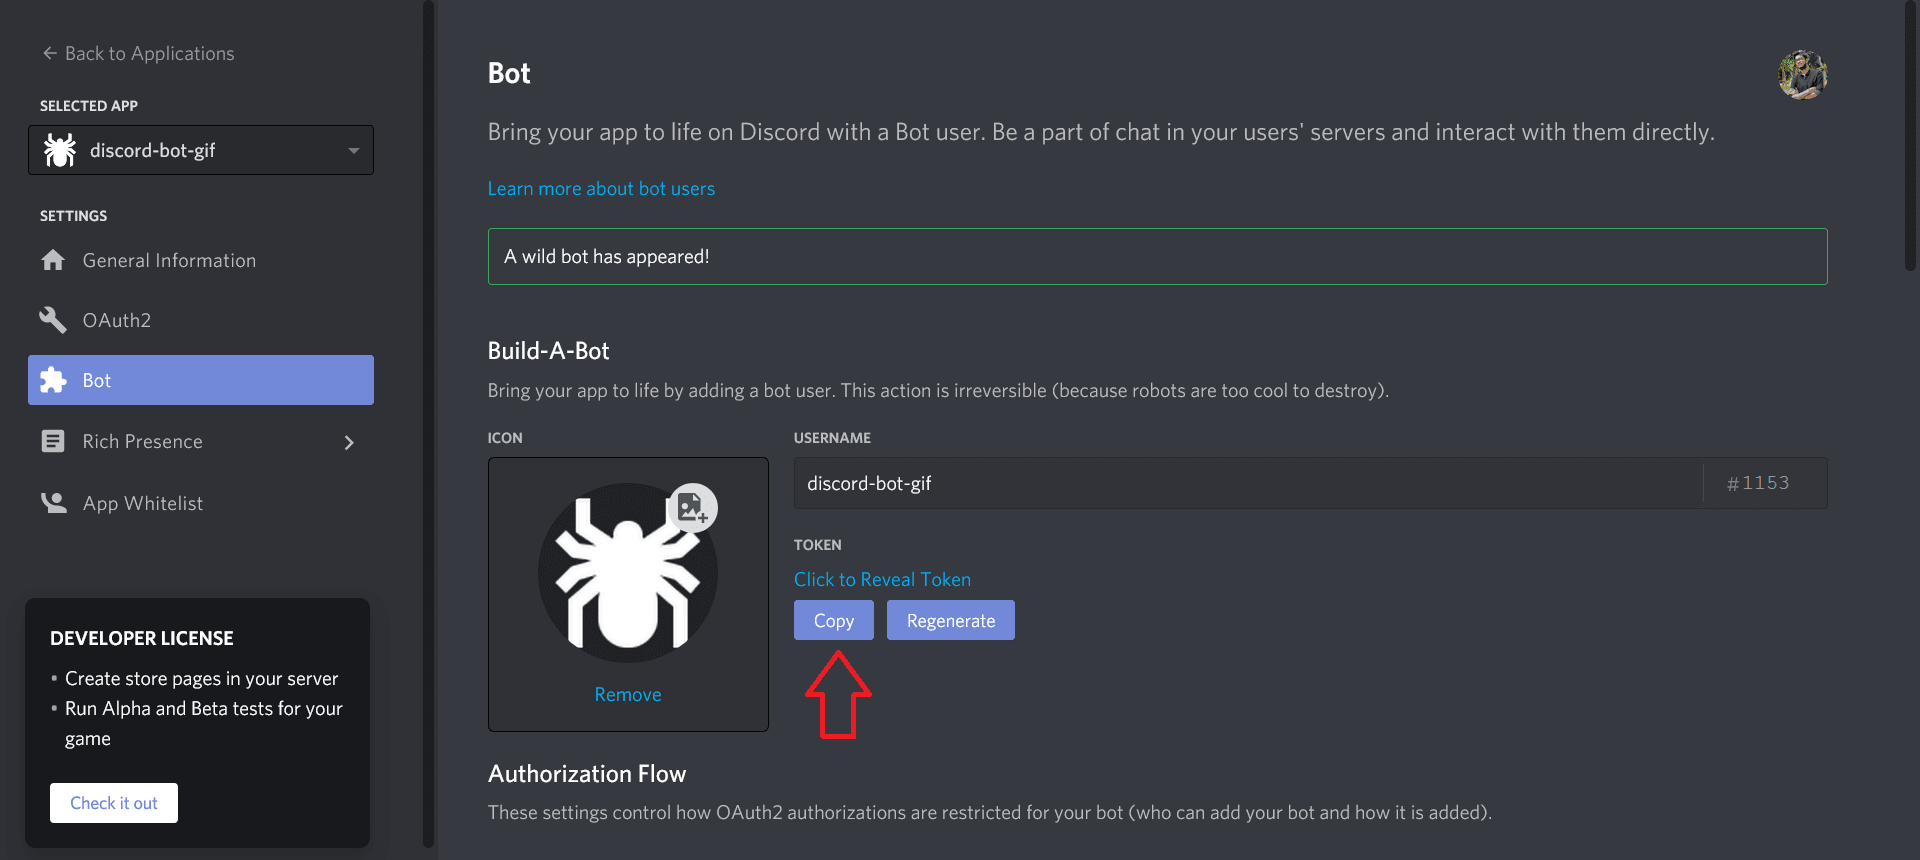
After creating the bot, copy the API Token from the Build-A-Bot section.
Paste the Discord Token in the .env file.
GIPHY_API_KEY = ''
DISCORD_TOKEN = ''
In this section, you will create a dummy server in your Discord app and add the bot to it.
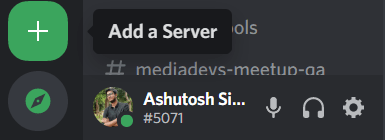
Head over to your discord app, click on the plus icon present in the bottom left.
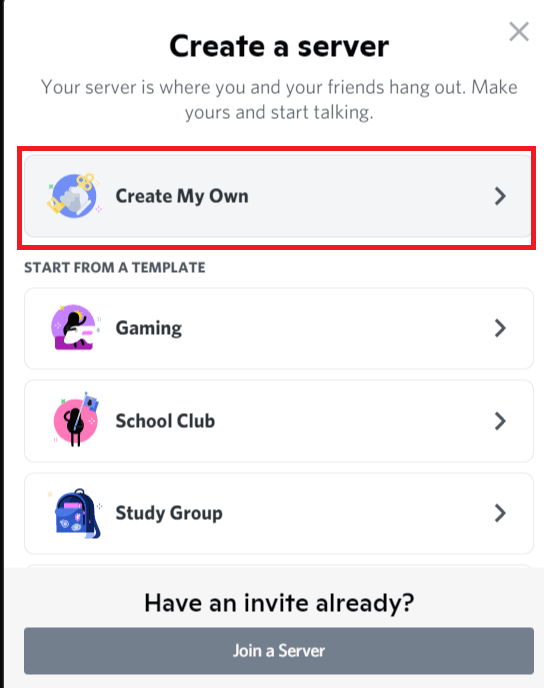
When prompted, click on Create My Own to create a dummy server.
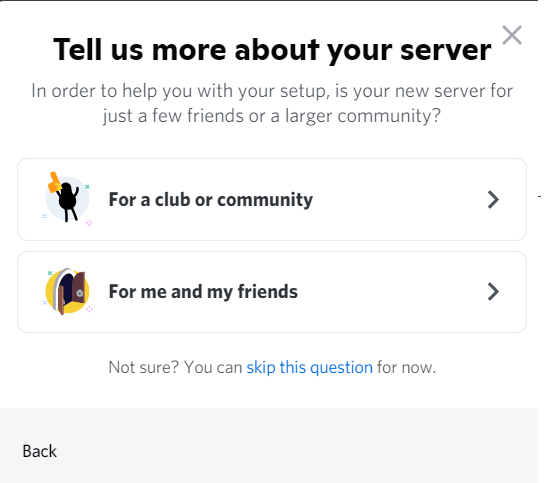
You will be asked who the server is for; you can skip this by clicking on skip this question.
Given a name to your server, for example, Discord Bot Tutorial Server, and click on the Create button. You can also add an icon to it.
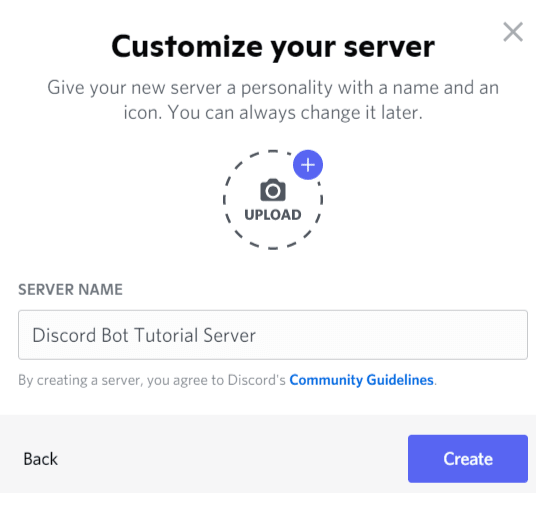
You have successfully created a dummy discord server for development purposes.
The next step is to add the bot to this server. Head over to Discord’s developer page and click on the OAuth2 tab in the left tab menu.
On the OAuth2 page, select bot under the SCOPES section. After selecting the bot, copy the URL present just below it and paste it into a new tab in the browser.
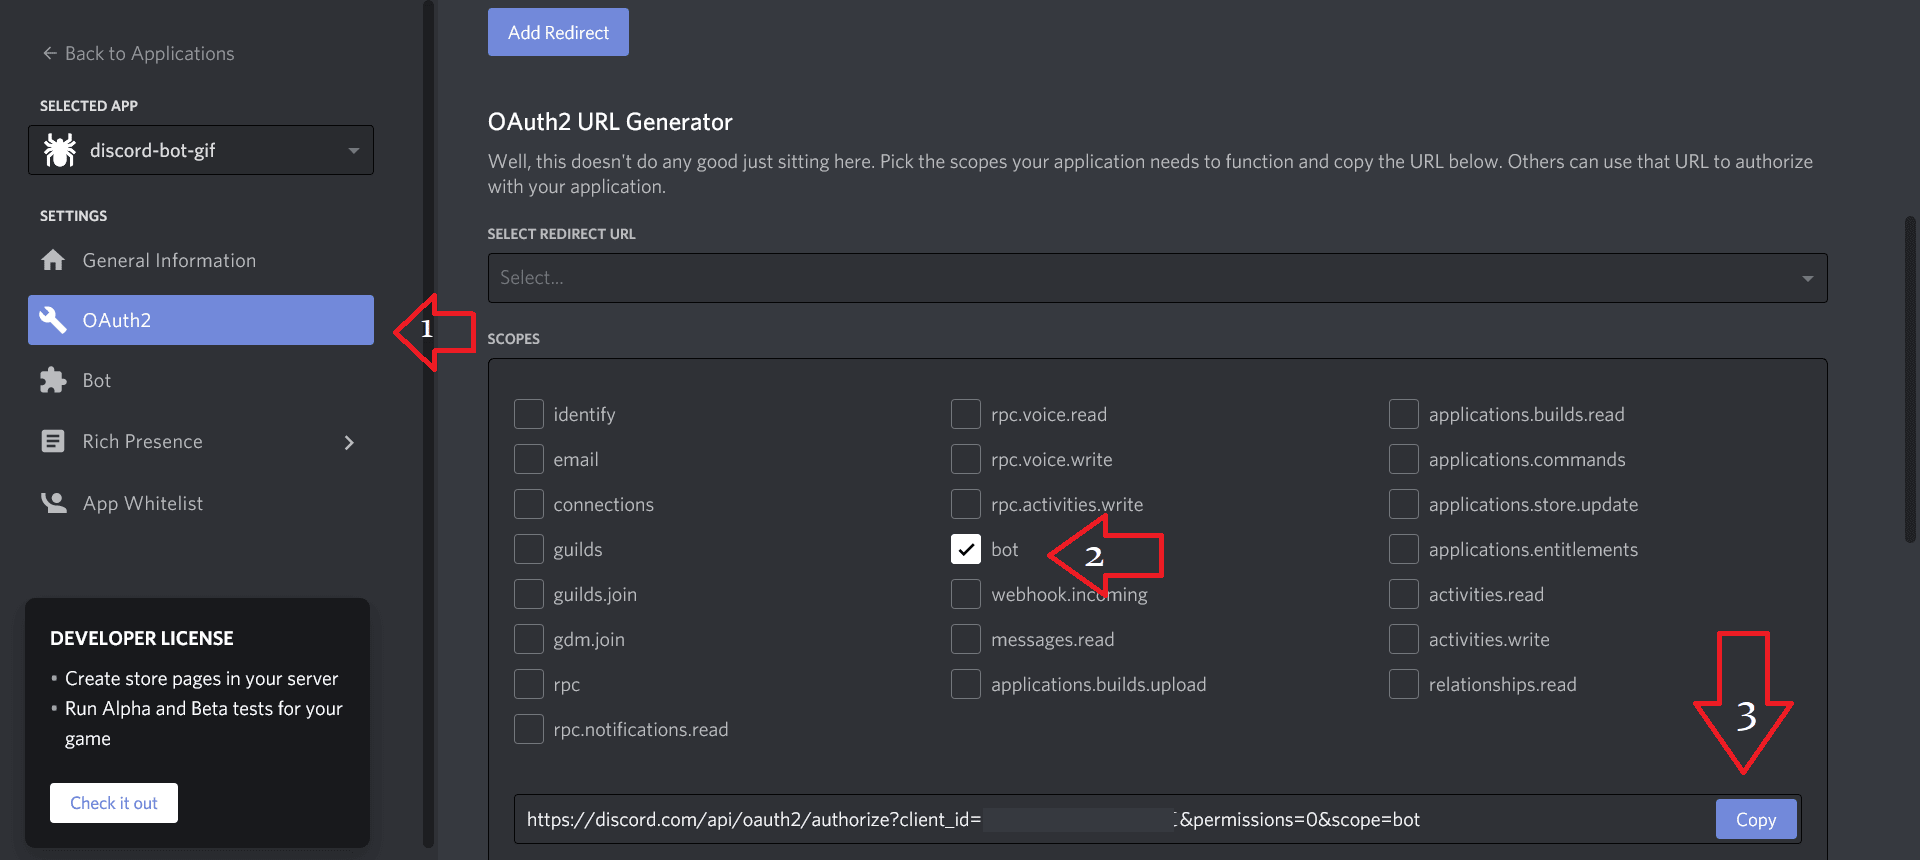
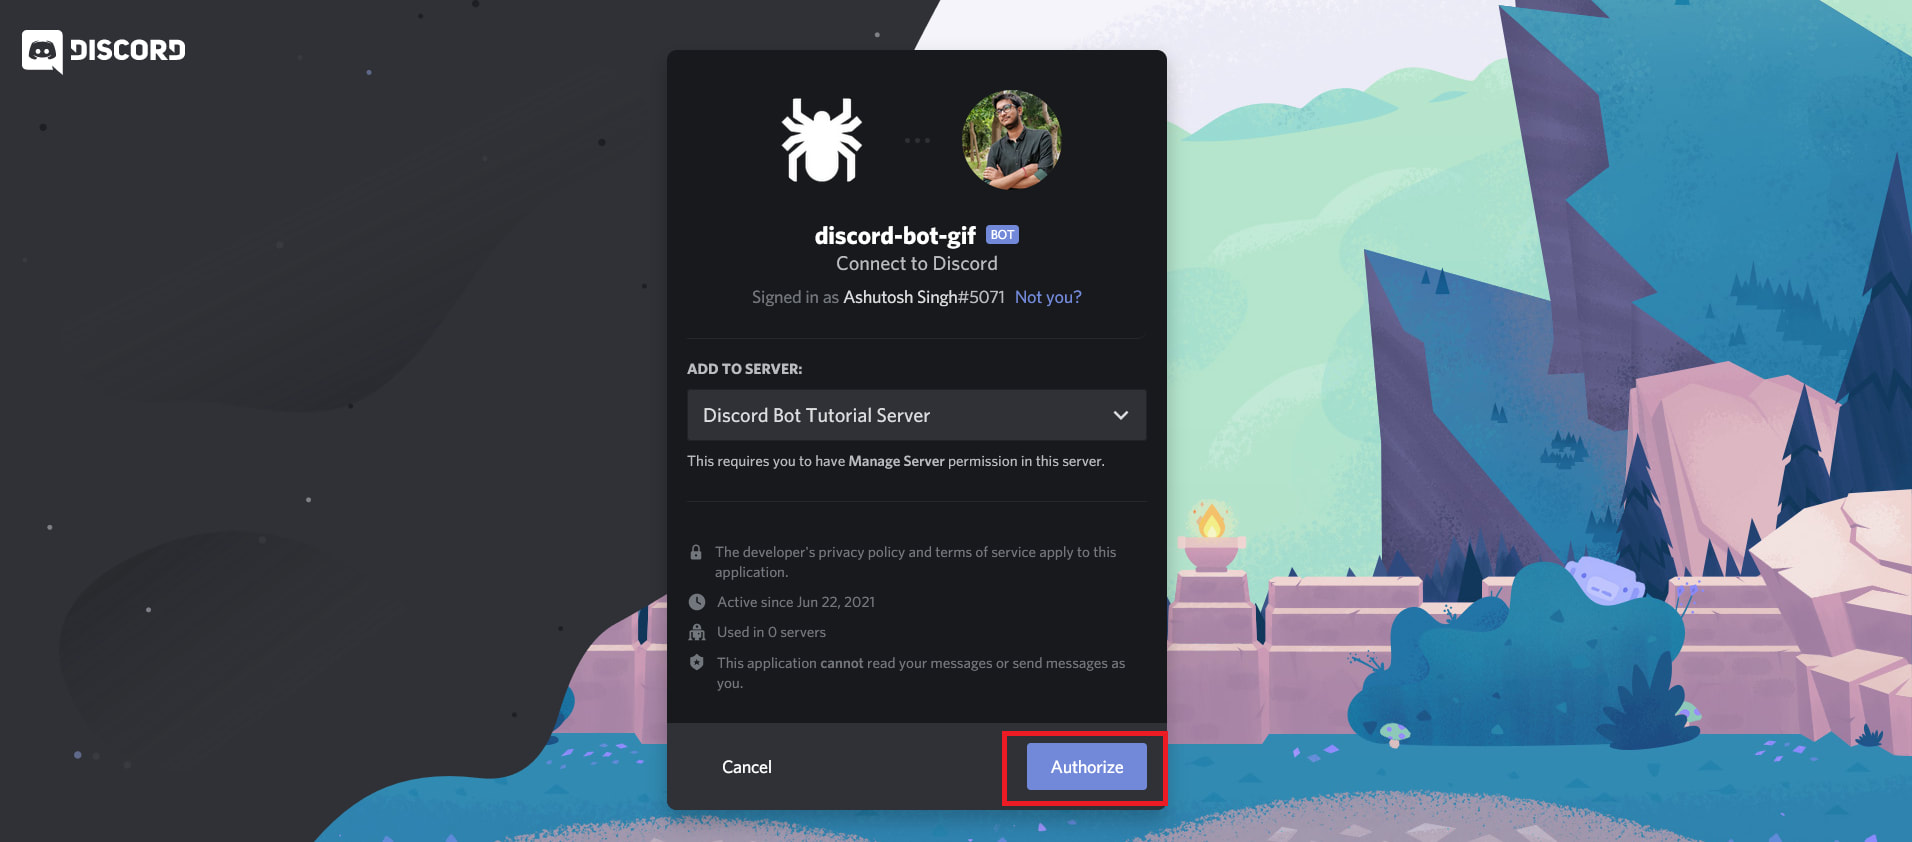
This link will install the discord-bot-gif in your dummy server. You will be asked to select the server you want the bot to be installed on this page, select the dummy server you created, and click on the Authorize button.
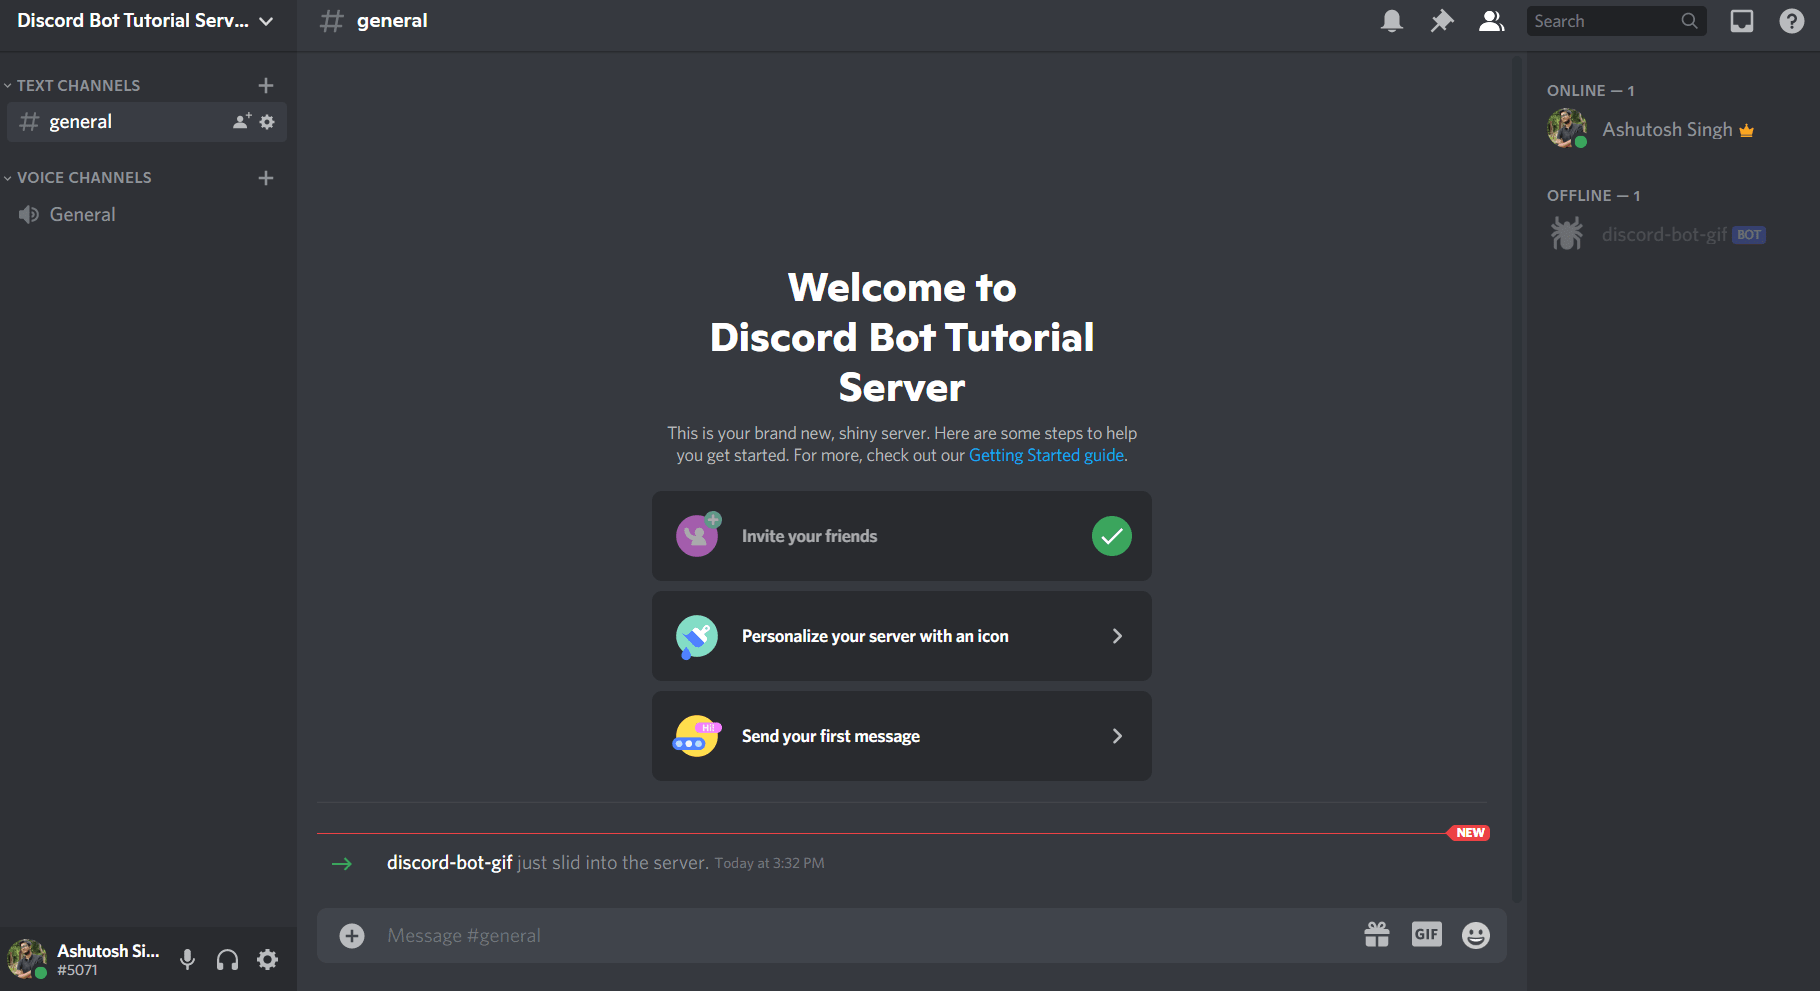
The bot will be installed in your dummy server, and you will see a message similar to the one below in the general channel of your server.
In this section, you will code the bot to send a message, pong, when ping is entered in the discord channel. This simple command, i.e., ping, will help in checking the status of the bot.
Run the following command to create a file named index.js in your project’s root directory.
touch index.js
Code language: CSS (css)
Add the following code the index.js file.
require("dotenv").config();
const Discord = require("discord.js");

const client = new Discord.Client();

client.on("ready", () => {
  console.log(`Logged in as ${client.user.tag}!`);
});

client.on("message", async (message) => {
  if (message.content === "ping") {
    message.reply("Pong!");
  }
});

client.login(process.env.DISCORD_TOKEN);
Code language: JavaScript (javascript)
In the above code, you start by importing the dotenv package to load the environment variables in your code. Then you create an instance of Discord.Client.
You add two event handlers to the discord client, the first being the ready event triggered when the bot is ready and the second message event triggered when the user sends a message in the discord channel.
The ready event handler logs the user tag of the bot in the terminal. In the message event handler, you check if the message typed by the user is ping or not. If it is ping, then you send a reply message pong to the user.
Start the development server by running the following command in the terminal.
npm run dev
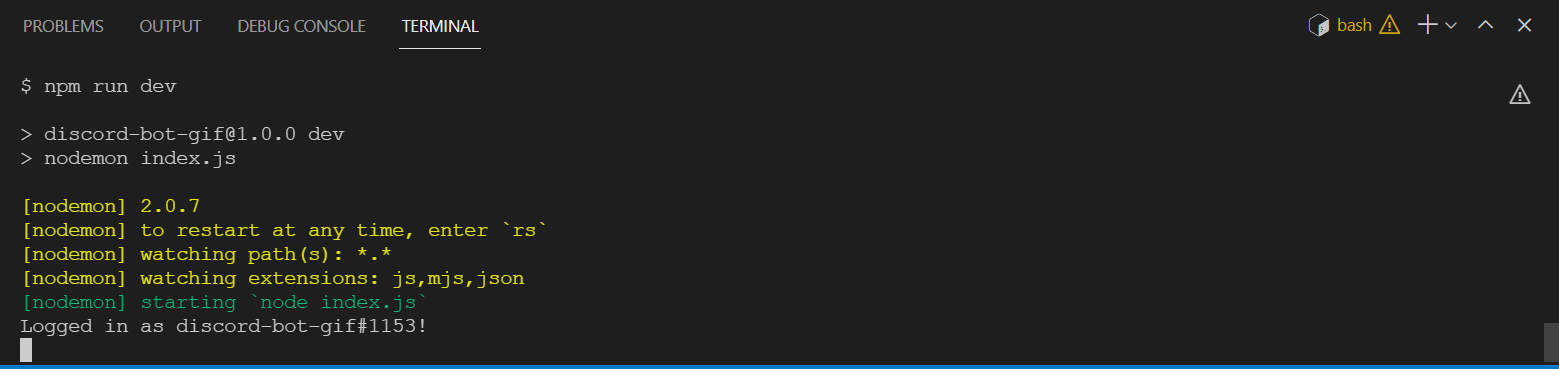
Your development server will start with nodemon, and once the discord client is ready, a message similar to Logged in as discord-bot-gif#1153! will be logged in the terminal.
Head over to the general channel in the discord server. You will notice that your bot is online in the right section. Type ping in the text area and hit enter.
The bot will reply with a pong message.
In this section, you will fetch the GIFs based on the searched query and then send them to the channel. You have already installed the node-fetch package, which will help to fetch the GIFs from Giphy.com.
You will send the user’s query in the URL of the fetch request where gifSearchText is the query entered by the user and process.env.GIPHY_API_KEY is your Giphy API Key.
http://api.giphy.com/v1/gifs/search?q=${gifSearchText}&
api_key=${process.env.GIPHY_API_KEY}&limit=100
The next step is to finalize the invocation command, which triggers the bot to send the GIF; this tutorial uses !gif as the invocation command. You can also choose any other command like !searchGif, !gifff, etc.
The search query will be followed by the invocation command. So, for example, the command to search for GIFs related to hello will look like this.
!gif hello
You first need to listen for the invocation command, i.e., !gif, and then make a request to Giphy API with the query followed by !gif.
One way of doing so is using the split() method of an Array. You can split the entire string into an array of substrings and check if the index element is !gif or not. You can read more about the split() method here.
Update the index.js file like this.
require("dotenv").config();
const Discord = require("discord.js");
const fetch = require("node-fetch");

const client = new Discord.Client();

client.on("ready", () => {
  console.log(`Logged in as ${client.user.tag}!`);
});

client.on("message", async (message) => {
  if (message.content === "ping") {
    message.reply("Pong!");
  }

  let splitMessage = message.content.split(" ");

  if (splitMessage[0] === "!gif") {
    const gifSearchText = splitMessage.slice(0, splitMessage.length).join(" ");

    const url = `http://api.giphy.com/v1/gifs/search?q=${gifSearchText}
    &api_key=${process.env.GIPHY_API_KEY}&limit=100`;

    const res = await fetch(url);

    const json = await res.json();

    const randomIndex = Math.floor(Math.random() * json.data.length);

    message.channel.send(json.data[randomIndex].url);
  }
});

client.login(process.env.DISCORD_TOKEN);
Code language: JavaScript (javascript)
In the above code, you split the message into substrings using the split() method. The split() method splits the message wherever it finds a space, i.e., after the invocation word. You then check if the first element in the array is !gif.
If the first element is !gif, you create a new substring of all the elements except !gif using the slice() and join method.
For example, a user can search for !gif happy birthday; you will need to make the fetch request using the string happy birthday and remove the !gif from the message, which is what the following line of code does.
const gifSearchText = splitMessage.slice(0, splitMessage.length).join(" ");
Code language: JavaScript (javascript)
Then you pass the search query, i.e., the gifSearchText variable and the Giphy API key in the fetch URL. You also pass a limit to return only 100 GIFs in the responses.
const url = `http://api.giphy.com/v1/gifs/search?q=${gifSearchText}
    &api_key=${process.env.GIPHY_API_KEY}&limit=100`;
Code language: JavaScript (javascript)
You then fetch the GIFs bypassing the URL or the url variable in the fetch method.
You convert the returned response into JSON using the .json() method and send a random GIF from the fetched responses.
    const json = await res.json();
    const randomIndex = Math.floor(Math.random() * json.data.length);
    message.channel.send(json.data[randomIndex].url);
Code language: JavaScript (javascript)
You are actually sending the URL of the GIF which is converted to the GIF by Discord.
In this media jam, you created a Discord Bot to send GIFs from scratch. We used Giphy API in this jam; you can also integrate other APIs like Tenor, Imgur, Gfycat, etc., with the bot. You can change the invocation command to select which API should be used. For example, !giphy <QUERY> or
!tenor <QUERY>.
You can also try to integrate Spotify API to play music in the channel.
Here are a few resources that you might find helpful:
Happy coding!