Raise your hand if you have ever seen the following error in your browser’s console:
GET http://localhost:8001/favicon.ico 404 (Not Found)
This error usually happens if you haven’t defined a favicon for your website.
In this Media Jam, we’ll explain how to add a custom icon for any web application that runs over a desktop browser in just five steps.
Of course, we cannot add a favicon if we don’t have a website ready to go.
To have a simple site to work with, we’ll create an index.html file with the following content:
<!DOCTYPE html>
<html lang="en">
<head>
    <meta charset="UTF-8">
    <meta http-equiv="X-UA-Compatible" content="IE=edge">
    <meta name="viewport" content="width=device-width, initial-scale=1.0">
    <title>Favicon Demo</title>
</head>
<body>
    <h1>Favicon Demo</h1>
</body>
</html>
Code language: HTML, XML (xml)
The previous code was auto-generated in Visual Studio Code.
If you’re interested in giving it a try from scratch, you can install Live Server in your code editor to launch a development server with the live-reload feature for this project.

Pay attention to the upper-left corner. There is no custom logo for the application yet, and that’s the reason you see the browser’s error console, since it’s trying to get that resource by default.
You must have a high-quality squared-logo ready before creating the favicon. Remember that this graphic image will be associated with your brand. Let’s take the Unofficial JavaScript Logo in PNG format as an example. It has a size of 1000x1000 pixels.
It’s great if you have a high-resolution version of your logo. However, the standard size for most desktop browsers is 32x32.
In this step, you’re free to choose any image editor you have available to resize your image logo.
In this case, I’ll describe the steps you may follow using Adobe Photoshop:
- Open your image in Adobe Photoshop.
- Choose the
Imagemenu, and thenImage Size. You’ll see a popup where you can adjust the image’s size. Put32for the width and height (pixels), and clickOKto save the changes.

- To export the new image, go to the
Filemenu, and then clickExport, andSave for Web.
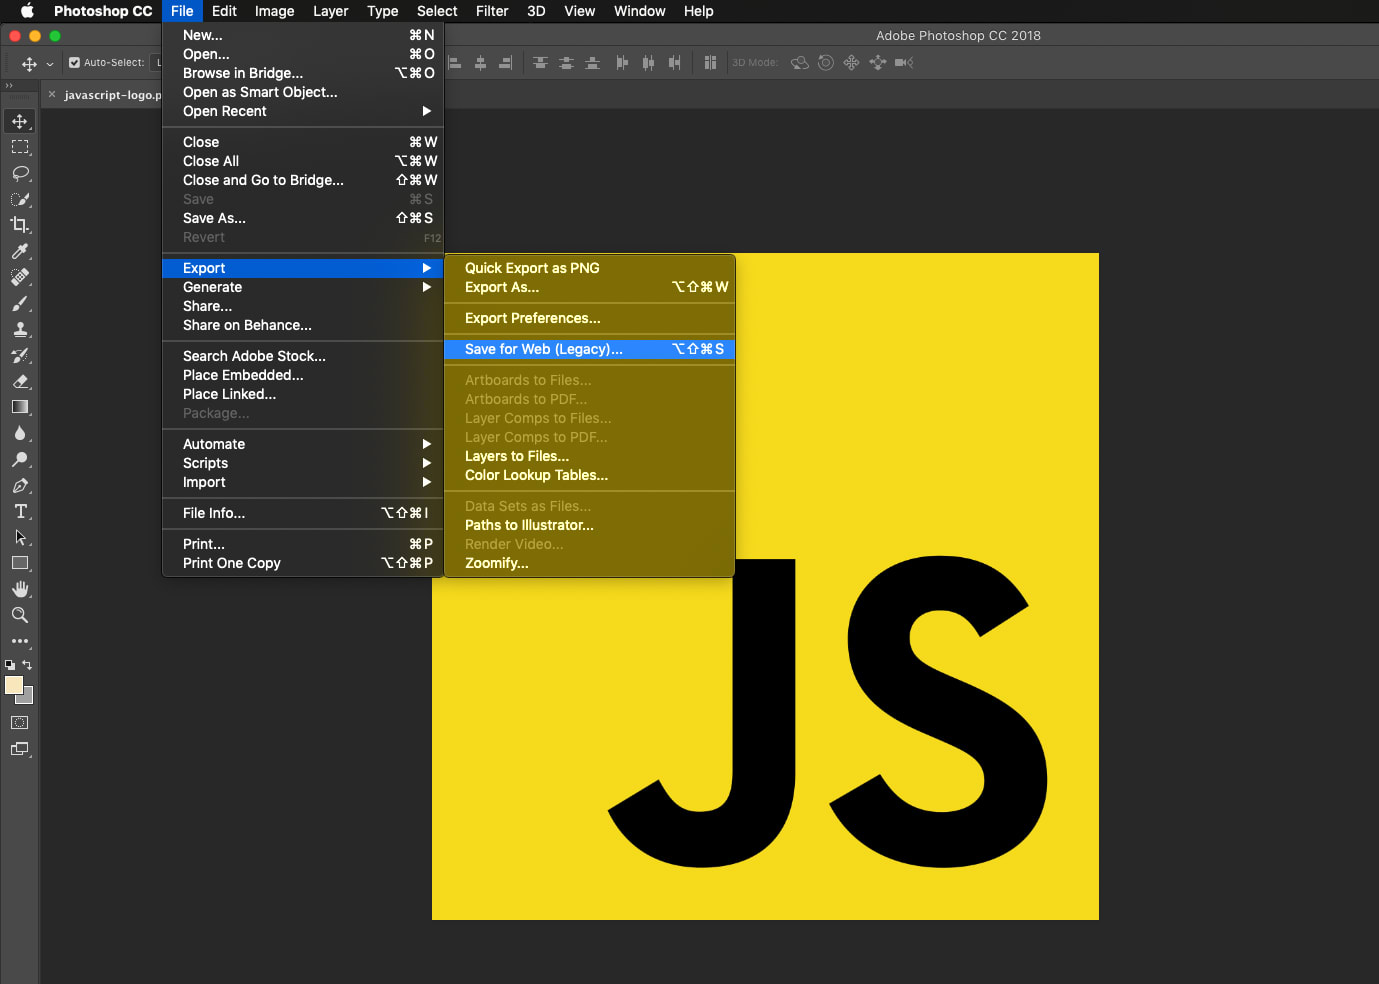
Then, make sure you select the PNG format (top right option). Check the Transparency option (in case you have borders or a logo with transparency). Finally, click the Save button, name your file, and select the folder.
I have chosen favicon.png for the file name, under my Downloads folder.
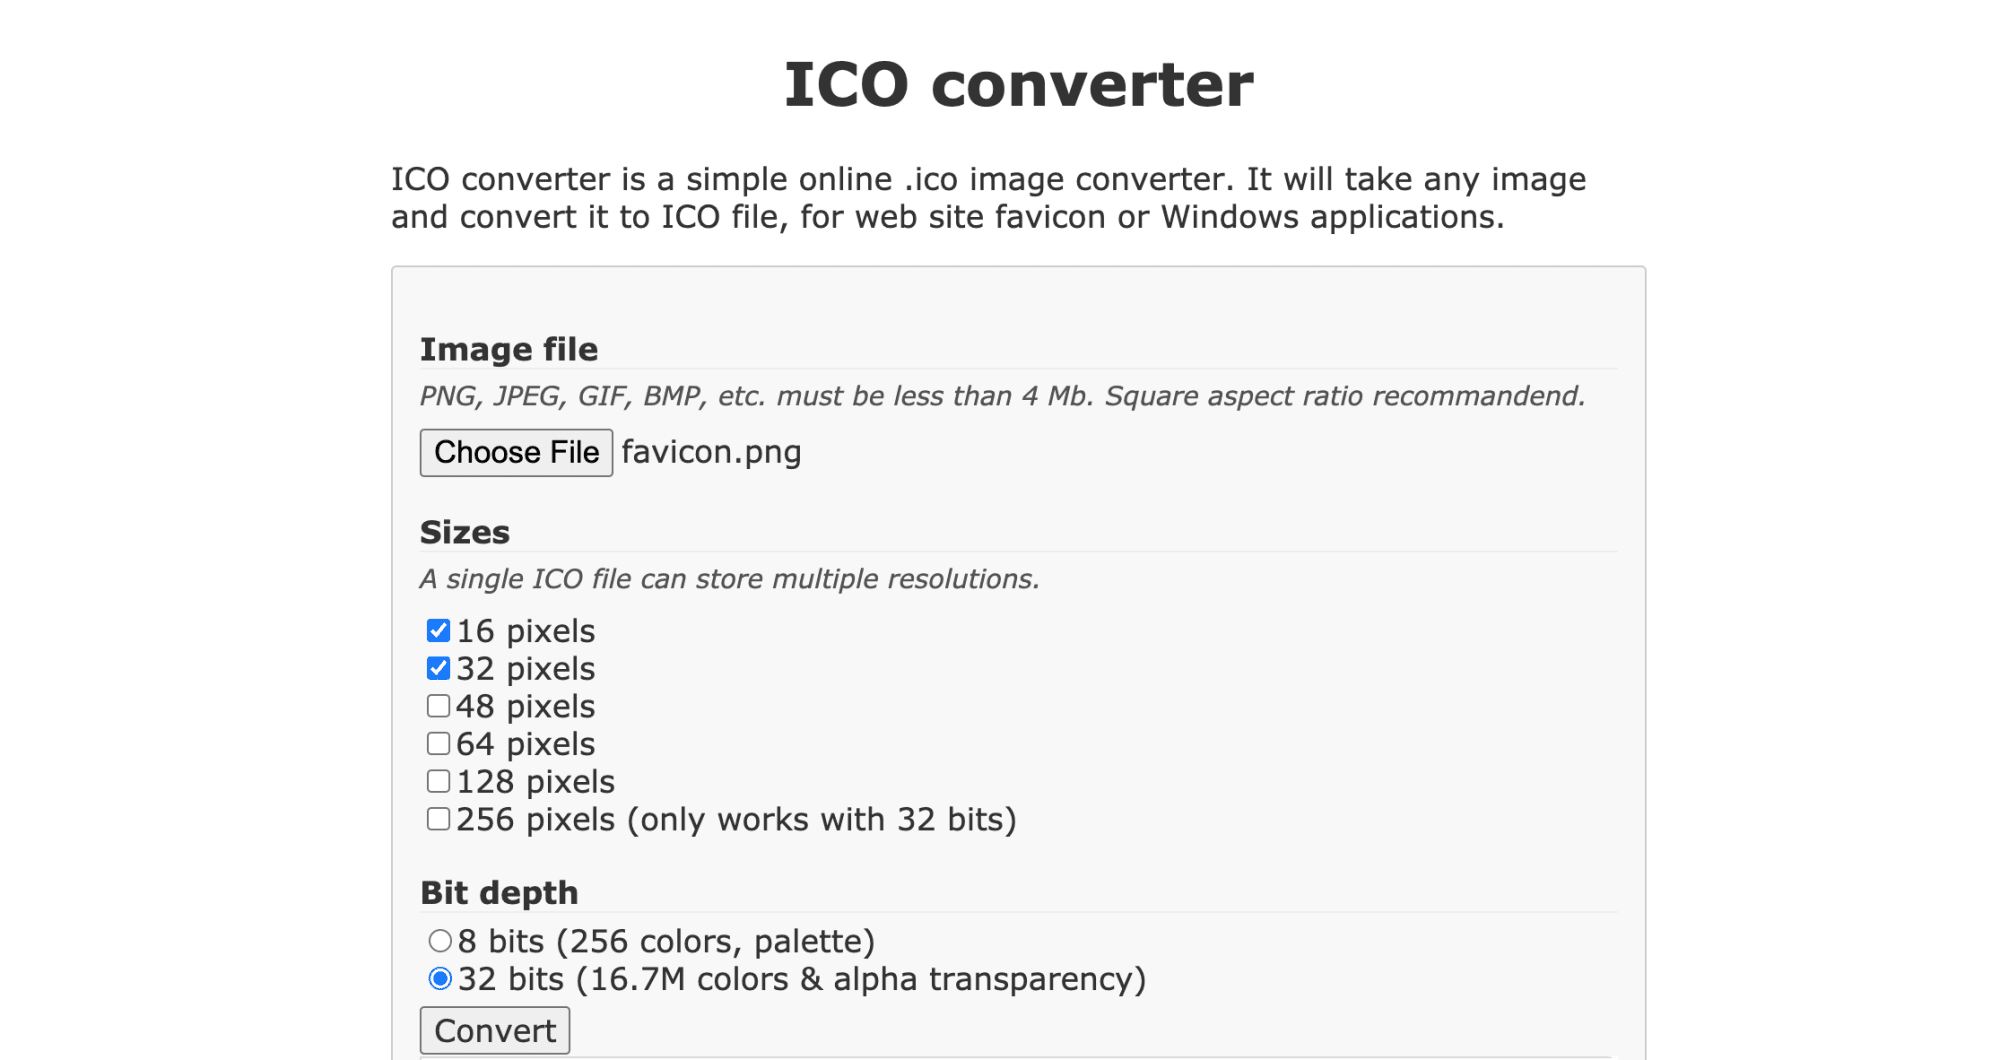
There are a lot of tools that can generate a .ico file. In my personal experience, it’s easy to generate it using ICO converter. It’s free, and you don’t even need to create an account to use it!
- Open the ICO converter website.
- Click on the
Choose Filebutton, and open the file you just saved in the previous step. - You may select
16 pixelsand32 pixelsfor the size. - Keep
32 bitsas the default option. - Click on the
Convertbutton. - Select the same folder location as your
PNGfile.
You should have two files now: favicon.png and favicon.ico.
Before applying the favicon, you’ll need to copy the brand new favicon.ico file into your images folder. In the sample project, I’ll put it in the static/icons/ directory.
Next, let’s update the index.html file. Specifically, we’ll need to add a <link> element into the <head> section:
<head>
    <link rel="shortcut icon" href="static/icons/favicon.ico" />
</head>
Code language: HTML, XML (xml)
After that, the index.html should have the full content as follows:
<!DOCTYPE html>
<html lang="en">
<head>
    <meta charset="UTF-8">
    <meta http-equiv="X-UA-Compatible" content="IE=edge">
    <meta name="viewport" content="width=device-width, initial-scale=1.0">

    <link rel="shortcut icon" href="static/icons/favicon.ico" />

    <title>Favicon Demo</title>
</head>
<body>
    <h1>Favicon Demo</h1>
</body>
</html>
Code language: HTML, XML (xml)Once you’ve completed all the previous steps, you can try refreshing your browser, and the new favicon should be there. In most modern browsers (Google Chrome, Mozilla Firefox) you’ll see it at the top-left corner of the active tab as the next screenshot shows.

Also, note that the initial error displayed in the browser’s console is gone.
You may need to add more icon sizes in case your app is used on several platforms, including mobile devices. In that case, just make sure to know what the new sizes are, and then create the PNG files for all of them (Step 2).
Once you are ready with the new files, you can add the new icons in your index.html file (just next to the initial one):
<link rel="shortcut icon" href="static/icons/favicon.ico" />
<link rel="icon" type="image/png" sizes="32x32" href="static/icons/favicon-32x32.png" />
<link rel="icon" type="image/png" sizes="48x48" href="static/icons/favicon-48x48.png" />
<link rel="icon" type="image/png" sizes="96x96" href="static/icons/favicon-96x96.png" />
<link rel="icon" type="image/png" sizes="144x144" href="static/icons/favicon-144x144.png" />
Code language: HTML, XML (xml)Find the live demo here, and the source code in GitHub.
If you prefer, you can play around with the project in this CodeSandbox too: