
Ever wished to paint like Michelangelo or Leonardo Da Vinci? – Now, it is possible using the Neural Style Transfer. In this post, we will be looking at creating a simple art gallery using the Neural style transfer.
The Neural Style Transfer uses neural networks to transfer and blend the styles from one image (source image) into another image (target image) while still maintaining the content of both images. Primarily, the Neural Style Transfer repaints and transforms the target image in the style of the source image using an intricate network.
We completed this project in a CodeSandbox. Fork and run it to quickly get started.
Check out the complete source code here.
Understanding this article requires the following:
- Installation of Node.js.
- Basic knowledge of JavaScript.
- Familiarity with Nuxt.js
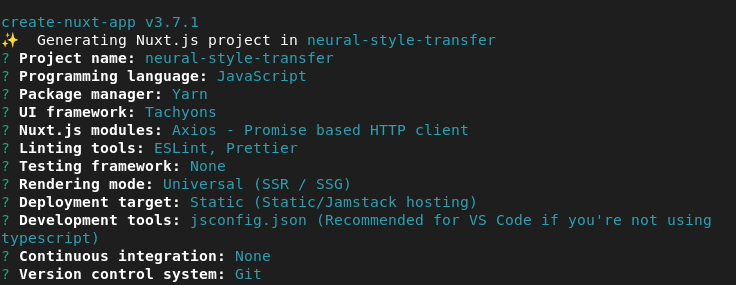
Use the npx create-nuxt-app <project-name> to create a new Nuxt project.
The process of scaffolding the project should bring a list of options which should look like this:
After successful project creation, we start our application by running the following command.
  cd <project name>
  npm run dev
Code language: HTML, XML (xml)
Nuxt will, in turn, start a hot-reloading development environment which is accessible by default at http://localhost:3000
We can achieve the Neural Style Transfer in our Nuxt application using Cloudinary, a cloud-based service that provides solutions for asset management (images, videos).
To use Cloudinary, we will need to create an account and also install the Cloudinary Nuxt SDK, like so: npm install @nuxtjs/cloudinary
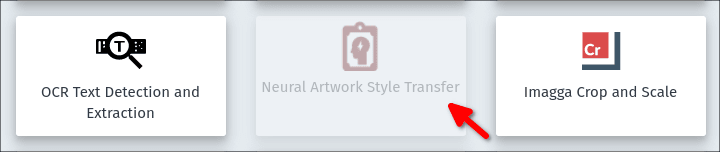
Cloudinary uses the Neural Artwork Style Transfer add-on ****to perform the Neural Style Transfer. Click on the Add-ons tab to access the add-on page.
![]()
The Add-ons page has several add-ons from which we can pick our desired add-on, in this case, the Neural Artwork Style Transfer add-on:
We need to configure our Nuxt application in the nuxt.config file before we can use Cloudinary.
To do this, we will need to do the following:
- Create a
.envfile in the root of our project and add our Cloudinary Cloud name, API Key, and the API Secret. We can find these by navigating to the Cloudinary dashboard. - Register these properties in our
.envfile like so:
    cloudName='***'
    apiKey='***'
    apiSecret='***'
Code language: JavaScript (javascript)- Register Cloudinary component for global use in the
nuxt.configfile by adding'@nuxtjs/cloudinary'in themodulessection. - Add a
cloudinarysection in thenuxt.configlike so:
    cloudinary: {
      cloudName: process.env.cloudName,
      apiKey: process.env.apiKey,
      apiSecret: process.env.apiSecret,
      useComponent: true,
    },
Code language: CSS (css)NB: Endeavor to replace all occurrences of “**“ with the correct values.
Voila! We are ready to start building and using our Cloudinary components in our project.
With our Nuxt app scaffolding completed, we’ll start by uploading sixteen images from Unsplash to Cloudinary.
Cloudinary allows us to upload images via the dashboard by clicking the Media Library tab.
![]()
After uploading the images, we will need to copy the public Id as this is required to pick each uploaded image from Cloudinary.
We will need to call our images from the Nuxt application by creating a utils folder at the root of our application. We will create an images.json file within this folder to hold the individual image information for each image occurrence in our application.
A sample snippet of our images.json file should look like this:
    [
      {
        "id": 1,
        "publicId": "rita-burza-unsplash",
        "overlay": "micheile-visual-stories-unsplash"
      },
    ]
Code language: JSON / JSON with Comments (json)Setting up and configuring Cloudinary for usage in our application means we can now use Cloudinary’s cld-image and cld-transformation component in our application like we would use the native <img> tag in an HTML document.
As a result, we will create a Gallery.vue file in our components folder. This file will contain all the code needed for the art gallery, which will result from neural style transfer for this tutorial.
To show the result in our browser view, we will need to import the Gallery.vue component into our pages/index.vue like so:
    <template>
      <div class="ph3">
        <Gallery />
      </div>
    </template>
Code language: HTML, XML (xml)
Cloudinary provides for style transfer using different transformation properties attached to the component. The required setup for neural style transfer in Cloudinary is:
- The target image: The image we would use as the base for the styles to get transferred to
- The source image: The image we intend to transfer its style to the target image.
- The input image: The repainted generated image which is a blend of both the target and the source image
The public-id will represent the target image, while our overlay will be the source image. We will also need to specify the overlay effect which is denoted as style_transfer in the Gallery.vue component.
    <template>
      <div>
        <div v-for="image in images" :key="image.id" class="fl w-50 w-25-l pa1 overflow-hidden">
          <cld-image :public-id="image.publicId" class="grow" sign-url="true">
            <cld-transformation height="750" width="750" crop="crop" />
            <cld-transformation :overlay="image.overlay" />
            <cld-transformation effect="style_transfer" flags="layer_apply" />
          </cld-image>
        </div>
      </div>
    </template>
    <script>
    import images from "~/utils/images.json";
    export default {
      data() {
        return {
          images
        }
      }
    }
    </script>
Code language: HTML, XML (xml)
The snippet above renders the images from the images.json by looping through each dataset using v-for.
The public-id is then set to the value of the publicId in our json file. Consequently, the overlay props in the cld-transformation are also set to the value of the overlay in our json file.
Cloudinary transformations are pretty powerful and may prove costly if others access unaccounted URLs that apply the neural art style or other forms of image transformations. Hence, our URL is needed to be signed by Cloudinary’s authenticated API.
As seen in the code snippet above, we can sign our Cloudinary URL by setting the sign_url props to true.
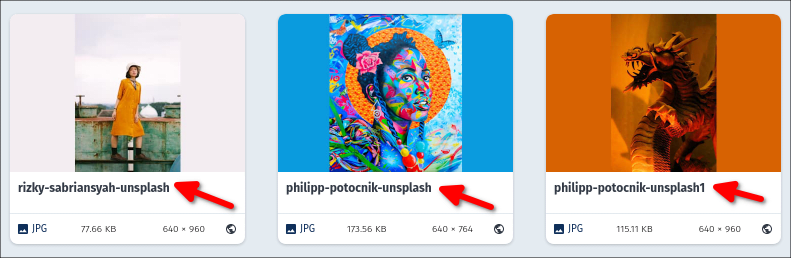
At this point, our result should look like this:
![]()
From the screenshot above, we can see the images have transformed. The styles from the source image get imprinted on the target image. We have a new painting that combines two paintings whose content is still intact.
This post explains how to build an art gallery in Nuxt with the Neural style transfer using Cloudinary transformations.