
One of the key factors to high conversion rates on an e-commerce platform is the presence of high-quality product images. When customers can see your product with more precision on its finer details, they are more likely to purchase it.
In this article, you will build a full-featured e-commerce product-image gallery with Nuxtjs and Cloudinary’s Product Gallery widget.
Nuxtjs is an open-source framework built on Vuejs that offers enhancements such as server-side rendering, zero configurations, and an ecosystem of modules that make for a better developer experience.
Click the link below to view a complete demo of this article on CodeSanbox
https://codesandbox.io/embed/nuxtjs-product-zoom-rkso64?fontsize=14&hidenavigation=1&theme=dark
To view the source code on GitHub, click here
This article requires the following:
- Knowledge of JavaScript and Vuejs.
- A Cloudinary account to manage your product images – create a free one here.
- Yarn package manager to handle the node packages used in this project. You’ll need to install Nodejs first, which comes with npm.
- Knowing Nuxtjs isn’t a strict requirement, but it’ll be nice to have.
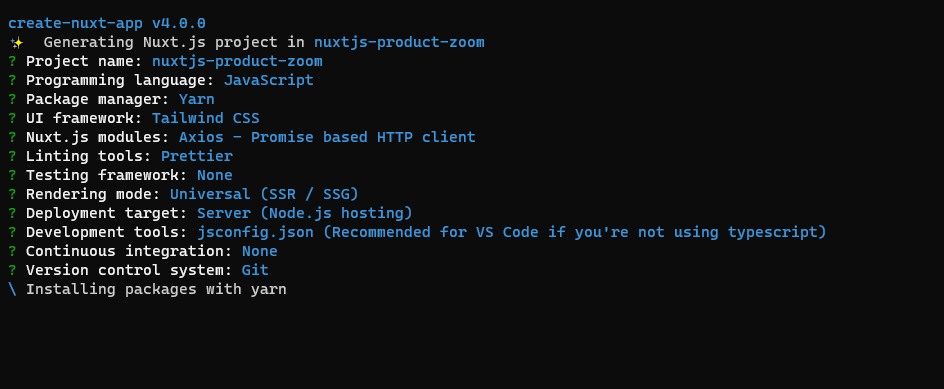
In your terminal, navigate to the directory where you want to store your project and initialize it using the command create-nuxt-app:
npx create-nuxt-app nuxtjs-product-zoom
Read and respond to the prompts with the recommended options below:
With the project’s successful setup, navigate into it and open it with your preferred code editor.
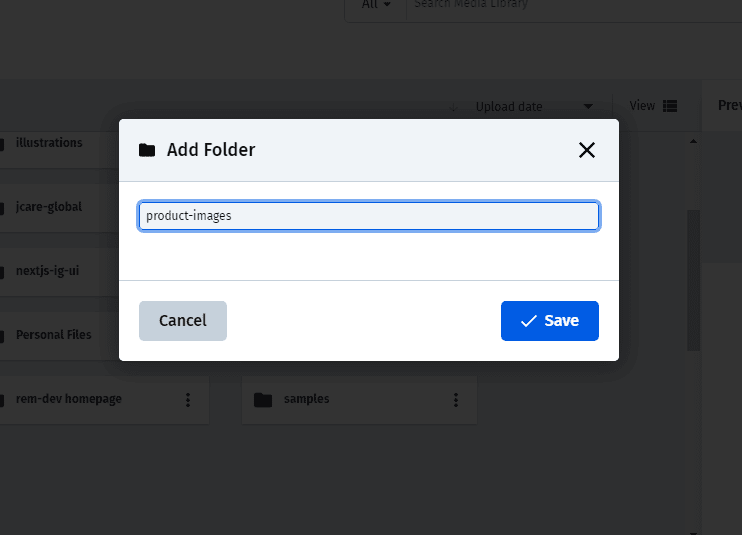
On your Cloudinary dashboard, click on ‘Media Library’ and create a new folder named product-images:
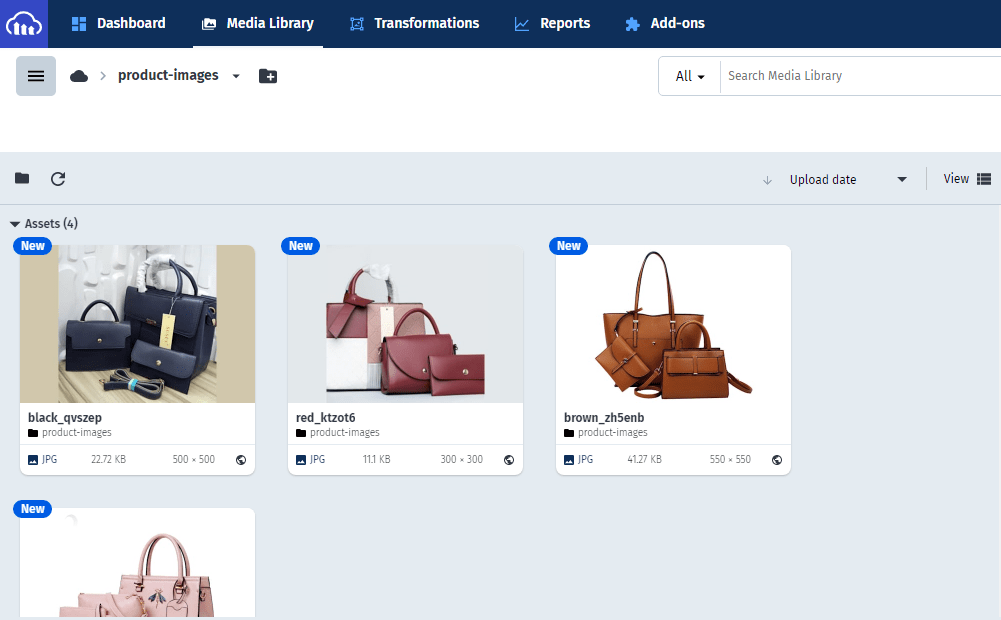
Upload your images to the folder you’ve created. You can use the ones provided for this demo:
Product Gallery is an interactive widget that enables you to display images on your website or application.
It does this using a galleryWidget() method that takes in an object with three key parameters:
- Your Cloudinary account cloud name
- The element that will contain the widget
- The media assets (your product images) for the widget.
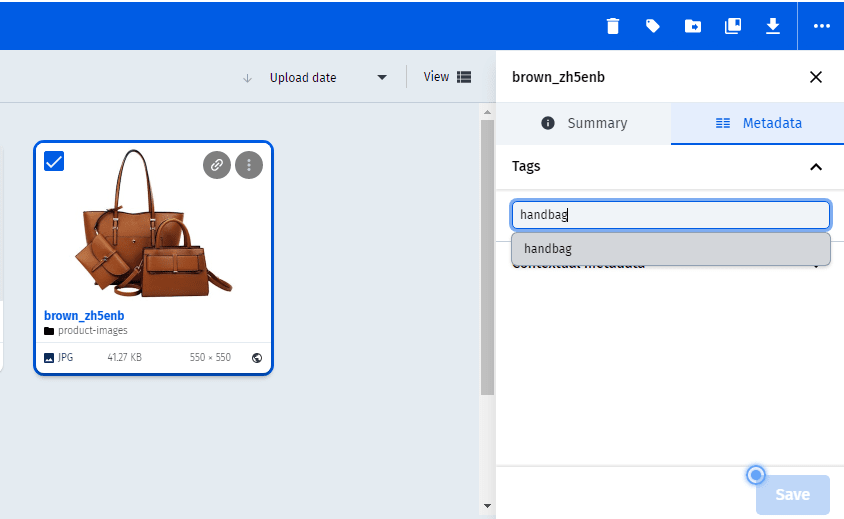
To specify which media assets to get from Cloudinary, you need to add tags to your product images so you can reference them by their tags. Click a product image, and on the sidebar that appears to the right, click on ‘Metadata’ and add your tag. Click on ‘Save’ to store the tag. In the same way, you should add all the products you want to display, ensuring they have the same tag name. I recommend naming your tags in camelCase (the same way you name your variables).
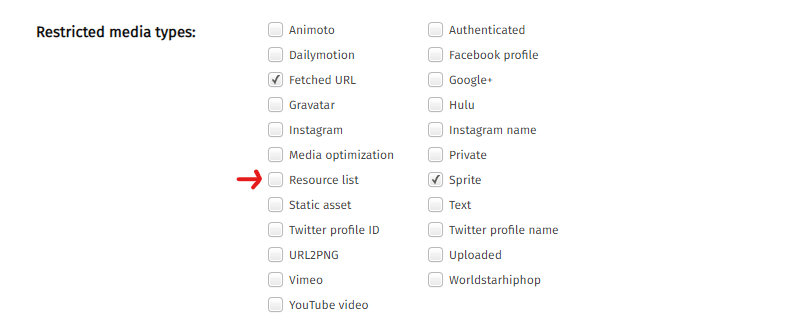
To get your media assets from Cloudinary, Product Gallery needs access to your client-side asset lists. By default, this delivery type is disabled. To enable it, go to ‘Settings’ and click on the ‘Security’ tab, then scroll down to ‘Restricted media types:’
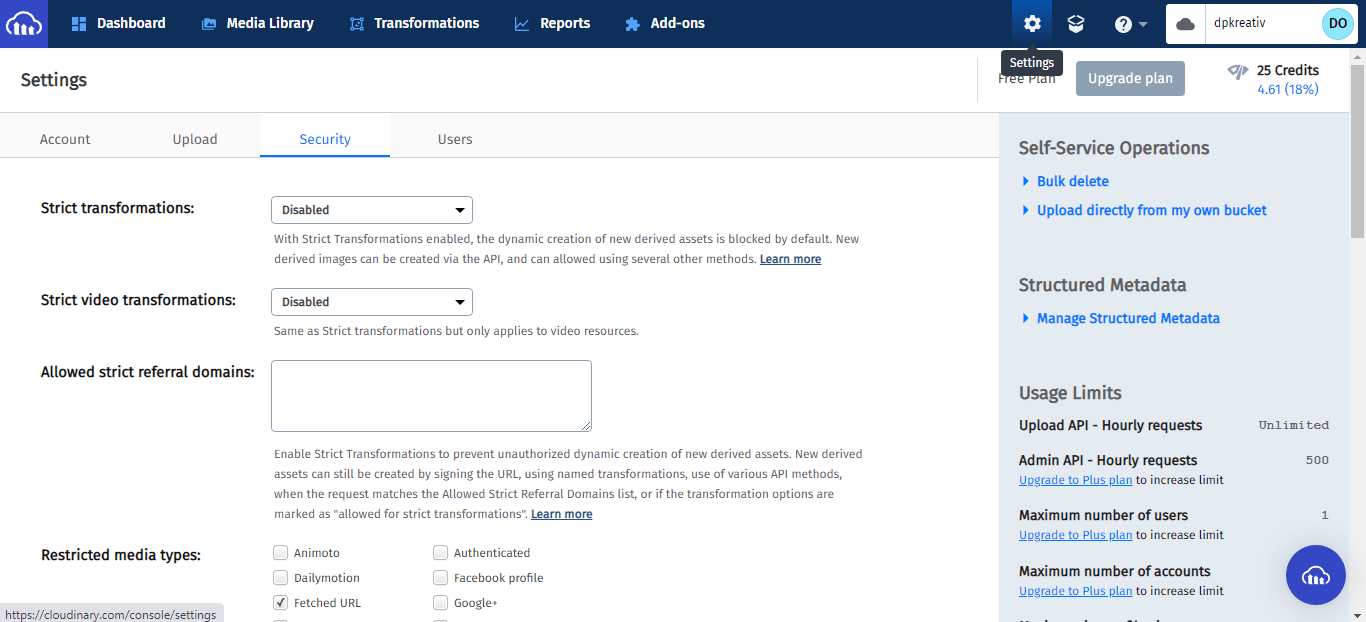
Ensure that ‘Resource list’ is unchecked, then scroll to the bottom of the page and click ‘Save’.
In your code editor, open pages/index.vue and update <template> with the code below:
<template>
  <div class="mx-auto w-full max-w-lg p-5">
    <div class="my-5">
      <h2 class="font-bold text-xl">Product Gallery Demo</h2>
      <p>Click/Tap on each image to zoom</p>
    </div>
    <div id="product-gallery"></div>
  </div>
</template>
Here, you set up the demo’s UI layout. <div id="product-gallery"></div> is the element that will be referenced by JavaScript to contain our Product Gallery widget.
In static/, create a js/ folder with a cloudinary.js file and add the following content to it:
const cloudName = 'dpkreativ'
const productGallery = cloudinary.galleryWidget({
  container: '#product-gallery',
  cloudName: cloudName,
  mediaAssets: [{ tag: 'handbag' }],
})
productGallery.render()
In this code:
-
cloudNametakes the cloud name on your Cloudinary account as a variable - You created a
productGalleryvariable that instantiates acloudinaryclass with agalleryWidgetmethod. -
cloudinary.galleryWidgettakes in at least three required parameters –container,cloudNameandmediaAssets. -
containerreferences yourid=``"``product-gallery``"inpages/index.vue -
cloudNametakes in the value of the cloudName variable you created earlier -
mediaAssetscontains an array of assets.{ tag:'``handbag``'}creates an object that contains all media with “handbag” as its tag. - `productGallery.render()“ renders the product gallery widget you’ve just created
Cloudinary provides a JavaScript file that contains all the functionality required for the Product Gallery widget to work; its URL is https://product-gallery.cloudinary.com/all.js.
Navigate to the root folder of your project, open nuxt.config.js, and update head with the code below:
  head: {
    title: 'nuxtjs-product-zoom',
    htmlAttrs: {
      lang: 'en',
    },
    meta: [
      { charset: 'utf-8' },
      { name: 'viewport', content: 'width=device-width, initial-scale=1' },
      { hid: 'description', name: 'description', content: '' },
      { name: 'format-detection', content: 'telephone=no' },
    ],
    link: [{ rel: 'icon', type: 'image/x-icon', href: '/favicon.ico' }],
    script: [
      {
        src: 'https://product-gallery.cloudinary.com/all.js',
      },
      {
        body: true,
        src: '/js/cloudinary.js',
      },
    ],
  },
In this code:
- You added the
scriptproperty withsrcpointing to Cloudinary’s Product Gallery JavaScript file. - You added another
srcpointing to the/js/cloudinary.jsfile you created in yourstatic/folder. The object also containsbody: true, which tells Nuxt to put the script tag below the body tag in your HTML file.
In your terminal, run yarn dev to compile the code and view it on your browser at localhost:3000

In this article, you learned how to build a product image gallery in Nuxtjs using Cloudinary’s Product Gallery widget. For easier customizations on the widget, check out this Product Gallery Demo offered by Cloudinary. You can make customizations using its GUI and copy the code for your needs.