
Concerts are music performances done by one or more musicians and often happen a lot in the summer due to the warm weather that facilitates a lot of outdoor gatherings. Tickets for such events have gone through several transformations; from the age of manual writing with pen on paper to the printing press era to becoming entirely digitized.
This article will discuss creating custom summer concert tickets using Nuxt.js and Cloudinary. After reading this article, we’ll have learned how to create custom concert tickets in Nuxt.js using images stored in Cloudinary by applying Cloudinary transformations.
Nuxt.js is a Vue.js based, open-source JavaScript library that improves building server-rendered Vue.js applications, leading to more performant web applications.
Cloudinary is a cloud-based video and image management platform that offers services for managing and transforming uploaded assets for usage on the web.
We completed this project in a CodeSandbox. Fork and run it to quickly get started.
Check out the complete source code here.
Understanding this article requires the following:
- Installation of Node.js
- Basic knowledge of JavaScript
- Familiarity with Nuxt.js
- A Cloudinary account (sign up here).
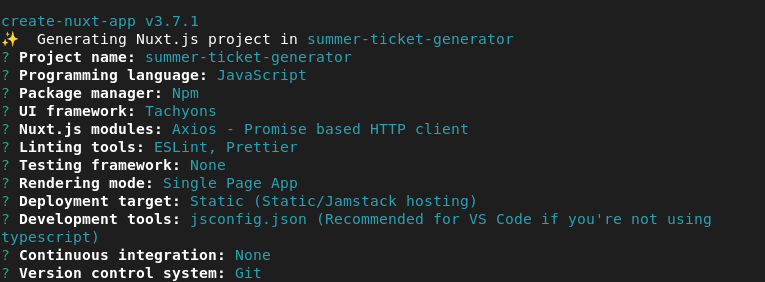
Use npx create-nuxt-app <project-name> to create a new Nuxt.js project.
The process of scaffolding the project would provide a list of options, which should look like this:
After successful project creation, we’ll navigate into our directory and start our application by running the following command:
cd <project name>
npm run dev
Code language: HTML, XML (xml)
Nuxt.js will, in turn, start a hot-reloading development environment that is accessible by default at http://localhost:3000.
To use Cloudinary, we will need to create an account and also install the Cloudinary Nuxt SDK in our project, like so:
npm install @nuxtjs/cloudinary
Code language: CSS (css)We need to configure our Nuxt.js application in the nuxt.config file before we can use Cloudinary.
To do this, we will need to perform the following steps:
-
Create a
.envfile in the root of our Nuxt.js project and add our Cloudinary Cloud name, API Key, and the API Secret. We can find these by navigating to the Cloudinary dashboard. -
Register these properties in our
.envfile like so:
cloudName='***'
apiKey='***'
apiSecret='***'
Code language: JavaScript (javascript)- Register the Cloudinary component for global use in the
nuxt.config.jsfile by adding'@nuxtjs/cloudinary'in themodulessection:
modules: [ '@nuxtjs/cloudinary' ],
Code language: CSS (css)- Add a
cloudinarysection in thenuxt.config.jslike so:
cloudinary: {
  cloudName: process.env.cloudName,
  apiKey: process.env.apiKey,
  apiSecret: process.env.apiSecret,
  useComponent: true,
},
Code language: CSS (css)
The useComponent attribute is needed to make Cloudinary components like the cldimage and cldtransformation available for usage in Nuxt.js.
NB: Endeavor to replace all occurrences of “**“ with the correct values.
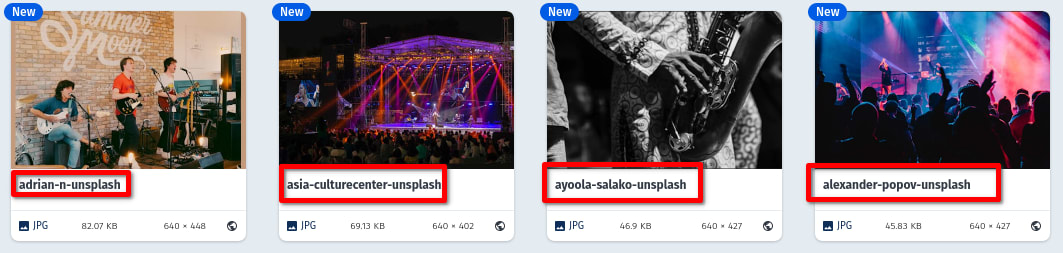
With our Nuxt.js app scaffolding completed, we’ll upload images from Unsplash to Cloudinary. Cloudinary allows us to upload images via the dashboard by clicking the Media Library tab.
![]()
After uploading the images, we will need to copy the public Id to pick each uploaded image from Cloudinary.
We will create a utils/ticket.json file which will hold the Cloudinary individual image information for each image occurrence in our application.
A sample snippet of our ticket.json file should look like this:
[
  {
    "id": 1,
    "publicId": "adrian-n-unsplash"
  }
]
Code language: JSON / JSON with Comments (json)In creating the concert ticket, we will need to set up the markup, including Cloudinary’s cld-image and cld-transformation component, which can be likened to using the native <img> tag in an HTML document.
To achieve this, we will navigate to the pages/index.vue file and replace the content with the code below:
https://gist.github.com/MoeRayo/ed2ab83e1ed3aa03e101f49ed85c802a
We achieved the following in the code snippet above:
- Imported the ticket JSON images from the
utilsfolder and declared it in the data properties before using Cloudinary images components —<cld-image />and<cld-transformation />to render the images in the application - Added a
clickfunction to the images rendered to show the active image - Created a functional form to handle user input for the concert’s title and artist’s name
- Added an error message to prompt users to select an image and fill the input fields before submission
- Added a
dataproperty to manage the form data, error message, and other vital properties
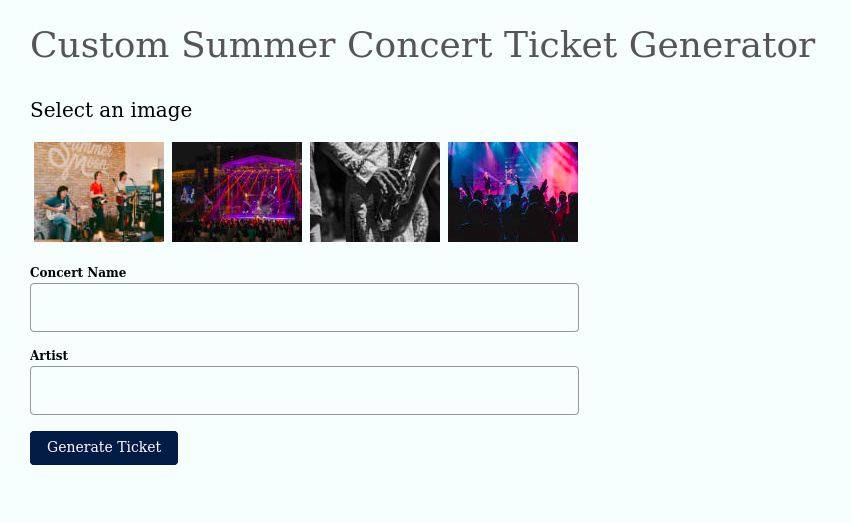
After this stage, our page should look like the image below:
To generate a concert ticket, we’ll create a component that renders the generated concert ticket when the handleSubmit function linked to the “Generate Ticket” button is clicked.
We will create a file named GeneratedConcertTicket.vue in the components folder and add the code below to the file.
<template>
  <div>

    <cld-image ref="ref" :public-id="publicId">

      <cld-transformation effect="blur:150"/>
      <cld-transformation effect="brightness_hsb:-30"/>
      <cld-transformation :overlay="{fontFamily: 'Metal Mania', fontSize: 60, fontWeight: 'bold', text: concertName, testAlign: 'center'}" color="#fff" opacity="90" crop="fit" width="550" effect="shadow"/>
      <cld-transformation flags="layer_apply"/>
      <cld-transformation :overlay="{fontFamily: 'Courgette', fontSize: 15, fontWeight: 'bold', text: `Artist: ${artist}`}" color="#fff" effect="shadow"  crop="fit" width="120" />
      <cld-transformation flags="layer_apply" gravity="south_east" x="150" y="80" />

    </cld-image>
  </div>
</template>
<script>
export default {
  props: {
    concertName: {
      type: String,
      required: true
    },
    artist: {
      type: String,
      required: true
    },
    publicId: {
      type: String,
      required: true
    },
  },
}
</script>
Code language: HTML, XML (xml)
We achieved the following using the snippet above:
- Rendered the generated ticket using Cloudinary’s
<cld-image />and<cld-transformation />. - Configured the Cloudinary components to accept the
concertName,artist, andpublicIdas props. - Cloudinary components support asset transformations, which we leveraged by blurring, changing the width, and cropping images. We also added text transformations like the font family and colors to achieve the desired ticket image.
To render the GeneratedConcertTicket.vue component, in our view, we will need to import it into the index.vue file where it is conditionally rendered:
https://gist.github.com/MoeRayo/428a0ab260f1b477c8f68dda2928b1a6
The handleSubmit method verifies whether an image is selected and if the concert title and artists were added before conditionally rendering the GeneratedConcertTicket.vue component with the expected props.
At this stage, our application should look like this.

To share the generated ticket, we will modify the GeneratedConcertTicket.vue component by adding functionality to create the image URL and a button that enables us to copy the URL.
Thus, we’ll add the following code in the components/GeneratedConcertTicket.vue.
<template>
<div>

  <cld-image ref="ref" :public-id="publicId">

    <cld-transformation effect="blur:150"/>
    <cld-transformation effect="brightness_hsb:-30"/>
    <cld-transformation :overlay="{fontFamily: 'Metal Mania', fontSize: 60, fontWeight: 'bold', text: concertName, testAlign: 'center'}" color="#fff" opacity="90" crop="fit" width="550" effect="shadow"/>
    <cld-transformation flags="layer_apply"/>
    <cld-transformation :overlay="{fontFamily: 'Courgette', fontSize: 15, fontWeight: 'bold', text: `Artist: ${artist}`}" color="#fff" effect="shadow"  crop="fit" width="120" />
    <cld-transformation flags="layer_apply" gravity="south_east" x="150" y="80" />

  </cld-image>
  <div class="mv4">
    <label class="db mb2 f3 fw4 b">Shareable link</label>
    <input disabled type="text" class="db w-90 pv3 ph2 br2 ba b--black-40 f7" :value="url" />
    <button class="f6 link dim br2 ph3 pv2 db white bg-dark-green ba b--green mt2" @click="copyUrl">{{share}}</button>
  </div>

</div>
</template>
<script>
export default {
props: {
  concertName: {
    type: String,
    required: true
  },
  artist: {
    type: String,
    required: true
  },
  publicId: {
    type: String,
    required: true
  },
},
data() {
  return {
    url: "",
    share: 'Share Link'
  };
},
mounted() {
  this.$nextTick(() => {
    this.url = this.$refs.ref.$el.src
  });
},
methods: {
  copyUrl(){
    navigator.clipboard
    .writeText(this.url)
    .then(() => (this.share = 'Copied!'))
    .catch((err) => err)
  }
},
}
</script>
Code language: HTML, XML (xml)
The code block above does the following:
- Adds a ref attribute to the
cld-imagecomponent to access thesrcattribute of the rendered image in the DOM - Creates a
urlin thedataoptions, which is initialized to “empty” but gets updated with the imagesrcvalue when the component is mounted - Added a
copyUrlmethod that copies the updated URL to the clipboard for easy sharing
Our application, at this stage, should look like this:
Click here to find the shareable link from the generated concert ticket.
This post explains creating a custom summer concert ticket using Nuxt.js and Cloudinary transformations.