
AI has so transformed and automated a lot of activities that with OCR (Optical Character Recognition), we can now get all texts from images without having to type them out as we have been doing manually.
NuxtJS is a Vue.js based, open-source JavaScript library that improves building server-rendered Vue.js applications, leading to more performant web applications.
Cloudinary is a cloud-based video and image management platform that offers services for managing and transforming uploaded assets for usage on the web. The OCR add-on for text detection and extraction is also a part of the solutions rendered by Cloudinary. In this article, we will be explaining how to detect and extract texts from images in NuxtJS using the OCR add-on from Cloudinary.
We can find the completed project on CodeSandbox. Fork it and run the code.
Check out the complete source code here.
Understanding this article requires the following:
- Installation of Node.js
- Basic knowledge of JavaScript
- Familiarity with NuxtJS
- A Cloudinary account (sign up for a free account here)
Use npx create-nuxt-app <project-name> to create a new NuxtJS project.
The process of scaffolding the project would provide a list of options, which should look like this:

After successful project creation, we’ll navigate into our directory and start our application by running the following command:
cd <project name>
npm run dev
Code language: HTML, XML (xml)
NuxtJS
will, in turn, start a hot-reloading development environment that is accessible by default at http://localhost:3000.
Our project requires the OCR text detection and extraction add-on from Cloudinary. To use the add-on in code, we must register for it via the Cloudinary dashboard. We will log into our Cloudinary dashboard and choose the Add-ons tabs from the available options on the navigation bar.

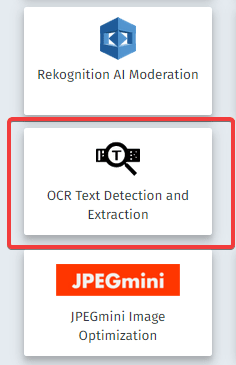
Clicking on the tab above shows all the available add-ons on Cloudinary, from which we will choose the OCR text detection and extraction add-on:
Choosing the add-on prompts us to view a well-detailed tab about the add-on. For this demo, we will pick the free plan:

To allow people to transform images on the fly without verification using Cloudinary’s authenticated API, we will navigate to the Settings and click on the security option. This will show a bunch of options for us to activate or deactivate. In our case, we will look out for the Unsigned add-on transformations allowed options and check like so:

We will need to link the unsigned add-on to an upload preset, enabling us to upload and transform our assets on Cloudinary. To do this, we will pick the upload option from the settings tab and look for the upload presets. From the upload preset, we can either decide to choose an existing preset and modify or create a new unsigned preset like so:

The above will create a new unsigned preset that we can modify. Clicking on the newly created preset will take us to an inner page. Here, we can see the OCR in the Media analysis and AI tab.

We are ready to begin working on our application with all these fully set.
We will be adding an input UI that allows the user to upload an image from which we can extract texts. To do this, we will add the block of code below in the pages/index.vue.
<template>
  <div class="flex flex-column flex-row-ns pa3 calisto bg-black-05 vh-100">
    <form enctype="multipart/form-data" class="w-50-ns w-100 ph3">
      <h2>Upload Image</h2>
      <div class="b--dashed bw1 b--light-purple pa3 hover-bg-black-10 bg-animate pointer relative h4">
        <input type="file" accept="image/*" class="input-file absolute w-100 h4 pointer o-0">
        <p class="tc f4">
          Drag your file here to begin<br> or click to browse
        </p>
      </div>
      <button class="bg-light-blue pa3 mv4 link dim br2 pointer ba b--light-blue dib">Extract Text</button>
    </form>
    <section class="w-40-l w-50-m w-100 ph3">
      <h2>Extracted Text</h2>
      <div class="bg-light-blue br3 h-auto pa3 f4 lh-copy">
        Lorem ipsum dolor sit amet consectetur adipisicing elit. Officia autem veritatis facere commodi, id repellat accusantium. Aliquam animi quaerat ullam vero ad. Nam, laudantium at. Vitae maiores beatae nostrum! Corporis delectus inventore dolor, necessitatibus, ipsa voluptate aspernatur ipsum officia earum, at reiciendis atque beatae illum libero eligendi eius vel! Ex.
      </div>
      <button class="bg-black pa3 mv4 link dim br2 pointer ba b--black dib white">Copy to clipboard</button>
    </section>
  </div>
</template>
Code language: HTML, XML (xml)
We achieved the following from the above:
- Added a
<form>tag with theenctype="multipart/form-data"attribute to enable file upload. - Added
inputwith afiletype attribute to accept file upload and with theaccept="image/*"attribute, we restricted the input to only taking images - Created a section with placeholders showing where the extracted text from images should appear
At this point, our UI should look like the image below:

To handle the file upload to be displayed in the UI, we will create a utils/file-upload.service.js and add the code block below:
function upload(formData) {
  const photos = formData.getAll('photos');
  const promises = photos.map((x) => getImage(x)
  .then(img => ({
    id: img,
    originalName: x.name,
    fileName: x.name,
    url: img
  })));
  return Promise.all(promises);
}
function getImage(file) {
  return new Promise((resolve, reject) => {
    const fReader = new FileReader();
    const img = document.createElement('img');
    fReader.onload = () => {
      img.src = fReader.result;
      resolve(getBase64Image(img));
    }
    fReader.readAsDataURL(file);
  })
}
function getBase64Image(img) {
  const canvas = document.createElement('canvas');
  canvas.width = img.width;
  canvas.height = img.height;
  const ctx = canvas.getContext('2d');
  ctx.drawImage(img, 0, 0);
  const dataURL = img.src;
  return dataURL;
}
export { upload }
Code language: JavaScript (javascript)
The code above reads the image to be uploaded, draws it into a canvas, and then converts it to a Base64 string.
We want to delay the file upload for some seconds in order to see the different states change. We can do this by adding the code block below in the utils.wait.js file:
function wait(ms) {
  return (x) => {
    return new Promise(resolve => setTimeout(() => resolve(x), ms));
  };
}
export { wait }
Code language: JavaScript (javascript)
Bringing all these together, we can add the code block below in the pages/index.vue
https://gist.github.com/MoeRayo/a9269165f91638d5dd7d3f9ae87f2abd
In the code block above, we have achieved the following:
- Created
STATUS_INITIAL,STATUS_SAVING,STATUS_SUCCESS, andSTATUS_FAILEDstatuses to reflect different states - Created a
new FormDatato append the uploaded images - Added a
savefunction that calls the file upload service - Have a
mounted()hook, one of Vue’s lifecycle hooks which calls thereset()method and sets the state toSTATUS_INITIAL - The
filesChangemethod check for theFileListobject returned by the<input>element, which gives us access to the image uploaded
With the step above, we have been able to handle the file upload. To see the changes in the UI, we will now update the HTML template of the pages/index.vue with the following:
https://gist.github.com/MoeRayo/6ecf42d7a1f1a7d69efc9c18ccb11a40
At this stage, our UI should look like the below after a successful image upload:

Using the Cloudinary OCR add-on, we can extract the texts from images. We will add the code below in the pages/index.vue.
https://gist.github.com/MoeRayo/2ce47e5a43e273fedd1e86c455a567bb
NB: Endeavor to replace all occurrences of “***” with the correct values.
From the above, we achieved the following:
- Added
dataproperties for managing some core Cloudinary features, namely,ocr,preset, andcloudName - Added a
dataproperty for the extracted texts returned from the Cloudinary API - Added a method,
detectText, executed when the “extract text” button is triggered. This method runs theprepareFormDatafunction that contains the form data - Used Axios to post data to the Cloudinary endpoint using the request object options of the
url, POSTmethod, and theformData - Used destructuring to get data back, after which the extracted text can be shown in the browser
To copy the generated text to the clipboard for easy sharing, we will modify the pages/index.vue like so:
<template>
  <div class="flex flex-column flex-row-ns pa3 calisto bg-black-05 vh-100">
    <section class="w-40-l w-50-m w-100 ph3">
      <h2>Extracted Text</h2>
      <div class="bg-light-blue br3 h-auto pa3 f4 lh-copy">
        {{detectedText}}
      </div>
      <button class="bg-black pa3 mv4 link dim br2 pointer ba b--black dib white" @click="copyText">{{shareText}}</button>
    </section>
  </div>
</template>
<script>

export default {
  data() {
    return {
      detectedText: '',
      shareText: 'Copy Text'
    }
  },
  methods: {
    copyText(){
      navigator.clipboard
      .writeText(this.detectedText)
      .then(() => (this.shareText = 'Copied!'))
      .catch((err) => err)
    }
  }
}
</script>
Code language: HTML, XML (xml)
At this point, our application should look like the below:
This article explains how to detect and extract text from images using Cloudinary’s OCR add-on.