
Building web applications involves displaying text, videos, and images to users. Sometimes, the sheer size of these assets could cause application lag; therefore, the need to display these assets in bits to users.
Developers have devised several means of compressing images, and notable among these are applying pagination to make users’ experience better. The use of an infinite scroll has proven to provide a better user experience. Building an infinite scroll into projects has gotten even easier with the introduction of the Intersection Observer API in browsers.
This tutorial will walk you through implementing infinite scroll in an image gallery using the intersection observer web API.
The completed project can be found on CodeSandbox. Fork it and run the code.
Check out the complete source code in this Github repository.
Infinite scroll is an interactive feature that automatically loads more content as the user scrolls through the page – meaning it creates a seemingly endless page.
The interactivity has successfully eliminated the friction of pagination and led to increasing engagement – little wonder you’d see it on almost all social media platforms and E-commerce websites.
“Just a few more shoes to check….” But you never get to the end of the seemingly endless list of shoes before you doze right off!
This tutorial will leverage the Intersection Observer API to achieve infinite scroll.
The Intersection Observer API is a browser API that allows you to track a DOM element’s location and visibility relative to a specified defined root element before calling a callback function if certain circumstances are satisfied.
While monitoring the visibility of the target DOM element, the root element is the ancestor of the target element that acts as the viewport for checking the element’s visibility.
This root element will automatically traverse up the DOM tree to the browser’s viewport if no target element is specified.
There are several use cases for the Intersection Observer API, but the focus will be on implementing the infinite scroll.
This tutorial assumes the reader has the following:
- Node.js installed on their computer
- Basic knowledge of JavaScript
- Familiarity with Nuxt.js
- Tachyons CSS Toolkit
- Unsplash account
Open a terminal on your computer and run the following command.
npm init nuxt-app intersection-observer
cd intersection-observer
npm run dev
Running npm run dev starts the project on the development server at localhost:3000 in your browser.

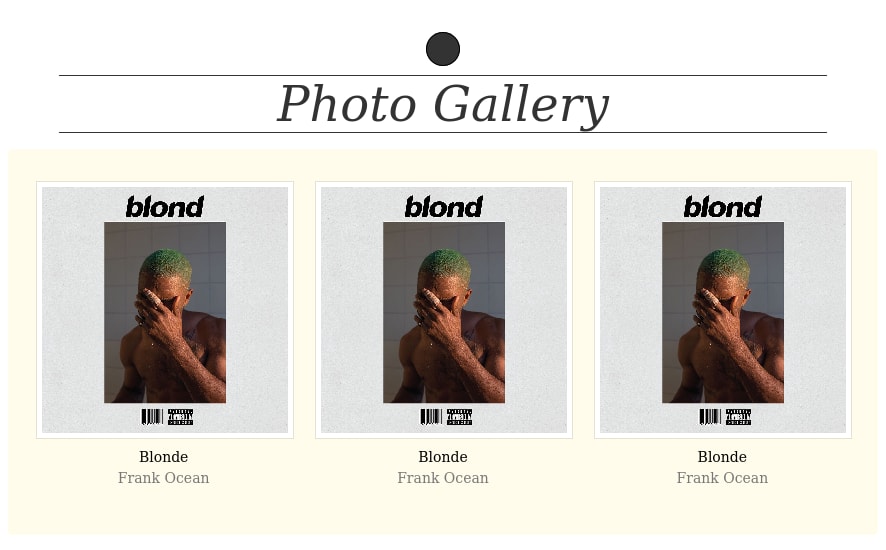
Before wading through an endless list of images, you’ll build a skeleton interface to lay the foundation of your gallery.
The grid of images across each row shows a photo gallery.
Navigate to the components folder, create a Gallery.vue file and add the code block below.
<template>
  <div class="pv4 ph3 bg-washed-yellow h-100 mv3 mh2 br2">
    <div class="flex flex-wrap justify-between-l justify-center">
      <a class="db center mw5 tc black link dim" title="Frank Ocean's Blonde on Apple Music" href="https://geo.itunes.apple.com/us/album/blonde/id1146195596?at=1l3vqFJ&mt=1&app=music">
        <img class="db ba b--black-10" alt="Frank Ocean Blonde Album Cover" src="https://s3-us-west-1.amazonaws.com/tachyonsio/img/Blonde-Frank_Ocean.jpeg">
        <dl class="mt2 f6 lh-copy">
          <dt class="clip">Title</dt>
          <dd class="ml0">Blonde</dd>
          <dt class="clip">Artist</dt>
          <dd class="ml0 gray">Frank Ocean</dd>
        </dl>
      </a>
    </div>
  </div>
</template>
Code language: HTML, XML (xml)
Proceed to the index.vue file in the pages folder and import the Gallery component below the GalleryHeader component.
At this point, your pages/index.vue should look like this:
<template>
  <div>
    <GalleryHeader />
    <Gallery />
  </div>
</template>
Code language: HTML, XML (xml)
Your webpage should then look like this:
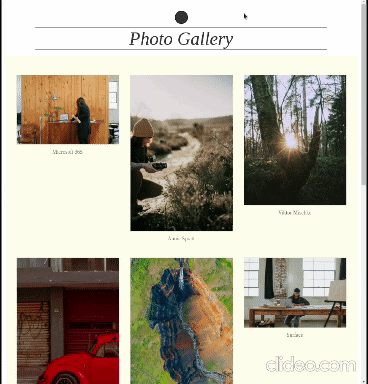
After setting up the basic UI skeleton for the page, the next thing to be done is to add dynamic images that populate automatically from an API. This article will be using the unsplash API. This tutorial focuses more on using the Intersection Observer API for infinite scroll. Here is a comprehensive guide written by the Unsplash team to guide you on setting up an Unsplash account up.
At the end of this setup, your components/gallery.vue should look like the below:
<template>
  <!--  repeated code removed -->
  <a v-for="image in imageList" :key="image.id" class="w-100 w-40-m w-30-l db center tc black link dim ma2" href="">
    <img class="db center ba b--black-10 ma2" :src="image.urls.small" :alt="image.alt_description" >
    <dl class="mt2 f6 lh-copy">
      <dt class="clip">Artist</dt>
      <dd class="ml0 gray">{{image.user.name}}</dd>
    </dl>
  </a>
</template>
<script>
  import axios from "axios"
  export default {
    data: () => ({
      imageList: [],
      page: 1
    }),
    mounted(){
      this.imageIntersected()
    },
    methods: {
      imageIntersected() {
          axios
            .get(
              `https://api.unsplash.com/photos?page=${this.page}&per_page=21&w=1280&h=1280`,
              {
                headers: {
                  Authorization:
                    "Client-ID {add your client-ID here}",
                  "Accept-Version": "v1"
                }
              }
            )
          .then(response => {
            this.page++;
            const lists = response.data;
            this.imageList = [...this.imageList, ...lists];
          })
          .catch(() => {
            this.imageList = [];
        });
      }
    }
  }
</script>
Code language: HTML, XML (xml)
The imageIntersected method gets dynamic images from the unsplash API in the code above. The imageList array displayed in the v-for gets populated with the data obtained when this method is mounted.
Instead of Unsplash, you could use data of images stored locally or retrieved from an API.
Your UI, in return, should look like this:

Using the Intersection Observer API in your code involves several things – but foremost is using the object constructor function to create a new instance of the Intersection Observer like so:
new IntersectionObserver()

const observer = new IntersectionObserver(callbackFunction, options);
const targetElement = document.querySelector(".observer");

observer.observe(targetElement);
Code language: JavaScript (javascript)
The IntersectionObserver receives two arguments – the first is the callback function and the second is the options.
- Callback function: The intersection of targeted elements with viewport execute the call back function.
- Options: The options argument is optional, but its added function controls how the observer function executes.
The options argument is an object and can have fields like: root, threshold and rootMargin.
const options = {
  root: null,
  rootMargin: "50px",
  threshold: 1.0
};
observer.observe(targetElement, options);
Code language: JavaScript (javascript)With the basics of using the Intersection Observer API in your code being covered, get started with integrating it in your photo gallery project.
Create a components/Observer.vue file and add the code below:
<template>
  <div class="observer"/>
</template>
<script>
  export default {
    props: {
      options: {
        type: Object
      }
    },
    data: () => ({
      observer: null,
    }),
    mounted() {
      const observerOptions = this.options || {};
      this.observer = new IntersectionObserver(([entry]) => {
      if (entry && entry.isIntersecting) {
        this.$emit("intersect");
        }
      }, observerOptions);
        this.observer.observe(this.$el);
      },
      destroyed() {
        this.observer.disconnect();
    },
  };
</script>
Code language: HTML, XML (xml)Register the Observer.vue component in the Gallery.vue component to get the expected result.
At this point, Gallery.vue should look like this:
<template>
  <div class="pv4 ph3 bg-washed-yellow h-100 mv3 mh2 br2">
    <div class="flex flex-wrap justify-between-l justify-center">
      <a
        v-for="image in imageList"
        :key="image.id"
        class="w-100 w-40-m w-30-l db center tc black link dim ma2"
        href="#"
      >
        <img
          class="db center ba b--black-10 ma2"
          :src="image.urls.small"
          :alt="image.alt_description"
        />
        <dl class="mt2 f6 lh-copy">
          <dt class="clip">Artist</dt>
          <dd class="ml0 gray">{{ image.user.name }}</dd>
        </dl>
      </a>
      <Observer @intersect="imageIntersected" />
    </div>
  </div>
</template>
<script>
  import axios from "axios";
  import Observer from "@/components/Observer";
  export default {
    components: {
      Observer,
    },
    data: () => ({
      imageList: [],
      page: 1,
    }),
    methods: {
      imageIntersected() {
        axios
          .get(
            `https://api.unsplash.com/photos?page=${this.page}&per_page=10&w=1280&h=1280`,
          {
            headers: {
              Authorization: `Client-ID {add your unsplash Client Id here}`,
              "Accept-Version": "v1",
            },
          }
        )
         .then((response) => {
           this.page++;
           const lists = response.data;
           this.imageList = [...this.imageList, ...lists];
         })
        .catch(() => {
          this.imageList = [];
        });
      },
    },
  };
</script>
Code language: HTML, XML (xml)
At this point, more images should automatically load as you navigate through the application in your browser.
This post has gone through building a photo gallery that has infinite scroll implemented using the Intersection Observer and Unsplash APIs.
The resources below will be helpful for further studies: