
Generating thumbnails for a photo gallery can feel tedious if you have to do it all by hand. With Cloudinary, we can automatically generate thumbnails from our full-size images that focus in on faces. In this tutorial, we’ll learn how to automatically generate both full-sized and thumbnail images for a React-powered photo gallery.
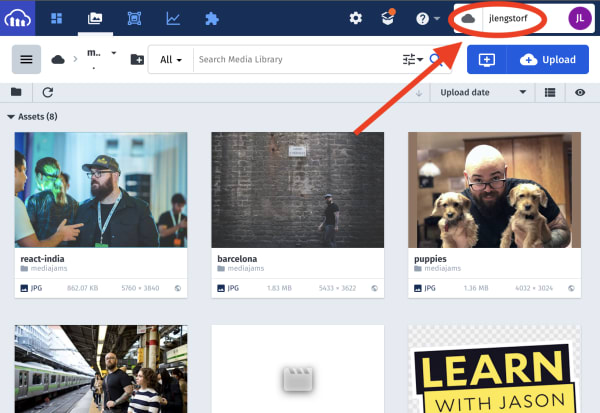
First, we need to get all of our images uploaded to Cloudinary. The fastest way to do this is using the Cloudinary console.
For this tutorial, we’ll use four images:
- https://res.cloudinary.com/jlengstorf/image/upload/mediajams/tokyo.jpg
- https://res.cloudinary.com/jlengstorf/image/upload/mediajams/react-india.jpg
- https://res.cloudinary.com/jlengstorf/image/upload/mediajams/puppies.jpg
- https://res.cloudinary.com/jlengstorf/image/upload/mediajams/barcelona.jpg
With these photos uploaded, we can create a photo gallery in React!
To display images, we’ll need to generate Cloudinary URLs for both full-size and thumbnail images. Since this will be essentially the same except for the transformations we apply, let’s write a utility function to avoid duplicating our code.
function getImageUrl({ cloudName, publicId, transformations }) {
  return `https://res.cloudinary.com/${cloudName}/image/upload/${transformations}/${publicId}.jpg`;
}
Code language: JavaScript (javascript)
This function accepts a config object with three properties: cloudName, publicId, and transformations.
The cloudName should contain our Cloudinary cloud name, which is displayed at the top-right of the console.
The publicId will contain the public ID of the image to display. For example, if we wanted to show one of our images listed above, we could pass in mediajams/tokyo.
Finally, the transformations will contain a string of image transformations that allow us to do things including resizing and cropping the image. This is what makes automatic thumbnail creation possible!
Using the getImageUrl() utility, we can define a React component to display our full-size images.
function Image({ cloudName, publicId, alt }) {
  const imageSource = getImageUrl({
    cloudName,
    publicId,
    transformations: "q_auto,f_auto,c_fill,g_face,w_400,ar_1"
  });

  return <img src={imageSource} alt={alt} />;
}
Code language: JavaScript (javascript)
This applies the following transformations:
- Automatic quality and format optimizations to reduce image sizes for performance
- Fill cropping to make sure all the images are the same size
- Centering the cropped image on the subject using face detection in the gravity transformation
- Resizing the width to 400px
- Setting the aspect ratio to square (1:1)
The result will be an optimized, square image, 400px wide, with the subject’s face centered in the cropped image.
To display thumbnails, we can use almost exactly the same setup as the Image component, but we make a couple small adjustments to the transformations:
function Thumb({ cloudName, publicId, alt }) {
  const imageSource = getImageUrl({
    cloudName,
    publicId,
    transformations: "q_auto,f_auto,c_thumb,g_face,w_50,ar_1"
  });

  // add the full URL to a standard HTML5 video element
  return <img src={imageSource} alt={alt} />;
}
Code language: JavaScript (javascript)
We resize to 50px and switch over to thumb cropping, which will zoom in on the face found in the photo for a more interesting thumbnail.
Now that we can generate both images and thumbnails, we can combine them to create a photo gallery!
First, we set up an array with our image data:
const photoArray = [
  { publicId: "mediajams/tokyo", alt: "Jason on a train platform in Tokyo" },
  {
    publicId: "mediajams/react-india",
    alt: "Jason talking to someone at React India"
  },
  { publicId: "mediajams/puppies", alt: "Jason holding two puppies" },
  {
    publicId: "mediajams/barcelona",
    alt: "Jason walking along an alley in Barcelona"
  }
];
Code language: JavaScript (javascript)
Then, we can create a component to display them!
function App() {
  const [selected, setSelected] = React.useState(photoArray[0]);

  return (
    <main>
      <h1>Photo Gallery With Automatic Thumbnails Using React & Cloudinary</h1>
      <div className="gallery">
        <Image
          cloudName="jlengstorf"
          publicId={selected.publicId}
          alt={selected.alt}
        />
        <nav className="thumbnails">
          {photoArray.map((photo) => (
            <button
              onClick={() => setSelected(photo)}
              className={selected.publicId === photo.publicId ? "selected" : ""}
            >
              <Thumb
                cloudName="jlengstorf"
                publicId={photo.publicId}
                alt={photo.alt}
              />
            </button>
          ))}
        </nav>
      </div>
    </main>
  );
}
Code language: JavaScript (javascript)
With React state, we can keep track of which image is selected, and use that to set the full-size image.
For each image, we want to create a thumbnail wrapped in a button so we can change which image is displayed full size. On click, we call the setSelected function to update the currently selected image.
Once this is rendered on the page, we can see a fully functional image gallery with auto-generated, interesting thumbnails!