We use Slack for all kinds of tasks, like talking to coworkers and interacting with different communities. There are a lot of bots we run into that send alerts or give you other functionality like making polls. The best part is that Slack has an API that we can play with to trigger actions from a number of apps.
In this post, we’re going to build a Next app that sends a slack notification once an image has been uploaded to Cloudinary. We’ll go through how to set up the Slack app for your workspace and we’ll implement the API call inside of our app. By the time you finish this post, you should feel more comfortable working with Next and the Slack API.
$ yarn create next-app --typescript
This command will prompt you for a project name. I’ve called this project slack-notifs, but feel free to name it whatever you like. We’ll need to install the Slack package.
$ yarn add @slack/web-api
If you don’t already have a free Cloudinary account, sign up for one here. In the dashboard, get the cloud name for your account and the upload preset value from your settings. We’ll use these a bit later to upload the images.
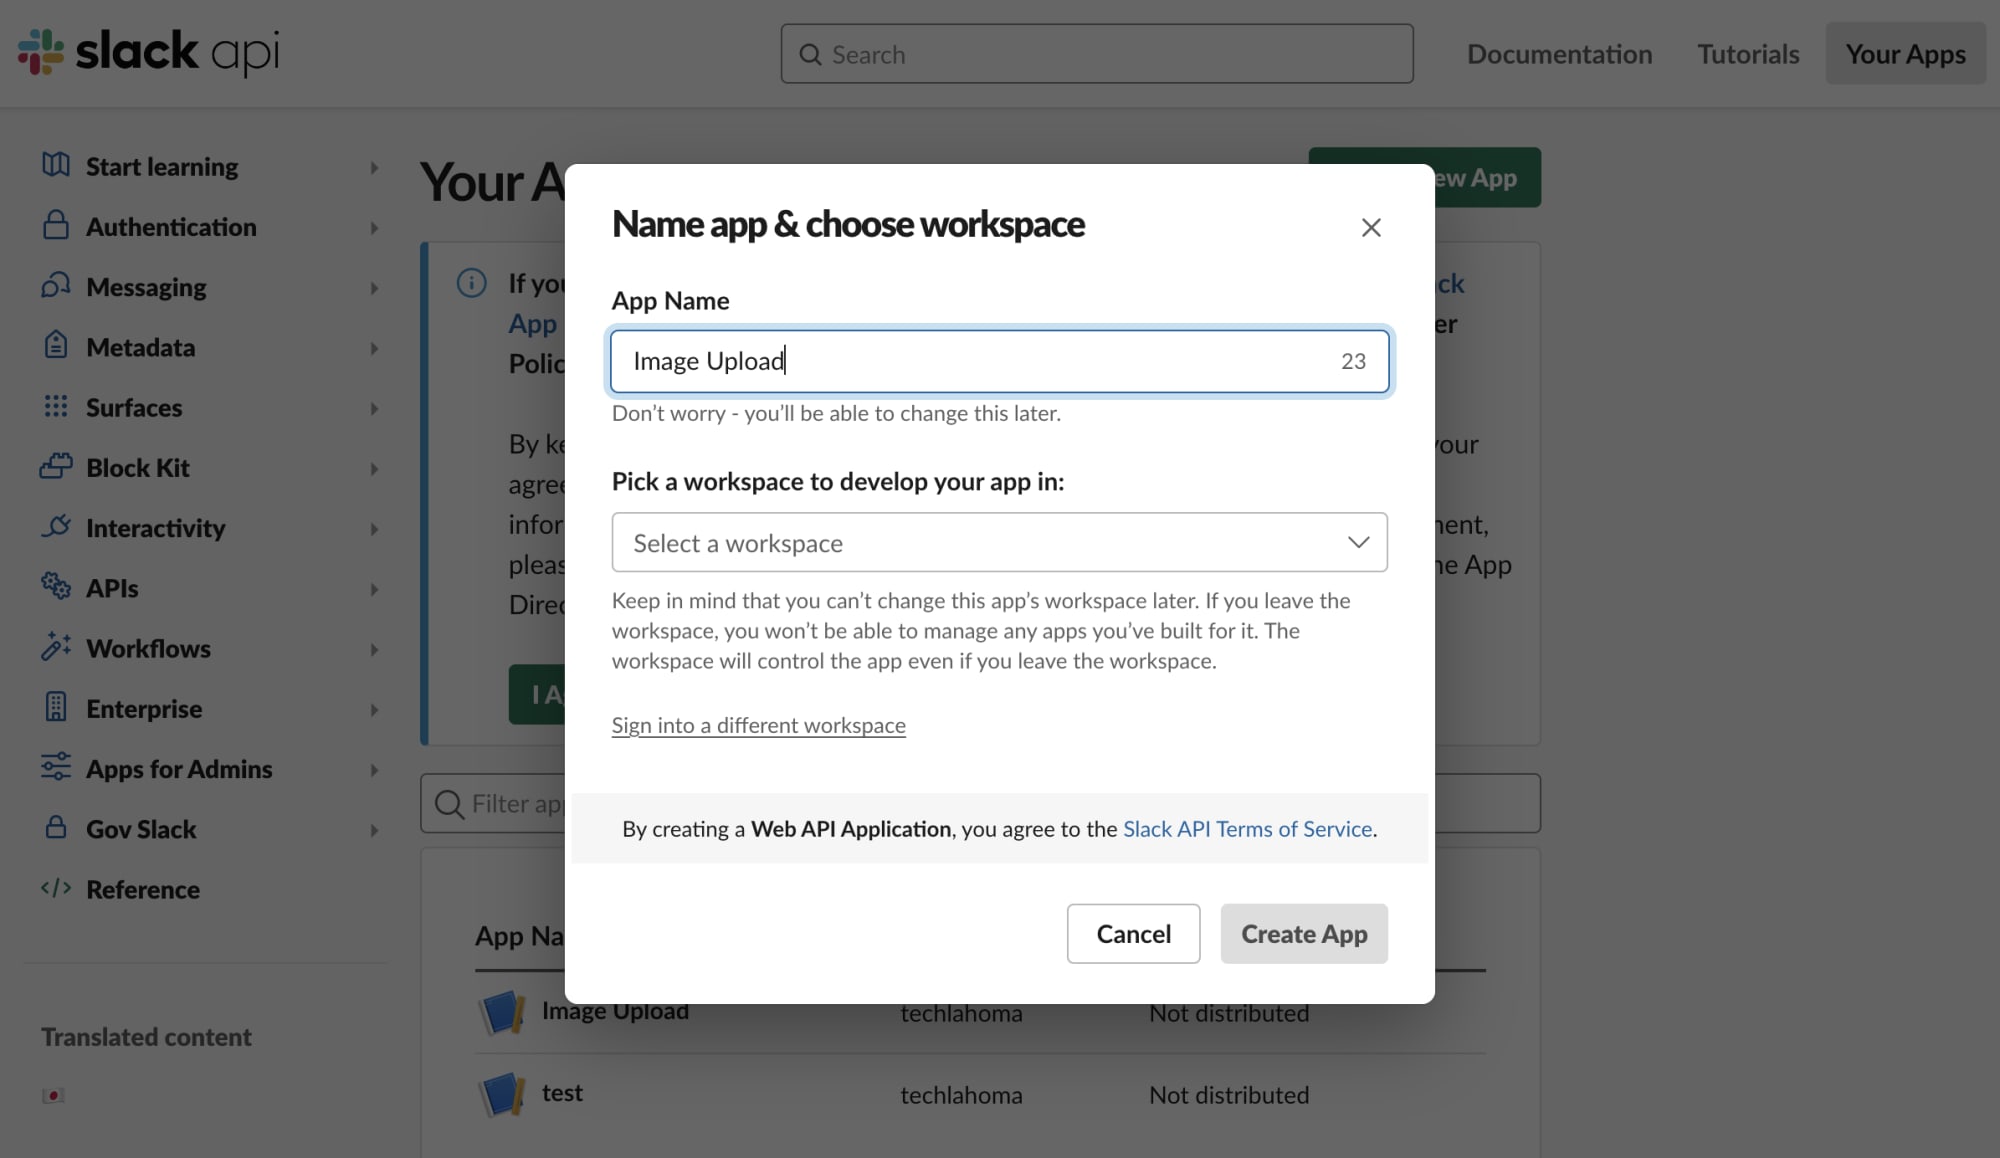
First, you’ll need to create a Slack app so that you can generate a token for the Next app. Log in to Slack in the browser and create a new app. Make sure you choose the right workspace and name the app Image Upload.
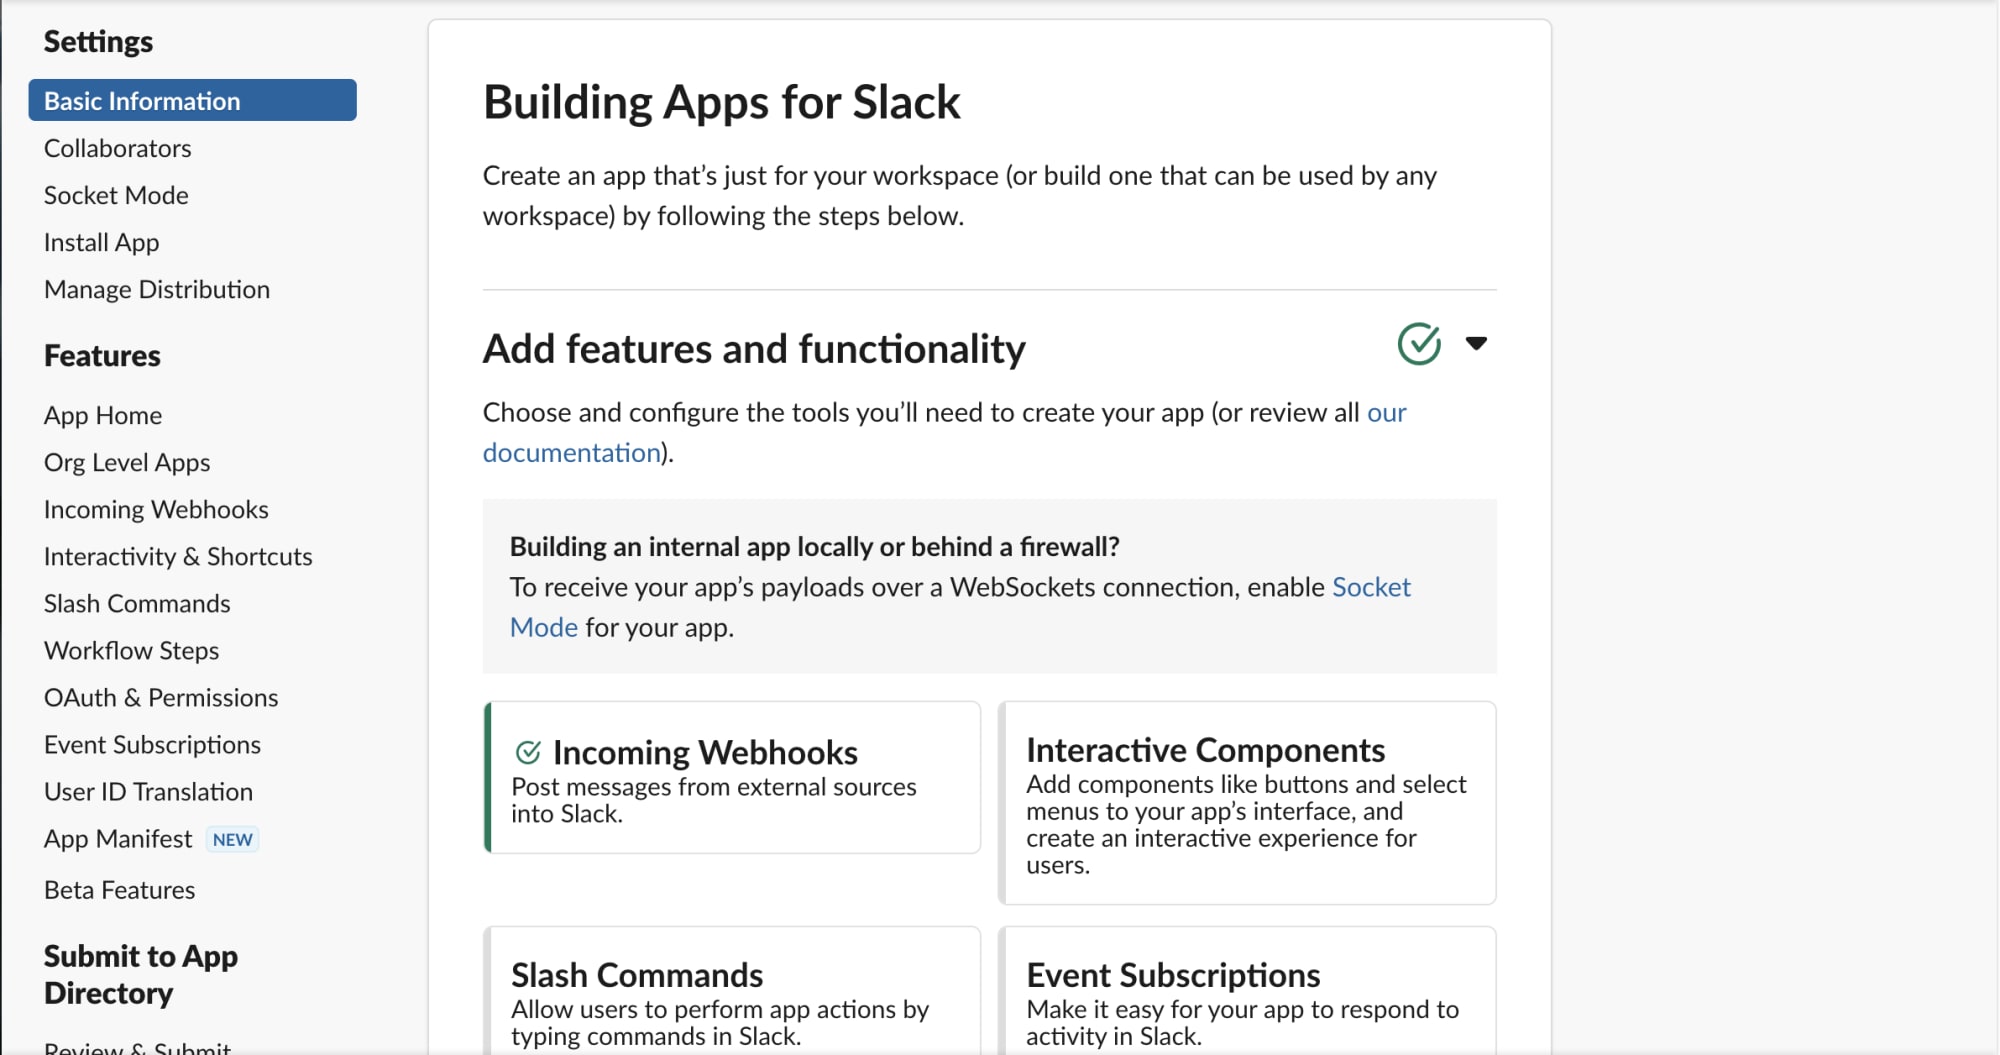
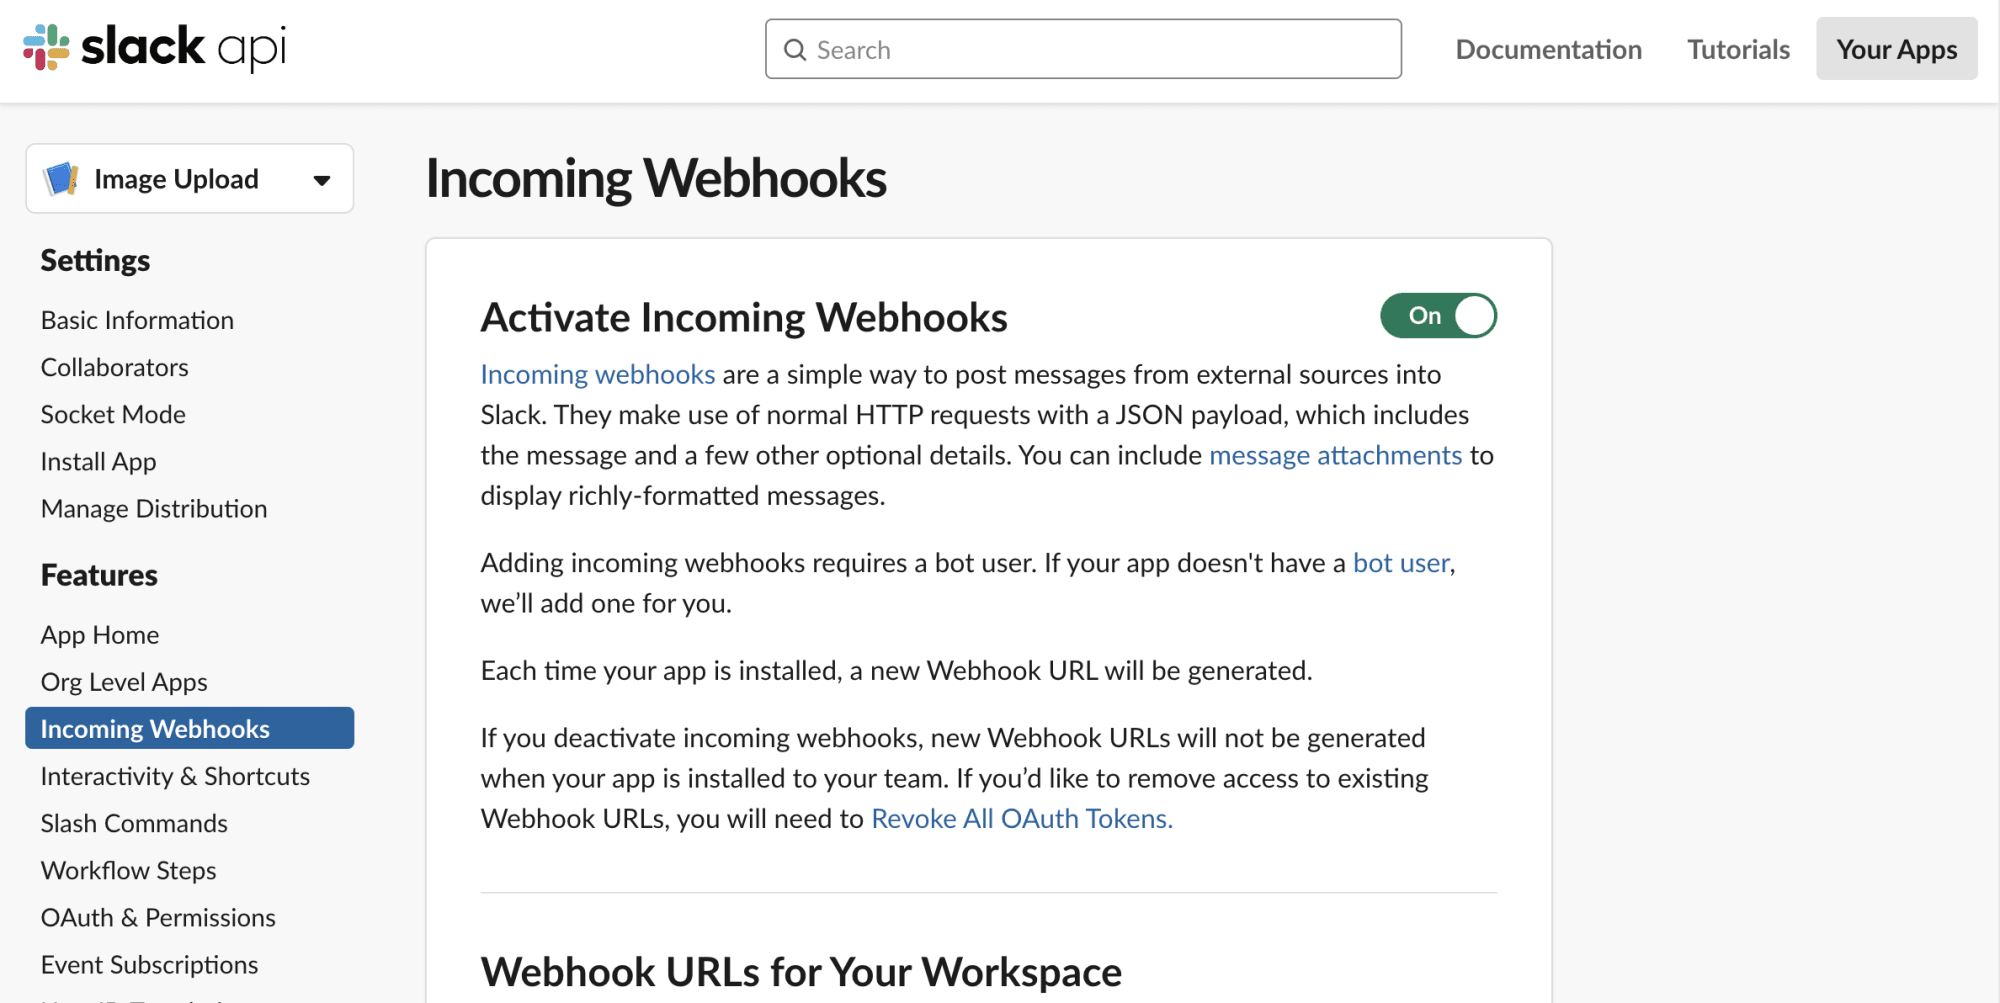
You’ll get redirected to a page with all of the app settings we need to set up to interact with this throughout Next API. Let’s start by enabling Incoming Webhooks. This is how we’ll be able to post messages from the Next API. You’ll be taken to another page where you’ll need to add a new webhook to your workspace.
Pay extra attention to the workspace permission screen so that you know you’re posting in the right channel. I have mine set to post to my direct messages to test with. After you choose the channel in your workspace, you’ll be redirected back to the Incoming Webhooks page. You should test out that the app is working as you expect by using the example cURL method generated on the page.
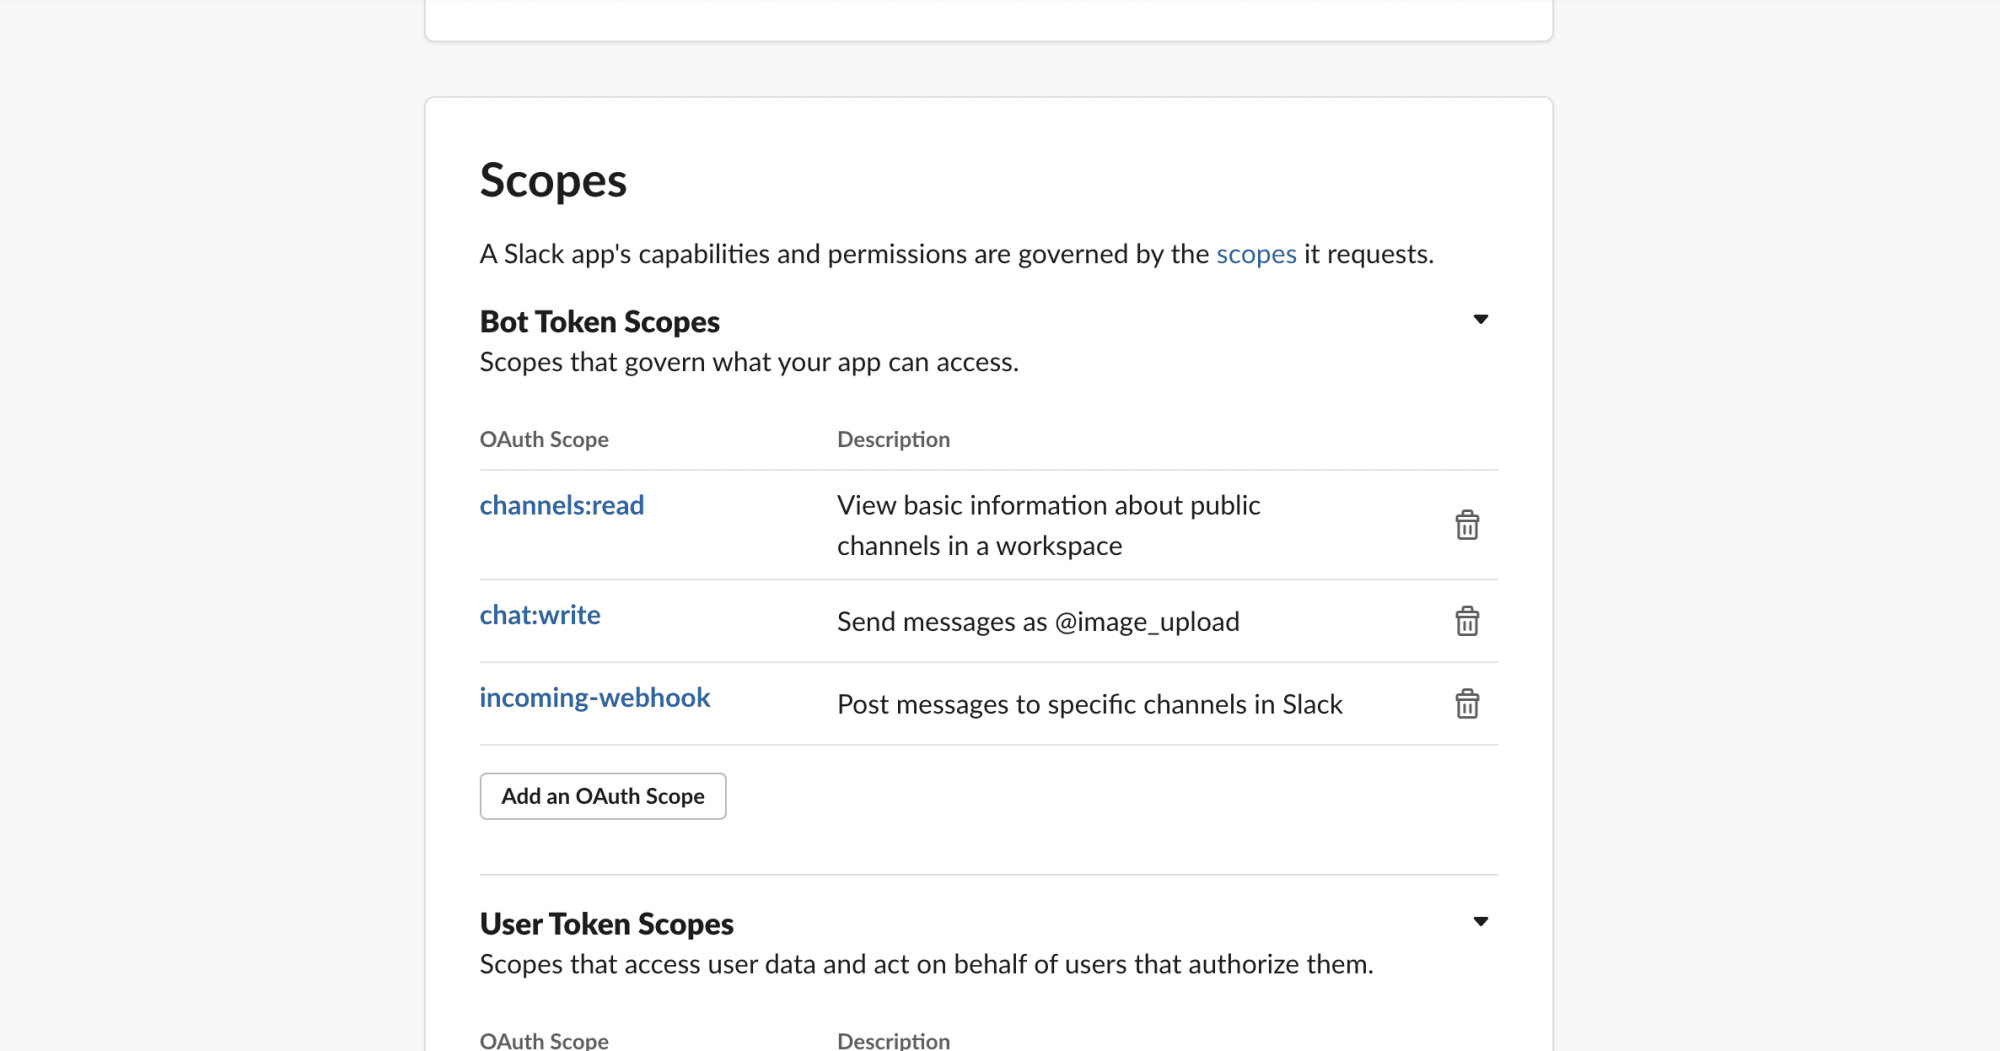
Now you need to go to the OAuth & Permissions page in the left sidebar. This is where we set the scopes for the access token we’ll use to post messages to our channel. You’ll need the channels:read, chat:write, and incoming-webhook scopes on the Bot Token Scopes.
With all of this in place, we can move in the Next app and start writing some code.
Let’s start by creating a .env file at the root of the project to hold the credentials we need to use Slack and Cloudinary. The file should look something like this.
SLACK_TOKEN=xoxb-your-token
CLOUDINARY_UPLOAD_PRESET=your-upload-preset
CLOUDINARY_CLOUD_NAME=your-cloud-name
We’re going to take advantage of Next’s built-in API functionality. With those values in place, let’s make some updates to the boilerplate code in the pages > api folder of the project. There will be a file in this folder called hello.ts. Rename it to notication.ts and open it. Delete all of the existing code out of the file and replace it with this:
// notification.ts
import type { NextApiRequest, NextApiResponse } from "next";
import { WebClient, LogLevel } from "@slack/web-api";

const client = new WebClient(process.env.SLACK_TOKEN);

type MessageData = {
  channelName: string;
  imageName: string;
  imageUrl: string;
};

export default async function handler(
  req: NextApiRequest,
  res: NextApiResponse
) {
  const body = req.body;

  await publishMessage({
    ...body,
    channelName: "zzz_test",
  });

  res.send("image uploaded successfully");
  res.status(200);
}

async function publishMessage(messageData: MessageData) {
  const channelId = await getChannelId(messageData.channelName);

  try {
    if (channelId) {
      await client.chat.postMessage({
        token: process.env.SLACK_TOKEN,
        channel: channelId,
        text: `The ${messageData.imageName} image upload is ready at ${messageData.imageUrl}`,
      });
    }
  } catch (error) {
    console.error(error);
  }
}

async function getChannelId(name: string) {
  try {
    const result = await client.conversations.list({
      token: process.env.SLACK_TOKEN,
    });

    if (result.channels) {
      const channel = result.channels.find((channel) => {
        return channel.name?.includes(name);
      });

      return channel?.id;
    }
  } catch (error) {
    console.error(error);
  }
}
Code language: JavaScript (javascript)
Let’s step through this code piece by piece. We start with the imports we’ll need from a couple of packages. Then we instantiate a new instance of the Slack client using our bot token. This client is how we’ll execute commands to post to the channel we want via the Slack API. Then we move on to define the type for the MessageData we need to send the message to the Slack channel.
Next, we define the handler function. This function is required for all endpoints in using Next as the back-end. In this function, we get the body from the request, call a function that will publish a message to Slack with the info we have, and then send a response back to the requester.
The publishMessage function first finds the channelId based on the channel name we pass in. So the getChannelId uses the Slack client to find the channel ID based on the name by looping through all of the channels in your Slack workspace. When it finds a matching channel, it sends that ID back.
Then we take the channelId and use it in the Slack client to post a message to that specific channel. The message has the name of the image we uploaded and a Cloudinary link to view it. Everything is wrapped in try-catch statements so we should catch any errors that pop up along the way.
That finishes up the back-end work! Now let’s move over to the front-end where users will upload those images to trigger the Slack message to be posted.
The front-end will be pretty bare-bones in terms of the user interface. We’ll have an image upload element and a button on the screen, but the majority of the code will handle the API request logic. We’re going to work in the pages > index.tsx file so open that and delete the existing code and replace it with the following:
import type { NextPage } from "next";
import { useState } from "react";
import styles from "../styles/Home.module.css";

const Home: NextPage = () => {
  const [uploadedImage, setUploadedImage] = useState<any>();

  const uploadFn = async (e: any) => {
    e.preventDefault();

    const dataUrl = uploadedImage;

    const uploadApi = `https://api.cloudinary.com/v1_1/${process.env.CLOUDINARY_CLOUD_NAME}/image/upload`;

    const formData = new FormData();
    formData.append("file", dataUrl);
    formData.append(
      "upload_preset",
      process.env.CLOUDINARY_UPLOAD_PRESET || ""
    );

    await fetch(uploadApi, {
      method: "POST",
      body: formData,
    }).then(async (res) => {
      const values = await res.json();

      const data = {
        name: values.original_filename,
        url: values.url,
      };

      await fetch("/api/notification", {
        method: "POST",
        body: JSON.stringify(data),
      });
    });
  };

  return (
    <div className={styles.container}>
      <main className={styles.main}>
        <input
          type="file"
          onChange={(e) => setUploadedImage(e.currentTarget.value)}
        />
        <button onClick={uploadFn}>Upload picture</button>
      </main>
    </div>
  );
};

export default Home;
Code language: JavaScript (javascript)
There’s a bit going on here so let’s walk through it. As usual, we start by importing the packages we’ll need. We will be keeping some of the styles that were part of the boilerplate code to make things a little better. Then we jump right into the Home component. We start by declaring the uploadedImage state.
Then we get to the big part of this component. The uploadFn function is how we’re going to upload an image to Cloudinary, get the image name and Cloudinary link, and make the Slack request that we built on the back-end.
First, we define the dataUrl which is where the image data will come from. Then we define the Cloudinary upload endpoint we’ll be using with the credentials we got from the Cloudinary dashboard earlier. Next, we make a new FormData object that will be sent in the upload request.
After that, we wait for a response from the Cloudinary endpoint and take that data to use in our notification endpoint. This will send the Slack message to the channel we specified.
Finally, at the bottom, you see the two elements that are rendered on the page. There’s a simple <input> element so users can upload files and a button they click when they’re ready to send the image to Cloudinary.
We’re done! Start the app locally with yarn dev and watch the messages go to your Slack channel.
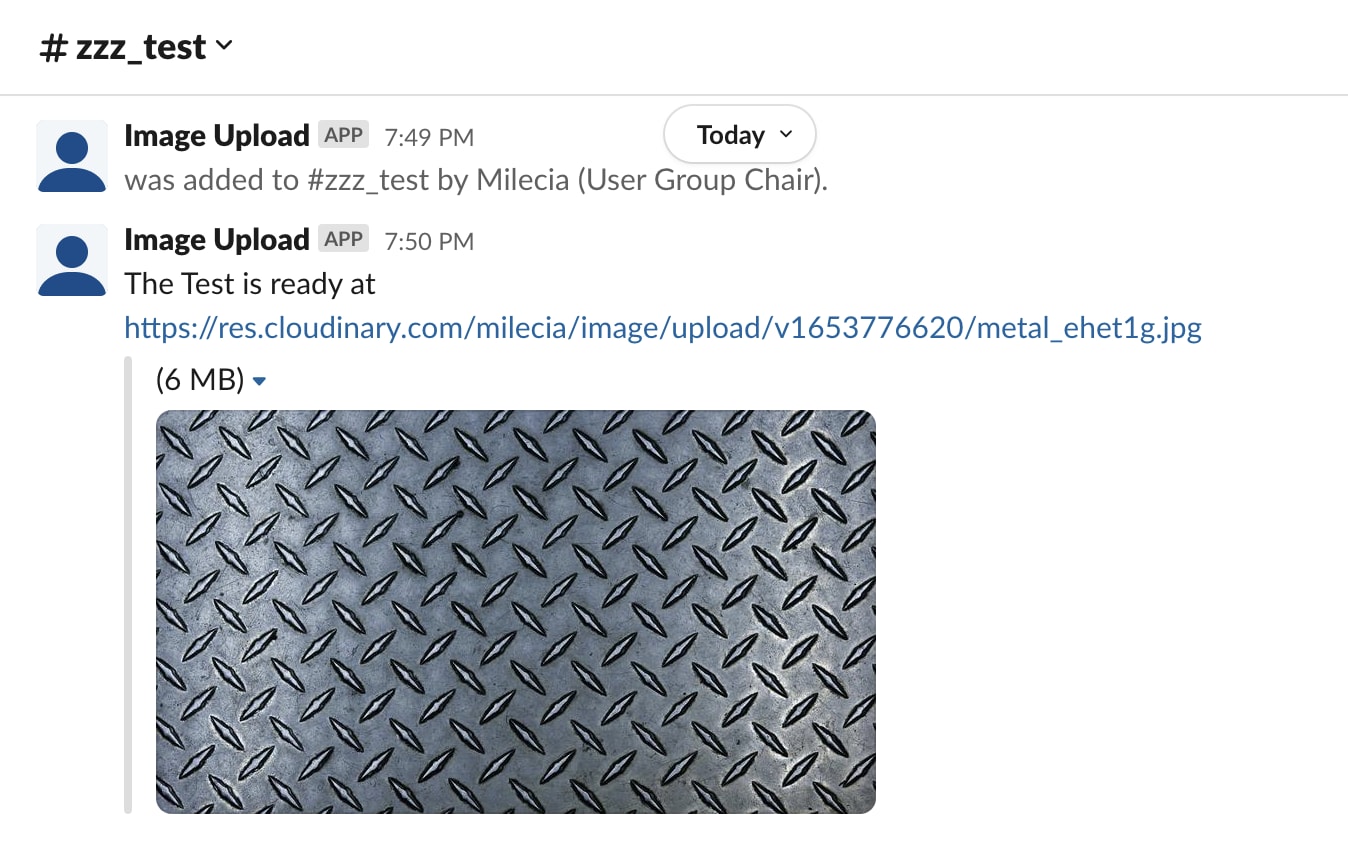
You can check out all of the code in the slack-notifs folder of this repo. You can also check out the app in this Code Sandbox.
Working with third-party APIs comes up in almost every app. Since Slack is a commonly used tool across the tech industry, having some practice working with it and the issues that arise will help sharpen your developer skills and push you to think about implementations from a few angles. Just always make sure to check the documentation!
