
The use of multimedia on the web has gone mainstream primarily because of obvious benefits such as increased user engagement, dwell time, improved SEO, etc. Getting it right with media assets on the web entails dealing with optimization, delivery, transformation, and other management tasks. Fortunately, technologies like Cloudinary offer scalable, performant, and easy-to-use tools for practically all media management concerns.
In this post, we will upload files from a simple React app using a Cloudinary backend SDK on a Node.js web server.
Run this command in your terminal to create the working directory:
mkdir cloudinary-react-node
We’ll also need two subdirectories within the cloudinary-react-node directory. Run this command to create them:
cd cloudinary-react-node
mkdir frontend server
Our React app, and its dependencies, will be kept in the frontend folder, while our backend code will be in the server folder.
Let’s initialize the working directory to be able to install the necessary dependencies that will be used for our backend. Run this command:
npm init --y
Next, run the following command in your terminal to install the dependencies for our backend:
npm install express multer cloudinary cors dotenv
The above command installs several modules: express will be used to build our web server, all the necessary routes, and handling middleware. multer is a middleware used to parse multipart form data, which includes files from the HTTP request body. The cloudinary SDK will provide us with easy-to-use APIs to upload parsed files to our Cloudinary account and do any media file manipulations as the need be. The cors module is also another middleware that would help us with CORS errors, and finally, the dotenv module will allow us to parse environment variables defined in a .env file.
Run this command to create a file within the server folder, where we will write our serverside logic:
touch server/index.js
Now let’s run the following command to set up our React app in the frontend folder created earlier:
npx create-react-app frontend
Run this command to install the dependency for our React app — the axios module, which will be our HTTP client:
cd frontend
npm install axios
We are not done with our setup yet. We need a way to automate the task of starting our React app and our web server concurrently. Within the working directory, run this command in your terminal to install the concurrently module:
npm i concurrently --save-dev
Next, update the scripts object within the package.json file in the root of the working directory to match the following:
      "scripts": {
        "backend": "node server/index.js",
        "frontend": "npm run start --prefix frontend",
        "dev": "concurrently \"npm run backend\" \"npm run frontend\""
      },
Code language: JavaScript (javascript)
Here, we included three scripts, the first two are for starting our Node server and our React app, respectively, and the third uses the concurrently module to start both of them concurrently.
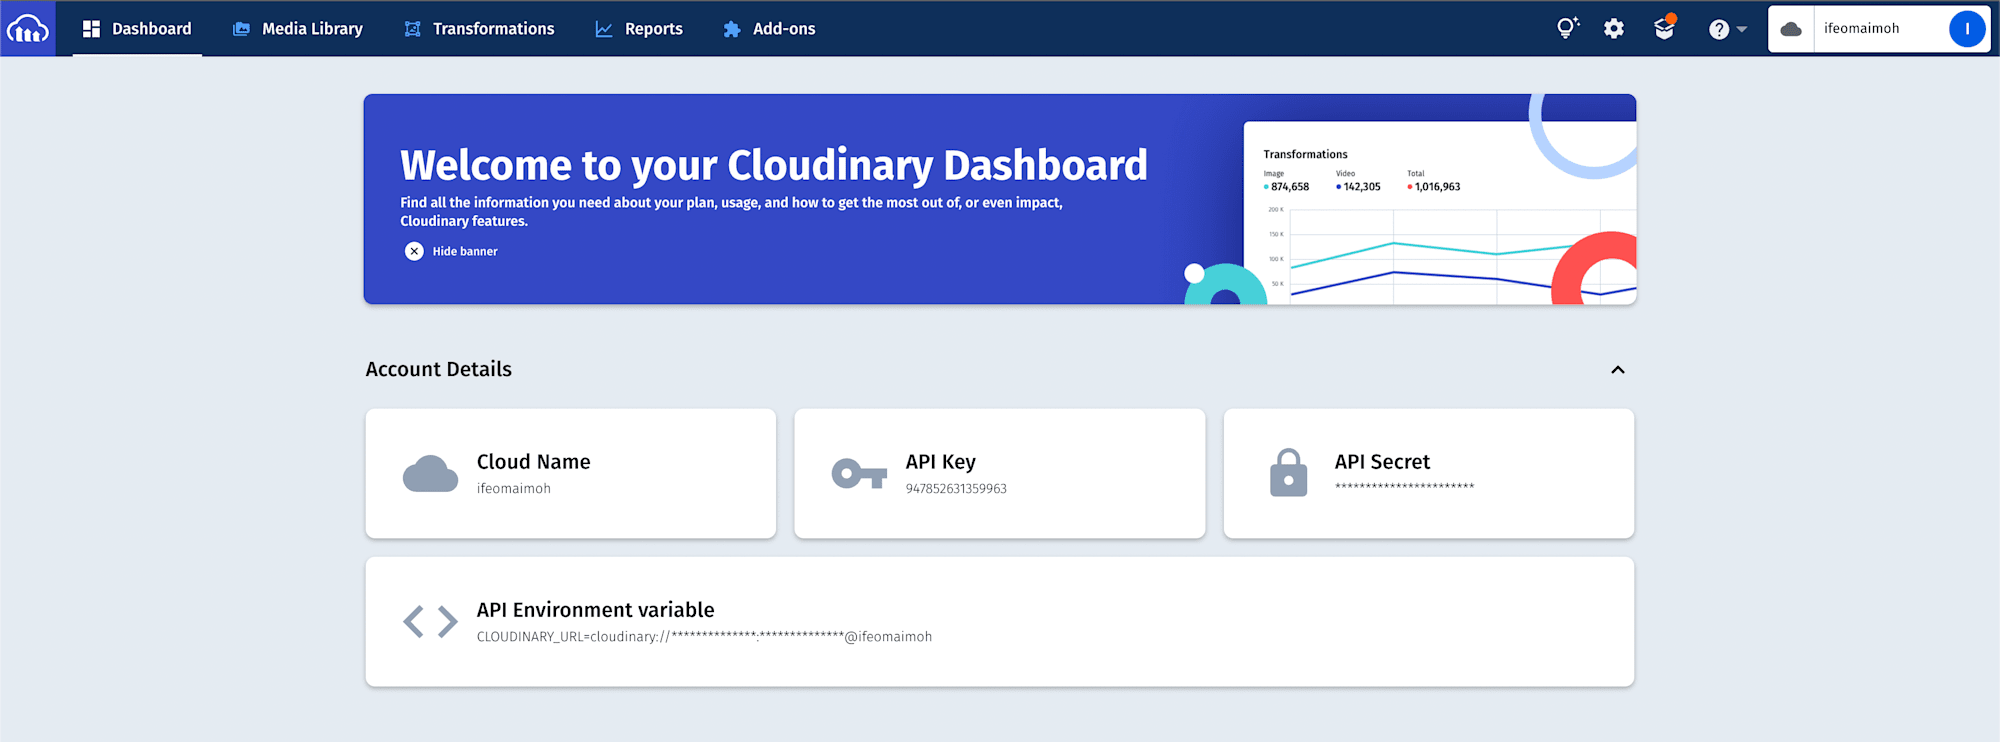
To use Cloudinary’s provisioned services, you need to first sign up for a free Cloudinary account if you don’t have one already. Displayed on your account’s Management Console (aka Dashboard) are important details: your cloud name, API key, etc.
Next, let’s create environment variables to hold the details of our Cloudinary account. Create a new file called .env at the root of your project and add the following to it:
    CLOUD_NAME = YOUR CLOUD NAME HERE
    API_KEY = YOUR API API KEY
    API_SECRET = YOUR API API SECRET
You can update the .env file with your Cloudinary credentials.
In the following steps, we will update our server.js file with the logic needed to set up our web server and include the endpoint that will enable us to upload files to Cloudinary.
- Let’s start by including the necessary imports we will be needing. Add the following to your
server.jsfile:
require("dotenv").config();
const express = require("express");
const cloudinary = require("cloudinary").v2;
const cors = require("cors");
const Multer = require("multer");
Code language: JavaScript (javascript)- Next, let’s set up our Cloudinary SDK and define a function that will help us with file uploads.
cloudinary.config({
  cloud_name: process.env.CLOUD_NAME,
  api_key: process.env.API_KEY,
  api_secret: process.env.API_SECRET,
});
async function handleUpload(file) {
  const res = await cloudinary.uploader.upload(file, {
    resource_type: "auto",
  });
  return res;
}
Code language: JavaScript (javascript)
In the code above, we import Cloudinary and configure it with an object consisting of our Cloudinary credentials. Next, we define the handleUpload function, which accepts a file and attempts to upload the file. The upload is made possible by calling the upload method on the cloudinary object, and it accepts two parameters. The first is the file to be uploaded, and the second is an object that holds the options we want for the uploaded file.
When we do uploads from the server, the upload call assumes that the file is an image, i.e., resource_type: "image", but setting the resource_type to auto automatically detects the file type during the upload process. Once the file is successfully uploaded, the response we get from the API is returned.
- Next, let’s set up the multer middleware.
const storage = new Multer.memoryStorage();
const upload = Multer({
  storage,
});
Code language: JavaScript (javascript)
Multer provides us with two storage options: disk and memory storage. In the snippet above, we create and initialize a Multer instance and select the memory storage option.
Now, let’s use the Express module to create a web server to listen for requests. We will also create an endpoint to handle file uploads.
const app = express();
app.use(cors());

app.post("/upload", upload.single("my_file"), async (req, res) => {
  try {
    const b64 = Buffer.from(req.file.buffer).toString("base64");
    let dataURI = "data:" + req.file.mimetype + ";base64," + b64;
    const cldRes = await handleUpload(dataURI);
    res.json(cldRes);
  } catch (error) {
    console.log(error);
    res.send({
      message: error.message,
    });
  }
});
const port = 6000;
app.listen(port, () => {
  console.log(`Server Listening on ${port}`);
});
Code language: JavaScript (javascript)
We create an instance of express and store it in a variable called app; this is followed by including the cors middleware. Then we create an endpoint that will route any POST requests made to the /upload path, with two middlewares to handle the request.
The first is the multer middleware we created earlier. The upload.single("my_file") call returns a function that is set up to parse a single file contained in the request body with a named attribute — my file (this is the name we would bind to the file before it is uploaded on the client-side).
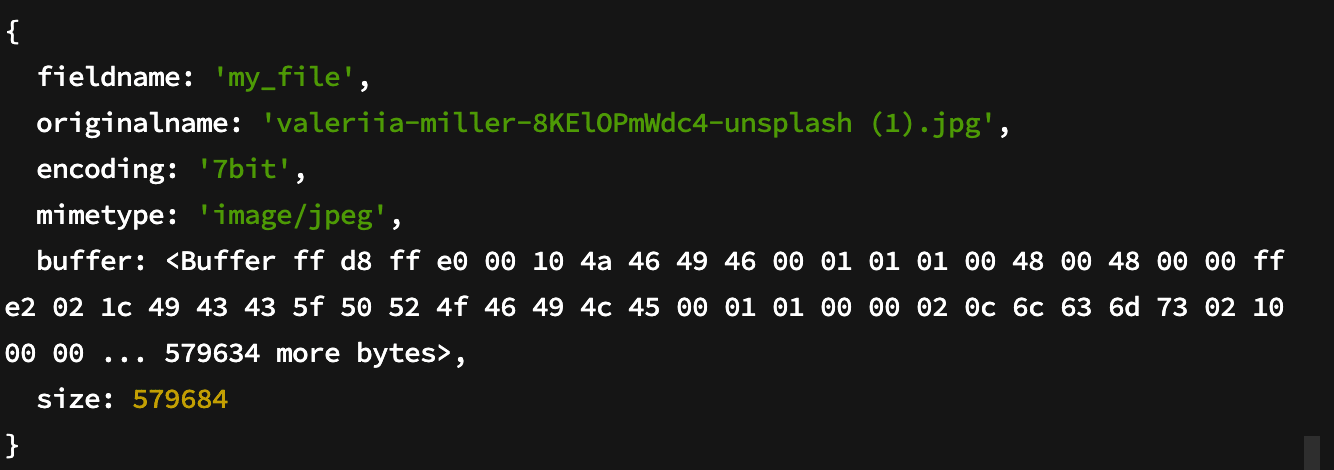
Once the file is parsed successfully, the multer middleware attaches a file property to the request body, i.e., req.file, which contains information about the file. Since we are using the memoryStorage option to store our file, the object looks like this for some images:
The Second middleware then takes the request body, converts the buffer in the parsed file to base64, and further transforms this representation to a data URI, which is then fed to the handleUpload function to upload. Once it succeeds, we send the upload response we get from cloudinary back to the client-side, and if it fails, the error response is sent back.
We now have our web server ready. Next, let’s build our frontend application that will communicate with it. Open the frontend folder and update the content of the src/App.js file with the following:
import "./index.css";
import { useState } from "react";
import axios from "axios";

function App() {
  const [file, setFile] = useState(null);
  const [loading, setLoading] = useState(false);
  const [res, setRes] = useState({});
  const handleSelectFile = (e) => setFile(e.target.files[0]);
  const handleUpload = async () => {
    try {
      setLoading(true);
      const data = new FormData();
      data.append("my_file", file);
      const res = await axios.post("http://localhost:6000/upload", data);
      setRes(res.data);
    } catch (error) {
      alert(error.message);
    } finally {
      setLoading(false);
    }
  };

  return (
    <div className="App">
      <label htmlFor="file" className="btn-grey">
        {" "}
        select file
      </label>
      {file && <center> {file.name}</center>}
      <input
        id="file"
        type="file"
        onChange={handleSelectFile}
        multiple={false}
      />
      <code>
        {Object.keys(res).length > 0
          ? Object.keys(res).map((key) => (
              <p className="output-item" key={key}>
                <span>{key}:</span>
                <span>
                  {typeof res[key] === "object" ? "object" : res[key]}
                </span>
              </p>
            ))
          : null}
      </code>
      {file && (
        <>
          <button onClick={handleUpload} className="btn-green">
            {loading ? "uploading..." : "upload to cloudinary"}
          </button>
        </>
      )}
    </div>
  );
}
export default App;
Code language: PHP (php)
This component is quite straightforward; it simply allows the user to select a file from their computer, provides them with a button to upload the file, and displays the result received from the server on the screen if the upload is successful. The centerpiece of this component is the function called handleUpload, which performs file uploading through the following steps:
-
It embeds the file selected by the user into the request payload using the FormData API with a name attribute called
my_file— a string that matches the one we configured on our server using the Multer middleware. -
The payload is then used to initiate an HTTP request to our backend. If the request is successful, the response is stored in a state variable called
res, which is iterated on and rendered to the screen; otherwise, an error message is displayed.
We’ll also need some styles to give the application a nice appearance. Copy the styles in this codeSandbox link to your index.css file.
To preview the running application, let’s start our web server and React app. Run this command in your terminal:
npm run dev

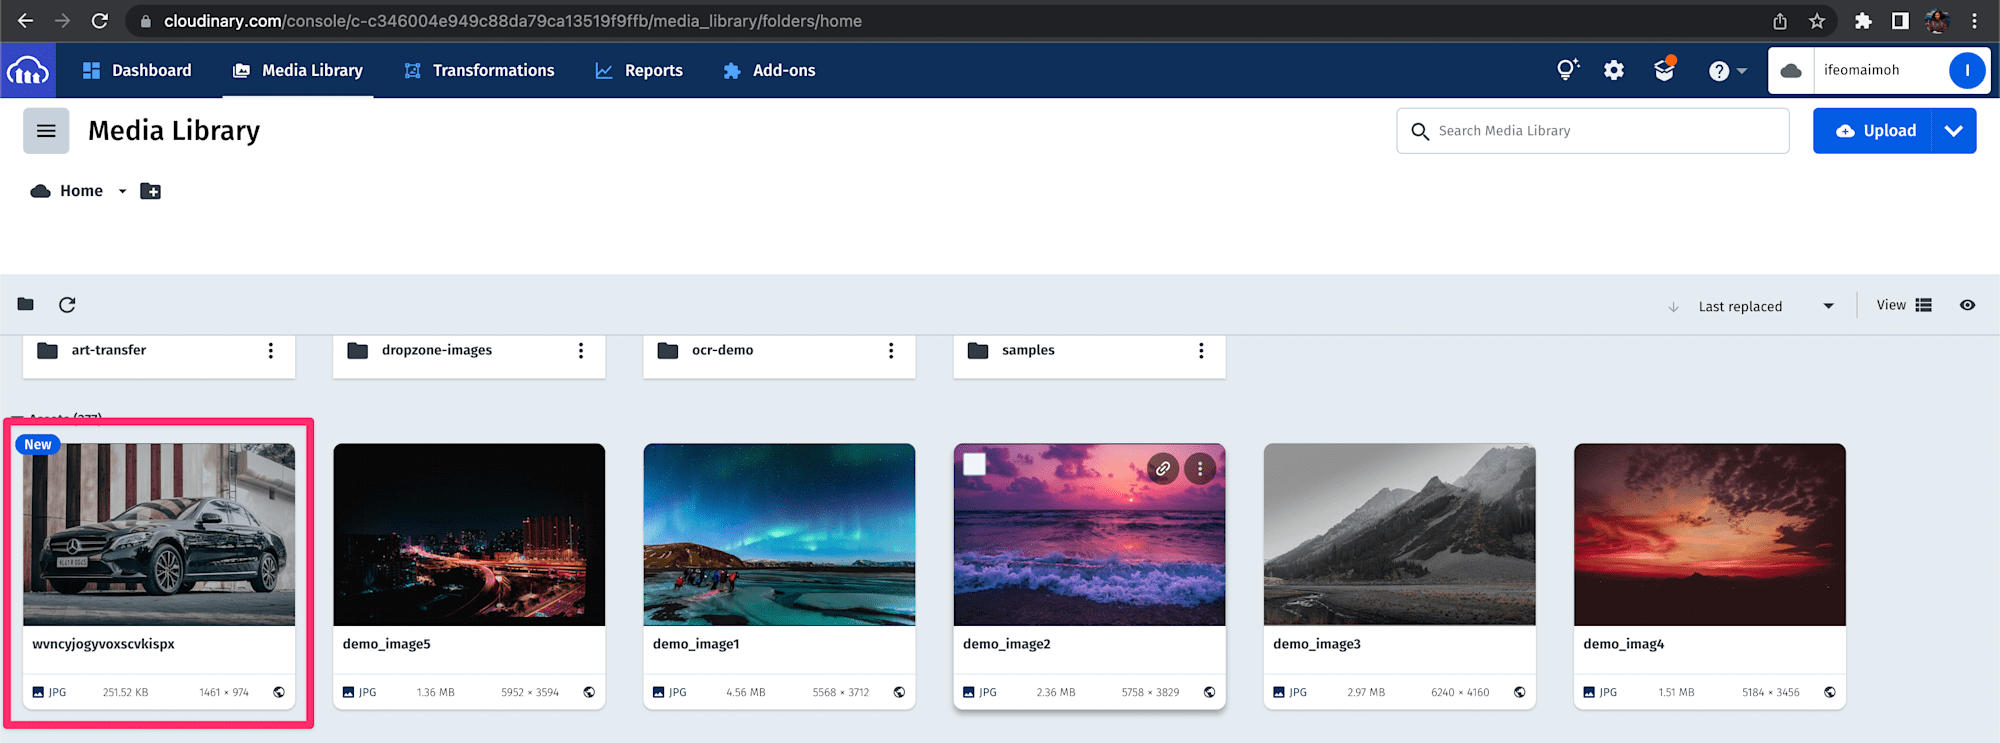
As seen above, we get the upload response displayed on the screen. You can also visit the media gallery section on your cloudinary account to see the uploaded file.
Find the complete project here on GitHub.
When working with media assets, platforms like Cloudinary provide you with an advantage. Hopefully, using this as a jumping-off point, you can go further and explore the platform’s advanced features.


