
Azure functions provide an elegant serverless solution that allows users to build applications by writing pieces of event-driven functions relevant to their business logic without focusing on scaling and managing infrastructures. Cloudinary, on the other hand, is a PaaS that provides an excellent solution for storing and managing media assets(images, videos, etc.).
This article will illustrate how to upload media assets to Cloudinary with an Azure serverless function. First, we will create an azure project locally that would hold a single serverless function to handle file uploads. Next, we will deploy the local project to the cloud to make the serverless functions globally accessible. Finally, we will expose and trigger the serverless function via a traditional HTTP request from a simple React application with the desired files.
Let’s get started! Here’s a link to the demo on CodeSandbox.
To follow along with this tutorial, you will need to have:
- NodeJs installed on your machine.
- Basic knowledge of ReactJs.
- Basic understanding of the Azure platform.
Let’s set up our project environment; open your terminal, and run the following:
    # create a React app and install axios
    mkdir frontend
    npx create-react-app frontend
    cd frontend
    npm i axios

    # create an empty node project and install Cloudinary
    cd ../
    mkdir azurefunc
    cd azurefunc
    npm init --y
    npm install cloudinary
Code language: PHP (php)
The source code of our application will live in two folders. The folder frontend will hold our React application, while the folder azurefunc will hold the local copy of our serverless functions.
The command above creates both folders, then bootstraps a react application in the frontend folder and installs the axios dependency. Next, it initializes the azurefunc folder and installs the Cloudinary SDK, which will be used to upload media assets to Cloudinary.
To be able to upload media assets to Cloudinary, we need our Cloudinary credentials. If you don’t have a Cloudinary account yet, sign up for a free account here. Log in after creating your account, and on your dashboard page, you should see your credentials (cloud name, etc.).
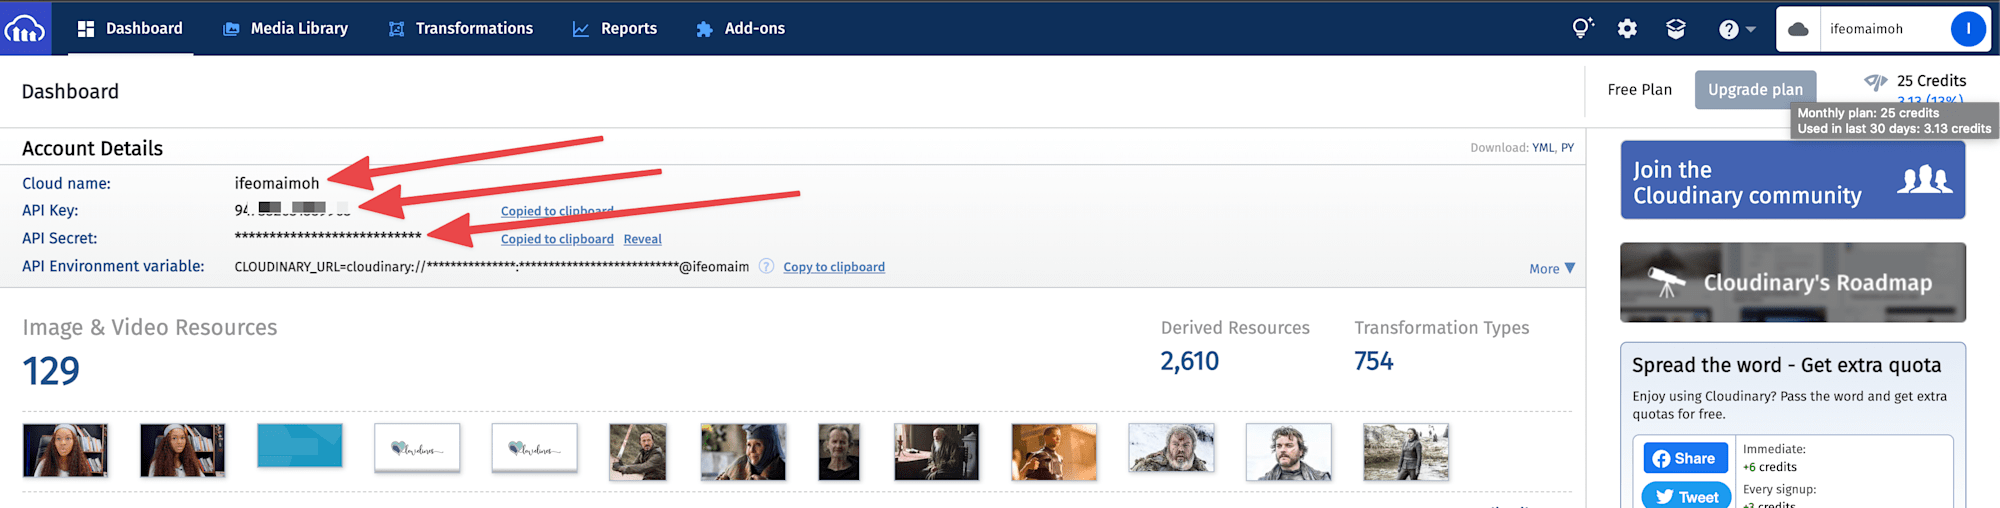
Our credentials will be stored in an environment variable when we configure our function project.
The Azure cloud platform allows users to create and test functions directly from the dashboard. Regardless, the recommended approach is to develop and test serverless functions locally before deploying to the cloud, and that’s what we will be doing.
The terminal commands from here should be done in the
azurefuncfolder unless stated otherwise.
For convenience, we will also use the Visual Studio Code Azure tool extension, which integrates all the CLI tools and provides an easy-to-use interface to work with the function project.
We need two CLI tools:
- Azure CLI tool: we will be using this tool to access and manage our resources; download here.
- Azure core function tools will be used to bootstrap, debug, and test our local function project. This tool requires the Azure CLI tool as a dependency when executing some commands.
Run the following in your terminal to install this tool.
npm i -D azure-functions-core-tools
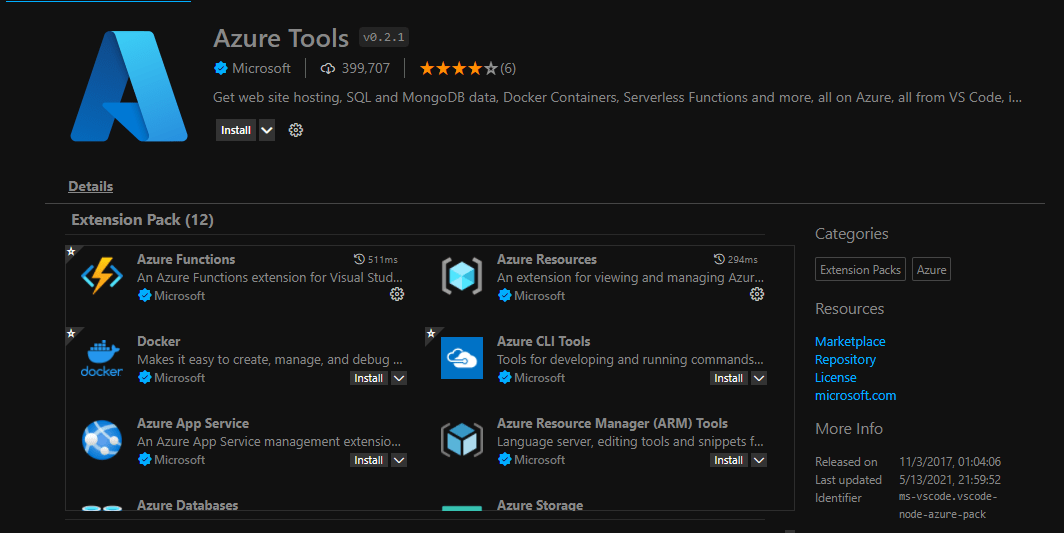
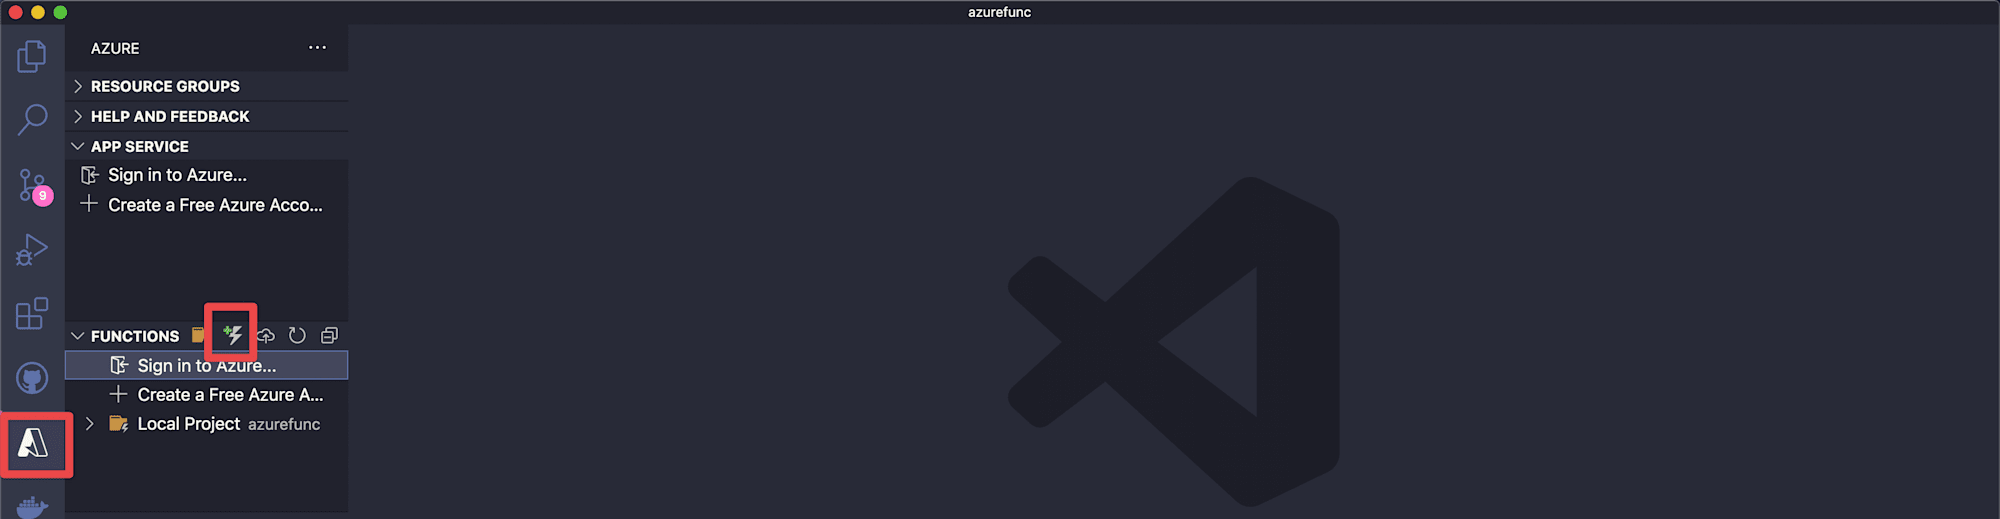
Now go to the Extensions tab of your VS Code IDE, search, and install the azure tools extension shown below.
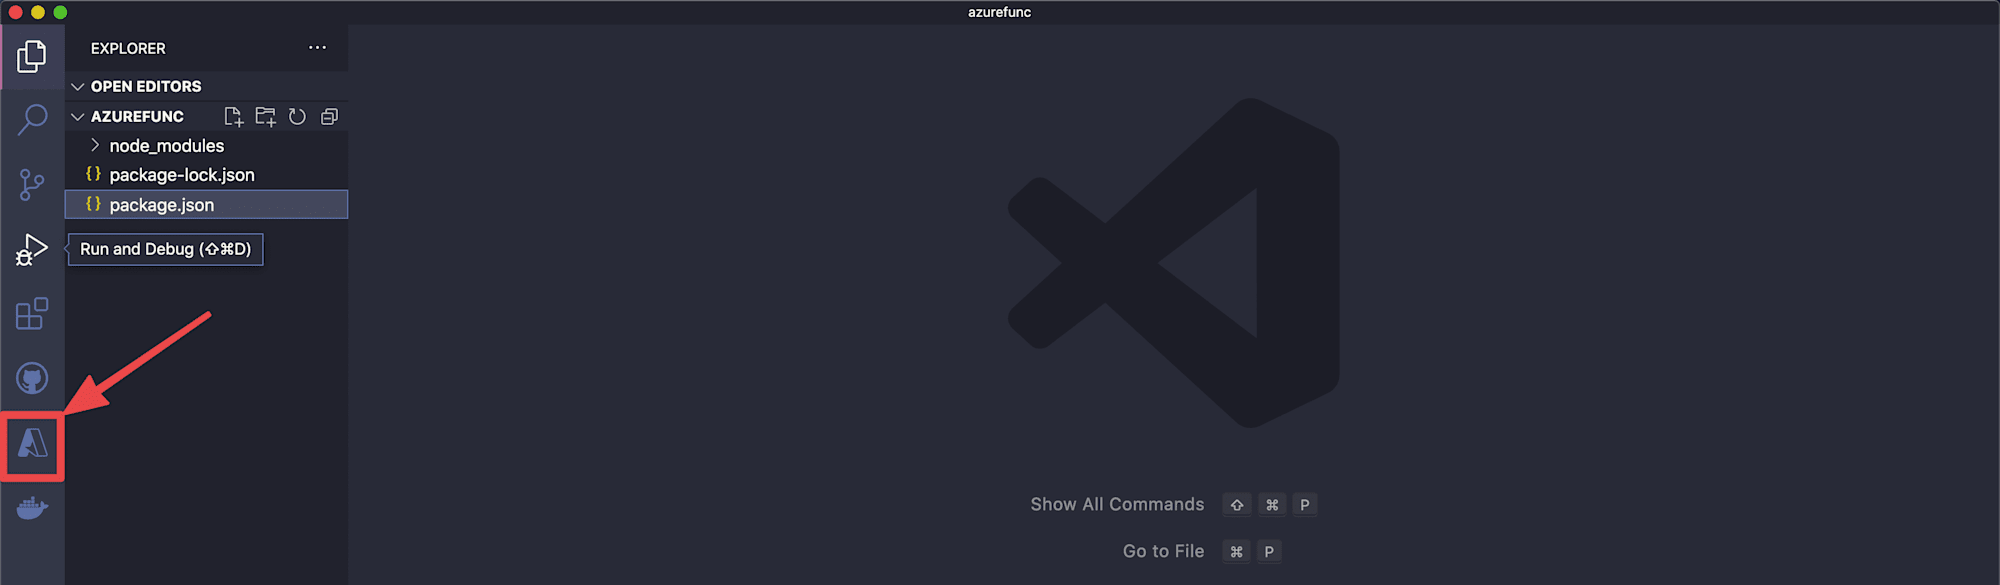
After the installation, you should see an icon on the activity bar, as shown below.
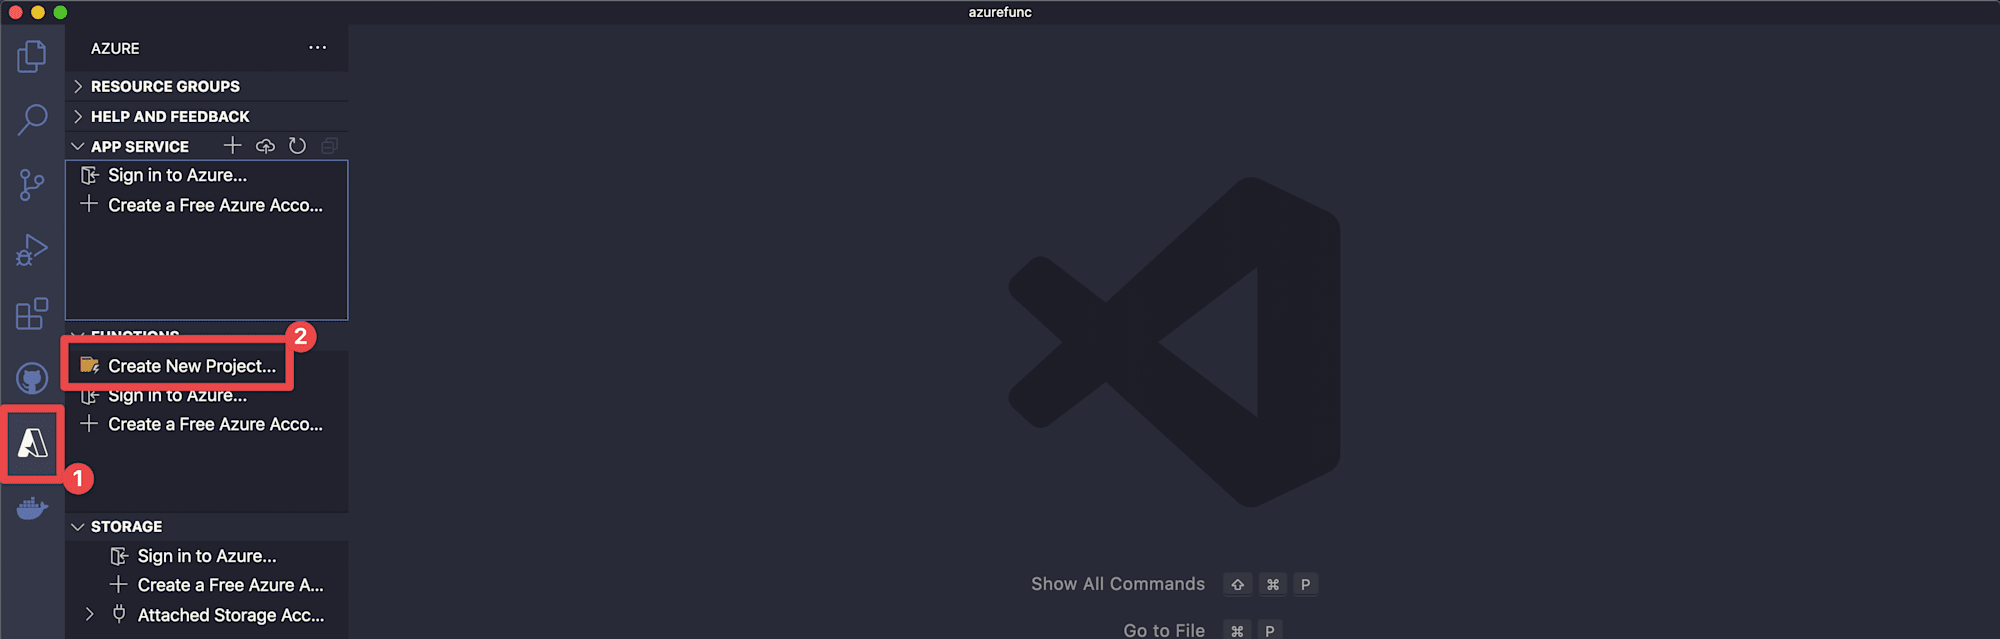
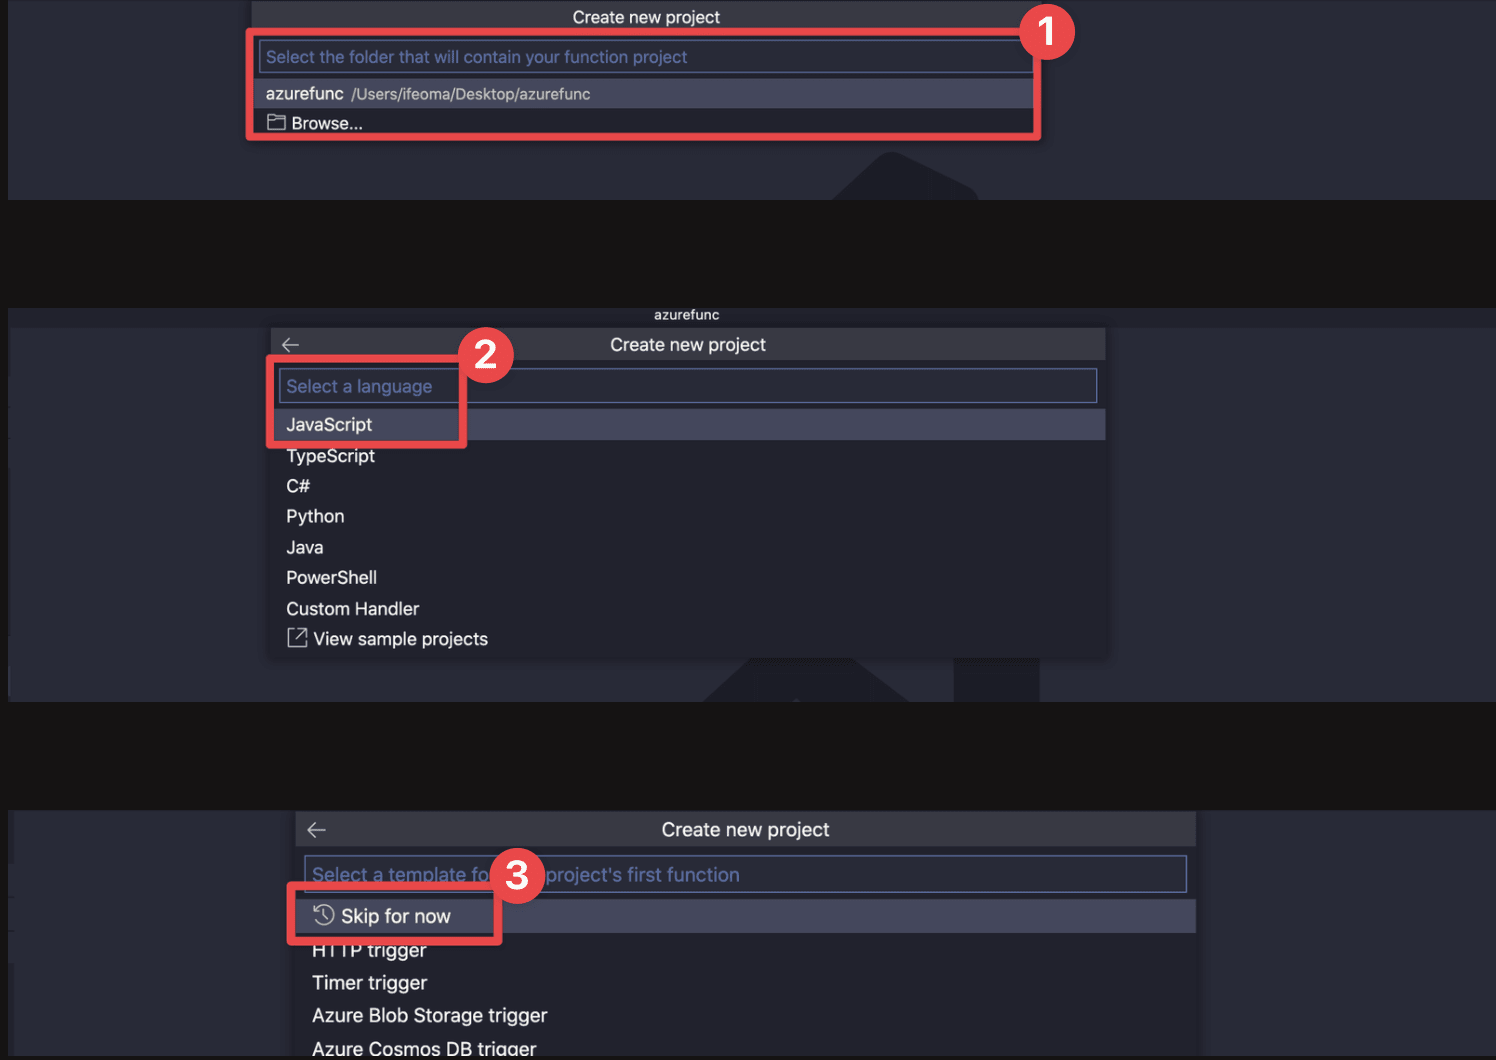
To get started, click on the Azure icon on the activity bar, then select Create New Project.
Select the desired folder and language; we used the default folder azurefunc and Javascript as shown below. Select the Skip for now option when asked to select a template.
As mentioned earlier, azure functions can be triggered by different events.
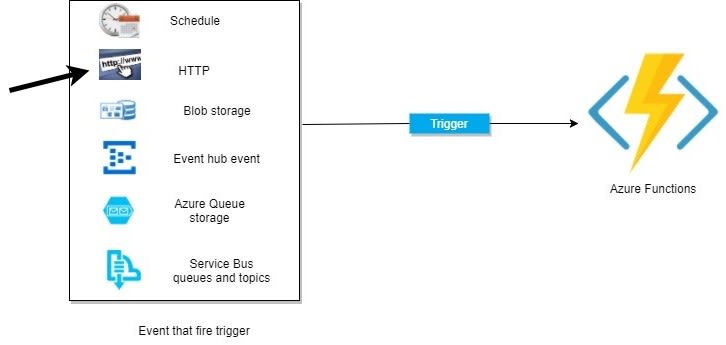
The tools we installed provide us with several templates to create serverless functions depending on how we want them to be triggered. In this case, since we only want our function to run when an HTTP request is made, we would be using the HTTP-trigger template to create the function.
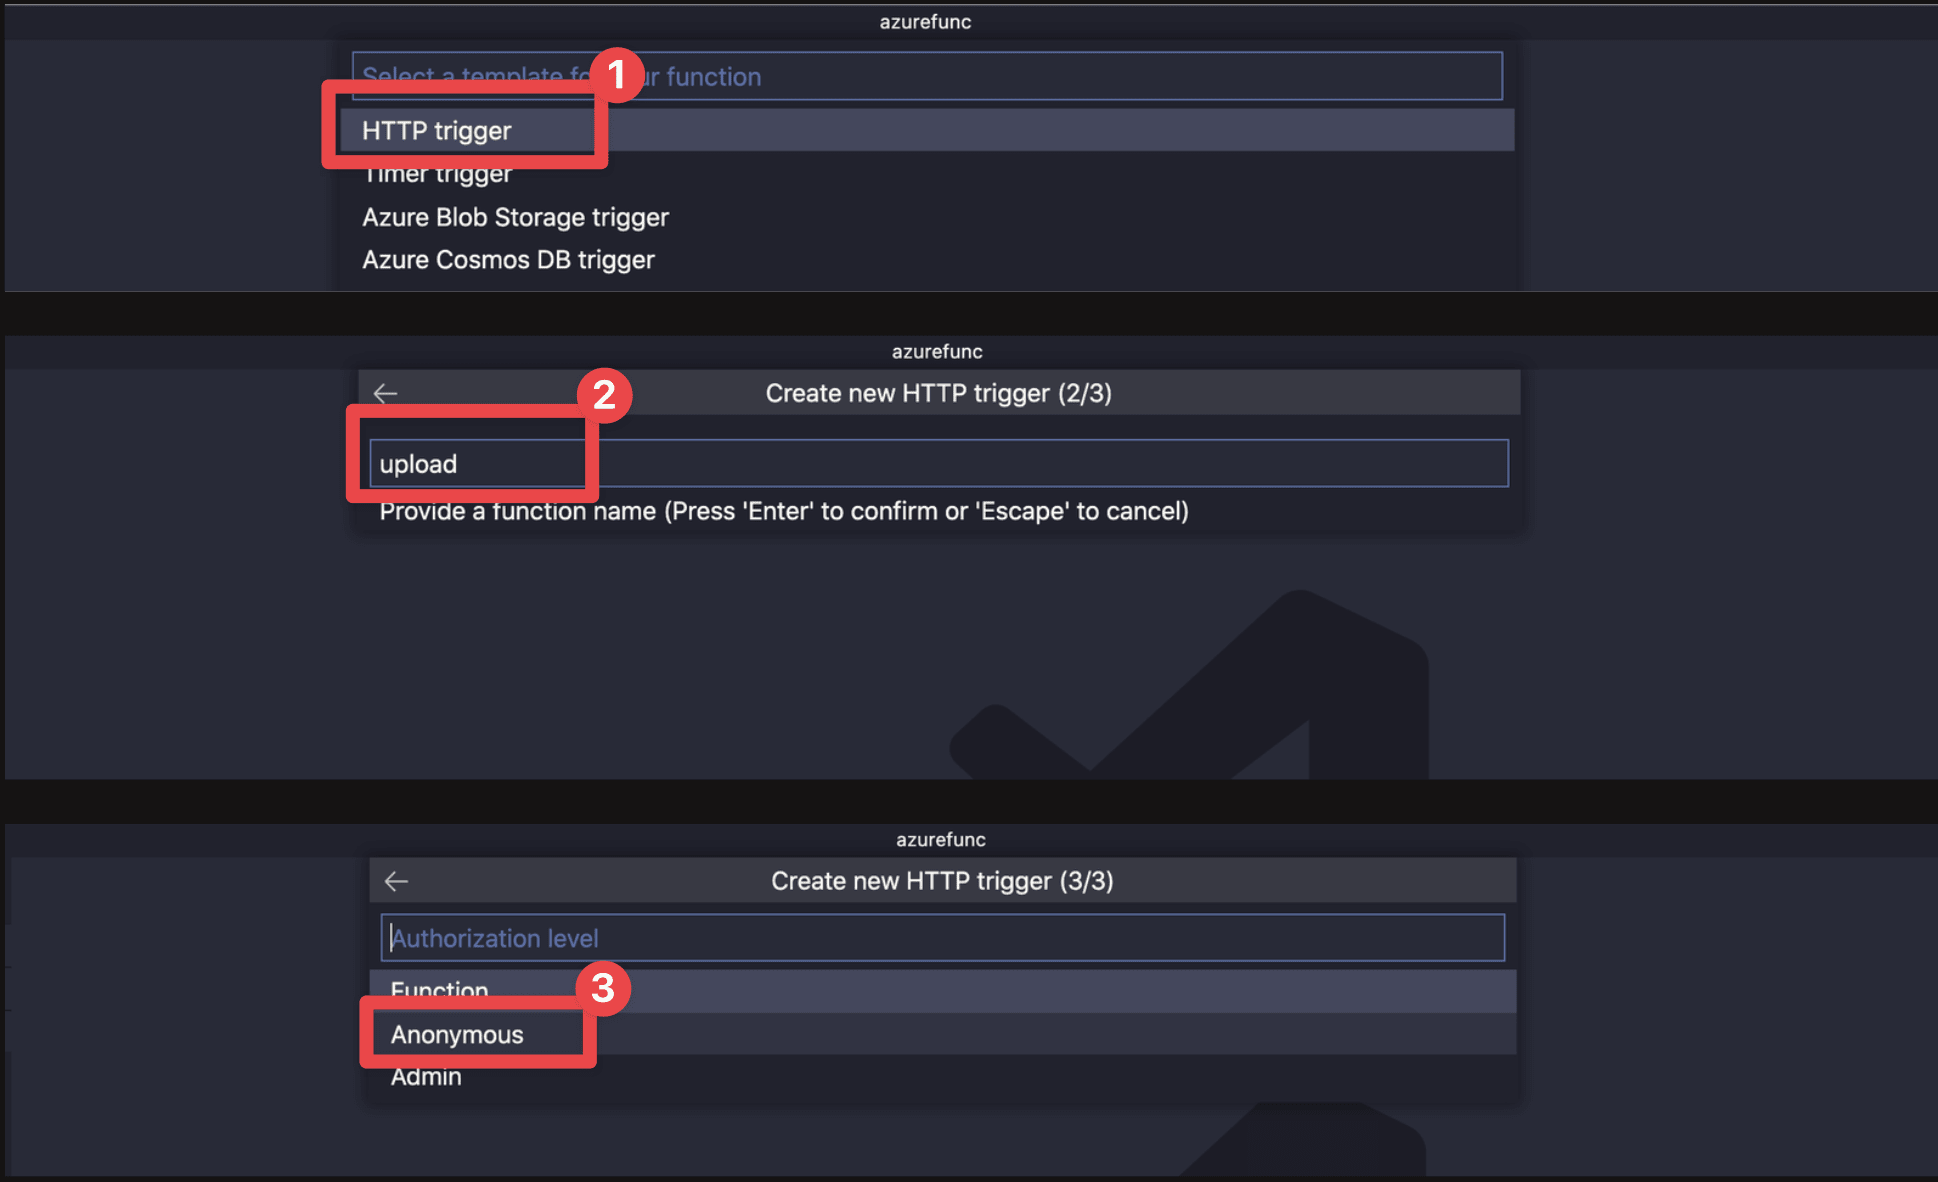
To create a function, click on the azure icon on the activity bar and select the thunderbolt icon.
Select the HTTP trigger template and give the function a name. I called mine upload. Finally, for the Authorization level, select anonymous.
We can also create the function using the CLI by running the following:
    func new --template "Http Trigger" --name upload
Code language: JavaScript (javascript)
Irrespective of how you chose to create the function, you have a folder structure identical to this.
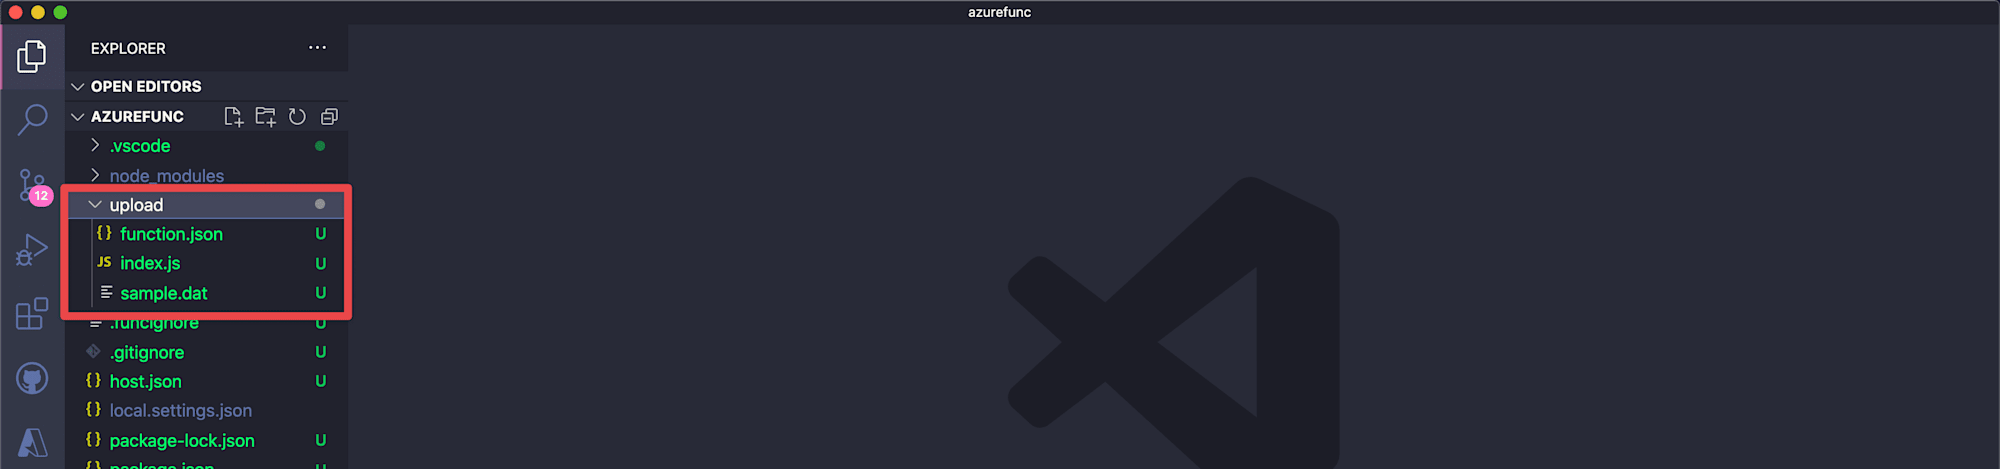
The index.js file holds the primary serverless function’s logic. The function.json file contains the settings for our function, such as input and output bindings. This file was automatically configured based on the template we chose. In our case, the settings tell the Azure function that its input and output are an HTTP request and response object.
Before updating our serverless function with the upload logic, we need to store our Cloudinary credentials in an environment variable. Update your local.settings.json file with the following:
{
"IsEncrypted": false,
"Values": {
"AzureWebJobsStorage": "",
"FUNCTIONS_WORKER_RUNTIME": "node",
"cloudSecret":"INSERT-YOUR-CLOUDINARY-API-SECRET-HERE"
"ApiKey":"INSERT-YOUR-CLOUDINARY-API-KEY-HERE"
},
"Host": {
//...
}
}
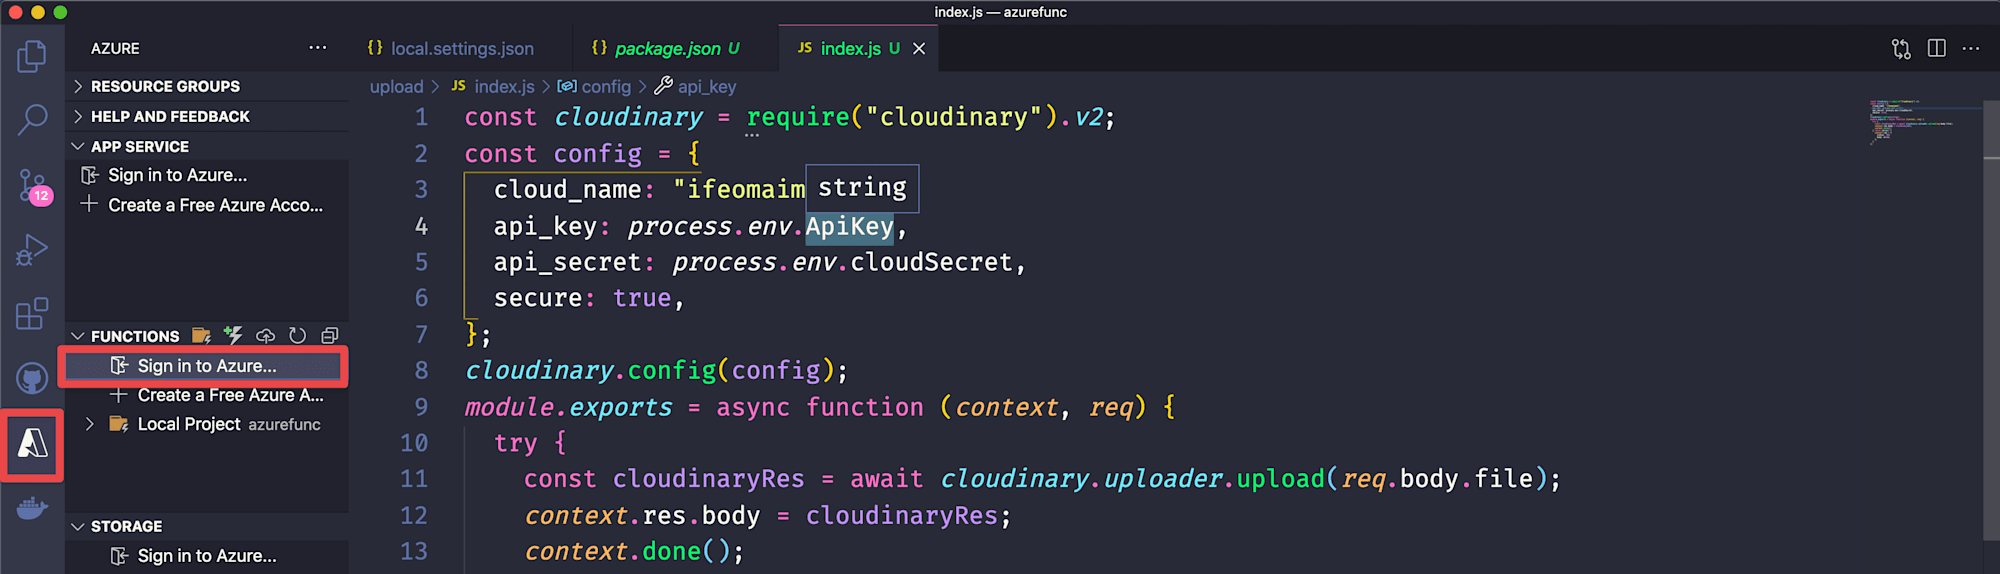
Code language: JSON / JSON with Comments (json)Now let’s update our serverless function with the following:
    const cloudinary = require("cloudinary").v2;
    const config = {
      cloud_name: INSERT-CLOUDINARY-CLOUD-NAME-HERE,
      api_key: INSERT-CLOUDINARY-API-KEY-HERE,
      api_secret: process.env.cloudSecret,
      secure: true,
    };
    cloudinary.config(config);
    module.exports = async function (context, req) {
      try {
        const cloudinaryRes = await cloudinary.uploader.upload(req.body.file, {
          resource_type: "auto",
        });
        context.res.body = cloudinaryRes;
        context.done();
      } catch (error) {
        context.res = {
          status: 500,
          body: error,
        };
      }
    };
Code language: JavaScript (javascript)
First, we bring in the Cloudinary SDK and configure it with our credentials. In the main function, we use this module to attempt to upload the file contained in the request body, which will come as a base64 string. By setting resource_type to auto in the upload settings, Cloudinary will automatically detect the file type (image, video) and handle it accordingly. If the upload is successful, we get a successful response from the Cloudinary servers; otherwise, it responds with an error message.
Cloudinary allows different file source options. Our upload call, in this case, uses the base64 option.
To test our local project, Run the following in your terminal:
func start
This command executes our local function app as expected. It also displays the URLs to all the serverless functions with the acceptable HTTP methods in the terminal.
We only get one URL displayed in our case since we defined one serverless function.
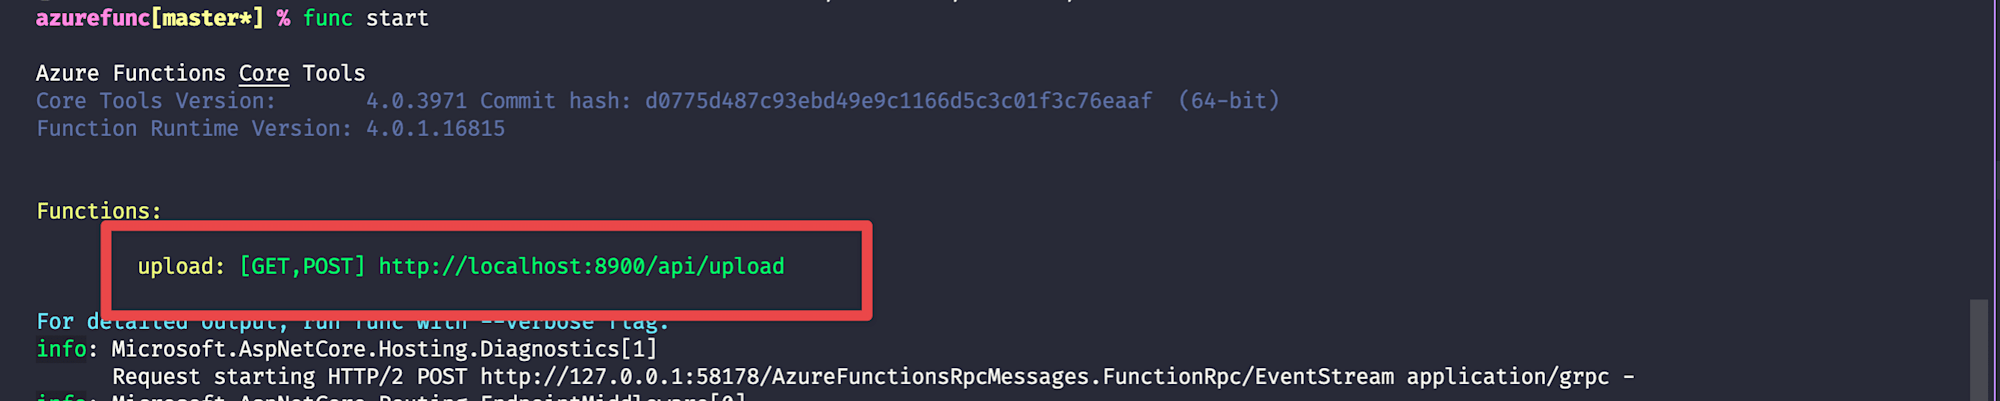
We can use this URL to test our serverless function locally by making an HTTP request to the endpoint.
The URL to our serverless function, for now, is only accessible locally. To make it globally available, we would have to deploy our project to the cloud. Before proceeding, you need to have an account on the Azure cloud platform. Create a free account here.
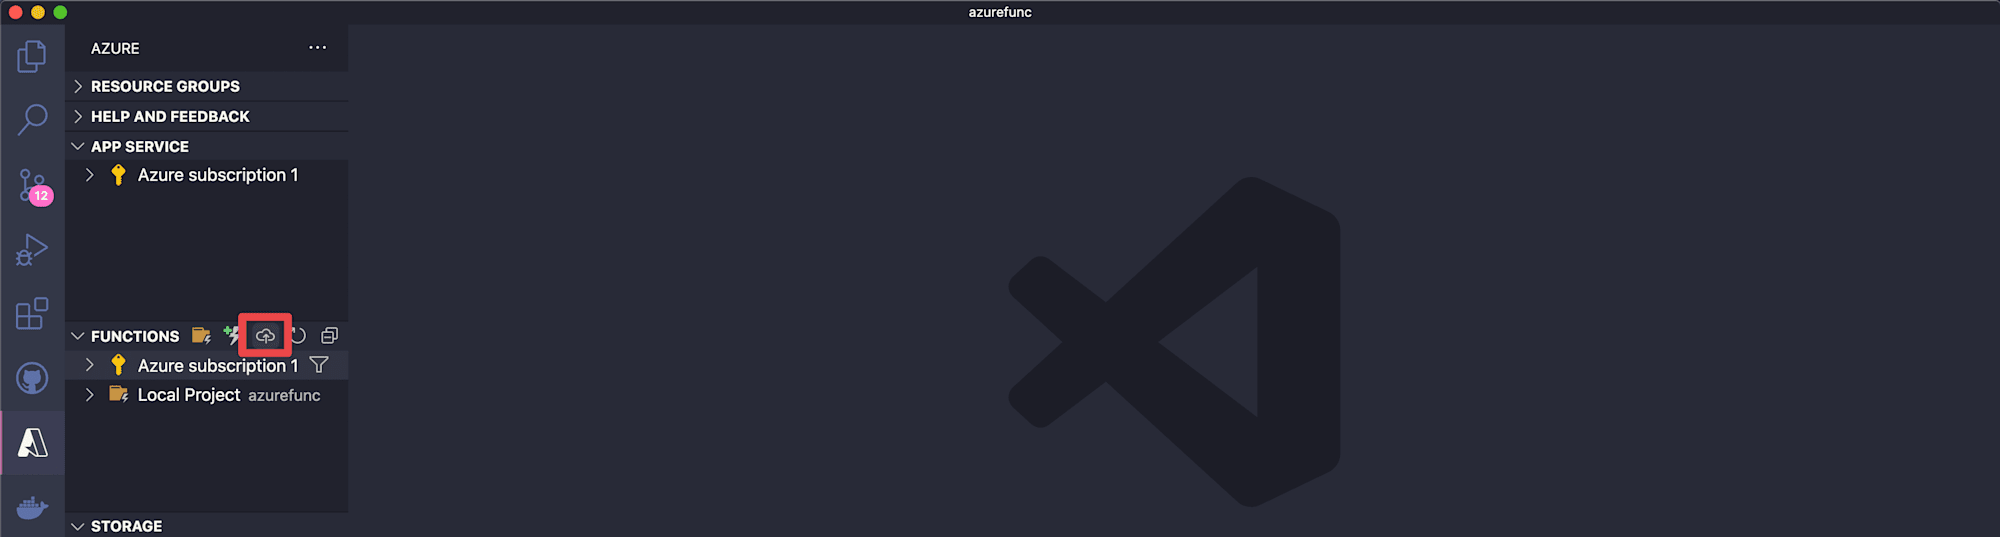
In the Azure extension in VS Code, click on the Sign in to Azure link. You will be redirected to the Azure cloud platform to log in with your cloud credentials.
Now, click on the upload to cloud icon to deploy the function app.
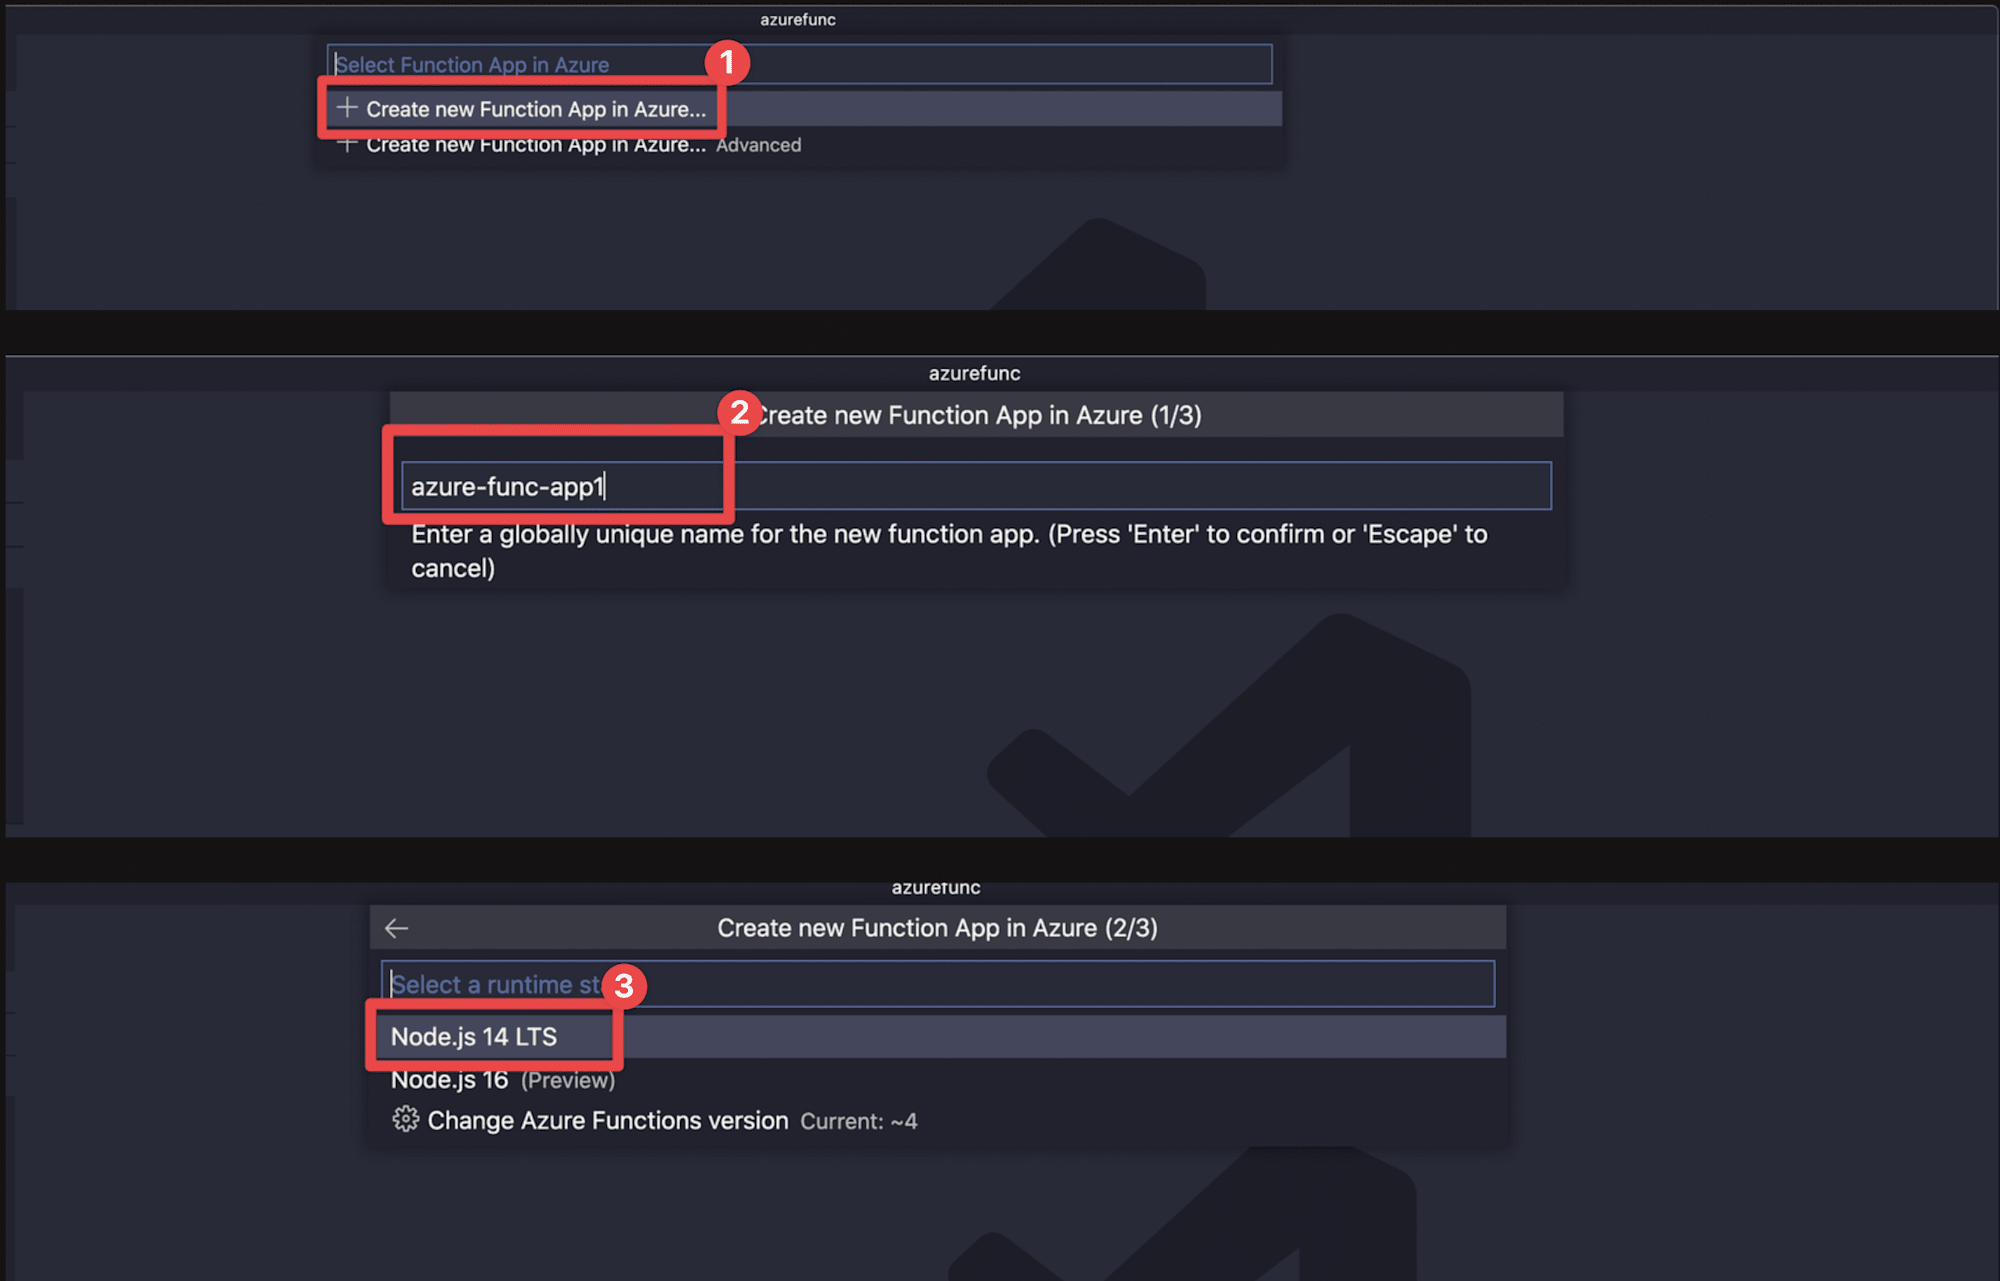
Click the Create new Function App in Azure and choose a globally unique name for your function. Select the runtime stack and the region where you want to deploy it.
This extension under the hood uses the CLI tool to create a function project on your cloud account using the name specified and attaches it to a storage account, and then it deploys your local project.
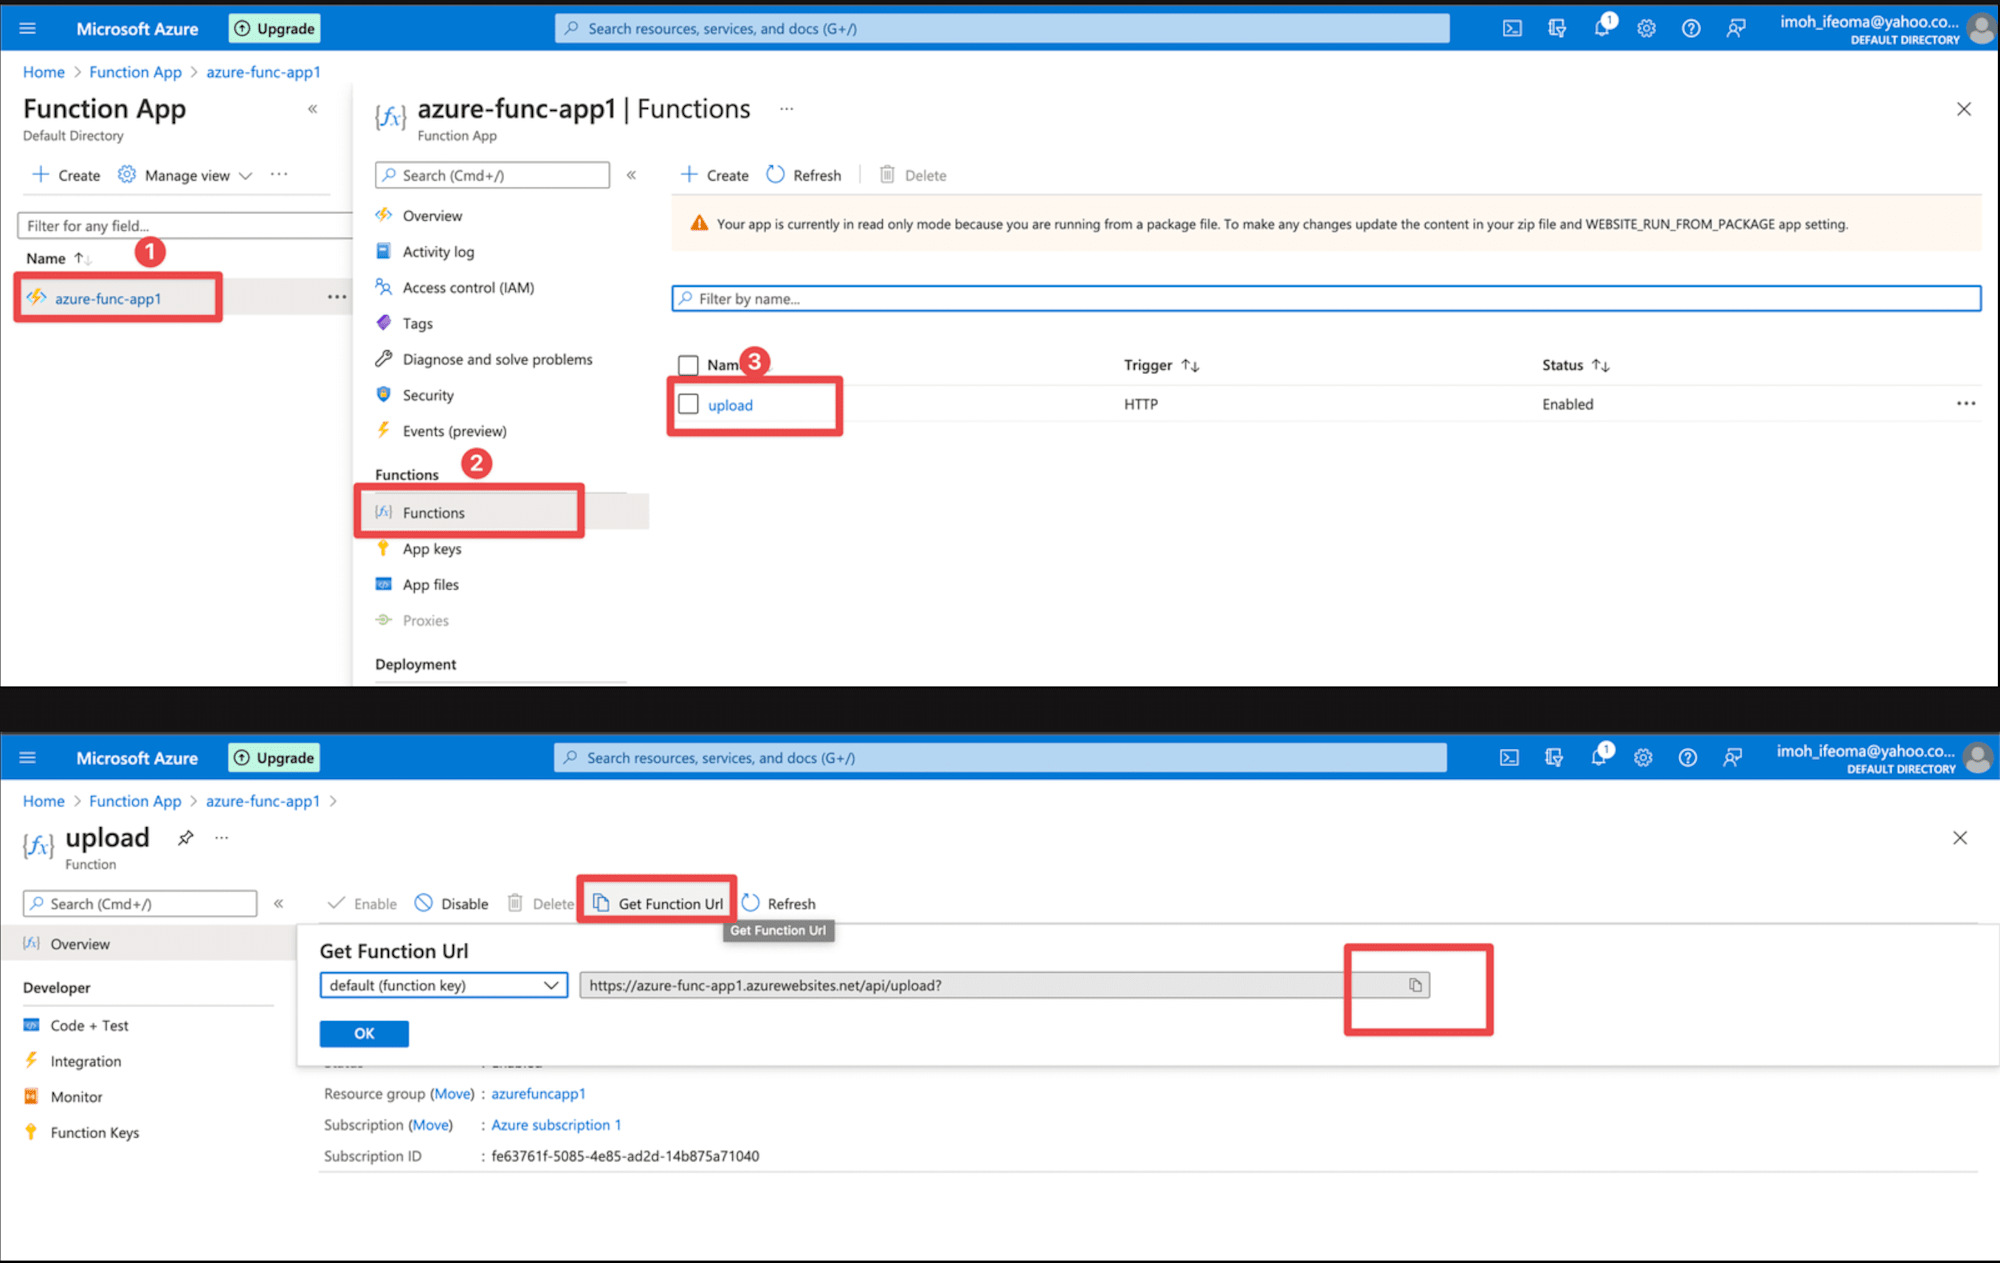
Once you’re done deploying, visit the Function App section of the Azure cloud platform and select the newly created function project. In its Function section, you should see the list of functions available in the project. As expected, we only have the upload function. Next, select it and click on the button to get the function’s URL, as seen below.
Some of our Cloudinary credentials integral to our application currently reside in the local.settings.json file. Remember this file is not part of the deployment. We need to replicate the environment variables that currently live in this file to our deployed application. To see how to add environment variables using the CLI tool, check here.
We now have our function app running, and we have the URL to communicate with this function. We are now going to compose a simple React application to communicate with the serverless function.
In the frontend directory, open your App.js file and add the following to it:
import { useState } from "react";
import axios from "axios";
import "./App.css";
export default function App() {
const [file, setFile] = useState(null);
const [isLoading, setIsLoading] = useState(false);
const [res, setRes] = useState({});
const handleChange = (event) => {
setFile(event.target.files[0]);
setRes({});
};
const readFileAsBase64 = async (file) => {
return new Promise((resolve, reject) => {
const reader = new FileReader();
reader.onload = () => {
resolve(reader.result);
};
reader.onerror = reject;
reader.readAsDataURL(file);
});
};
const handleUpload = async () => {
const fileInBase64 = await readFileAsBase64(file);
setIsLoading(true);
try {
const res = await axios.post(
"https://azure-func-app1.azurewebsites.net/api/upload?",
{
file: fileInBase64,
}
);
setRes(res.data);
alert("success");
} catch (error) {
console.log({ error });
alert("error");
} finally {
setIsLoading(false);
}
};
return (
<div className="App">
<div className="box">
<label htmlFor="file_id"> select file</label>
<input
id="file_id"
type="file"
accept="image/*, video/* "
onChange={handleChange}
/>
<code>
{Object.keys(res).map((key) => (
<p className="output-item" key={key}>
<span>{key}:</span>
<span>{typeof res[key] === "object" ? "object" : res[key]}</span>
</p>
))}
</code>
{file && (
<button onClick={handleUpload} disabled={isLoading}>
{isLoading ? "uploading..." : "upload"}
</button>
)}
</div>
</div>
);
}
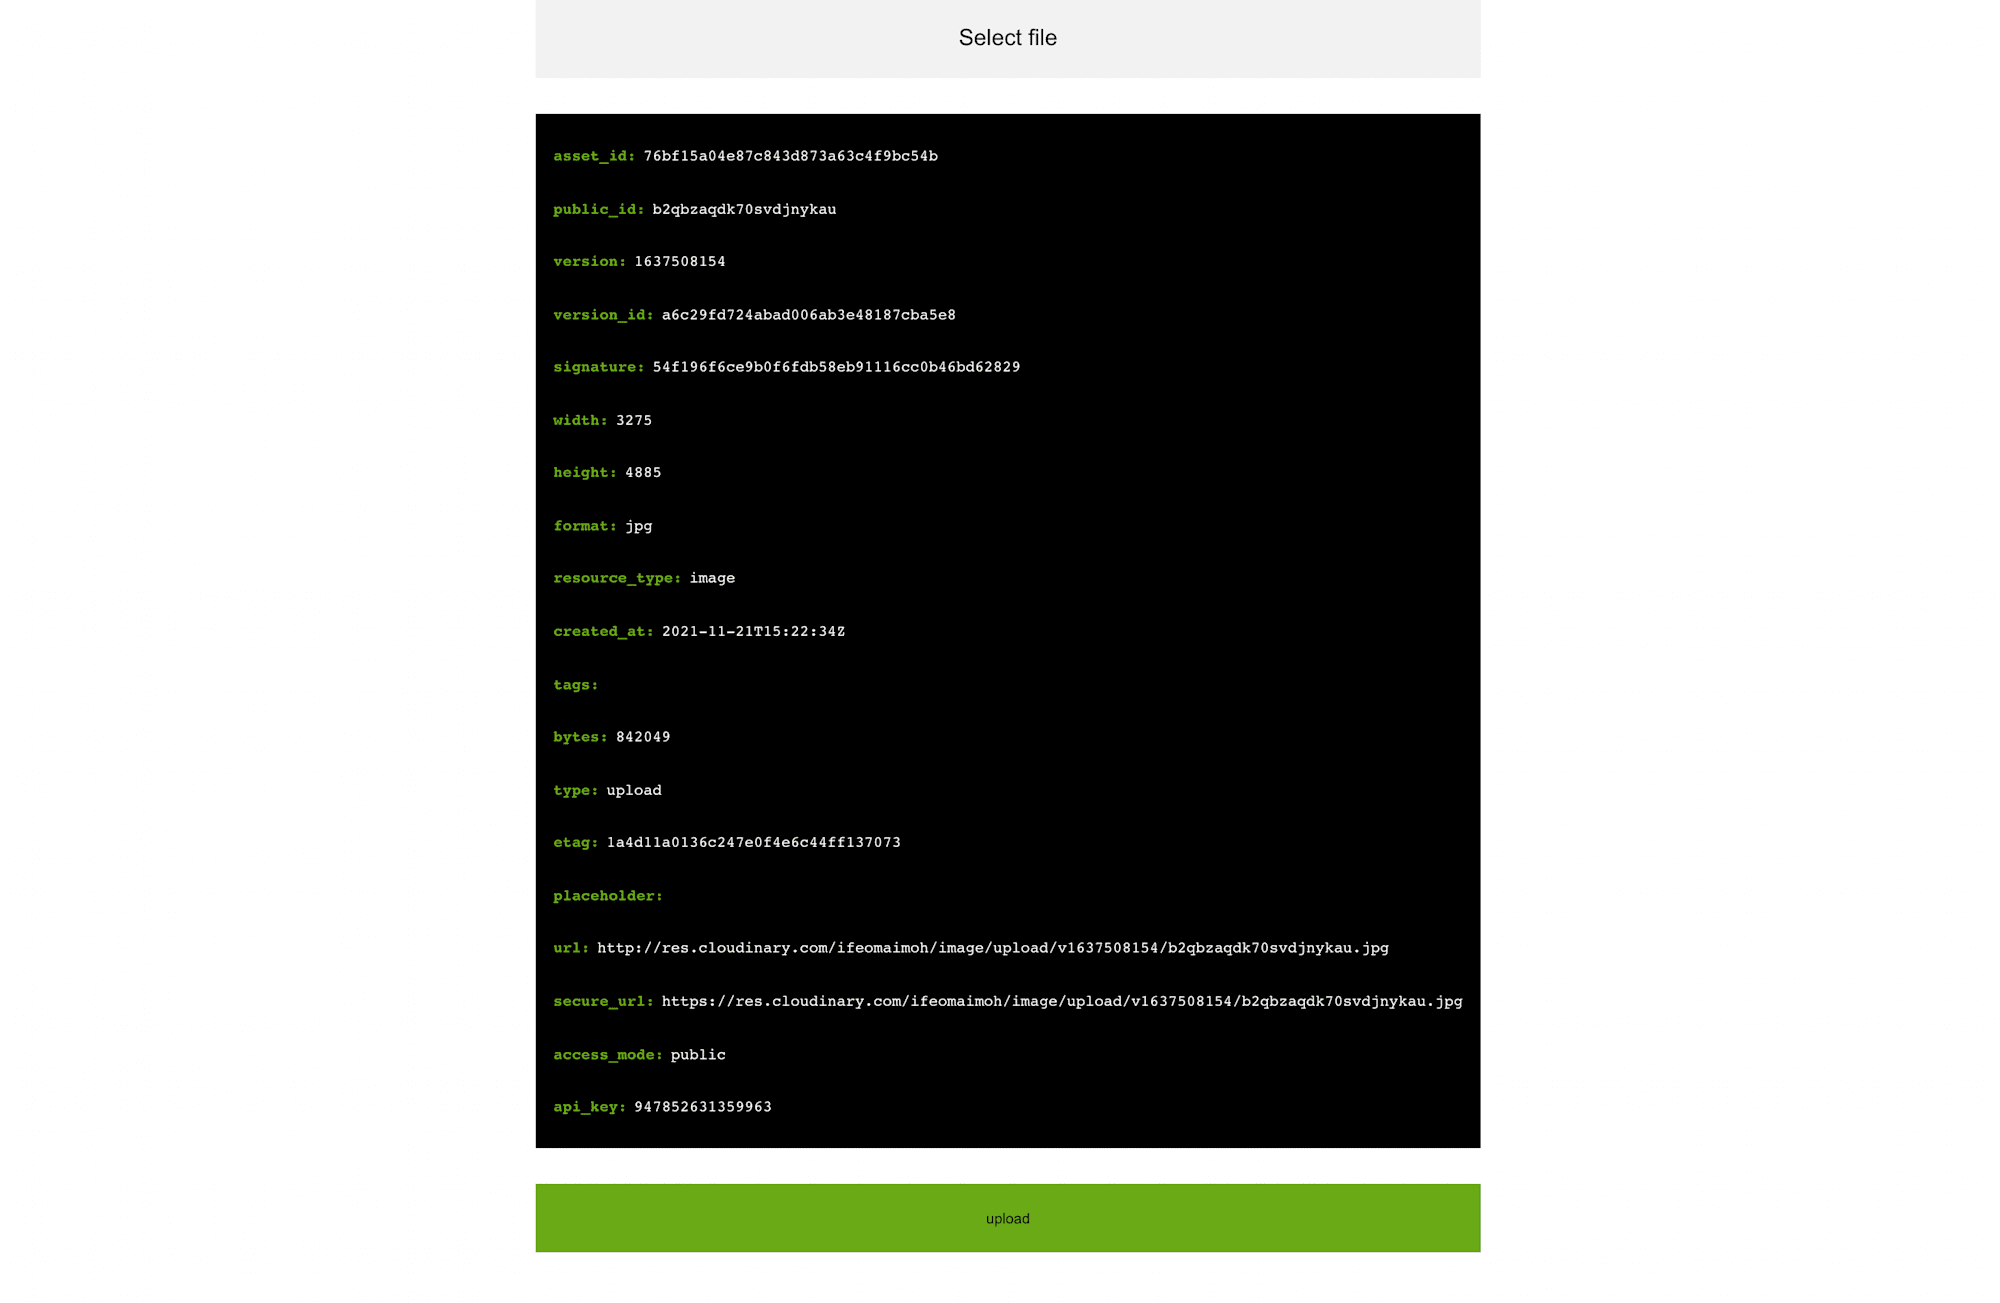
Code language: JavaScript (javascript)This component allows the user to select an image or video and then displays a button to enable the user to upload the selected file. The upload function converts the selected file to a base64 data string then it requests the URL of our serverless function. If it succeeds, it then gets the JSON response and displays it to the screen. Otherwise, it prints an error to the console.
Run the following in your terminal to see the app running:
npm run start
Running our app now, we get some CORS errors when communicating with the serverless function. By default, every deployed function app accepts requests from domains with the same base URL. We would have to enlist our React app’s URL to make it a recognized endpoint.
Navigate to Function App on your cloud account. Go to the API section on the left sidebar, select the CORS button, add as many origins as you require, and save. In this case, we specified a wildcard *****, which means it will accept and process requests from any domain.

Save your settings and restart the function app. We should be able to select and upload media assets to Cloudinary now from our React app.
To view uploaded images, log in to your Cloudinary account and head over to your media library.
Find the complete project here on GitHub.
Serverless architecture has ushered in a new frontier on how we develop our applications. This article shows us a bit of what can be achieved using Azure Functions, and it provides a basis for exploring them deeply in future projects.
Resources you may find helpful