
As mobile developers, we find ourselves in a battle where we are trying to create the most excellent applications. Still, the most excellent applications require rich media, images, videos, animations, and more!
Lately, I started playing around with the React Native framework which was originally developed by Facebook back in 2015.
Dealing with performance problems arising from managing various assets such as images, videos, and other types on different devices with varying screen sizes is among the most significant challenges faced by mobile developers.
During my past employment, I had the responsibility of overseeing an application that enabled users to download images onto their mobile devices and set them as backgrounds for their lock or home screen, or both. This application necessitated the retrieval of significant JSON files that contained all the relevant image details, including the title, URL, and creation date. On the primary screen, I had to display a thumbnail of each image, which is a smaller version of the original. When a user clicked on a thumbnail, they were directed to a screen where the image was displayed in full-screen mode.
These two screens necessitated the use of several iterations of a single image. Displaying a full-screen image as a thumbnail image is not feasible as it results in a pixelated image, which provides a suboptimal user experience. Conversely, presenting the full-screen image would cause the screen to take an extended period to load, which is also detrimental to the user experience.
In addition, each image arrived in a distinct size, necessitating a consistent approach to display them. Furthermore, we aimed to ensure the application functioned optimally on a variety of devices, including iPhones, iPads, Android smartphones, and tablets, each requiring different image dimensions. The circumstance of displaying a single image in various sizes is quite prevalent. How can we address this challenge most effectively? Let us examine some potential solutions.
A potential solution could be to acquire the image in a single size and modify it accordingly. Regrettably, this approach would be inefficient and may result in an extended processing period. Alternatively, we could tackle the issue on the server side (assuming one exists). We could generate various URLs and transmit them to the client. However, this approach could result in larger JSON files that are more challenging to handle and parse.
That’s where Cloudinary comes in.
What’s Cloudinary?
Cloudinary is a platform that enables swift and straightforward creation, administration, and distribution of digital experiences, regardless of the browser, device, or bandwidth.
Working with Cloudinary
Setup
The first thing you need to do is go to the Cloudinary website and sign-up for a free account.
You can find the Git repository for the Cloudinary Flutter SDK here.
To integrate Cloudinary into your app you can use:
npm install cloudinary-react-native
Or
yarn add cloudinary-react-native --save
Configuration
Once the package is integrated, we’ll need to set up our Cloudinary object.
Your cloud name will appear in the dashboard where you created your account.

import { AdvancedImage } from 'cloudinary-react-native';
import { Cloudinary } from '@cloudinary/url-gen';

const myCld = new Cloudinary({
 cloud: {
  cloudName: "demo",
 },
});Code language: JavaScript (javascript)
Transformations
At the beginning of this article, I introduced a dilemma where we require a single asset in numerous sizes and aspect ratios. Let us examine how we can easily achieve this objective by employing Cloudinary’s transformations.
Here’s the original image called ‘tiger’:

Crop
You can easily create a thumbnail(700×700) for your main screen:
import {crop} from "@cloudinary/url-gen/actions/resize";

var myImage = cld.image('tiger').resize(crop().width(700).height(700));
var url = myImage.toURL();Code language: JavaScript (javascript)
This code creates a new string URL using the cldobject that was initiated in the previous step. The image function builds the URL using the publicId (‘tiger’) of the specified image.
In this case, the resizeaction is applied with the crop and the values for width and height , Finally, the toURL()turns the object into a string and puts it into url variable.
This code will output a URL for the following image:

As we can see we got the 700×700 thumbnail we wanted, but the result could be improved. We lost the tiger and we can see that the tiger’s face is cut and not centered (not optimal at all).
What can we do? OH! Cloudinary has a few more tricks up its sleeve! Another COOL feature we can use is “gravity” where we can ask Cloudinary to focus on the most interesting object in the image.
Gravity
import {crop} from "@cloudinary/url-gen/actions/resize";
import {autoGravity} from "@cloudinary/url-gen/qualifiers/gravity";

var myImage = cld.image('tiger').resize(crop().width(700).height(700).gravity(autoGravity()));Code language: JavaScript (javascript)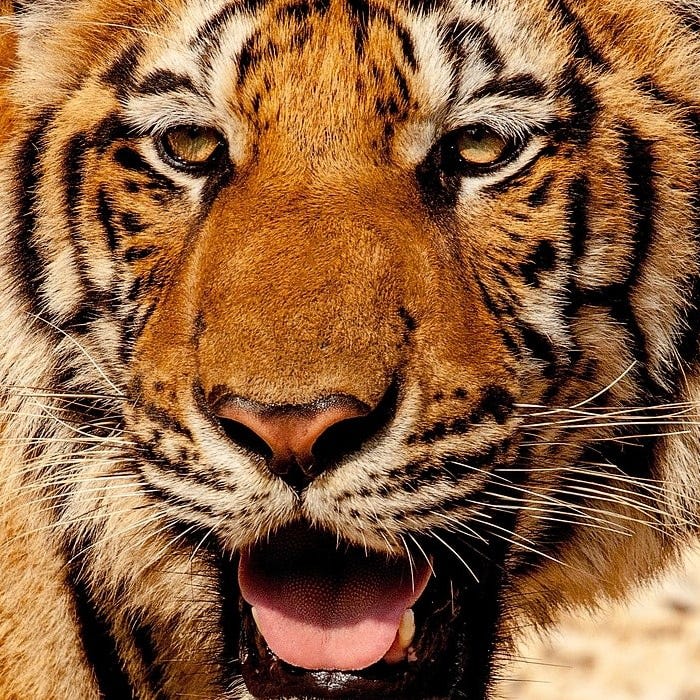
And as we can see the result is much better. The focus is on the tiger’s face.
Quality
Here’s another scenario to consider: Suppose you wish to send a 2k resolution image, which is a considerably large file, but there is no need to display it in its highest quality. However, mobile data roaming services may not always be able to handle large bandwidths. To reduce the image’s size, we can leverage Cloudinary’s “quality” feature.
Here’s the original image (5MB)

With Cloudinary we can do the following:
import { auto } from '@cloudinary/url-gen/qualifiers/quality';

var myImage = cld.image('image_2k').quality(auto());Code language: JavaScript (javascript)
This code will produce the following URL:
After this transformation, the size is reduced to 626.56 KB and it’ll be faster to load this image on a mobile device.
So far we’ve seen how to generate URLs and we can manually put them into an image widget, but Cloudinary gives us an extra zing, an image widget that can integrate with everything we’ve implemented so far.
import { View } from 'react-native';
import { AdvancedImage } from 'cloudinary-react-native';
import {crop} from "@cloudinary/url-gen/actions/resize";
import { autoGravity } from '@cloudinary/url-gen/qualifiers/gravity';
import { auto } from '@cloudinary/url-gen/qualifiers/quality';

export default function App() {
const cld = new Cloudinary({
  cloud: {
    cloudName: '<Cloud_Name>'
  },
  url: {
    secure: true // force https, set to false to force http
  }
});
  var myImage = cld.image('tiger').quality(auto()).resize(crop().width(800).height(800).gravity(autoGravity()));
  return (
    <View style={styles.container}>
      <AdvancedImage cldImg={myImage} style={{width:300, height:300}}/>
    </View>
  );
}

const styles = StyleSheet.create({
  container: {
    flex: 1,
    alignItems: 'center',
    justifyContent: 'center',
  },
});Code language: JavaScript (javascript)
The important part to take from this code is the creation of myImage object which we have seen before.
We take myImage and use it in our image component AdvancedImage .
The AdvacnedImage component has all React Native Image component plus Cloudinary integration, which means we can send it the cldImg prop.
This blog post demonstrated how Cloudinary can effectively manage a single asset in multiple sizes and qualities. However, this is only the beginning, as Cloudinary provides a wealth of other features for media management in applications. I urge you to check Cloudinary’s documentation to maximize the platform’s potential.
The Cloudinary SDK can also be found on Android, iOS, Flutter, and 14 more languages you can find at Cloudinary’s git.