
Serving optimized images is a vital part of building a performant website. If we serve our users images that are unnecessarily large, we waste their bandwidth and time. We also increase our own costs, since serving enormous images isn’t cheap!
For the median webpage, 40% of the page weight is made up of images. Optimizing how we serve our images can have a big impact on our website’s load time and performance.
If you’re using Svelte, you don’t have a built-in way to optimize images. Cloudinary’s svelte-cloudinary package is a great way to start serving optimized images quickly — let’s dive in.
Normally, you interact with Cloudinary by uploading images and requesting them via certain URL formats. The CldImage component abstracts the URL construction part away from you, so that you can interact with Cloudinary through passing props to a component instead.
Here’s what that might look like:
```svelte

<CldImage

height={840}

width={700}

src="orange-cat"

alt="An orange cat with its head leaning to one side, looking quizzically at the camera"

/>

```Code language: HTML, XML (xml)
You provide the component with the width and height of the images and the ID in Cloudinary, and you’ll get back an optimized image matching the specifications. Some of the optimizations Cloudinary applies include:
- Resizing and compressing the image from its original size, so that it looks good at the specified dimensions while minimizing the file size.
- Converting the image to a modern format (like AVIF or WebP) that can reduce the file size further. Cloudinary will serve different formats depending on the browser, since image format support can vary.
In addition, these optimizations happen at request time so you don’t have to slow down your build to process images.
There are many other ways Cloudinary can transform your images, including:
- Dynamic cropping.
- Background removal.
- Generative fill with AI.
- Overlaying text or other images.
- And more!
Let’s see how to use this in a Svelte project. We’ll build a card displaying an animal that’s up for adoption.
First, you’ll need an image to work with. I downloaded this image of an orange cat from Unsplash, but feel free to bring your own image if you want. Take note of how large the image you downloaded is — mine was 8MB! With Cloudinary’s APIs, we’ll be able to serve a much smaller, more optimized image: it will be resized, compressed, and in a modern image format. This will also reduce our total page weight, which means the page will load faster and use less of our users’ bandwidth.
Once you have your image, upload it to your Media Library in the Cloudinary Console and get the Public ID of the item.
Now we can set up our Svelte project. Scaffold a new project by running npm create svelte@latest in a terminal. Choose the “Skeleton project” app template, and whatever you like from the other options. They shouldn’t matter much for this demo.
To set up svelte-cloudinary, install the library with:
npm install svelte-cloudinary
Create a .env file in the root of your project and add your Cloudinary cloud name.
```

VITE_PUBLIC_CLOUDINARY_CLOUD_NAME="CLOUD_NAME_GOES_HERE"

```

That should be all you need to start using the component. Let’s try it out – replace the contents of  `src/routes/+page.svelte` with the Cloudinary image component.

```svelte

<script>

    import { CldImage } from 'svelte-cloudinary';

    const src = 'orange-cat';

    const alt = 'An orange cat with its head leaning to one side, looking quizzically at the camera';

</script>

<CldImage height={840} width={700} {src} {alt} />

```Code language: HTML, XML (xml)
We’ll pass the following props to the CldImage:
widthandheightare the width and height of the image. This doesn’t have to be the same as the width and height of the image you uploaded. Cloudinary will automatically resize the image to match the dimensions you request.srcis the Cloudinary Public ID of the image you uploaded at the beginning.altis a description of the image. This will be used to describe the image when users browse with assistive technology like a screen reader, or if the image fails to load.
Run the dev server with npm run dev and navigate to the site. You should see the image on the page. Take a look at the network tab to see how big the image is now after being optimized by Cloudinary. Mine went from 8MB to 34KB — less than 1% of the size of the original image! While some of this decrease was accomplished by resizing and compressing the image, Cloudinary also converts the image to a more efficient file format like .avif to increase the cost savings even further.
If you take a peek at the HTML generated by the component, you’ll notice some additional attributes were added to make the image more performant by default.
loading=”lazy”. This delay loading the image until it is in the user’s viewport (MDN).decoding=”async”. If the image data takes a long time to decode, the browser will display the rest of the page content right away instead of waiting for decoding to finish (MDN).
Let’s take the image component a bit further. To display the image in a responsive card with some text added, you can add the following styles and markup.
```svelte

<script>

    import { CldImage } from 'svelte-cloudinary';

    const src = 'orange-cat';

    const alt = 'An orange cat with its head leaning to one side, looking quizzically at the camera';

</script>

<div class="card">

    <CldImage height={840} width={700} {src} {alt} class="big-image" />

    <div class="content">

    <div class="title">

    <CldImage height={200} width={200} {src} {alt} class="small-image" crop="thumb" />

    <h1>Sunny</h1>

    </div>

    <p>Code language: HTML, XML (xml)
Meet our charming orange tabby cat! This delightful feline, with its vibrant orange coat and captivating eyes, is sure to steal your heart. Known for its playful and affectionate nature, this cat is the perfect companion for both families and individuals. Whether it’s curling up on your lap for a cozy evening or entertaining you with its playful antics, this cat is full of personality. We’ve affectionately nicknamed them “Sunny,” but you can choose from a range of names like “Amber,” “Marmalade,” or “Leo” to suit their sunny disposition. Don’t miss out on the chance to bring a ray of sunshine into your life – adopt this orange beauty today!
</p>

    </div>

</div>

<style>

    .card {

    font-family: system-ui, -apple-system, Segoe UI, Roboto, Ubuntu, Cantarell, Noto Sans,

    sans-serif;

    display: grid;

    grid-template-columns: 1fr;

    border-radius: 1rem;

    border: 1px solid lightgrey;

    overflow: hidden;

    max-width: 800px;

    margin: 0 auto;

    align-items: center;

    }

    .content {

    padding: 1rem;

    line-height: 1.4;

    }

    .card :global(.big-image) {

    display: none;

    }

    .card :global(.small-image) {

    border-radius: 100%;

    flex-basis: 125px;

    }

    .title {

    display: flex;

    gap: 1rem;

    align-items: center;

    }

    @media (min-width: 600px) {

    .card {

    grid-template-columns: 300px 1fr;

    }

    .card :global(.big-image) {

    display: block;

    align-self: stretch;

    }

    .card :global(.small-image) {

    display: none;

    }

    }

</style>

```Code language: HTML, XML (xml)
To target the underlying <img> rendered by the CldImage component, we pass a class as a prop to the component. Since the <img class=”big-image”> is outside of the component we’re writing our styles in, we need to use :global(.big-image) modifier to style it from inside Svelte’s <style> block. If you like, you can also style the CldImage with inline styles via the style prop.
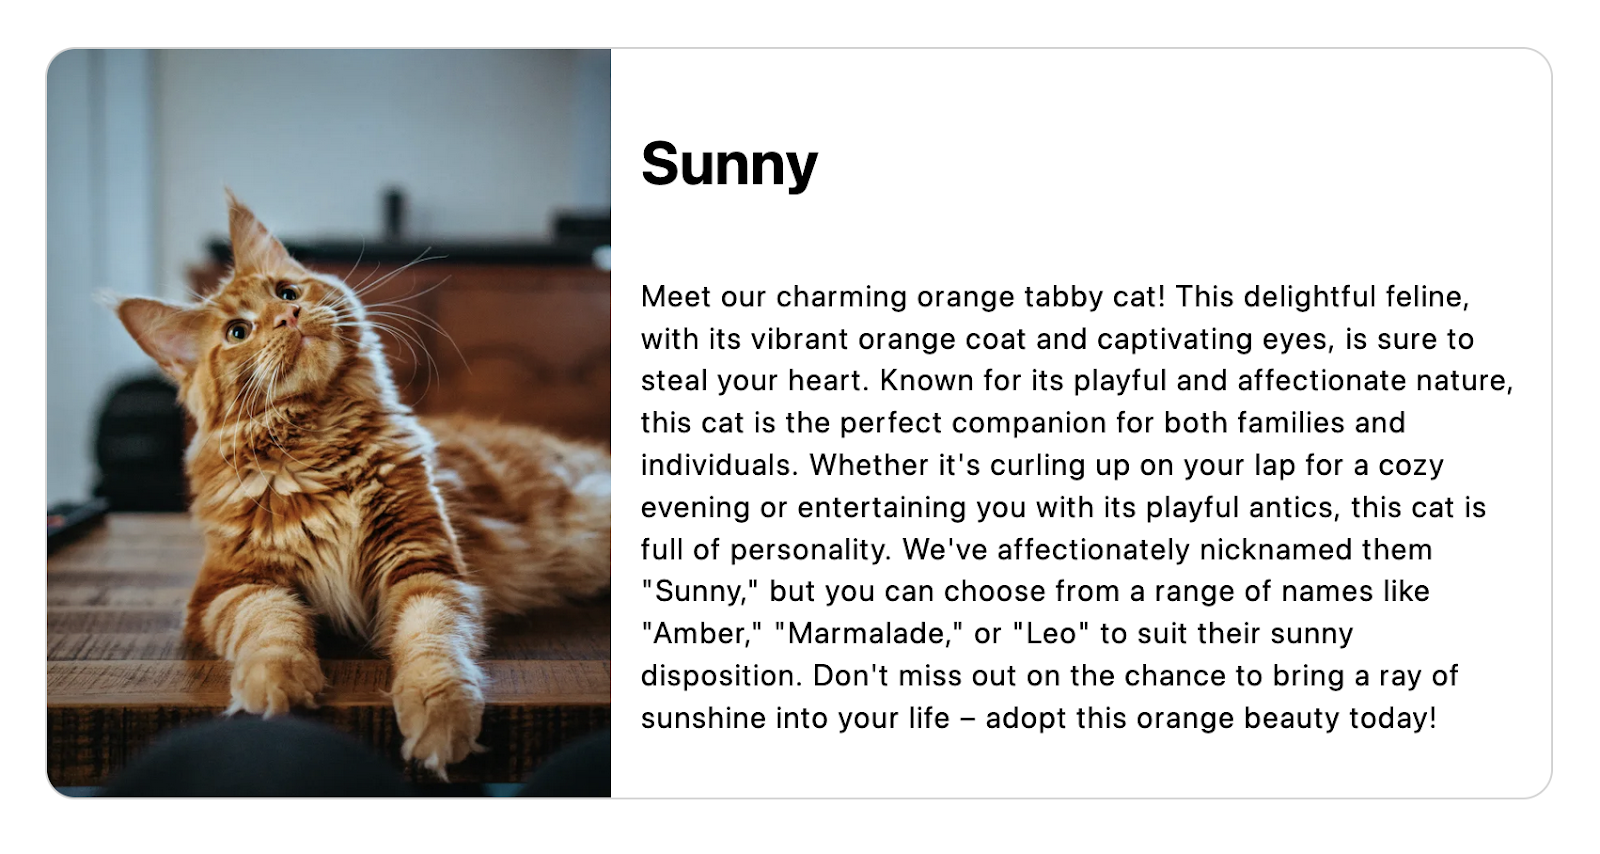
In this version, we’re including two CldImage components. Only one will be shown at a time, depending on the device’s screen size. The first is the same as the image component we started with, and it will show on screens 600px and up. Here’s what the card looks like at larger screen widths.
The second is a “thumbnail” version that we display for small screens. With these parameters, Cloudinary will generate a second optimized image that is 200×200 and ~6KB. By default, Cloudinary will intelligently crop the image so the important part of the image is still in view. You can read more about Cloudinary’s extensive resizing and cropping options in the documentation.
It’s worth highlighting that both versions of the image use the same source. We don’t have to manage two images – we only upload a single source image and Cloudinary transforms it based on our request.

You can find the completed demo code on GitHub and view the live version.
This only scratched the surface of the possibilities with the Cloudinary Image component – see the documentation for more and sign up for a free account today.
In addition to CldImage, Svelte Cloudinary includes several other components you can use in your Svelte app:
- A
CldOgImagecomponent to generate social card images. CldUploadButtonandCldUploadWidgetcomponents to easily upload media to Cloudinary.- A
CldVideoPlayercomponent to embed Cloudinary videos.