
This jam is the final part of a two-part series on creating a Product Hunt Clone in Next.js. In the first part, we configured the initial Next.js app with Auth0, Cloudinary, and Airtable. Then, we fetched and displayed the products on the homepage. We also discussed how to add and delete products in our app.
In this part, we will build the User Profile page where users can see their products and add the functionality to update the products. We will also discuss how to upvote a product.
If you want to jump right into the code, check out the GitHub Repo here.
You can refer to the first part here: How to build a Product Hunt Clone with Next.js – Part 1 of 2
Since the preview in the CodeSandbox is embedded inside another page, you will see the products but you will not be able to log in via the preview. Instead, to explore and play navigate to deployed version, https://d00re.sse.codesandbox.io/.
In this section, you will create the My Profile page, showing the current user’s information and their products. You have already created the link to the My Profile page in the Navbar component, i.e., /user/profile.
You can split the My Profile page into two parts. First, you need to show the user information, and second, you need to show the products created by that user. You can easily extract user information from the user object of the useUser() hook. For the second part, you will need to create a function in the lib/api.js file to get the products where the Sub of product is equal to the current user’s sub.
Create and export a function named getProductsByUserSub() by adding the following code to lib/api.js file.
export const getProductsByUserSub = async (sub) => {
  const data = await table
    .select({
      filterByFormula: `Sub = "${sub}"`,
    })
    .firstPage();
  return data.map((record) => {
    return { id: record.id, ...record.fields };
  });
};
Code language: JavaScript (javascript)
In the above code, you pass the sub of the user as an argument to the function and, with the help of the filterByFormula method, filter the records where the Sub of product is equal to the current user’s sub.
The next step is to create the profile.js file under the pages/user directory. Run the following command in the terminal.
mkdir pages/user
touch pages/user/profile.js
Add the following code to the user/profile.js file.
// pages/user/profile.js
import Head from "next/head";
import { useUser, withPageAuthRequired, getSession } from "@auth0/nextjs-auth0";
import Product from "../../components/Product";
import Navbar from "../../components/Navbar";
import {getProductsByUserSub} from "../../lib/api"

export default function Profile({products}) {
  const { user, error, isLoading } = useUser();

  if (isLoading) {
    return (
      <div className="mx-auto my-64 text-gray-800 text-center text-3xl">
        Loading
      </div>
    );
  }
  if (error) return <div>{error.message}</div>;

  return (
    <div className="contianer px-2">
      <Head>
        <title> User: {user.name}</title>
        <link rel="icon" href="/favicon.ico" />
      </Head>
      <Navbar />
      <div className="flex space-x-4 px-4 my-10 justify-around">
        <div className="h-36 w-96 rounded-3xl  shadow-lg relative flex flex-col
	    items-center justify-between md:items-start p-5 transition-all duration-150">
          <img
            className="rounded-full w-20 h-20 shadow-sm absolute -top-8
	    transform md:scale-110 duration-700"
            src={user.picture}
            alt={user.name}
          />

          <div className=" align-middle text-2xl font-semibold text-gray-800
	     text-center m-auto md:m-0 md:mt-8">
            {user.name}
          </div>
          <ul className="text-lg text-gray-600 font-light md:block">
            <li>Products: {products ? products.length : 0}</li>
          </ul>
        </div>
      </div>

      {products.length>0 ? (
        products.map((product) => (
          <Product
            key={product.id}
            id={product.id}
            name={product.Name}
            link={product.Link}
            description={product.Description}
            publicId={product.PublicId}
            check={true}
          />
        ))
      ) : (
        <div className="mx-auto my-12 text-gray-800 text-center text-3xl">
          You are yet to create your first Product.
        </div>
      )}
    </div>
  );
}

export const getServerSideProps = withPageAuthRequired({
  returnTo: "/api/auth/login",
  async getServerSideProps(ctx) {
    const sub = await getSession(ctx.req).user.sub;
    const data = await getProductsByUserSub(sub);
    return {
      props: {
        products: data,
      },
    };
  },
});
Code language: JavaScript (javascript)
In the above code, you are using Next.js getServerSideProps function to fetch the products created by the current user with the help of the getProductsByUserSub() function.
You will notice that you have wrapped the getServerSideProps() function with withPageAuthRequired() method from the @auth0/nextjs-auth0 SDK. This withPageAuthRequired protects the My Profile page from anonymous logins and redirects them to the login page. You can read more about this method here.
The getProductsByUserSub() function requires the user’s sub to fetch the products, accessed using the getSession() method. The getSession() method gets the user’s session from the request. You can read more about this method here.
The records from Airtable are passed as props to the Profile component. In this component, you use the user object to show the current user’s name and profile picture.
You also show the total number of products created by the user by calculating the length of the products array. You then map over the products array, and similar to the index.js file, show the products on the page using the Product component.
Since the products fetched from Airtable are created by the current user, you pass true in the check prop of the Product component.
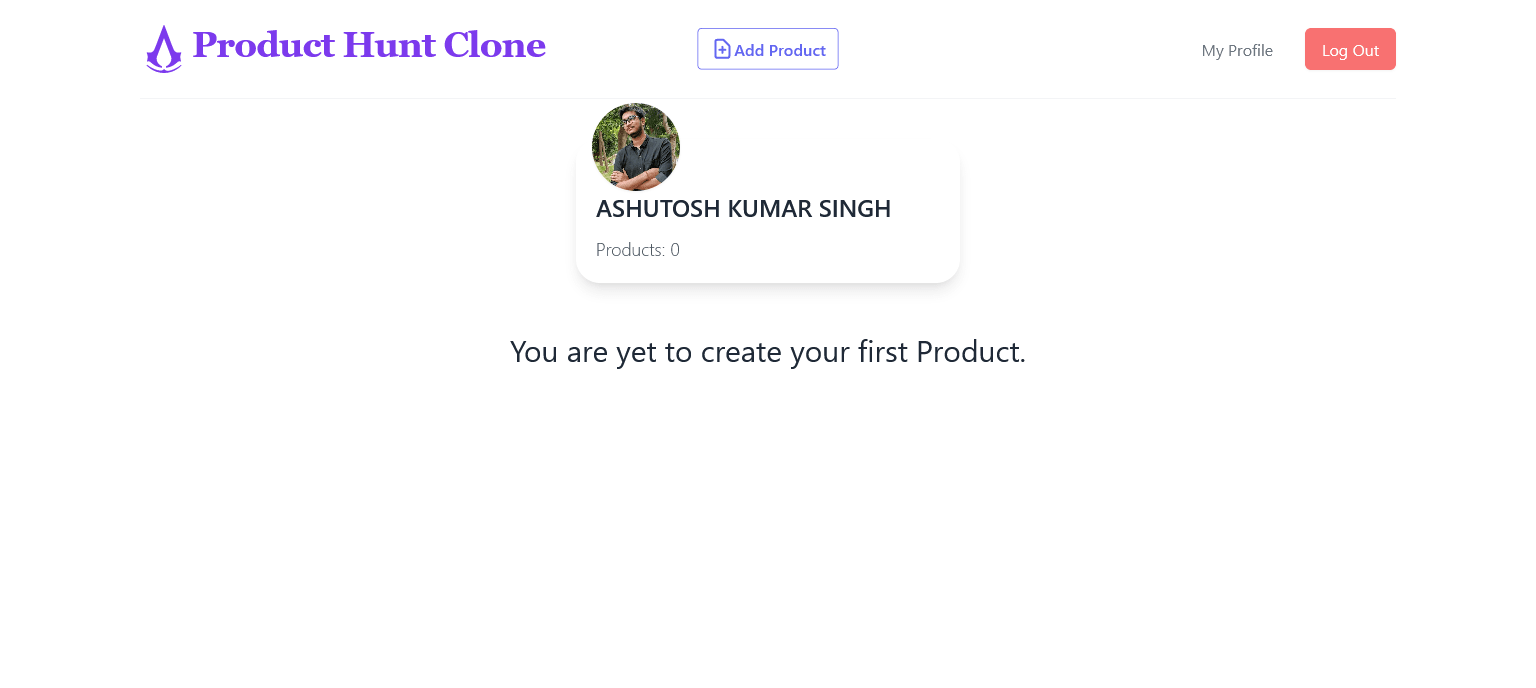
There is also a default message if the current user has not created any products.
Here is how the My Profile page will look if the user has not created any product.
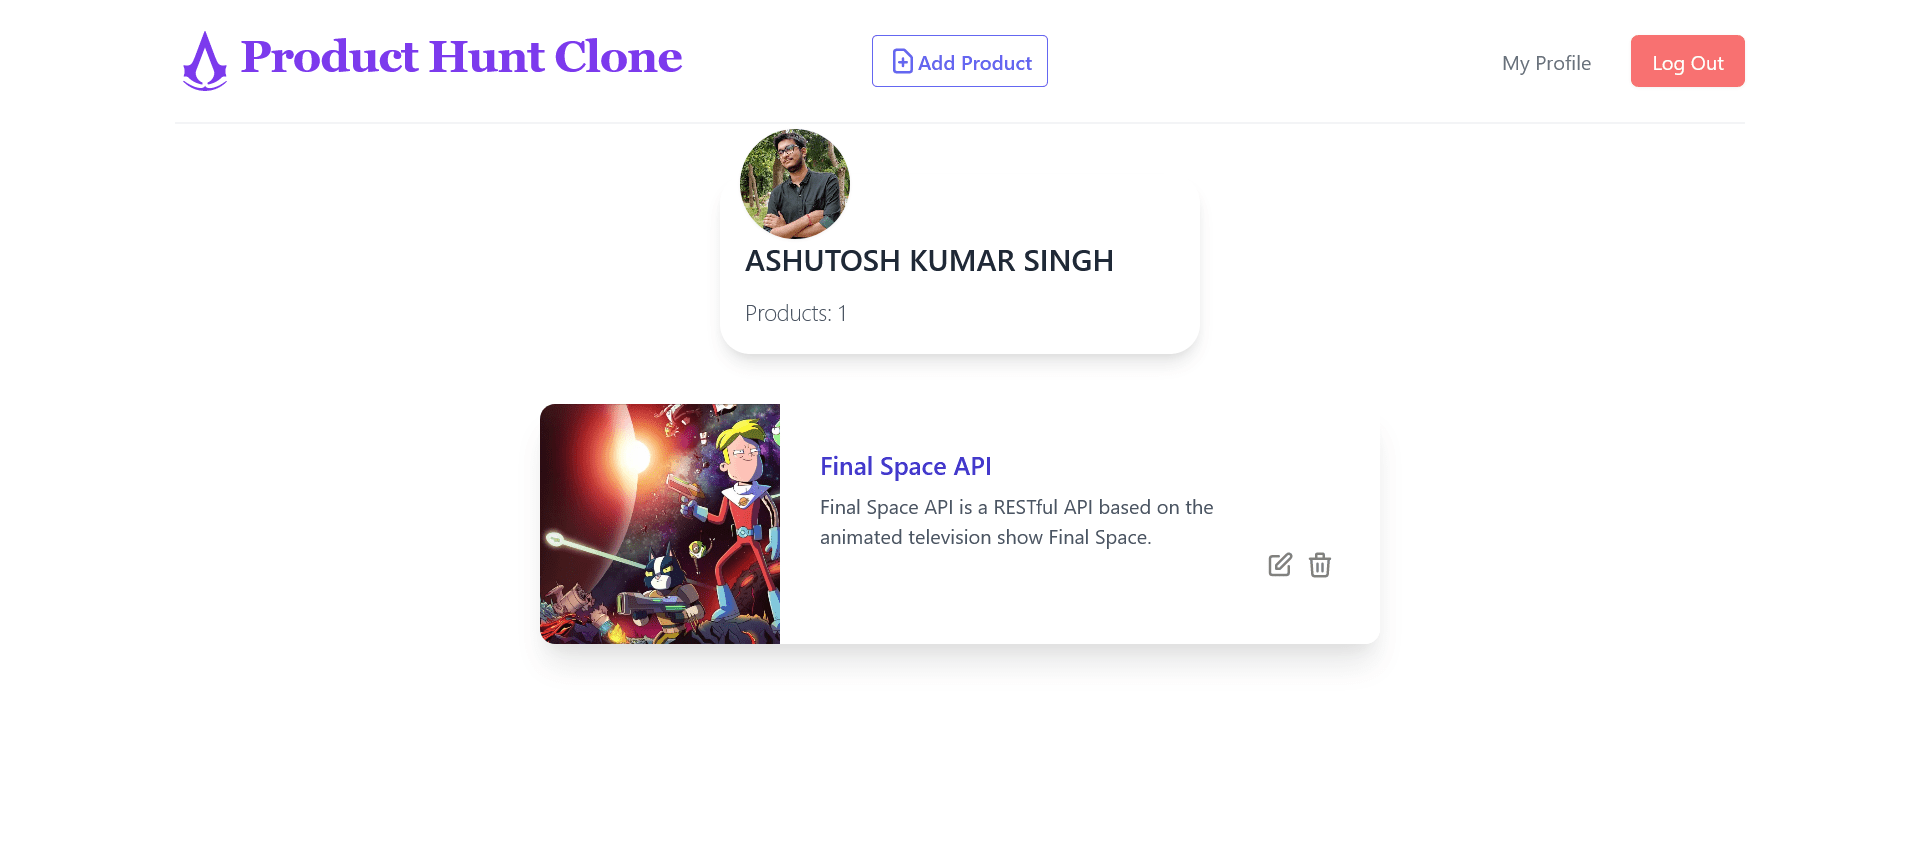
Here is the My Profile page after the user has created a product.
In this section, you will create the update/[id] dynamic route to edit/update a product. In this jam, you will update only the textual data of the product and not its image.
To update the product, you will create a form with Name, Link, and Description fields. Then, you will fetch the selected product and prefill the form with its data so that the user can see and update the product accordingly.
You might remember that in the Product component, you were sending the id of the product in the query parameter.
<button
  className="mx-1 h-6 w-6"
  onClick={() =>
    router.push({
      pathname: "/update/[id]",
      query: {
        id: id,
      },
    })
  }
>
Code language: HTML, XML (xml)
You will use this id in the query to fetch the corresponding product from Airtable.
Create and export functions named getProductById() and updateProduct() in lib/api.js file.
export const getProductById = async (id) => {
  const data = await table.find(id);
  return { id: data.id, ...data.fields };
};

export const updateProduct = async ({ id, name, link, description }) => {
  const data = await table.update(
    id,
    {
      Name: name,
      Description: description,
      Link: link,
    },

    function (err, records) {
      if (err) {
        console.error(err);
      }
    }
  );
};
Code language: JavaScript (javascript)
In the getProductById function, you use Airtable’s find() method to retrieve the product based on its id.
In the updateProduct function, you use Airtable’s update method to update the product. You pass the product’s id to be updated as the first argument, followed by an object containing the fields to be updated, i.e., Name, Description, and Link. The remaining fields like Sub and PublicId remain unchanged.
Run the following command to create the [id].js under the pages/update directory.
mkdir pages/update
touch pages/update/[id].js
Add the following code to [id].js file.
import React, { useState } from "react";
import Head from "next/head";
import { useUser, withPageAuthRequired } from "@auth0/nextjs-auth0";
import { getProductById } from "../../lib/api";
import { useRouter } from "next/router";
import Navbar from "../../components/Navbar";

const UpdateProduct = ({ product }) => {
  const router = useRouter();

  const [name, setName] = useState(product.Name);
  const [link, setLink] = useState(product.Link);
  const [description, setDescription] = useState(product.Description);
  const { user, error, isLoading } = useUser();

  if (isLoading) return <div>Loading</div>;
  if (error) return <div>{error.message}</div>;

  const handleSubmit = async (e) => {
    await e.preventDefault();
    const data = await fetch("/api/updateProduct", {
      method: "POST",
      body: JSON.stringify({ id: router.query.id, name, description, link }),
      headers: {
        "Content-Type": "application/json",
      }
    });
    await router.replace("/");
  };

  if (user) {
    return (
      <div>
        <Head>
          <title> Update Product : {product.Name} </title>
          <link rel="icon" href="/favicon.ico" />
        </Head>
        <Navbar />
        <div className="md:grid  justify-items-center md:gap-6">
          <div className="mt-0  md:mt-0 md:col-span-2">
            <h3 className="text-4xl text-center font-normal leading-normal mt-0 text-indigo-800">
              Update Product: {product.Name}
            </h3>
            <form>
              <div className="shadow-md sm:rounded-md sm:overflow-hidden">
                <div className="px-4 py-5 bg-white space-y-6 sm:p-6">
                  <div className="grid grid-cols-3 gap-6">
                    <div className="col-span-3 sm:col-span-2">
                      <label
                        htmlFor="product_name"
                        className="block text-sm font-medium text-gray-700"
                      >
                        Name of the Product
                      </label>
                      <div className="mt-1 flex rounded-md shadow-sm">
                        <input
                          type="text"
                          name="product_name"
                          id="product_name"
                          value={name}
                          onChange={(e) => setName(e.target.value)}
                          autoComplete="given-name"
                          className="mt-1 focus:ring-indigo-500 focus:border-indigo-500 block w-full shadow-sm sm:text-sm border-gray-300 rounded-md"
                        />
                      </div>
                    </div>
                  </div>

                  <div>
                    <label
                      htmlFor="product_description"
                      className="block text-sm font-medium text-gray-700"
                    >
                      Description
                    </label>
                    <div className="mt-1">
                      <textarea
                        id="product_description"
                        name="product_description"
                        rows={3}
                        value={description}
                        onChange={(e) => setDescription(e.target.value)}
                        className="shadow-sm focus:ring-indigo-500 focus:border-indigo-500 mt-1 block w-full sm:text-sm border-gray-300 rounded-md"
                        placeholder="Brief description for your Product."
                      />
                    </div>
                  </div>
                  <div className="grid grid-cols-3 gap-6">
                    <div className="col-span-3 sm:col-span-2">
                      <label
                        htmlFor="product_link"
                        className="block text-sm font-medium text-gray-700"
                      >
                        Link
                      </label>
                      <div className="mt-1 flex rounded-md shadow-sm">
                        <input
                          type="text"
                          name="product_link"
                          id="product_link"
                          value={link}
                          onChange={(e) => setLink(e.target.value)}
                          className="focus:ring-indigo-500 focus:border-indigo-500 flex-1 block w-full rounded-none rounded-md sm:text-sm border-gray-300"
                          placeholder="www.example.com"
                        />
                      </div>
                    </div>
                  </div>
                </div>
                <div className="px-4 py-2 bg-gray-50 text-right sm:px-6">
                  <button
                    type="submit"
                    onClick={handleSubmit}
                    className="inline-flex justify-center py-2 px-4 border border-transparent shadow-sm text-sm font-medium rounded-md text-white bg-indigo-600 hover:bg-indigo-700 focus:outline-none focus:ring-2 focus:ring-offset-2 focus:ring-indigo-500"
                  >
                    Update
                  </button>
                </div>
              </div>
            </form>
          </div>
        </div>
      </div>
    );
  }
};

export default UpdateProduct;

export const getServerSideProps = withPageAuthRequired({
  returnTo: "/api/auth/login",
  async getServerSideProps(ctx) {
    const data = await getProductById(ctx.params.id);

    return {
      props: {
        product: data,
      },
    };
  },
});
Code language: JavaScript (javascript)
You use the same code for the form as in the product/insert.js file.
Similar to /user/profile.js file, you use the getServerSideProps() function wrapped with the withPageAuthRequired method to redirect any anonymous user to the login page.
You access the product’s id using the params object and pass it to the getProductById() function. Finally, the product fetched is sent to the UpdateProduct function as a prop.
You define three states for name, description, and link of the product and set their default value to their corresponding value in the product object.
Then, in the UpdateProduct function’s return statement, you create a two-way data bind between the user input and the states.
Once the user has updated the product and clicks the Update button, the handleSubmit() function is triggered, sending a POST request to /api/updateProduct API route with the id, name, description, and link of the product in the request body.
Run the following commands to create the /api/updateProduct API route.
touch pages/api/updateProduct.js
Add the following code to updateProduct.js file.
import { withApiAuthRequired } from "@auth0/nextjs-auth0";
import {updateProduct} from "../../lib/api"

export default withApiAuthRequired(async function handler(req, res) {
  if (req.method !== "POST") {
    return res.status(405);
  }
  const { name, description, link, id } = req.body;

  await updateProduct({ id, name, description, link });
  return res.status(200).json({ msg: "Product Updated" });

});
Code language: JavaScript (javascript)
You protect this API route with the withApiAuthRequired() method from @auth0/nextjs-auth0 SDK. Then, you import the updateProduct function from the lib/api.js file and pass the arguments sent in the request body to it. Finally, after the product has been updated successfully, Product Updated is sent as a response.
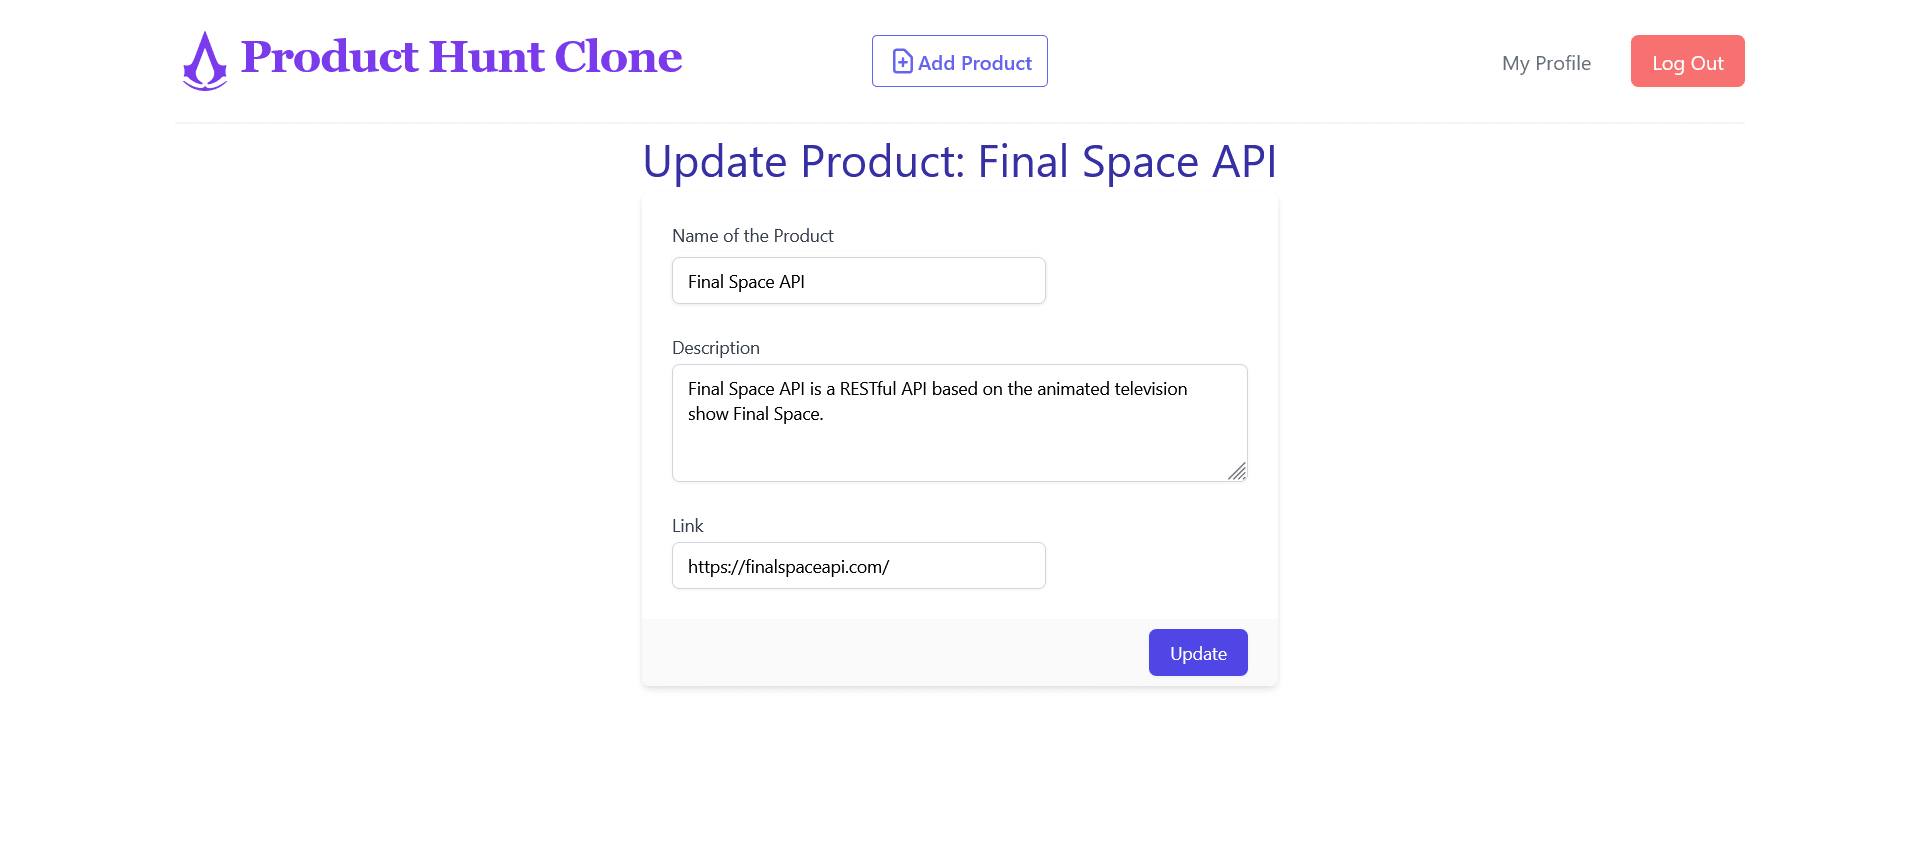
Here is a GIF showing the Update Product feature in action.
In this section, you will create the upvote feature in Products. Like the actual Product Hunt, a user should be able to upvote a product only once and should be able to remove their upvote from the product. For tutorial purposes, we will call the process of removing the upvote – downvote.
Note: You are not actually downvoting a product; you are removing your upvote from it.
For every upvote, you need to keep track of the id of the product and the unique identifier of a user, i.e., the user’s sub. You can store the id and sub together to represent an upvote.
By checking if the user’s sub is already associated with a product, i.e., a pair of the current user’s sub and the product id, you can make sure each user votes for a product only once. Then, when the user removes their upvote, you can delete this product id and sub pair.
If you were using a NoSQL database like MongoDB, you could have created a new field in the schema and store the sub of the current user in an array when the upvote button is clicked. This array would contain the sub of all the users who upvoted a particular product. And to downvote a product, you could remove that user’s sub from the array.
The resultant product object would look similar to this.
{
  "id": "rec176WGNlRJGN0mg",
  "Name": "Dev Desks",
  "Description": "The place where Devs share Desks! ",
  "PublicId": "product-hunt-clone/wji2dipmt3cssvvwbr06",
  "Link": "https://devdesks.io/",
  "Sub": "google-oauth2|10535765999545372338041",
  "Votes": [
    "google-oauth2|10535765999545372338041",
    "google-oauth2|1053576593456372338041",
    "google-oauth2|105357659995452323041"
  ]
}
Code language: JSON / JSON with Comments (json)
But, you cannot create an array object in Airtable, so its not possible to store the votes in the same manner as in a NoSQL database.
Here are a few workarounds for this limitation:
- You can create a
Long textfield in the schema and store thesubas strings separated by commas and then use thesplit(',')andjoin()methods to convert them into an array. Here you will have to make sure that when the user upvotes a product, you add to the existing string to retain the previous votes. - You can create another table in the same base named
votes, and for each vote, you can store bothsuband theidof the product in it. You can then filter out the votes of a product using its id.
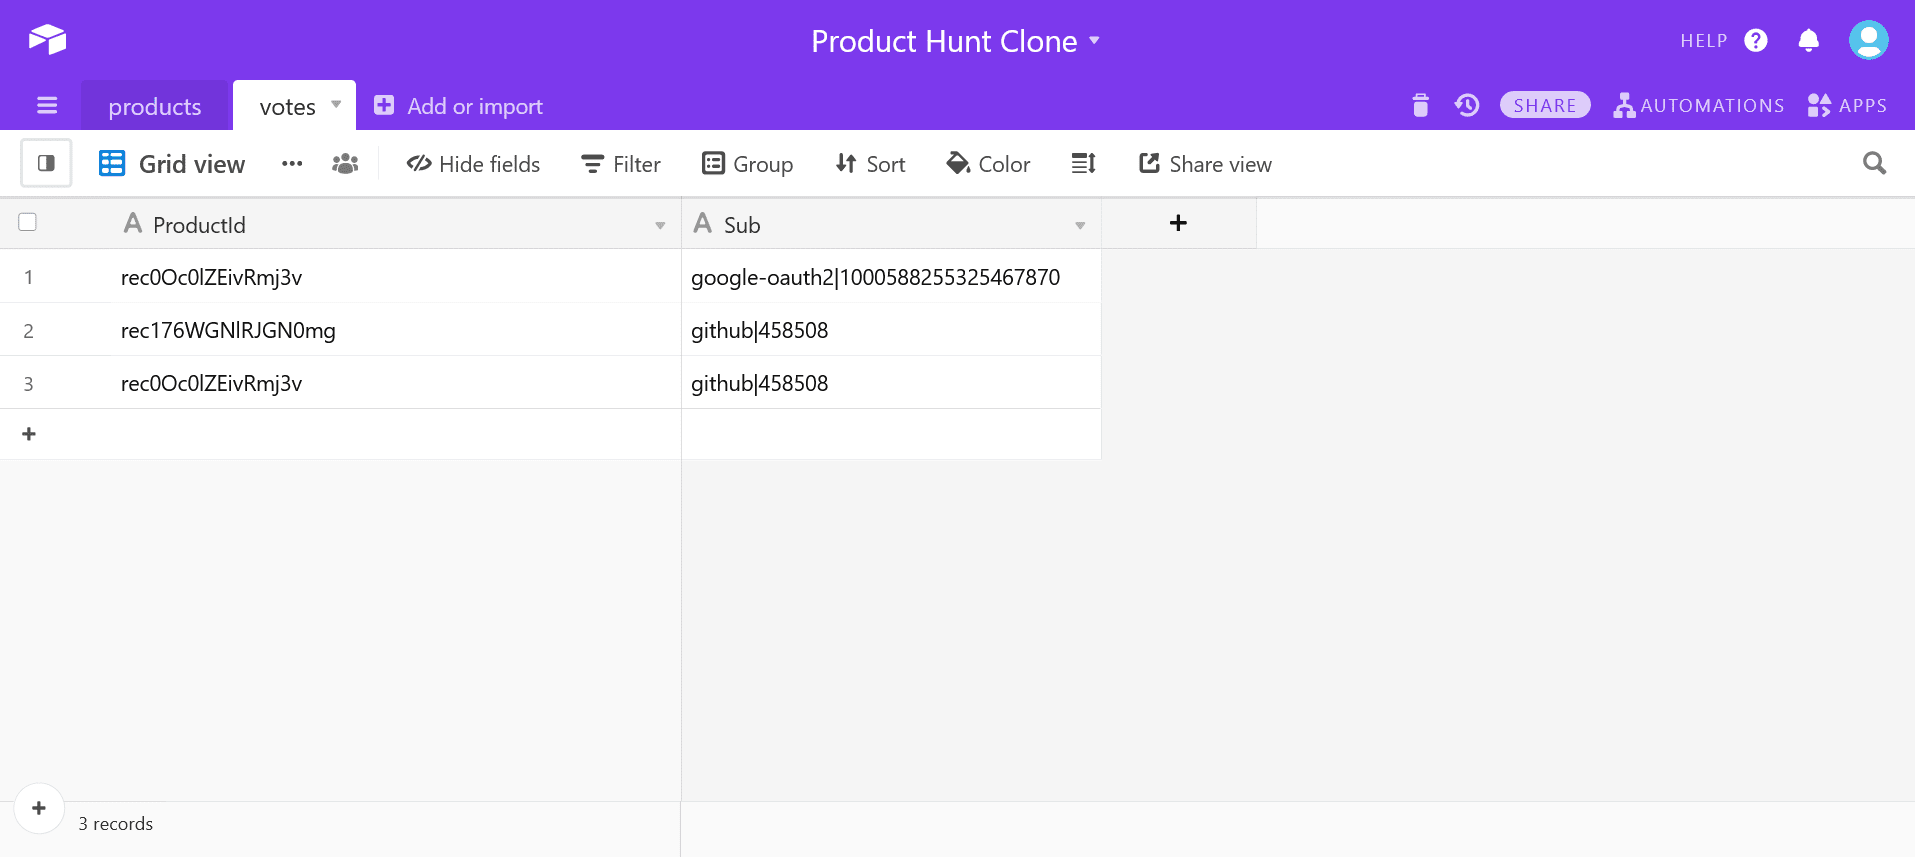
You will use the second method in this jam and create a new table named votes in the Product Hunt Clone base.
Head over to your Airtable account and open the Product Hunt Clone base. Create a new table named votes with the following schema.
-
ProductId– Id of the product upvoted. -
Sub– Sub of the user who upvoted the product.
You can refer to the votes table of this project here.
Each record in the votes table represents a vote. So, for example, if there is one product and three users in your Product Hunt Clone app. And each user upvotes the product; there will be three records in the votes table and one record in the products table.
The next step is to create the getVotesByProductId , upvoteProduct and downvoteProduct functions in lib/api.js. Add the following code to lib/api.js file.
export const getVotesByProductId = async (productId) => {
  const data = await base("votes")
    .select({
      view: "Grid view",
      filterByFormula: `ProductId = "${productId}"`,
    })
    .firstPage();

    return data.map((vote) => {
    return { id: vote.id, ...vote.fields };
  });
};
export const upvoteProduct = async ({ productId, sub }) => {
  const data = await base("votes").create({
    ProductId: productId,
    Sub: sub,
  });
};

export const downvoteProduct = async ({ id }) => {
  const data = await base("votes").destroy(id);
};
Code language: JavaScript (javascript)
The getVotesByProductId() functions filter out the records based on the product id. This means that the response returned from this function is the votes of a single product.
The upvoteProduct function creates a new record in the votes table with the current user’s sub and the product’s id upvoted. The productId passed to the upvoteProduct function is the id of the product.
The downvoteProduct function deletes the vote or record from the votes table. The id passed to the downvoteProduct function is the id of the vote. You might ask how to know which vote or record to delete from the votes table. Or which vote id should be passed in the downvoteProduct function.
Since each user can only vote once, if the user has upvoted a product, then the response returned from the getVotesByProductId function will have an object containing the sub of that user. You can filter out that object from all the objects in the array. That object will contain the id of the vote to be deleted.
The next step is to create the API routes for these functions. Create the getVotesByProductId/[id] , upvote and downvote API routes in the api directory.
touch pages/api/upvote.js
touch pages/api/downvote.js
mkdir pages/api/getVotesByProductId
touch pages/api/getVotesByProductId/[id].js
Add the following code to getVotesByProductId/[id].js file.
import { getVotesByProductId } from "../../../lib/api";

export default async function handler(req, res) {
  if (req.method !== "GET") {
    return res.status(405);
  }

  const { id } = req.query;

  try {
    const votes = await getVotesByProductId(id );
    return res.status(200).send(votes);
  } catch (err) {
    console.error(err);
    res.status(500).json({ msg: "Something went wrong." });
  }
}
Code language: JavaScript (javascript)
You use the id of the product extracted from the request query and pass it to the getVotesByProductId function. The data returned from the getVotesByProductId function is sent as the response.
Add the following code to upvote.js file.
import { upvoteProduct } from "../../lib/api";
import { withApiAuthRequired, getSession } from "@auth0/nextjs-auth0";

export default withApiAuthRequired(async function handler(req, res) {
  const session = getSession(req, res);
  const sub = await session.user.sub;

  if (req.method !== "PUT") {
    return res.status(405);
  }
  const { id } = req.body;

  try {
    const upvotedProduct = await upvoteProduct({ productId:id, sub });
    return res.status(200).json({ msg: "Upvoted" });
  } catch (err) {
    console.error(err);
    res.status(500).json({ msg: "Something went wrong." });
  }
});
Code language: JavaScript (javascript)
In the above code, the product’s id is extracted from the request body while the sub is accessed using the getSession() method from @auth0/nextjs-auth0 SDK. Finally, both the id and sub are passed to the upvoteProduct function.
Add the following code to downvote.js file.
import { downvoteProduct } from "../../lib/api";
import { withApiAuthRequired } from "@auth0/nextjs-auth0";

export default withApiAuthRequired(async function handler(req, res) {

  if (req.method !== "PUT") {
    return res.status(405);
  }
  const { id } = req.body;

  try {
    const downvotedProduct = await downvoteProduct({ id });
    return res.status(200).json({ msg: "Downvoted" });
  } catch (err) {
    console.error(err);
    res.status(500).json({ msg: "Something went wrong." });
  }
});
Code language: JavaScript (javascript)
Every vote in the votes table is a record. You delete a vote is deleted in the same way a product was deleted in the first part of the series, i.e., you use the destroy method and pass the id of the vote to it.
You will fetch the votes using the getVotesByProductId/[id] API route in the Product component. But, you cannot use the getServerSideProps() method in the Product component.
You will need to install the swr package to fetch the votes. You can read more about swr package here.
Run the following command in the terminal.
npm install swr
Update the components/Product.js file like this.
import React from "react";
import { Image, Transformation } from "cloudinary-react";
import { useUser } from "@auth0/nextjs-auth0";
import { useRouter } from "next/router";
import useSWR from "swr";
import Vote from "./Vote";

export default function Product({
  name,
  id,
  publicId,
  description,
  link,
  check,
}) {
  const router = useRouter();
  const { user, error, isLoading } = useUser();
  const { data, mutate } = useSWR(`/api/getVotesByProductId/${id}`);

  const deleteThisProduct = async (e) => {
    await fetch("/api/deleteProduct", {
      method: "DELETE",
      body: JSON.stringify({ id, publicId }),
      headers: {
        "Content-Type": "application/json",
      },
    });
    await router.reload();
  };

  return (
    <div className="max-w-md mx-auto my-4 bg-white rounded-xl shadow-xl overflow-hidden md:max-w-2xl">
      <div className="md:flex">
        <div className="md:flex-shrink-0">
          <Image
            className="h-48 w-full object-cover md:w-48"
            publicId={publicId}
            cloudName={process.env.NEXT_PUBLIC_CLOUDINARY_CLOUD_NAME}
            alt={name}
            format="webp"
            secure
          >
            <Transformation width="800" gravity="auto" crop="fill" />
          </Image>
        </div>
        <div className="p-8 w-full">
          <div className="flex justify-between  items-start">
            <a
              href={link}
              className="block mt-1 text-xl font-semibold leading-tight font-medium  text-indigo-700 hover:underline"
            >
              {name}
            </a>
            <Vote votes={data} refreshVotes={mutate} productId={id} />
          </div>
          <p className="mt-2 text-gray-600 w-10/12">{description} </p>

          {check && (
            <div className=" flex justify-end">
              <button
                className="mx-1 h-6 w-6"
                onClick={() =>
                  router.push({
                    pathname: "/update/[id]",
                    query: {
                      id: id,
                    },
                  })
                }
              >
                <svg
                  xmlns="http://www.w3.org/2000/svg"
                  className="h-6 w-6"
                  fill="none"
                  viewBox="0 0 24 24"
                  stroke="gray"
                >
                  <path
                    strokeLinecap="round"
                    strokeLinejoin="round"
                    strokeWidth={2}
                    d="M11 5H6a2 2 0 00-2 2v11a2 2 0 002 2h11a2 2 0 002-2v-5m-1.414-9.414a2 2 0 112.828 2.828L11.828 15H9v-2.828l8.586-8.586z"
                  />
                </svg>
              </button>
              <button onClick={deleteThisProduct} className="px-1">
                <svg
                  xmlns="http://www.w3.org/2000/svg"
                  className="h-6 w-6"
                  fill="none"
                  viewBox="0 0 24 24"
                  stroke="gray"
                >
                  <path
                    strokeLinecap="round"
                    strokeLinejoin="round"
                    strokeWidth={2}
                    d="M19 7l-.867 12.142A2 2 0 0116.138 21H7.862a2 2 0 01-1.995-1.858L5 7m5 4v6m4-6v6m1-10V4a1 1 0 00-1-1h-4a1 1 0 00-1 1v3M4 7h16"
                  />
                </svg>
              </button>
            </div>
          )}
        </div>
      </div>
    </div>
  );
}
Code language: JavaScript (javascript)
You use the useSWR hook to fetch the data from the getVotesByProductId/[id] API route.
const { data, mutate } = useSWR(`/api/getVotesByProductId/${id}`);
Code language: JavaScript (javascript)
The data fetched is stored in the data variable. This data array is passed to the Votes component along with id of the product and mutate function.
<Vote votes={data} refreshVotes={mutate} productId={id} />
Code language: HTML, XML (xml)
The mutate in the above code is a function that is pre-bound to the SWR’s key or /api/getVotesByProductId/${id}. This function updates the data array without any need to refresh the page. This means that if you upvote a product and call this function, the data array will be updated to include the latest addition without any reload of the whole page. You can read more about mutation here.
The next step is to create the Vote component in the components directory. Run the following command to create the Vote component.
touch components/Vote.js
Add the following code to the Vote.js file.
import React from "react";
import { useUser } from "@auth0/nextjs-auth0";
import { useRouter } from "next/router";

export default function Vote({ votes, refreshVotes, productId }) {
  const router = useRouter();
  const { user, error, isLoading } = useUser();

  const voteOfThisUser = user && votes ? votes.filter(function(vote){
    return vote.Sub == user.sub;
  }) : null;

  const upvoteThisProduct = async (e) => {
    await e.preventDefault();
    if (!user) {
      router.push("/api/auth/login");
    } else {
      await fetch("/api/upvote", {
        method: "PUT",
        body: JSON.stringify({ id: productId }),
        headers: {
          "Content-Type": "application/json",
        },
      });
      refreshVotes();
    }
  };

  const downvoteThisProduct = async (e) => {
    await e.preventDefault();
    await fetch("/api/downvote", {
      method: "PUT",
      body: JSON.stringify({ id: voteOfThisUser[0].id }),
      headers: {
        "Content-Type": "application/json",
      },
    });
    refreshVotes();

  };
  if (!votes || isLoading || error) return <div>...</div>

  return (
    <div className="flex">
      {user && votes.some((elem) => elem.Sub === user.sub) ? (
        <button
          className="flex border shadow-sm border-purple-800 rounded-md p-1"
          onClick={downvoteThisProduct}
        >
          <svg
            xmlns="http://www.w3.org/2000/svg"
            className="h-6 w-6"
            viewBox="0 0 20 20"
            fill="purple"
          >
            <path
              fillRule="evenodd"
              d="M10 18a8 8 0 100-16 8 8 0 000 16zm3.707-8.707l-3-3a1 1 0 00-1.414 0l-3 3a1 1 0 001.414 1.414L9 9.414V13a1 1 0 102 0V9.414l1.293 1.293a1 1 0 001.414-1.414z"
              clipRule="evenodd"
            />
          </svg>
          <p className="text-purple-700">
            {  votes.length}
          </p>
        </button>
      ) : (
        <button
          className="flex border  border-gray p-1   shadow-sm  rounded-md"
          onClick={upvoteThisProduct}
        >
          <svg
            xmlns="http://www.w3.org/2000/svg"
            className="h-6 w-6"
            fill="none"
            viewBox="0 0 24 24"
            stroke="gray"
          >
            <path
              strokeLinecap="round"
              strokeLinejoin="round"
              strokeWidth={2}
              d="M9 11l3-3m0 0l3 3m-3-3v8m0-13a9 9 0 110 18 9 9 0 010-18z"
            />
          </svg>
          <p className="text-gray-600">
            { votes.length}
            </p>
        </button>
      )}
    </div>
  );
}
Code language: JavaScript (javascript)
In the above function, you show the number of votes using the length of the votes array. By default, a user is shown the upvote button, which triggers the upvoteThisProduct function. This function checks if the user is logged in or not. If an anonymous user tries to upvote a product, they are redirected to the login page.
Otherwise, if the user is logged in, then a POST request is sent to the /api/upvote API route with the product’s id in the request body. After which, the refreshVotes or mutate function is triggered to update the count of the votes.
If the user has already upvoted the product, they are shown the downvote button, the colored version of the upvote button. This button triggers the downvoteThisProduct function, sending a POST request to the api/downvote API route with the id of the vote in the request body. After the POST request, the refreshVotes function is triggered.
Here is how the record to be deleted is filtered from the votes array.
const voteOfThisUser =
  user && votes
    ? votes.filter(function (vote) {
        return vote.Sub == user.sub;
      })
    : null;
Code language: JavaScript (javascript)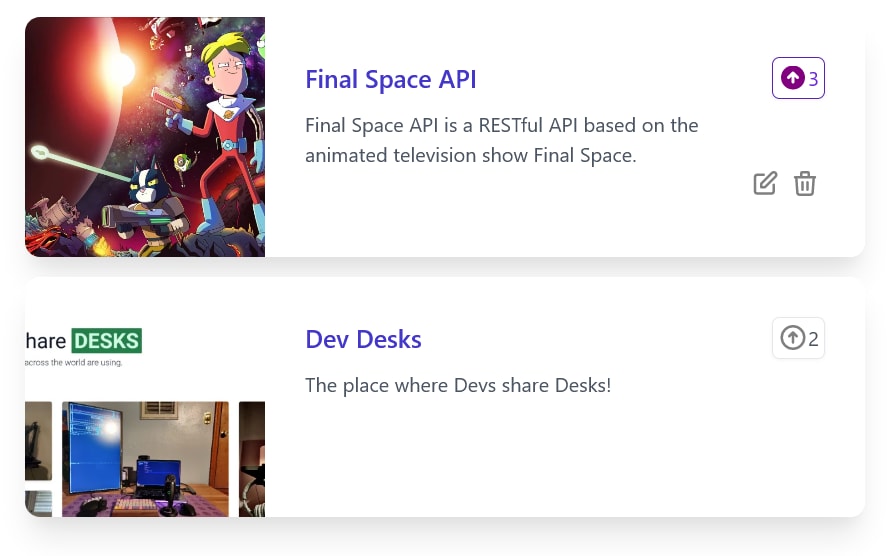
Here is a GIF showing the upvote and downvote in action.

When a user deletes the product, the votes associated with that product should also get deleted. In this section, you will update the deleteThisProduct function in the Product component and the deleteProduct API route.
Since there can be any number of votes associated with a product, you will first need to create an array of the id of all such votes.
Modify deleteThisProduct function in Product component like this.
const deleteThisProduct = async (e) => {
    const votesId =
      data &&
      data.map((vote) => {
        return vote.id;
      });

    await fetch("/api/deleteProduct", {
      method: "DELETE",
      body: JSON.stringify({ id, publicId, votesId }),
      headers: {
        "Content-Type": "application/json",
      },
    });
    await router.reload();
  };
Code language: JavaScript (javascript)
In the above code, you map over the votes array to create a new array containing only the id of votes. Then, you pass this voteId array in the request body of the /api/deleteProduct DELETE request.
Update api/deleteProduct.js file this.
import { withApiAuthRequired } from "@auth0/nextjs-auth0";
const cloudinary = require("cloudinary").v2;
var Airtable = require("airtable");

cloudinary.config({
  cloud_name: process.env.NEXT_PUBLIC_CLOUDINARY_CLOUD_NAME,
  api_key: process.env.CLOUDINARY_API_KEY,
  api_secret: process.env.CLOUDINARY_API_SECRET,
});

const base = new Airtable({ apiKey: process.env.AIRTABLE_API_KEY }).base(
  process.env.AIRTABLE_BASE_ID
);

export default withApiAuthRequired(async function handler(req, res) {
  if (req.method !== "DELETE") {
    return res.status(405);
  }
  const { id, publicId, votesId } = req.body;

  try {
    const deletedProduct = await base("products").destroy(id);
    const deletedVotes = await base("votes").destroy(votesId)

    const deleteImageFromCloudinary = cloudinary.uploader.destroy(
      publicId,
      function (error, result) {
        if (error) {
          console.log(error);
        }
      }
    );
    return res.status(200).json({ msg: "Product Deleted" });
  } catch (err) {
    console.error(err);
    res.status(500).json({ msg: "Something went wrong." });
  }
});
Code language: JavaScript (javascript)
You delete the votes using the destroy method and pass the votesId array to it. So now, when the user deletes a product, all the votes are deleted along with it.
In this media jam, we created a Profile page where the user can see the products created by them. Then, we built the dynamic route to update the product. Finally, we discussed how to upvote a product and how to delete votes along with the product.
You can follow this jam and create your own unique version of this project. There are many features and functionality that you can add to this project.
Here are a few ideas to get you started:
- In this project, the user cannot update the product’s image. You can add the feature to update the product’s image. You can either upload a new image to Cloudinary and update Airtable with the
public_idof this new image. Or you can replace the existing image while retaining the originalpublic_id. - You can follow the same steps to create a YouTube or Instagram Clone.
- Style the app using UI libraries like Chakra UI, Material UI, etc.
Here are a few resources that you might find helpful.
Happy coding!