
AWS Amplify enables developers of all skill levels to create, deploy, and maintain full-stack applications more effectively. Speaking of services, we will be using the Amplify CLI to create an S3 bucket and upload images from a React app. Next, we’ll use Cloudinary’s rich media transformation tools to retrieve images stored on the S3 bucket and apply some transformations to them.
Here is a link to the demo on CodeSandbox.
Run the following command in your terminal to set up a React application:
npx create-react-app my-amplify-project
Let’s create a file that’ll hold the logic for handling image transformation. Run this command in your terminal to create a file named TransformImage.js:
    cd my-amplify-project
    cd src
    mkdir components
    cd components
    touch TransformImage.js
Code language: CSS (css)
Our application will require some dependencies. To keep things simple, we will be installing them when we need them.
To initialize our React application, integrate, create and provision the AWS services required in our app, let’s install and configure the Amplify CLI tool. Run the following command in your terminal:
    npm i -g @aws-amplify/cli
Code language: CSS (css)
The installed tool must be linked to your AWS account; to do so, run the following command in your terminal:
amplify configure
AWS discourages using your Root-level credentials (i.e., email and password) to manage your account’s resources and instead suggests utilizing an IAM user account to specify permissions. You will be sent to your dashboard to fill up your information. We gave the IAM user account AdministratorAccess in the permissions area.
Once this is successful, you will receive an access key ID and a secret key, as shown below:
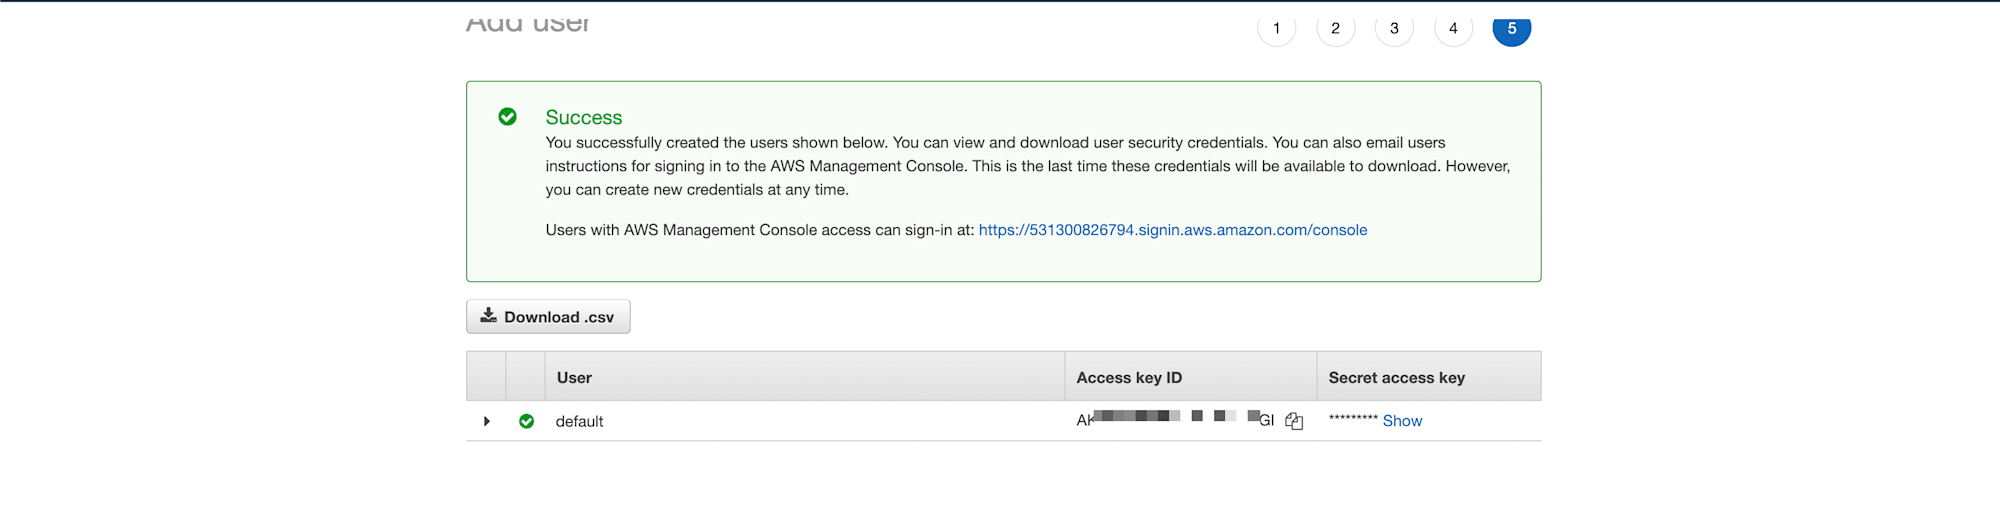
You will be prompted in the CLI to insert these credentials to complete the configuration step. Finally, select a name that will be bound to the profile of the IAM user you just created — I used “default”.
Login to your Cloudinary account or create one here if you don’t have one already. You can get your credentials in the Account details section on your dashboard.
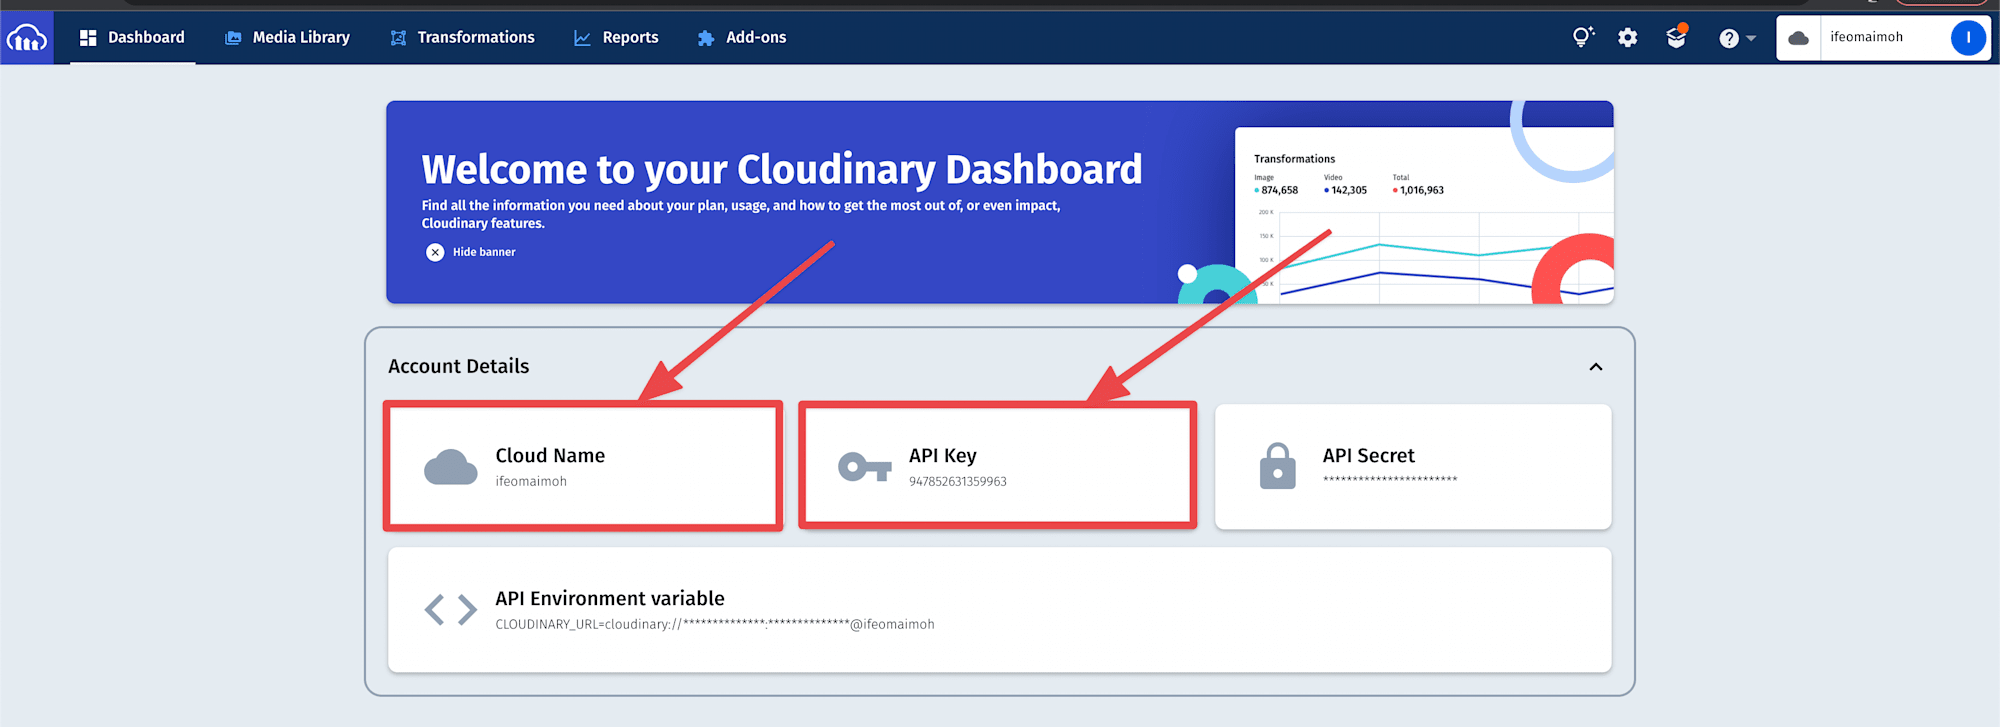
We only need our public credentials – our cloud name and API key. Take note of their values; we will use them later to set up the Cloudinary SDK to transform our images.
At the moment, our project is just a basic CRA application. To make it amplify compatible, we need to initialize it by running this command:
amplify init
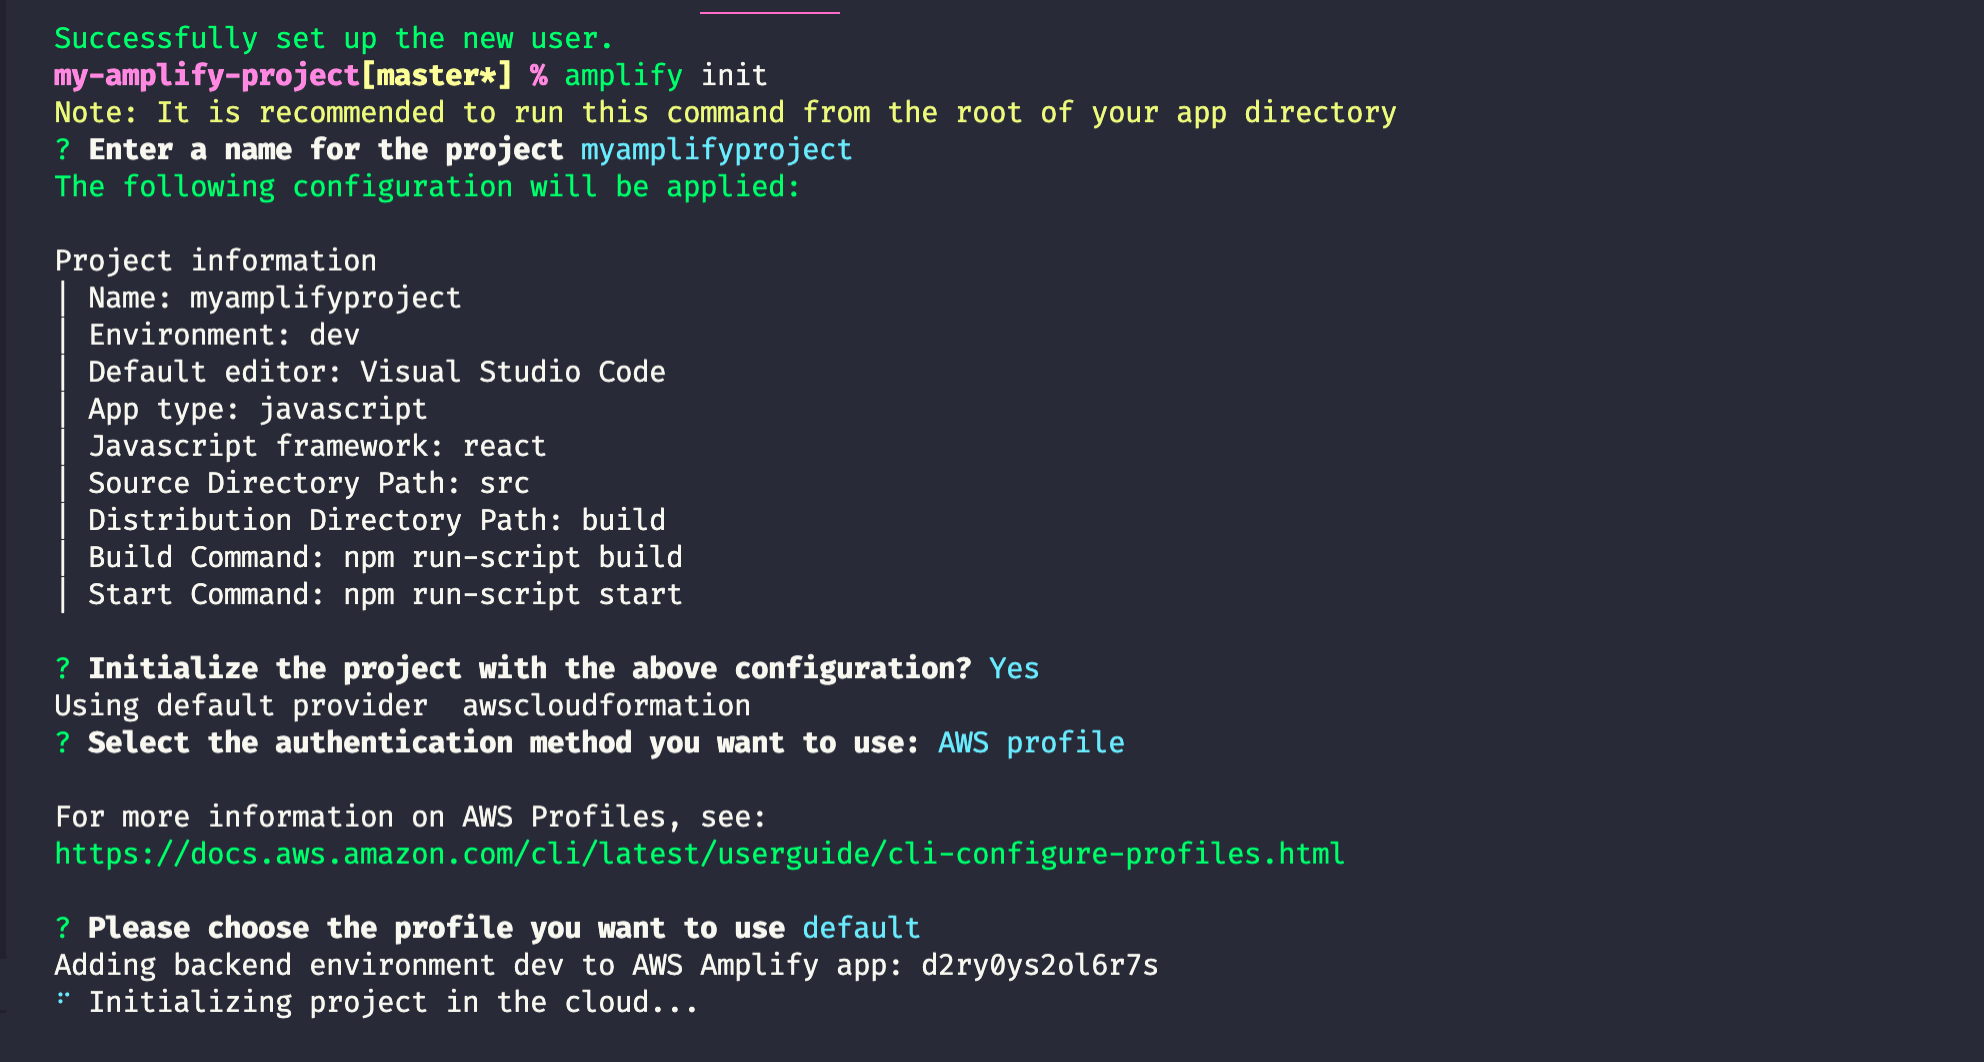
In the prompt, you will be required to choose the name of your Amplify project. It will also detect the framework you’re using (React) and other project-specific information. We are also required to authenticate using an IAM account, so we use the one created earlier. If this is successful, this tool does several things, the most important ones are as follows:
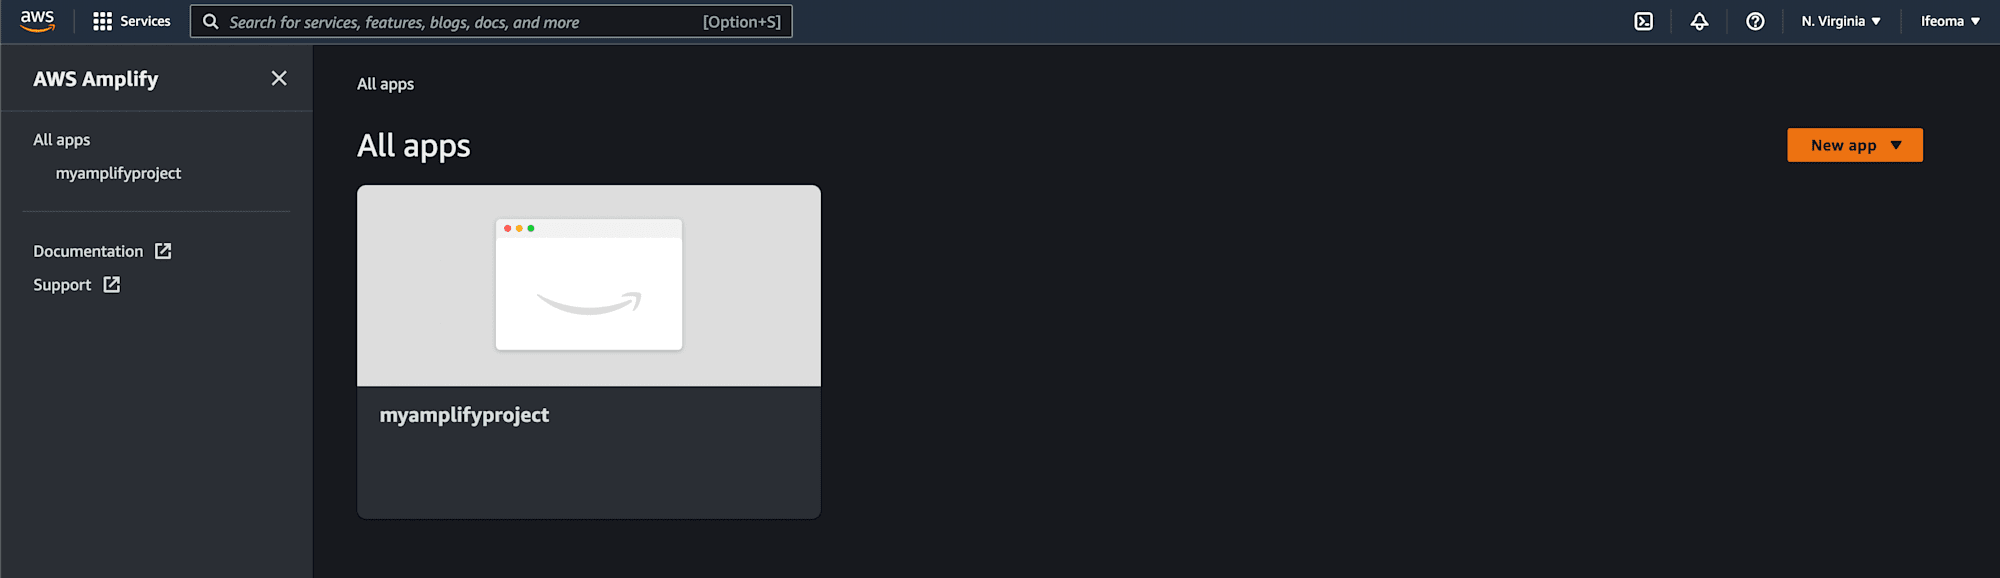
- It initializes our project in the cloud. You can see the app we just created in the AWS Amplify service section on your dashboard, as seen below:
- It creates an
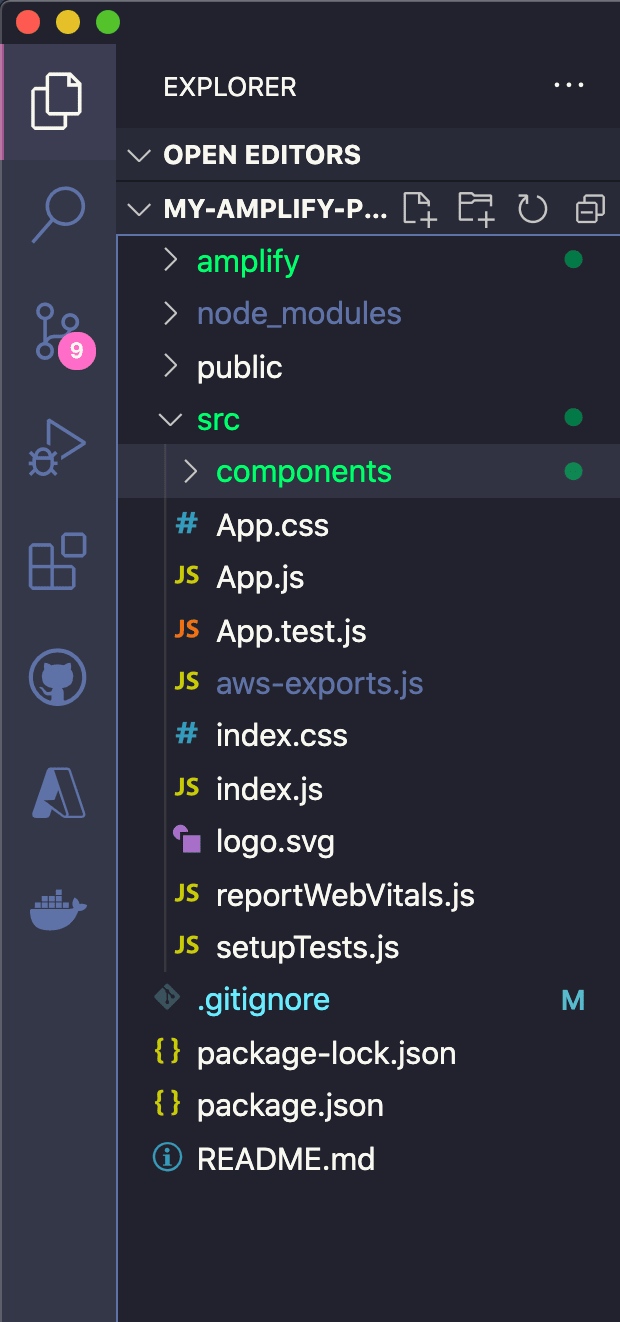
amplifyfolder in our working directory containing all the local code representing our backend infrastructure (code representing all the AWS services we need). It also creates anaws-exports.jsfile in the src folder. This config file holds data that we will use later to configure and integrate the services we include in our backend in our react app. As we add more services to our backend, the contents of theamplifyfolder and theaws-exports.jsfile will be updated accordingly to reflect this change.
Run this command in your terminal:
amplify add storage
The command above adds a simple storage service to the backend of our application. First, we choose the content service – S3 bucket in the prompts above. Although we are not adding login or signup functionality to our app, creating an S3 bucket requires adding the authentication service (we are using Cognito) to our backend.
Setting up Cognito involves choosing how we want users to signup for our application; in our case, we select Username and Password. We have also specified permissions for different operations (create, read, update, delete). Since our application doesn’t need authentication from users to upload files, our upload operations will be unauthenticated.
So far, we’ve set up Auth and storage on our local application. We need to replicate the changes we have on the cloud. To do that, run this command in your terminal:
amplify push
Run this command in your terminal to install the amplify dependency:
npm i -s aws-amplify
This main amplify module will provide us with useful classes and functions. we need to configure and use the services in our back-end and in our React application. Add the following to your App.js file:
import "./App.css";
import { useState } from "react";
import Amplify, { Storage } from "aws-amplify";
import config from "./aws-exports";
import TransformImage from "./components/TransformImage";
Amplify.configure(config);
function App() {
const [loading, setLoading] = useState(false);
const [file, setFile] = useState(null);
const [key, setKey] = useState("");
const handleSelectFile = (e) => setFile(e.target.files[0]);
const handleUpload = async () => {
try {
setLoading(true);
const res = await Storage.put(`${file.name}`, file);
console.log({ res });
setKey(res.key);
alert("upload successful");
} catch (error) {
alert(error.message);
} finally {
setLoading(false);
}
};
let choosenFileURL;
if (file) {
choosenFileURL = window.URL.createObjectURL(file);
}
// console.log({ URL: choosenFileURL, file });
return (
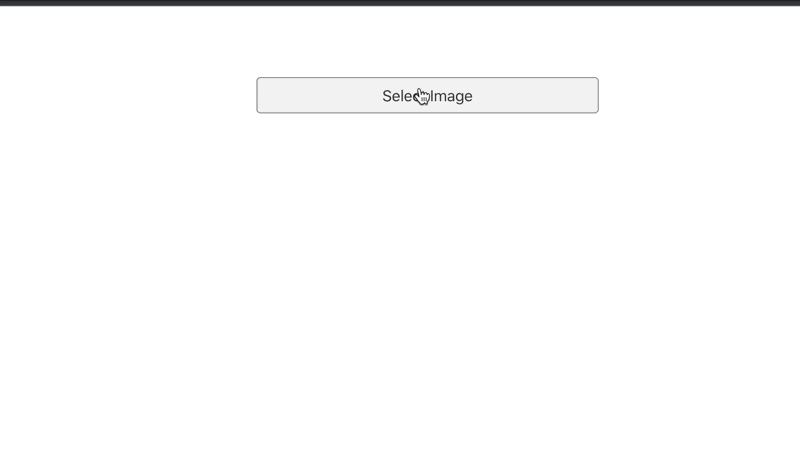
<div className="App">
<label htmlFor="file" className="btn-grey">
{" "}
select image
</label>
{file && (
<div>
<img width={300} alt="sample" src={choosenFileURL} />
<center> {file.name}</center>
</div>
)}
<input
id="file"
type="file"
onChange={handleSelectFile}
multiple={false}
/>
{file && (
<>
<button onClick={handleUpload} className="btn-green">
{loading ? "uploading..." : "upload to s3 bucket"}
</button>
</>
)}
{key && <TransformImage imageKey={key} />}
</div>
);
}
export default App;
Code language: PHP (php)We start by configuring our application using the configure method of the Amplify class. Next, we define and export our App component, which returns some JSX. It includes an input field that allows you to select an image and store it in a state before it is rendered to the screen. We also have a button that triggers the handleUpload function, which toggles the loading state and attempts to upload the file using the Storage class provided by the Amplify module. If the upload is successful, in the response object, we get an object with a key property whose value is the same as the first parameter we specified in the put call. This key is stored in state and passed as props to the TransformImage component.
Add the following styles to your App.css file:
    * {
      box-sizing: border-box;
    }
    .App {
      text-align: center;
      display: grid;
      gap: 2rem;
      max-width: 470px;
      padding: 1.5rem;
      margin: auto;
      margin-top: 4rem;
    }
    label,
    button {
      font-size: 1.2rem;
      color: #fff;
      padding: 0.5em 0.9em;
      cursor: pointer;
      border: none;
    }
    [type="file"] {
      display: none;
    }
    [class*="btn"] {
      border-radius: 5px;
      text-transform: capitalize;
    }
    .btn-grey {
      background-color: #f2f2f2;
      color: #333;
      border: 1px solid #888;
    }
    .btn-green {
      background-color: #63dd47;
    }
    .btn-blue {
      background-color: #0e80c9;
    }
    p {
      display: block;
      width: 60%;
      font-family: monospace;
      font-size: 1.2rem;
      background-color: #000;
      color: #f00;
      margin: auto;
      text-overflow: ellipsis;
    }
Code language: CSS (css)
To see the running application run the following command in your terminal:
npm start
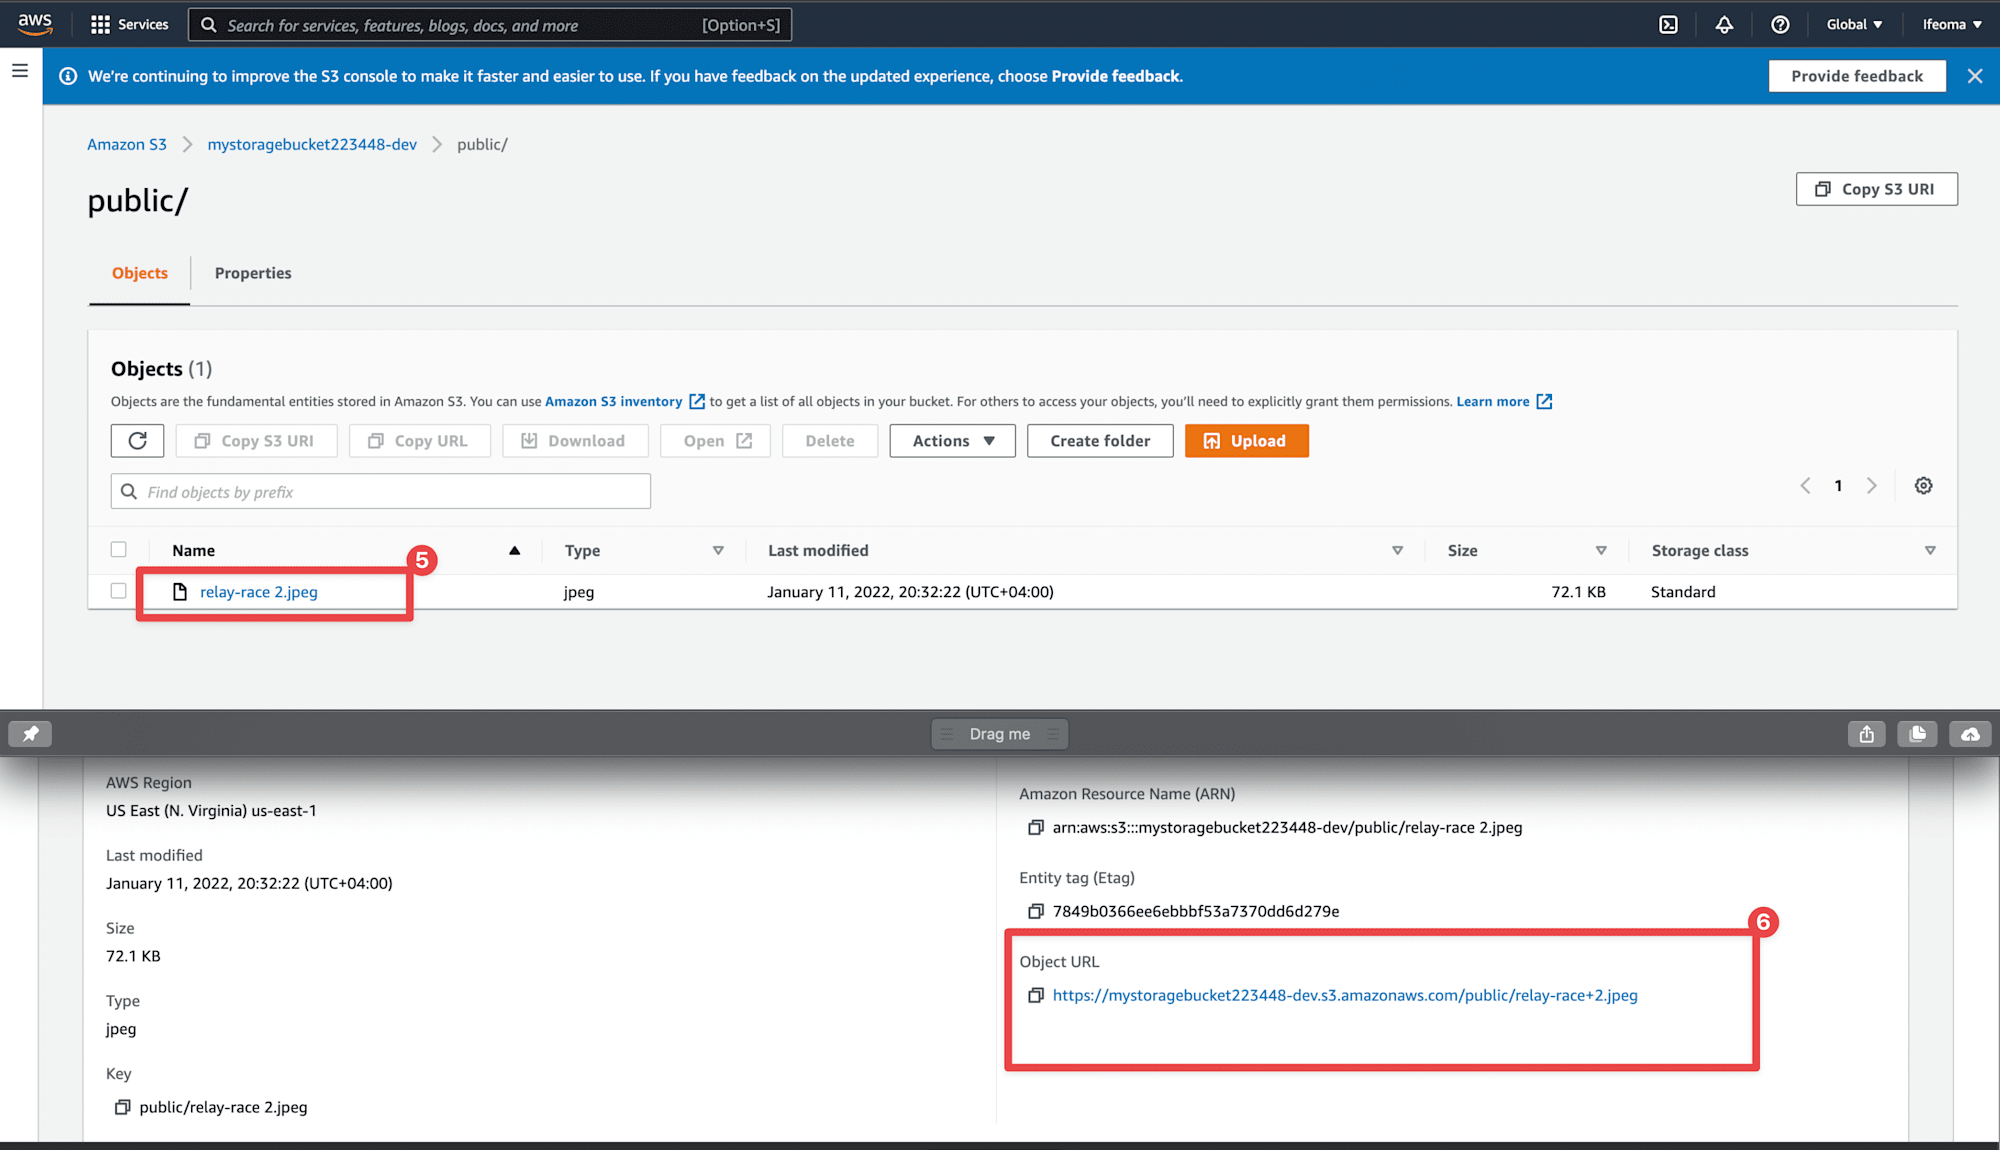
We can preview images uploaded to our bucket on the cloud console via the following steps:
-
Search for s3 in the search bar and click on Buckets.

-
Next, select the bucket’s name from the list and click on the public folder.
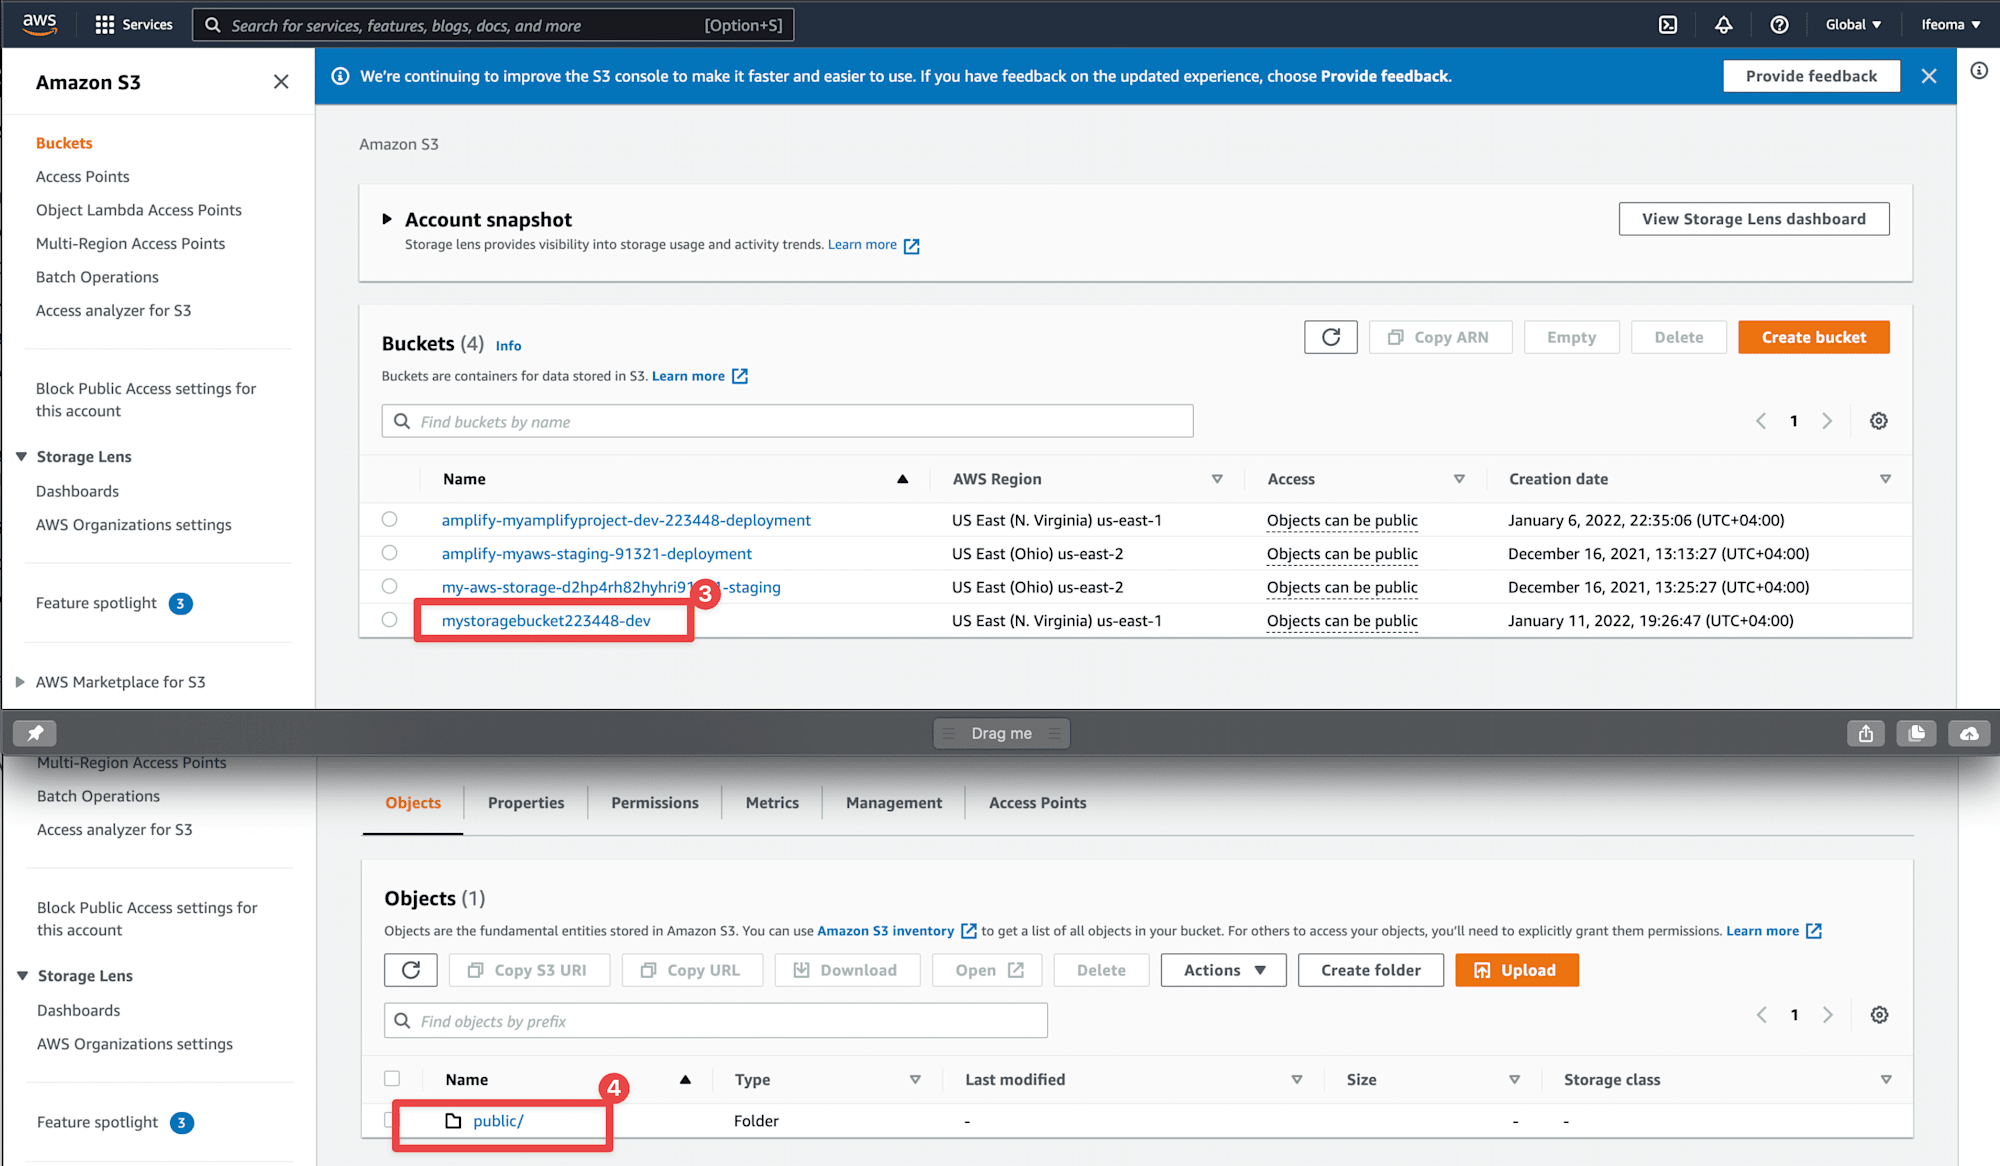
-
When you click on the image, you should see a unique URL that points to the image.
If you click the URL of your image now, you will get a 403 message, as seen below:

By default, all newly created s3 buckets block anonymous access to stored files(objects). This is normal because we don’t want unauthorized access to our assets. We need to change that because there are no confidential files in our bucket, and we need to use the URL of our files to fetch and transform our images using Cloudinary’s SDK.
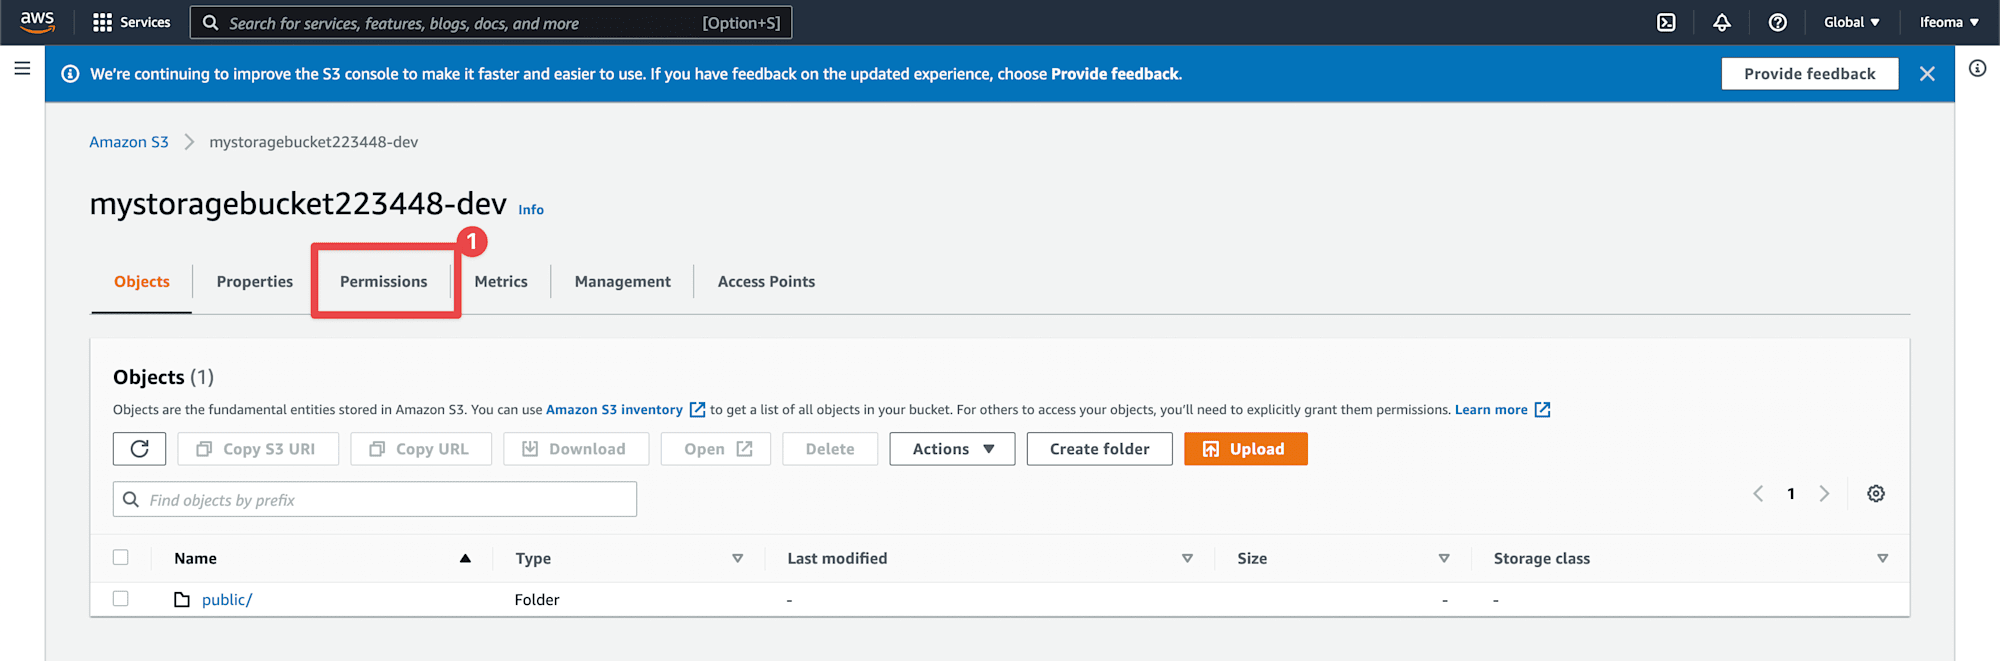
- Click on the newly created bucket and click on the Permissions tab.
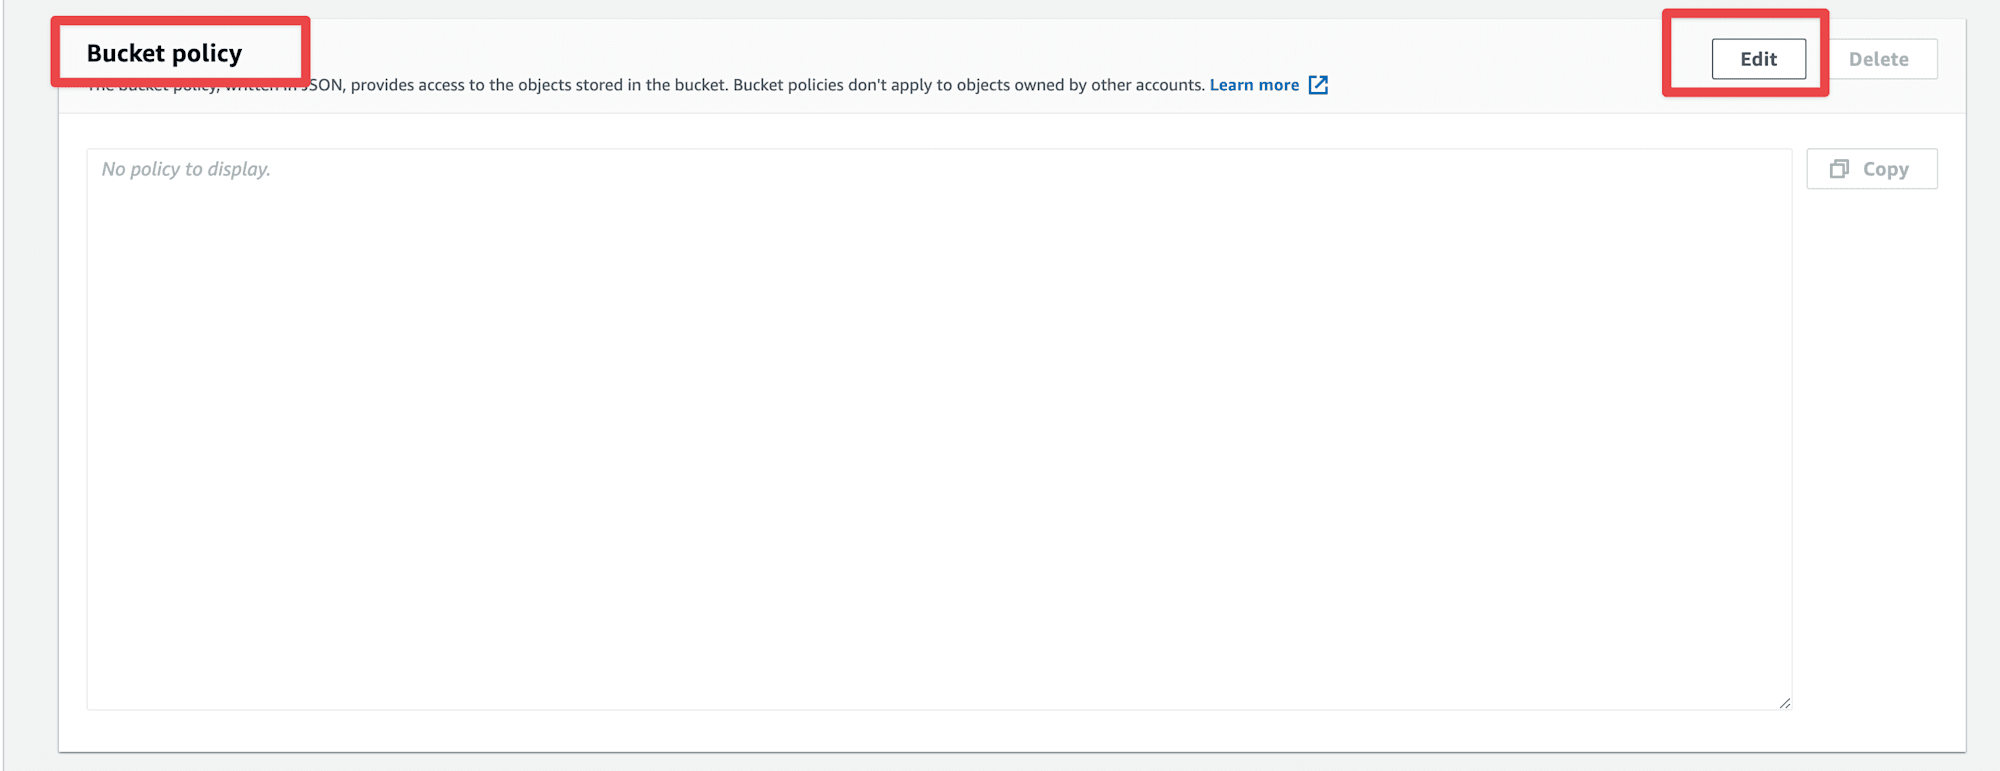
- Scroll down to Bucket policy and click the Edit button.
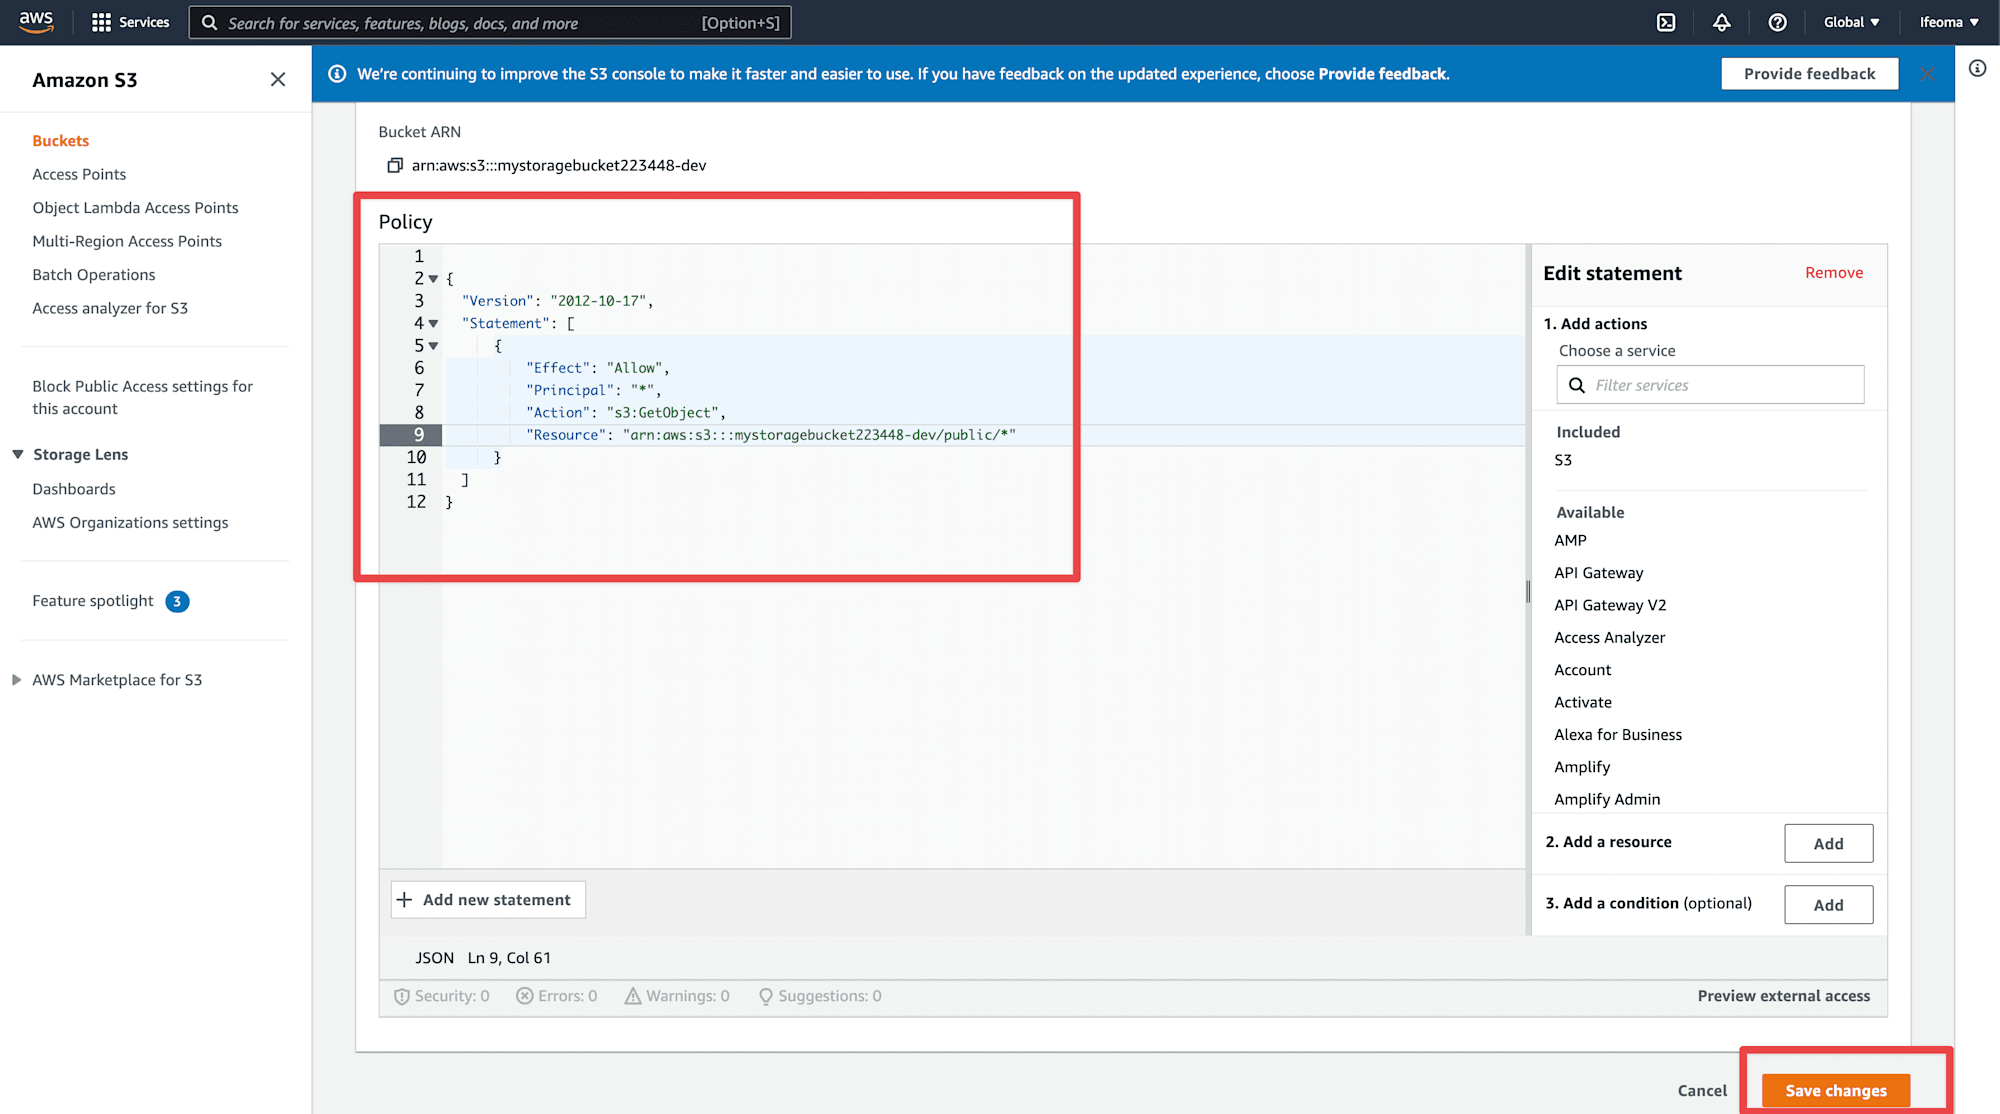
The bucket policy is just JSON written using amazon policy language. For our bucket, this data looks like this:
    {
      "Version": "2012-10-17",
      "Statement": [
          {
              "Effect": "Allow",
              "Principal": "*",
              "Action": "s3:GetObject",
              "Resource": "arn:aws:s3:::ADD-BUCKET-NAME-HERE/public/*"
          }
      ]
    }
Code language: JSON / JSON with Comments (json)
This information provided above states that we want to allow everyone to read ( s3:GetObject) only the public folder contents on our s3 bucket. Copy and paste the bucket policy in the field provided, add your bucket name, and click Save changes as shown below.
Now, if you click the URL of the file in your public folder, you should see the image.
We now understand the structure of object URLs that live on an s3 bucket and how to make its contents accessible. We will now see how to transform these images using Cloudinary in our React app.
Let’s install our Cloudinary SDK. Run this command in your terminal:
    npm install @cloudinary/url-gen
Code language: CSS (css)
This dependency will provide us with the tools to build delivery URLs and apply transformations to the images on our bucket.
Add the following to the TransformImage.js file in the components folder.
    import { useState } from "react";
    import { Cloudinary } from "@cloudinary/url-gen";
    import {
      Effect,
      RoundCorners,
      Rotate,
      Resize,
      Overlay,
    } from "@cloudinary/url-gen/actions";
    import { Position, Source } from "@cloudinary/url-gen/qualifiers";
    import { TextStyle } from "@cloudinary/url-gen/qualifiers/textStyle";
    import Transformation from "@cloudinary/url-gen/backwards/transformation";

    const myCld = new Cloudinary({
      cloud: {
        cloudName: "YOUR-CLOUD-NAME",
        apiKey: "YOUR-API-KEY",
      },
    });
    const TransformImage = ({ imageKey }) => {
      const [URL, setURL] = useState("");
      const getURLofS3Object = (tag) => {
        const S3BucketName = "YOUR-STORAGE-BUCKET-NAME";
        return `https://${S3BucketName}.s3.amazonaws.com/${tag}`;
      };
      const getImage = async () => {
        const objectURL = getURLofS3Object(`public/${imageKey}`);
        let image = myCld.image(objectURL).setDeliveryType("fetch");
        image
          .resize(Resize.fill().width(340))
          .effect(Effect.artisticFilter("frost"))
          .roundCorners(RoundCorners.byRadius().radius(40))
          .rotate(Rotate.byAngle(20))
          .overlay(
            Overlay.source(
              Source.text(
                imageKey.replace(/\.\w+$/, ""),
                new TextStyle("Cookie", 50).fontWeight(800)
              )
                .textColor("#0C0C14")
                .transformation(
                  new Transformation().effect(Effect.shadow(4).color("#FFCC43"))
                )
            ).position(new Position().offsetY("160").offsetX("20"))
          );
        setURL(image.toURL());
      };
      return (
        <>
          <button onClick={getImage} className="btn-blue">
            transform image
          </button>
          {URL && <img src={URL} alt="some_random_img" />}
        </>
      );
    };
    export default TransformImage;
Code language: JavaScript (javascript)
In the code above, we created an instance of the Cloudinary class and configured it using our Cloudinary credentials. Next, we define and export the TransformImage component, which accepts an imageKey – a string representing a key to a file on an s3bucket. In the component, we defined a variable that will hold the URL of our transformed image – Cloudinary calls this the delivery URL.
Next, we define a method, getURLofS3Object, which expects the key to a file of an S3 bucket as its parameter, and returns a URL to the object. We also defined a getImageURL function which generates a Cloudinary delivery/transformation URL of our s3 image. getImageURL starts by getting the s3 object URL, and then it uses our Cloudinary instance to create an image object. The call to setDeliveryType, set to fetch specifies that the image we want to transform is a remote file.
Next, we build the transformation section of the delivery URL, which follows a series of chained function calls. Here we resized the image to a width of 300px and rotated it by 20 degrees. We also applied the artistic filter with the frost qualifier value and added a text overlay formed from the image’s key without its file extension.
This function calls result in one big delivery URL that we can access by calling the toURL function on the image object and storing it in a state variable passed to a traditional HTML image tag to be rendered to the screen.
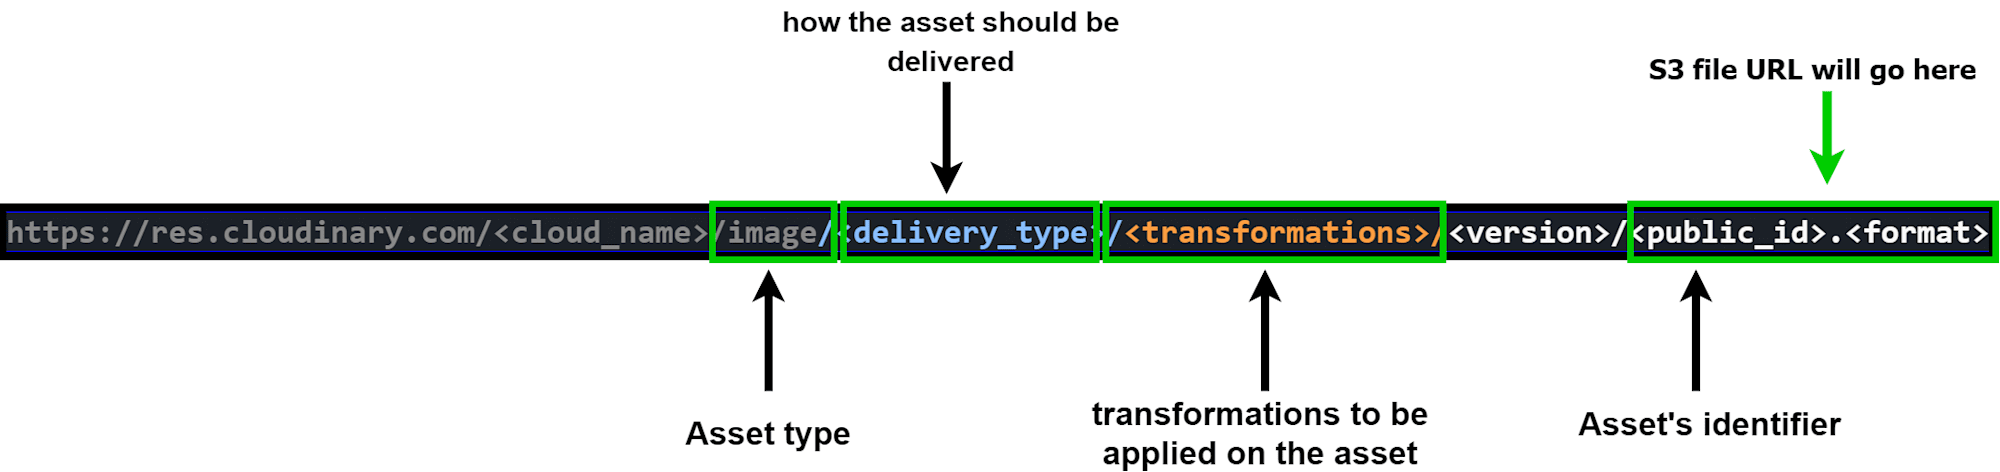
The image above shows the various components that make up this URL and where the URL of an S3 file will be embedded.
The strategy employed here applies transformations on-the-fly. This means the image is only transformed when we request it. The original untransformed version is cached on our Cloudinary account.
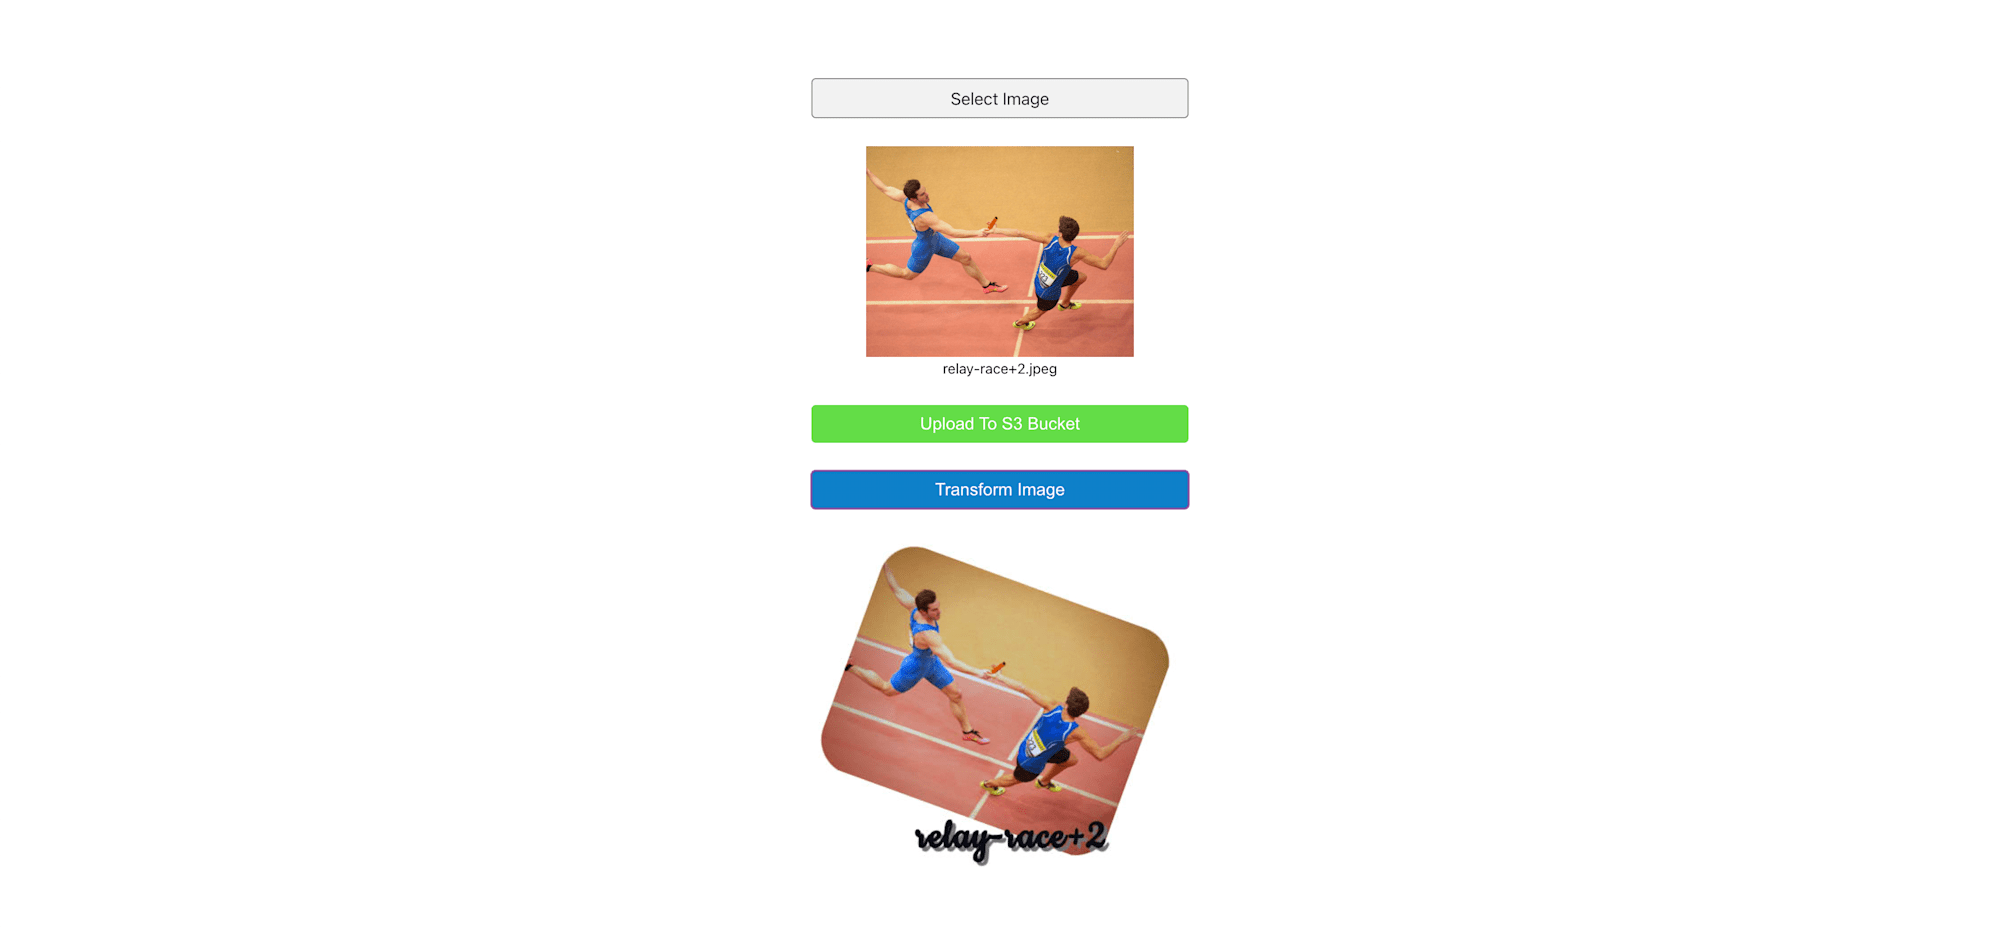
We can select, upload, and transform our images as expected.
You can find the complete project here on GitHub.
Resources you may find helpful: