JavaScript quick start
Last updated: Dec-17-2025
This quick start lets you get an end-to-end implementation up and running using the JavaScript SDK in 5 minutes or less.
Prerequisites
1. Set up and configure the SDK
Install the package
Install the @cloudinary/url-gen package using the NPM package manager:
Configure Cloudinary
Create a basic JavaScript app, and in index.js copy and paste the following:
2. Upload an image
If you changed the cloud name in the previous step to your own, you need to use an image that's stored in your Cloudinary product environment for the next steps. All new accounts come with sample images, so you can use one of those, or, if you want to use the same image as us, save this image locally, then upload it to Cloudinary.
For the purposes of this quick start, the quickest way to upload a single image is as follows:
- Log into your Cloudinary Console.
- Select Media Library from the left panel.
- Click Upload to open the Upload Widget, then click Advanced and type "docs/models" into the public ID field.
- Click Browse to find the image to upload. Once uploaded, you can see the image in the listed assets (set Creation date to Today in the Search to find it quickly).
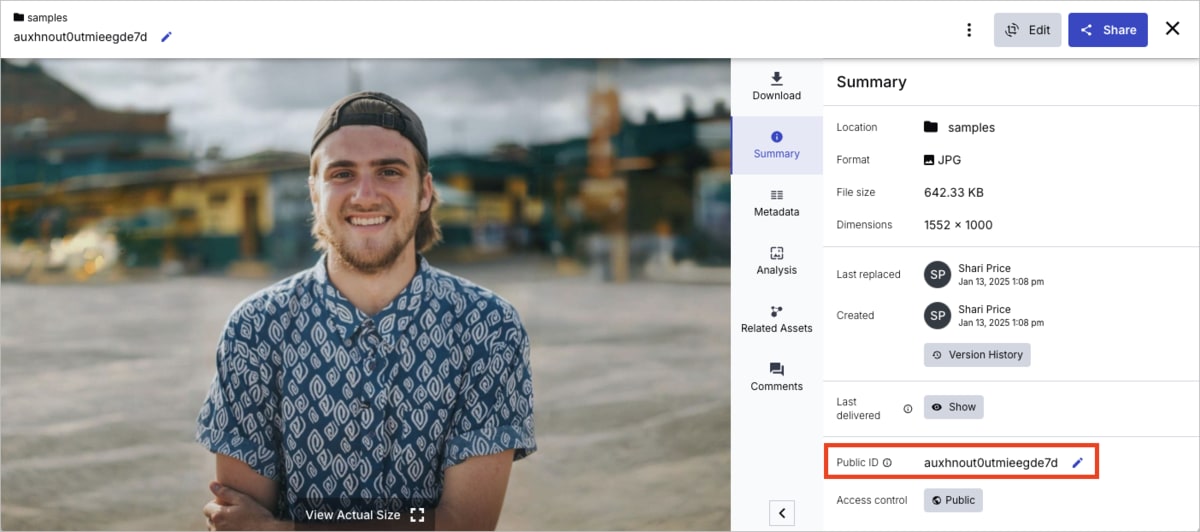
In the next step, you'll need the public ID of whichever image you use (in our case, we set the public ID on upload to docs/models). If using one of the sample images, double click the asset to open the Manage page, navigate to the Summary tab, and copy the Public ID:
3. Transform and deliver the image
Copy and paste this import statement below the existing one:
Copy and paste the following code, under the configuration code:
docs/models, make sure to update your code with the public ID of the image you're delivering.4. Run your code
Run the code to see the transformed image.

View the completed code
Here's the full example:
This code is also available in GitHub.
- Understand the architecture of the JavaScript SDK and get a more detailed overview of the libraries.
- Find out more about transforming images using
@cloudinary/url-gen. - Learn about transforming videos using
@cloudinary/url-gen. - Discover ways to improve load times and make your images responsive and accessible using plugins.
 Ask AI
