Using Cloudinary Postman Collections
Last updated: Nov-24-2025
Postman is a great tool for helping you try out and run REST API requests. Our API references include Run in Postman buttons that allow you to view, run and fork collections for each API method. There are a few short steps to run through in order to properly set it all up, but once done, you'll be able to start experimenting with our APIs without the need to set up your own backend environment.
Quick start
If you're familiar with Postman and just want to quickly explore and experiment with the Cloudinary Postman collections, you can go straight to the Programmable Media workspace. From here, you can view all the available collections, folders and requests and fork the ones that are relevant to you.
All the collections are defined with variables for your Cloudinary credentials, so before you can send any requests, make sure to fork the Cloudinary environment and set the values for your cloud name, API key, and API secret in the environment definition. Once you're done, save the new environment, and make sure it's active before you run any collections.
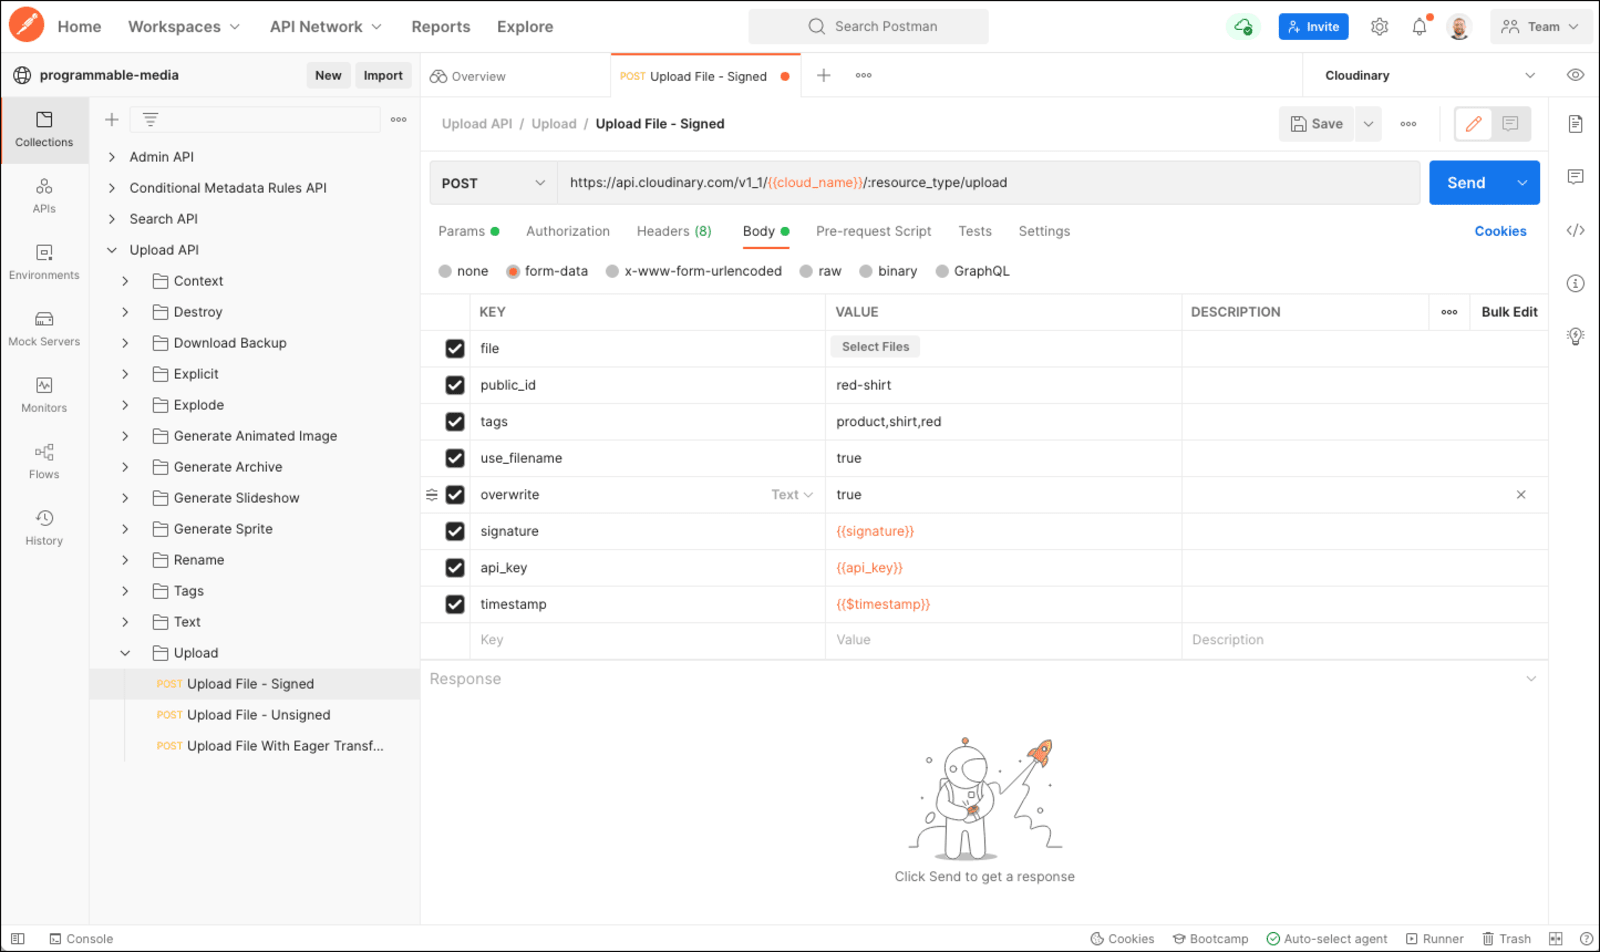
Once your environment is configured, pick any request, update the parameter values in the body tab as needed and Run your request.
- All Upload API requests include a pre-request script that automatically generates the required signature from your credentials and the parameter values you set, so even for Upload API requests, it's pure plug and play.
- If you'd like to contribute to the collections, fork them to your workspace and make any relevant changes. You can then open a pull request.
- You can also use the Postman runner to run multiple requests in sequence or to schedule them to run at certain intervals. To take this further, you can use Postman scripts that use the data from one request in the next one. For example, you could get a list of derived assets that haven't been accessed for a specified time period and then run a request to delete them.
Video tutorial
The tutorial below demonstrates how to get set up with the collections and make your first request.
This video is brought to you by Cloudinary's video player - embed your own!
Use the controls to set the playback speed, navigate to chapters of interest and select subtitles in your preferred language.
Getting Started
To get started with the Cloudinary Collections, you'll need to sign up for a Postman account at https://postman.com/.
You can use the collections in the Postman web application without installing anything, but if you prefer to use a native application, you can also download and install the relevant app for your operating system from the Postman website.
The collections themselves provide a UI-based option for you to try out the different APIs and methods provided by Cloudinary, and with some of the more advanced features, could even be used to schedule tasks or run tests on your media. Once you're ready to go, follow the steps below:
1. Configure your environment
Your Postman environment allows you to define a set of variables that can be used across multiple requests. For the Cloudinary Collections, use the environment to set your Cloudinary product environment credentials. You can find the Cloudinary environment included with the Cloudinary Collections.
To start running requests:
-
Add your credentials to the environment. You'll need to set the three variables to correspond to your Cloudinary product environment credentials. The current value should be used for updating with your own credentials. Here's an example of how this table should look:
VARIABLE INITIAL VALUE CURRENT VALUE cloud_nameCloud name my_cloudapi_keyAPI key 123456789api_secretAPI secret AbCdEfGhITipYou can find these credentials on the API Keys page of the Cloudinary Console Settings. -
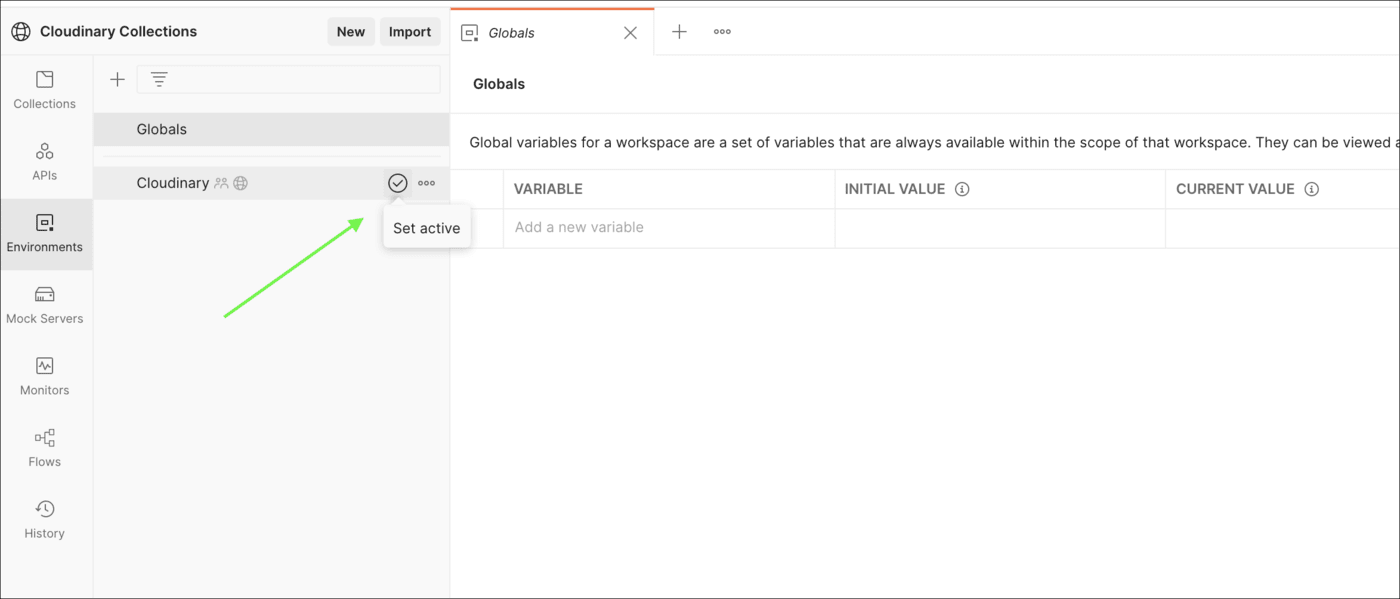
Set your environment as active, as shown in the screenshot below.
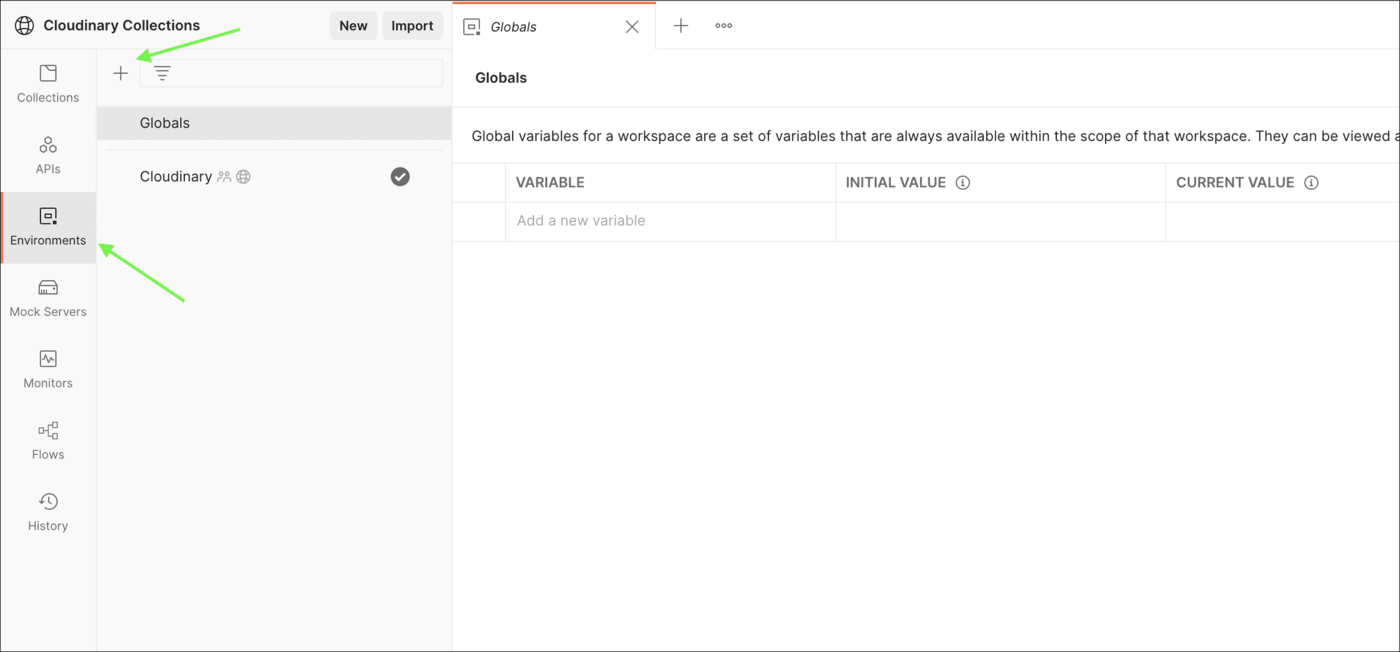
If you have forked any of the collections to your own workspace, you'll need to create a corresponding environment. To do this, navigate to the Environments tab on the left-hand menu and click the "+" symbol. Give the environment a name that identifies it for use with Cloudinary and follow the previous steps to add your credentials.
2. Fork the collections
In order to send any requests, you will need to fork the collections to your own Postman account. Forking the collections will enable you to add them to your own workspaces, get notified and pull updates from the official Cloudinary collections when they happen, or even create a pull request with suggested changes or additions to our collections.
To fork a collection, navigate to the relevant collection from the Programmable Media workspace overview and click the Fork button (a small fork icon). Alternatively, you can click the Run in Postman button from any of our API references to be taken directly to the required collection, and from there you can click the Fork button for that collection.
3. Run a collection
The Cloudinary collections can be run with minimal adjustments to the parameters and values. Most collections will include placeholder values. In some cases, these values will need to be updated to use valid values for your Cloudinary product environment and media assets.
After making sure that all required parameter variables have valid values, click the Run button to send your request and view the response.
4. Optional - Use the Postman Runner
In addition to running individual requests, you can use the Postman runner to perform a number of requests in sequence. A simple example of this would be running all the requests in the Upload Presets folder. The runner would:
- Get all the upload presets in your product environment
- Create a new upload preset called
my_preset - Get details of the new upload preset
- Delete the upload preset
The example above is extremely simple, but you could extend this further by creating scheduled clean-up tasks and performing complex sequences using the runner, for example passing details of the response from one request as a parameter value for another.
Pre-request signature script for Upload API requests
In order to send a request to the Upload API, you must provide a signature to verify the integrity of the message. When using any of our SDKs, the signature is generated for you. However, when sending a direct request to the REST API, such as when running requests from Postman, you must generate and pass the signature to the request.
To ensure that signature generation is handled correctly, the Upload API collection contains a pre-request script that automatically takes the query parameters you supply along with the necessary Cloudinary credential parameters and generates the right signature for you with the current timestamp.
The script is defined at the collection level, or, for some specific requests, it's included at folder level or in the request itself.
In short, this means that the Cloudinary collections do all the heavy lifting for generating the signature, so that you can easily run Upload API requests without dealing with signatures at all. Feel free to take a look at these scripts to get a better understanding of how to generate signatures, or take a look at our documentation on signatures for more information.
- Learn more about using Postman.
- Watch our DevJams podcast on how Postman, Cloudinary and Dropbox can be used for automation of screenshots in a unified repository.
 Ask AI


