 Ask AI
Generating authentication signatures
Last updated: Jun-14-2026
When using the Cloudinary SDKs for any upload or admin method that requires a signature, the signature is automatically generated and added to the request. If, however, you are making direct calls to the REST API, you have two options for authentication:
- Basic Authentication (simpler): Authenticate Upload API requests using your API key and API secret via HTTP Basic Auth. No signature calculation required.
- Signature-based authentication (documented below): Generate a SHA signature manually or using a Cloudinary backend SDK signature generation method.
Manual signature generation
If you manually generate your own POST request, you need to authenticate the request with a signature based on the parameters you use in the request. The signature is a hexadecimal message digest (hash value) created with the SHA-1 or SHA-256 (Secure Hash Algorithm) cryptographic function.
signature_algorithm SDK configuration parameter to sha256. If you want to limit your account to allow only the SHA-256 digest for all your validations, submit a request.A signed upload is always two phases:
- Compute
signatureon your server from the upload fields that belong in the string to sign (see below).ImportantNever expose the API secret to the client. - Send the HTTP POST that includes
signatureand the same signed fields you hashed, with identicalname=valuepairs. Also includefileandapi_keyin the body, and use the usual upload URL path forcloud_nameandresource_type.
file, cloud_name, resource_type, and api_key are never part of the string to sign, but are always part of the upload call.Minimal signed HTTP upload
When the POST body contains just file, api_key, and timestamp (with cloud_name and resource_type in the URL path), the string to sign is timestamp=<value>.
Generate the signature
- Choose the Unix
timestamp(seconds) you'll send in the upload. It stays valid for one hour. - Build the string to sign:
timestamp=<YOUR_TIMESTAMP>. - Append your API secret to that string with no separator.
- Hash with SHA-1 or SHA-256. The hex digest is
signature.
For example, if your API secret is abcd and the Unix time is 1315060510:
- Parameters to sign:
- timestamp:
1315060510
- timestamp:
- Serialized sorted parameters in a single string:
timestamp=1315060510
- Input to SHA-1: the string above with your API secret appended to the end—no spaces,
&, or other characters between them. In this example the secret isabcd, so the full string is:-
timestamp=1315060510+abcd>timestamp=1315060510abcd
-
- SHA-1 hexadecimal result:
a21ad0f63beb4de2e5575204b79ab90bffb02c10
Send the upload POST
POST to the upload endpoint with file, api_key, the same timestamp, signature, and no other upload API fields in the body.
Example
The final request parameters for the upload POST request:
- file:
sample.jpg - api_key:
1234 - timestamp:
1315060510 - signature:
a21ad0f63beb4de2e5575204b79ab90bffb02c10
For example, combining all the parameters in a cURL POST request to the demo product environment:
Signed HTTP upload with additional body parameters
Generate the signature
- List every field you'll send in the upload POST except
file,cloud_name,resource_type, andapi_key, includingtimestamp(for examplepublic_id,eager, …). - Build
name=valuepairs; if there is more than one, sort alphabetically by parameter name and join with&. - Append the API secret with no separator; hash with SHA-1 or SHA-256 >
signature.
For example, if your API secret is abcd, the Unix time is 1315060510, and public_id and eager are among your signed fields:
- Parameters to sign:
- timestamp:
1315060510 - public_id:
sample_image - eager:
w_400,h_300,c_pad|w_260,h_200,c_crop
- timestamp:
- Serialized sorted parameters in a single string:
eager=w_400,h_300,c_pad|w_260,h_200,c_crop&public_id=sample_image×tamp=1315060510
- Input to SHA-1: that serialized string immediately followed by your API secret (again, no delimiter). Here the secret is
abcd, so the full string is:-
eager=w_400,h_300,c_pad|w_260,h_200,c_crop&public_id=sample_image×tamp=1315060510+abcd>eager=w_400,h_300,c_pad|w_260,h_200,c_crop&public_id=sample_image×tamp=1315060510abcd
-
- SHA-1 hexadecimal result:
bfd09f95f331f558cbd1320e67aa8d488770583e
Send the upload POST
POST file, api_key, signature, and every field from your step‑1 list (same names and values you used when signing), including timestamp.
Example
The final request parameters for the upload POST request:
- timestamp:
1315060510 - public_id:
sample_image - api_key:
1234 - eager:
w_400,h_300,c_pad|w_260,h_200,c_crop - file:
https://www.example.com/sample.jpg - signature:
bfd09f95f331f558cbd1320e67aa8d488770583e
For example, combining all the parameters in a cURL POST request to the demo product environment:
Or, using the POST request from the form example with a selected local file:
Using Cloudinary backend SDKs to generate SHA authentication signatures
You can use one of Cloudinary's backend SDKs to generate the authentication signature. The api_sign_request method uses the SHA-1 algorithm by default, but you can use the SHA-256 algorithm instead by setting the signature_algorithm SDK configuration parameter to sha256. Make sure that the timestamp is included in the params_to_sign object.
Cloudinary backend SDKs can also be useful when you're integrating with workflow or automation platforms, such as n8n, that don't provide a secure or convenient way to generate authentication signatures directly in the workflow. In these cases, create a small backend service that uses a Cloudinary SDK to generate signatures and return the resulting timestamp and signature to your workflow, while keeping your API secret securely stored on the backend.
The following Node.js app contains two examples of using the api_sign_request method to provide a signature for uploading files:
- signed-uploads/modules/signuploadwidget.js provides a signature for uploading files using the upload widget (corresponding to signed-uploads/public/js/uploadclientwidget.js)
- signed-uploads/modules/signuploadform.js provides a signature for uploading files using a form (corresponding to signed-uploads/public/js/uploadclientform.js)
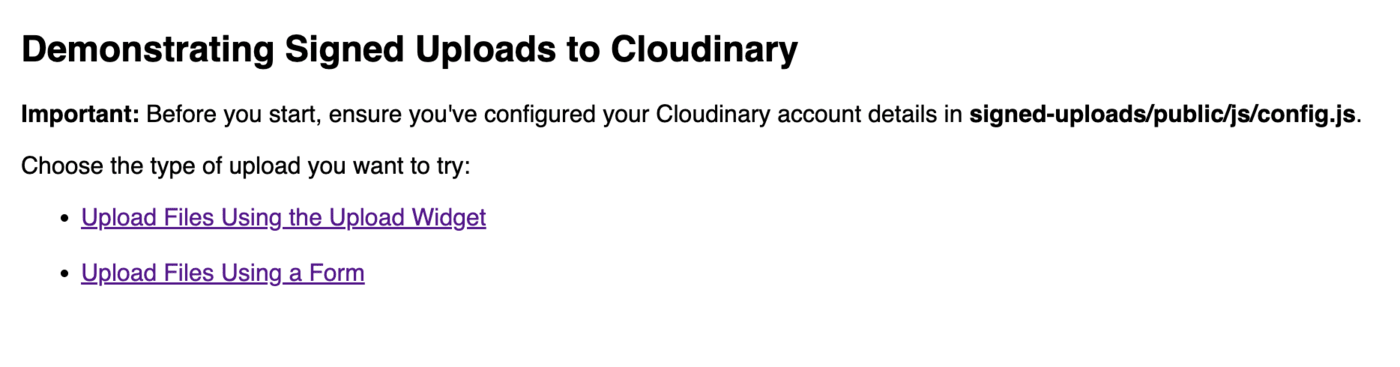
Setup instructions (after cloning from GitHub)
-
Install all dependencies from the top level:
Open signed-uploads/public/js/config.js
Set
cloud_name,api_keyandapi_secretwith the corresponding account details from the API Keys page of the Console Settings.-
Run the app to start the server:
The response should be:
Open
http://localhost:3000in a browser.
Go to GitHub to try it out:
Important considerations for authentication signatures
When generating authentication signatures keep in mind the following:
- The
api_secret, which is a required element of the signature, should never be revealed to anyone who is not authorized, and therefore your signature should never be generated on the client side or inside your native application. - For mobile and other client-side applications, you must either use unsigned upload or have a server for processing the signature.
- Signatures are valid for one hour from the
timestampvalue used to generate the signature. - Make sure to regenerate the signature if you dynamically change the payload of an upload request.
See the Upload API reference for a list of API methods, parameters, and response samples.
Error
Rate this page:
