
This will use Next.js to let users upload images of their items and do immediate updates as an admin.
There are a couple of things you need to have in place before we start working on the Next app. First, we’ll be using Cloudinary to host the product images. So if you don’t have a free account, you can go make one here. We’ll also be using a PostgreSQL database to hold all of the product data, so if you don’t have a local instance, you can download it for free here.
Now we can dive straight into the app and start by generating a new Next project. Run the following command in your terminal:
$ yarn create next-app --typescript
This will create a new Next project and it will prompt you for a name. I’ve called this project inventory-tracker, but feel free to call it anything you like. We’re going to use Next’s built-in API routes to handle our database operations since it’s basic CRUD operations. Since we’re talking about the database, let’s go ahead and set up Prisma to handle those operations with our local Postgres instance.
Let’s start by adding the prisma package to the project with the following command:
$ yarn add prisma @prisma/client
Now we can use the Prisma CLI to make the config files we need to connect our project to Postgres. Run the following command to set up Prisma:
$ npx prisma init
This generates a .env file at the root of your project and a new prisma directory that has the schema.prisma file that connects the whole app to Postgres. This is also where we will define the database schema. But first, open the .env file and update the connection string with your local Postgres username, password, and database name.
Now open the schema.prisma file because we can add the models for the table we’ll use here. Below the datasource where we define the connection to the database, add the following code:
// schema.prisma
...
model Product {
  id       String @id @default(uuid())
  name     String
  sku      String @default(uuid())
  image    String
  quantity Int
  storeId  String
}
Code language: JavaScript (javascript)
This defines the columns of the Product table that will help us keep all the items in multiple stores available. Now that we have the database defined, we can run a migration to make these changes in the database.
We’ll run another command to handle the migration using Prisma. In your terminal, run this:
$ npx prisma migrate dev --name init
This will create the Product table in your database with all the fields we have defined. Now we can move on to the API route for this app. We’ll write all of the CRUD logic for it in a new file.
Go to the pages > api directory and add a new file called inventory.ts. This is where we’ll make the calls to our database using Prisma. Open this file and add the follow code:
// inventory.ts
import type { NextApiRequest, NextApiResponse } from "next";
import { PrismaClient } from "@prisma/client";

interface Product {
  id: string;
  name: string;
  sku: string;
  image: string;
  quantity: number;
  storeId: string;
}

const prisma = new PrismaClient();

export default async function handler(
  req: NextApiRequest,
  res: NextApiResponse<Product[] | Product | null>
) {
  switch (req.query.type) {
    case "products":
      getAllProducts(req, res);
      break;
    case "product":
      getProduct(req, res);
      break;
    case "create":
      createProduct(req, res);
      break;
    case "update":
      updateProduct(req, res);
      break;
    case "delete":
      deleteProduct(req, res);
      break;
    default:
      res.status(200).json([]);
  }
}

async function getAllProducts(
  req: NextApiRequest,
  res: NextApiResponse<Product[]>
) {
  const allProducts = await prisma.product.findMany();

  res.status(200).json(allProducts || []);
}

async function getProduct(
  req: NextApiRequest,
  res: NextApiResponse<Product | null>
) {
  const product = await prisma.product.findUnique({
    where: {
      id: req.body.id,
    },
  });

  res.status(200).json(product);
}

async function createProduct(
  req: NextApiRequest,
  res: NextApiResponse<Product>
) {
  const newProduct = await prisma.product.create({
    data: {
      name: req.body.product.name,
      sku: req.body.product.sku,
      image: req.body.product.image,
      quantity: req.body.product.quantity,
      storeId: req.body.product.storeId,
    },
  });

  res.status(200).json(newProduct);
}

async function updateProduct(
  req: NextApiRequest,
  res: NextApiResponse<Product>
) {
  const updatedProduct = await prisma.product.update({
    where: { id: req.body.modifiedProduct.id },
    data: {
      name: req.body.modifiedProduct.name,
      sku: req.body.modifiedProduct.sku,
      image: req.body.modifiedProduct.image,
      quantity: req.body.modifiedProduct.quantity,
      storeId: req.body.modifiedProduct.storeId,
    },
  });

  res.status(200).json(updatedProduct);
}

async function deleteProduct(
  req: NextApiRequest,
  res: NextApiResponse<Product>
) {
  const deleteProduct = await prisma.product.delete({
    where: { id: req.body.productId },
  });

  res.status(200).json(deleteProduct);
}
Code language: JavaScript (javascript)
There’s quite a bit going on here so we’ll walk through it. We import some package and then define the Product type to appease TypeScript requirements. Then we instantiate a new Prisma client to connect to our database. After that is the handler function. This will take the request and call a different function based on the referer value. Finally, we have the getProducts, getProduct, createProduct, updateProduct, and deleteProduct methods.
These make all of the database queries that get sent to our Postgres instance. Each of these methods returns a product-typed response to the requester. So if you want to do some testing in Postman before you work with the front-end. Once you feel like your endpoints are good to go, we can switch over to the front-end.
We’re going to use Tailwind CSS to handle our styles so let’s install that package with the following command:
$ yarn add tailwindcss postcss autoprefixer @heroicons/react axios
Then run the following command to initialize Tailwind in the project:
$ npx tailwindcss init -p
This will add a new file to the root of your directory called tailwind.config.js and it handles all of the settings you choose for Tailwind. Open this file and update the content line to match this:
// tailwind.config.js
...
content: [
    "./pages/**/*.{js,ts,jsx,tsx}",
    "./components/**/*.{js,ts,jsx,tsx}",
  ],
...
Code language: JavaScript (javascript)
This makes it so Tailwind knows which files to style. Now go to styles > globals.css and delete all of the styles. We’re going to add these Tailwind directives to this stylesheet so we can use the classes throughout the front-end:
@tailwind base;
@tailwind components;
@tailwind utilities;
Code language: CSS (css)
Let’s update one more config file so that we’re able to get our images from Cloudinary. This will let Next access the source for any images. Open the next.config.ts file at the root of the project and make the following update:
// next.config.ts
const nextConfig = {
  reactStrictMode: true,
  images: {
    domains: ['res.cloudinary.com']
  },
...
Code language: JavaScript (javascript)
Now that Tailwind is ready to go, let’s create the main view for the products.
In the pages directory, open the index.tsx file and delete all of the existing code. This page will be the product table that lists everything in the inventory and there will be buttons that allow us to create new products or interact with existing ones. Let’s start by adding a few imports and a type dedinition at the top of the file:
// index.tsx
import { useState } from "react";
import axios from "axios";
import Image from "next/image";
import {
  PlusCircleIcon,
  PencilAltIcon,
  TrashIcon,
} from "@heroicons/react/solid";
import Modal from "../components/Modal";

interface Product {
  id: string;
  name: string;
  sku: string;
  image: string;
  quantity: number;
  storeId: string;
}
Code language: JavaScript (javascript)
We’ll make the Modal component a little later, so for now we’ll add the request to get the product information from the back-end using our API route. We’ll use the getServerSideProps method because we want this page to update every time a user visits it so they can get the most recent information. Add the following code to the bottom of the file:
// index.tsx
...
export async function getServerSideProps() {
  const productsRes = await fetch('http://localhost:3000/api/inventory?type=products')

  const products = await productsRes.json()

  return {
    props: {
      products
    },
  }
}
Code language: JavaScript (javascript)
Now we can focus on what gets rendered on the page. In between the Product type definition and the server-side request for all the products, add the following code:
// index.tsx
...
export default function Products({ products }) {
  const [newModal, setNewModal] = useState<boolean>(false);
  const [editModal, setEditModal] = useState<boolean>(false);
  const [index, setIndex] = useState<number>(0);

  const deleteProduct = async (productId: string) => {
    await axios.delete("/api/inventory?type=delete", { data: { productId } });
  };

  return (
    <div>
      <div className="flex gap-2" onClick={() => setNewModal(true)}>
        <div className="flex gap-2 bg-gray-700 hover:bg-gray-300 text-white font-bold py-2 px-4 rounded-full m-6">
          <PlusCircleIcon className="h-6 w-6 text-green-500" />
          Add a product
        </div>
      </div>
      <div className="flex flex-col gap-2">
        {products.length > 0 ? (
          products.map((product: Product, index: number) => (
            <div key={product.id} className="flex gap-6 border-b-2 w-full">
              <Image
                src={product.image}
                alt={product.name}
                width="100"
                height="100"
              />
              <div>{product.name}</div>
              <div>{product.quantity}</div>
              <div>{product.storeId}</div>
              <PencilAltIcon
                className="h-6 w-6 text-indigo-500"
                onClick={() => {
                  setIndex(index);
                  setEditModal(true);
                }}
              />
              <TrashIcon
                className="h-6 w-6 text-red-400"
                onClick={() => deleteProduct(product.id)}
              />
            </div>
          ))
        ) : (
          <div>Add some new products</div>
        )}
      </div>
      {newModal && <Modal product={{}} onCancel={() => setNewModal(false)} />}
      {editModal && (
        <Modal product={products[index]} onCancel={() => setEditModal(false)} />
      )}
    </div>
  );
}
...
Code language: JavaScript (javascript)
There’s a lot happening in this component. First, we define a few states we’ll need to toggle whether a modal needs to be displayed or not and the index of the product that will get sent to the modal if necessary.
Then we have the function that will delete a product record if we need to. It makes a request to the back-end and sends the product id so the correct record is removed.
Finally, we’re rendering a button to add new products and then displaying the default message or the product data as rows on the page and each row has product information and a couple of buttons that either display an edit modal or trigger a delete action for that product.
If you run the app with yarn dev now, you should see something like this.

We have all of the CRUD functionality in place so all that’s left is adding that Modal component we referenced earlier.
Now we’ll need to add a new folder to the root of the project called components and then add a new file called Modal.tsx. This component will have a lot of Tailwind styling on it, a few props passed from the index.tsx file and a couple of functions. Add the following code to this file and we can go over what’s happening.
// Modal.tsx
import axios from "axios";
export default function Modal({ product, onCancel }) {
const addProduct = async (e) => {
e.preventDefault();
const product = {
name: e.target.name.value,
sku: e.target.sku.value,
image: e.target.image.value,
quantity: Number(e.target.quantity.value),
storeId: e.target.storeId.value,
};
await axios.post("/api/inventory?type=create", { product });
onCancel();
};
const updateProduct = async (e) => {
e.preventDefault();
const modifiedProduct = {
id: product.id,
name: e.target.name.value,
sku: e.target.sku.value,
image: e.target.image.value,
quantity: Number(e.target.quantity.value),
storeId: e.target.storeId.value,
};
await axios.patch("/api/inventory?type=update", { modifiedProduct });
onCancel();
};
return (
<div
className="fixed z-10 inset-0 overflow-y-auto"
aria-labelledby="modal-title"
role="dialog"
aria-modal="true"
>
<div className="flex items-end justify-center min-h-screen pt-4 px-4 pb-20 text-center sm:block sm:p-0">
<div
className="fixed inset-0 bg-gray-500 bg-opacity-75 transition-opacity"
aria-hidden="true"
></div>
<span
className="hidden sm:inline-block sm:align-middle sm:h-screen"
aria-hidden="true"
>
​
</span>
<div className="relative inline-block align-bottom bg-white rounded-lg text-left overflow-hidden shadow-xl transform transition-all sm:my-8 sm:align-middle sm:max-w-lg sm:w-full">
<div className="bg-white px-4 pt-5 pb-4 sm:p-6 sm:pb-4">
<div className="sm:flex sm:items-start">
<div className="mt-3 text-center sm:mt-0 sm:ml-4 sm:text-left">
<h3
className="text-lg leading-6 font-medium text-gray-900"
id="modal-title"
>
Add a new product
</h3>
<div className="mt-2">
<form
className="w-full max-w-sm"
onSubmit={product ? updateProduct : addProduct}
>
<div className="md:flex md:items-center mb-6">
<div className="md:w-1/3">
<label
className="block text-gray-500 font-bold md:text-right mb-1 md:mb-0 pr-4"
htmlFor="name"
>
Product Name
</label>
</div>
<div className="md:w-2/3">
<input
className="bg-gray-200 appearance-none border-2 border-gray-200 rounded w-full py-2 px-4 text-gray-700 leading-tight focus:outline-none focus:bg-white focus:border-purple-500"
id="product-name"
name="name"
type="text"
defaultValue={product ? product.name : ""}
/>
</div>
</div>
<div className="md:flex md:items-center mb-6">
<div className="md:w-1/3">
<label
className="block text-gray-500 font-bold md:text-right mb-1 md:mb-0 pr-4"
htmlFor="sku"
>
SKU
</label>
</div>
<div className="md:w-2/3">
<input
className="bg-gray-200 appearance-none border-2 border-gray-200 rounded w-full py-2 px-4 text-gray-700 leading-tight focus:outline-none focus:bg-white focus:border-purple-500"
id="sku"
name="sku"
type="text"
defaultValue={product ? product.sku : ""}
/>
</div>
</div>
<div className="md:flex md:items-center mb-6">
<div className="md:w-1/3">
<label
className="block text-gray-500 font-bold md:text-right mb-1 md:mb-0 pr-4"
htmlFor="quantity"
>
Quantity
</label>
</div>
<div className="md:w-2/3">
<input
className="bg-gray-200 appearance-none border-2 border-gray-200 rounded w-full py-2 px-4 text-gray-700 leading-tight focus:outline-none focus:bg-white focus:border-purple-500"
id="quantity"
name="quantity"
type="number"
defaultValue={product ? product.quantity : 0}
/>
</div>
</div>
<div className="md:flex md:items-center mb-6">
<div className="md:w-1/3">
<label
className="block text-gray-500 font-bold md:text-right mb-1 md:mb-0 pr-4"
htmlFor="image"
>
Image
</label>
</div>
<div className="md:w-2/3">
<input
className="bg-gray-200 appearance-none border-2 border-gray-200 rounded w-full py-2 px-4 text-gray-700 leading-tight focus:outline-none focus:bg-white focus:border-purple-500"
id="image"
name="image"
type="text"
defaultValue={product ? product.image : ""}
/>
</div>
</div>
<div className="md:flex md:items-center mb-6">
<div className="md:w-1/3">
<label
className="block text-gray-500 font-bold md:text-right mb-1 md:mb-0 pr-4"
htmlFor="storeId"
>
Store Id
</label>
</div>
<div className="md:w-2/3">
<input
className="bg-gray-200 appearance-none border-2 border-gray-200 rounded w-full py-2 px-4 text-gray-700 leading-tight focus:outline-none focus:bg-white focus:border-purple-500"
id="storeId"
name="storeId"
type="text"
defaultValue={product ? product.storeId : ""}
/>
</div>
</div>
<div className="md:flex md:items-center">
<div className="md:w-1/3"></div>
<div className="md:w-1/3">
<button
className="shadow bg-purple-500 hover:bg-purple-400 focus:shadow-outline focus:outline-none text-white font-bold py-2 px-4 rounded"
type="button"
onClick={onCancel}
>
Cancel
</button>
</div>
<div className="md:w-2/3">
<button
className="shadow bg-purple-500 hover:bg-purple-400 focus:shadow-outline focus:outline-none text-white font-bold py-2 px-4 rounded"
type="submit"
>
Save Product
</button>
</div>
</div>
</form>
</div>
</div>
</div>
</div>
</div>
</div>
</div>
);
}
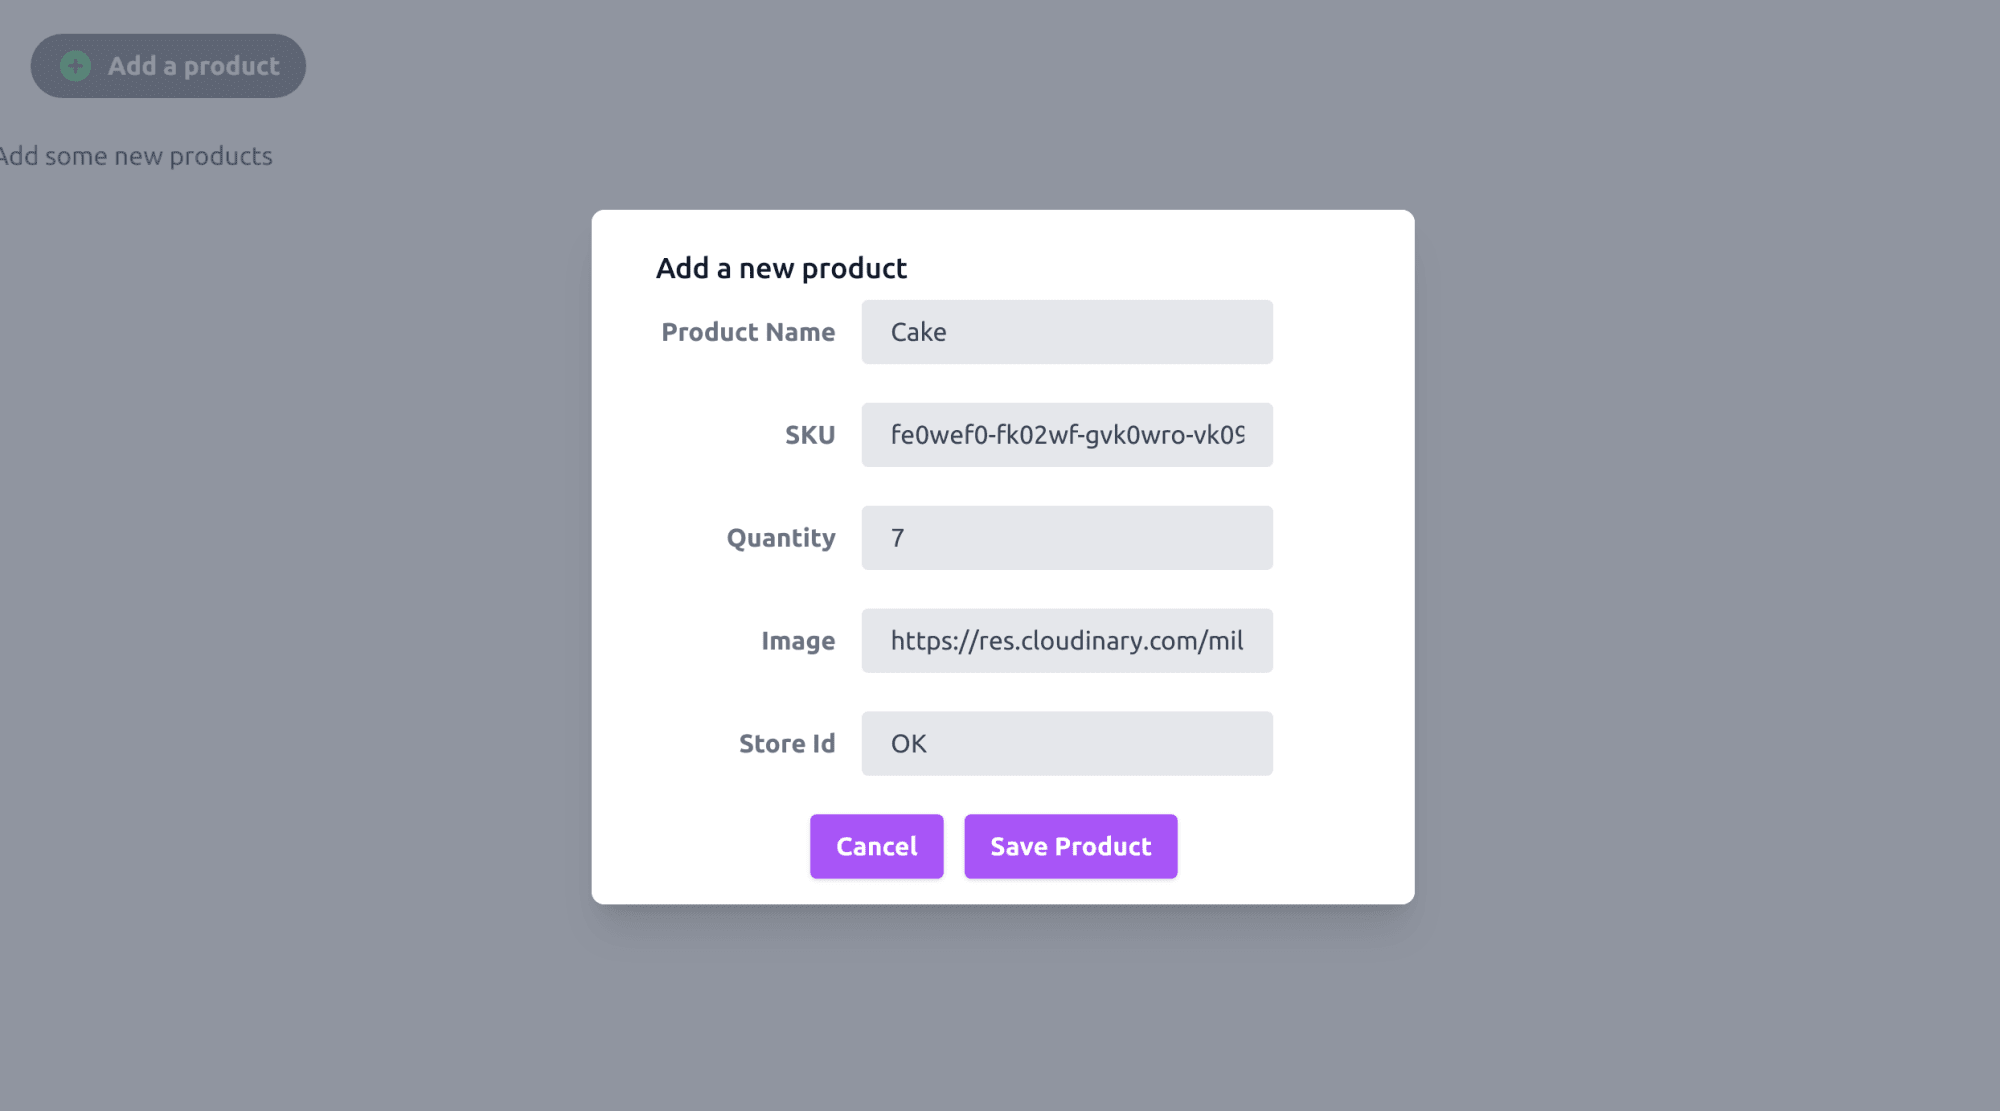
Code language: JavaScript (javascript)We have just one import in this component so that we can use the axios package. Then the Modal component takes in an optional product object and a required onCancel method. After this, we define the calls to the back-end to create or edit a product. In the rendered elements, we do a quick check to see if there has been a product passed to the modal.
If there is, we create our rows of products and if there is a product passed, we show the default message as we saw earlier. Either way, we render a form with the product fields we can set values for. If the product info is available, it will be set as the default value for the fields. The submit function also updates based on whether we are editing existing information or not.
Now if you run the app and click the add product button, your page should look like this.

All of the functionality is connected now, so all we have to do is start adding new products to the inventory. With your modal open, go ahead and add some info for a product and save it.
When you refresh the page, you’ll see something similar to this.
That’s everything! Now you have a fully functional inventory app.
You can check out all of the code in the inventory-tracker folder of this repo. You can also check out the app in this Code Sandbox.
<CodeSandBox title=“using-tailwind-with-next-js-forked-jp1riy” id=“using-tailwind-with-next-js-forked-jp1riy” />
Once you have the CRUD functionality set up for an app, you can expand it in a number of directions. You could make more advanced data displays so that users see the important statuses earlier. Or you can take the front-end and make it more user-friendly.