
A QR code is a digital or image-based representation of data in text. It is a way of formatting an image so that cameras can read the image and translate it into text.
An everyday use case of using a QR code is when you view a restaurant’s menu by scanning a QR code. This action opens the URL encoded in the QR code.
This tutorial will teach you how to build a QR code for a restaurant and embed its menu in an image.
The complete code for this project is in this CodeSandbox. Fork it and run the code.
Check out the source code on GitHub for your reference.
You require the following to complete this exercise:
- Installation of Node.js v10 or above on your local machine.
- Understanding of Vue; knowledge of Nuxt.js is not required.
Setting up this project will begin with the nuxt CLI to scaffold all the files and folders for the project. Run the following command in your terminal:
npx create-nuxt-app qrcode
With the command above, answer the following prompts as follows:
    create-nuxt-app v4.0.0
    ✨  Generating Nuxt.js project in qrcode
    Project name: accept the default, press Enter
    Programming language: JAVASCRIPT
    Package manager: Npm
    UI framework: N/A
    Nuxt.js modules: N/A
    Linting tools: N/A
    Testing framework: None
    Rendering mode: Universal (SSR / SSG)
    Deployment target: Static (Static/Jamstack hosting)
    Development tools: jsconfig.json
    What is your GitHub username? <your-github-username>
    Version control system: GIT
Now, start the development environment to view the project on http://localhost:3000 with the following command:
    # change directory to project folder
    cd qrcode

    # start the development environment
    npm run dev
Creating a restaurant QR code is a way to eliminate the printing of bulky menu books. The ease of going digital with current trends, like mobile phones, stays with restaurant-goers. It is interesting to note that you can view your delicious dishes from your mobile phone once you have an internet connection.
With this bit of knowledge of the importance of QR code, let’s first create a folder called assets at the root of the project where the CSS code will live.
Add the following code to the assets/css/main.css file from this gist.
https://gist.github.com/Terieyenike/f9f6c88ca887f8bc92d56ec0301d1317
Next, update the nuxt.config.js file with the CSS file location like this:
    export default {
      ...
      css: ["@/assets/css/main.css"]
    }
Code language: JavaScript (javascript)
The above snippet handles the styling of the app.
Next, install the required dependencies using the command below:
npm install vue@2 @chenfengyuan/vue-qrcode@1
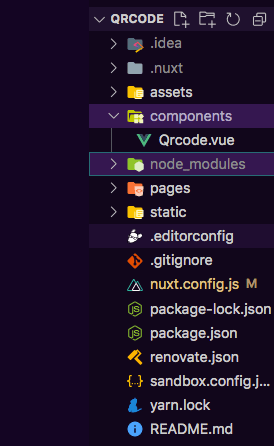
Back in your project, create a folder called components, and in there, create a file, Qrcode.vue, and include the following code:
<!-- components/Qrcode.vue -->
<template>
<div>
<section class="row container">
<div class="row__left">
<h1>Restaurant QR Code Menu</h1>
<p>Scan the QR code to view our menu</p>
</div>
<qrcode value="https://www.buffalowildwings.com/en/food/" :options="{
color: {
dark: '#FFC72C',
light: '#DA291C',
},
width: 300
}"></qrcode>
</section>
<footer>
<address>
© 2022. Built with Nuxt.js
</address>
</footer>
</div>
</template>
<script>
import VueQrcode from "@chenfengyuan/vue-qrcode";
export default {
components: {
qrcode: VueQrcode,
},
};
</script>
Import the QR code package in the above code block and initialize the component to the Vue instance for usage. The QR code package has several props attached to the component that makes it function. Some of them are:
value: String that describes the value of the QR code, mobile phone camera reads the value and translates it to text that pops up when scanned
:options: Pass in width and color options for the QR code having a foreground and background color, values passed within are determined by how much you want to configure the QR code.
Next, let’s import the QR code component into the pages/index.vue file to view the newly created QR code. Add the following code:
    <!-- pages/index.vue -->
    <template>
      <Qrcode />
    </template>
Finally, the page should look like this:

Open your camera app and scan the QR code to confirm it is working. If done correctly, a pop-up should appear with the link to the restaurant menu, prompting you to visit the website.
Delicious treats await you as you order a meal.
This article discussed how to handle creating a QR code, embed it on a website, or print it out for visitors to scan, which will lead them to the restaurant menu.
These resources will be helpful.