
High-fidelity product image galleries are a critical component of successful e-commerce campaigns.
In this article, we will build a fully optimized and robust image gallery with Next.js and Cloudinary’s Product Gallery widget.
The completed project is on CodeSandbox. Fork it and run the code.
<Codesandbox id="cloudinary-widget-image-gallery-xdf7c6" title="cloudinary-widget-image-gallery" />
The source code is also available on GitHub.
Knowledge of React and Next.js, as well as a Cloudinary account, are required to get the most out of this article.
Create a Next.js project by running the command below in our terminal.
npx create-next-app robust-product-image-gallery
Next, navigate into the project directory and run the application.
cd airbnb-cards-demo
Then, run the command below to start the application.
npm run dev
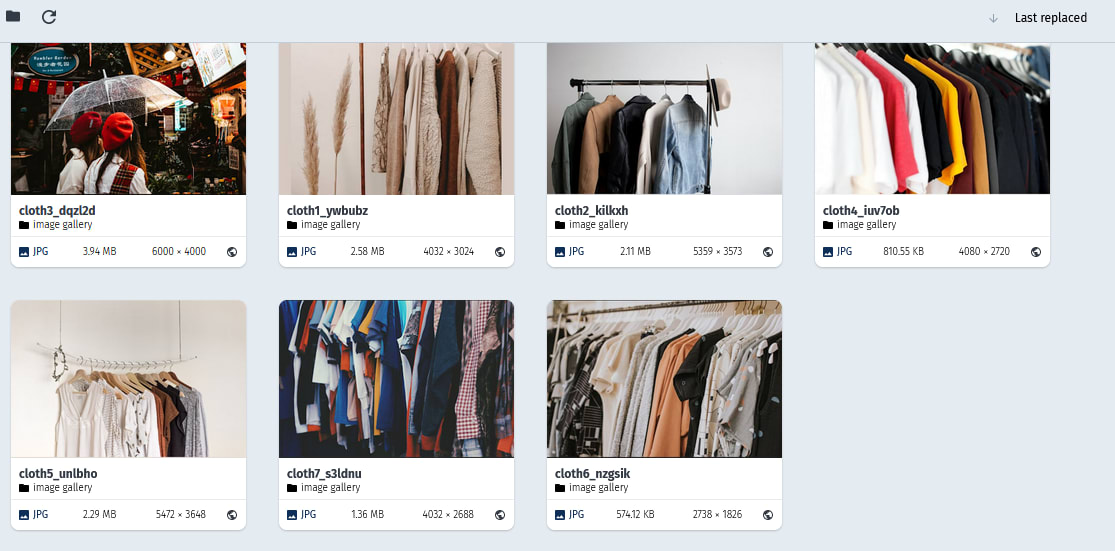
Navigate to the Media Library section of the Cloudinary dashboard, and there, create a new folder called image-gallery.

Upload some images into the image-gallery folder.
With Cloudinary’s Product Gallery widget, we can dynamically display images, videos, 3D models, and 360 degree animations on our websites with ease.
To integrate the widget into our application, the following steps are required:
- Tag the media assets so that the widget can easily retrieve them.
- Provide access to client-side resource lists.
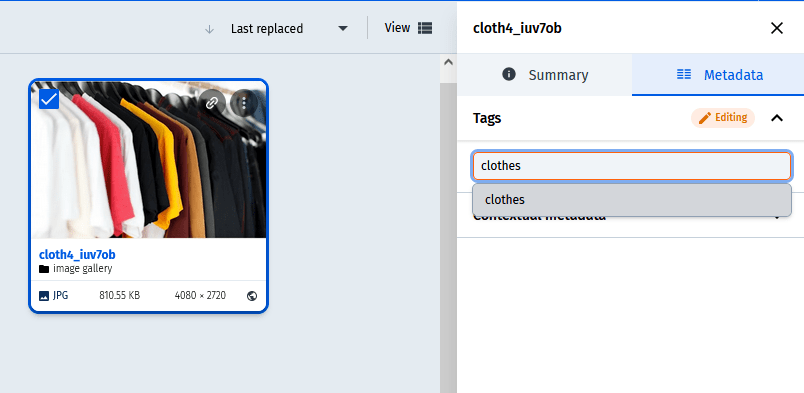
To add tags to images, click on an image, and then a sidebar will appear on the right side of the dashboard.
Click on the “metadata” setting in the sidebar, set the tag to “clothes,” and then save that tag. We’ll do this for all the images we want the widget to track.
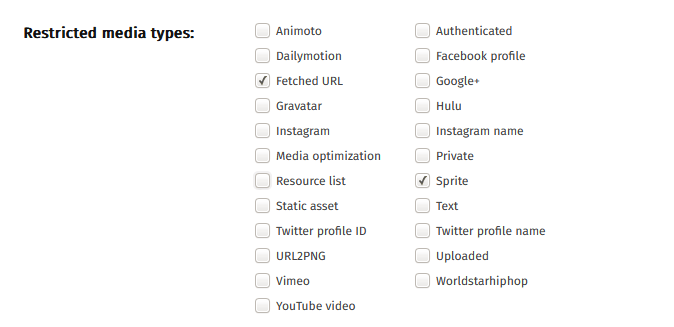
Cloudinary supports listing resources from the client side by their tags. However, the resource list is restricted by default, so we need to enable it on our account’s security settings page.
On the security settings page, scroll down to ‘Restricted media types.’ There, uncheck ‘Resource List,’ then save.
Update the index.js file with the code below.
import { useEffect } from "react";

export default function Home() {
  useEffect(() => {
    const productGallery = cloudinary.galleryWidget({
      container: "#image-gallery",
      cloudName: "nefejames",
      mediaAssets: [{ tag: "clothes" }],
    });

    productGallery.render();
  }, []);

  return (
    <div className="container">
      <h1>Robust Image Gallery</h1>
      <div className="gallery-container">
        <div id="image-gallery"></div>
      </div>
    </div>
  );
}
Code language: JavaScript (javascript)
In the file above, we do the following:
-
Import
useEffectfrom React, and from there, initialize the widget. -
Set up a
divwith an ID ofimage-gallery. This is the element where we will render the Product Gallery.
 const productGallery = cloudinary.galleryWidget({
   container: "#image-gallery",
   cloudName: "nefejames",
   mediaAssets: [{ tag: "clothes" }],
 });

 productGallery.render();
Code language: JavaScript (javascript)
Let’s break down the code above that initializes the widget.
-
cloudinary.galleryWidget(options): initializes the widget. It takes incontainer,cloudName, andmediaAssetas required parameters. -
container: references thedivwith the ID ofimage-gallery. -
cloudName: the cloud name of our Cloudinary account. -
mediaAssets: an array of the media assets we want to display. -
productGallery.render(): renders the product gallery widget.
Next.js provides a Script component that we can use to load third-party scripts in our application. We need the Script component to load the Product Gallery widget’s script.
Next, we’ll import Script into the app.js file and load the cloudinary gallery there.
import "../styles/globals.css";
import Script from "next/script";
function MyApp({ Component, pageProps }) {
return (
<>
<Script
src="https://product-gallery.cloudinary.com/all.js"
type="text/javascript"
/>
);
}
export default MyApp;
Code language: JavaScript (javascript)If we run our code, we get an error: “cloudinary is not defined.”
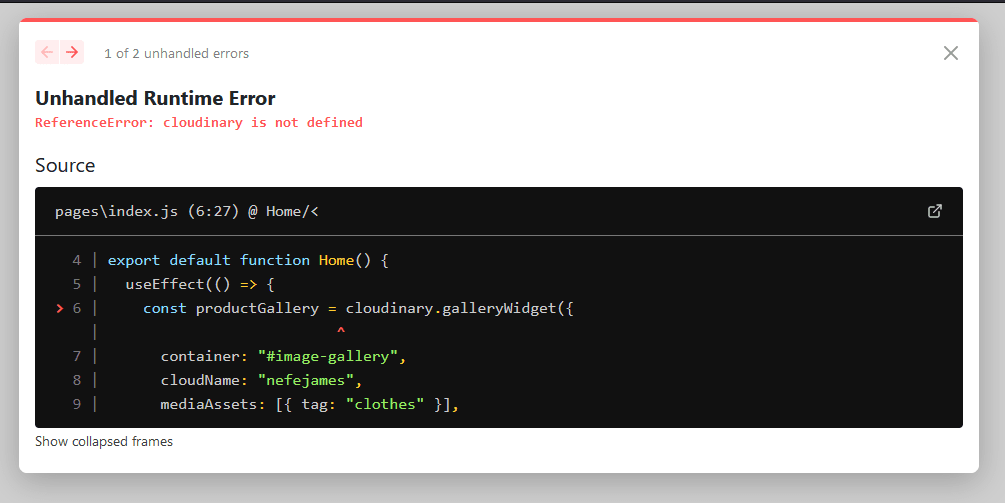
This is because the widget is a client-side tool, and Next.js renders our application on the server. To fix this, we need to change the strategy of the Script.
Thus, update the app.js file and set the Script’s strategy beforeInteractive.
function MyApp({ Component, pageProps }) {
return (
<>
<Script
src="https://product-gallery.cloudinary.com/all.js"
type="text/javascript"
strategy="beforeInteractive" //this has to be the strategy
/>
);
}
export default MyApp;
Code language: JavaScript (javascript)The beforeInteractive strategy loads scripts before a page becomes interactive. Use this strategy for critical scripts that must be fetched and executed before the page is interactive.
Next.js ensures that such scripts are injected into the initial HTML on the server and executed before other self-bundled JavaScript.
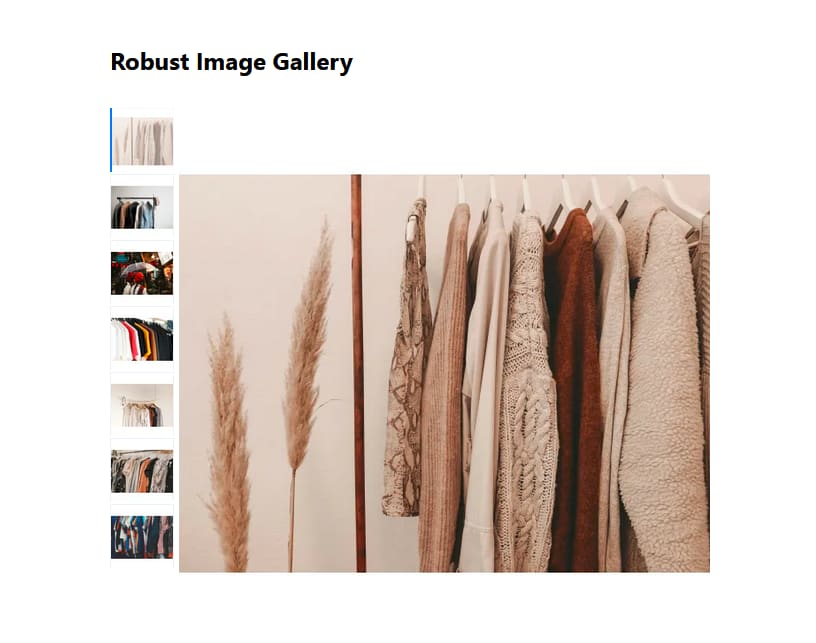
If we rerun our code, we see the product gallery display properly.
This article taught us how to build a robust image gallery with Next.js and Cloudinary’s Product Gallery widget.