
Sometimes you have a picture that seems to have the right vibe you want in your app or your environment. Maybe an image of an overwater bungalow has some colors you’d like to use in an interior design project or it gives the right feel to a landing page you’ve been working on.
No matter what the end-use is, pictures tend to have great color palettes sitting there looking at us. That’s why we’re going to make an app that lets us upload these images and get a color palette directly from them. By the time you finish this, you’ll be not only have practiced some JavaScript skills, but you’ll be ready to take on some interior design projects as well with your great palettes.
We’ll be working with a local Postgres database so that we can store the color palettes generated from an image along with the image itself. So if you don’t have this set up already, make sure to download Postgres and create a new table called palettes. I always use pgAdmin to perform actions in Postgres but feel free to use the command line if that’s more comfortable.
We’ll also be using Cloudinary to host the images we upload, so if you don’t have a free account, you can make one here.
Now, let’s bootstrap a new NextJS app since that’s the framework we’ll play with this time. Open up a terminal and run the following command:
$ yarn create next-app --typescript
This will start the process of making the app and it’ll prompt you for an app name pretty quickly. Since I’m super creative, I’ve called this project image-color-palette, but feel free to name this anything you like.
Now open a terminal and go to the image-color-palette directory and install the following packages:
$ yarn add swr styled-components @prisma/client prisma react-cloudinary-upload-widget node-vibrant axios
$ yarn add -D ts-node typescript @types/node
The packages and dev dependencies are everything we’ll need to get this app working. We’ll talk about what each of them does as we build out the functionality of the app. For now, let’s set up the database so we can store the color palettes a user creates.
We’ll be working with Prisma to handle all of the database operations and the data will be stored in our local Postgres instance. So at the root of your project, create a new directory called prisma. Then inside of that directory, create a new file called schema.prisma. This is where we’ll define the schema we want the database to have.
There are a few things we need to add to this file so that Prisma knows how to handle migrations to the database. So add the following code to the schema file:
generator client {
    provider = "prisma-client-js"
}

datasource db {
    provider = "postgresql"
    url      = "postgres://username:password@localhost:5432/palettes"
}
Code language: JavaScript (javascript)
This sets up the client type we’ll use to connect to the database. Then the datasource defines the type of database we’re working with, which in our case is Postgres. The url is where you’ll need to put your connection string to the database. Make sure to update the username and password with your values.
We created the palettes table back when we set up the local Postgres instance so you should be good to go here. Next, we need to define a model that tells Prisma what kind of database schema we’re working with. Below the current code in the schema.prisma file, add the following model:
model ColorPalette {
    id        String   @id @default(uuid())
    createdAt DateTime @default(now())
    updatedAt DateTime @updatedAt
    name      String
    src       String
    colorHigh String
    colorMid  String
    colorLow  String
}
Code language: JavaScript (javascript)
The top three fields are pretty standard things to include in a table, but the last five are our main concerns. We’ll have a name for each palette generated, the src will be a URL to the image in Cloudinary, and colorHigh, colorMid, and colorLow are the hex values we’ll save to make up the palette.
This is all for our schema and Prisma setup. Now we need to create a migration to get all of this info to our database. To do that, run the following command in the root directory of your project:
$ npx prisma migrate dev
This will prompt you for a migration name and then it’ll add a ColorPalette table to the palettes database with all of the columns we defined in that model.
The last thing we need to get in place on the data side is a way to handle connections. So we’ll need to set up a version of the Prisma client our back-end can connect to. In order to do that, we need to implement a small helper file.
At the root of your project, create a new directory named utils. Inside this new folder, create a new file called prisma.ts. This is where we’ll add the following code:
import { PrismaClient } from "@prisma/client";

let prisma: PrismaClient

if (process.env.NODE_ENV === 'production') {
  prisma = new PrismaClient()
} else {
  if (!global.prisma) {
    global.prisma = new PrismaClient()
  }
  prisma = global.prisma
}
export default prisma
Code language: JavaScript (javascript)
We make the global Prisma client for development so we don’t exhaust the database connection limit locally. This enables us to do development work without worrying about connection issues.
That wraps up all of the data things! Now we can turn our attention to the API side of things.
NextJS has an interesting way of including back-end functionality through API routes. This gives you the flexibility to create simple and complex back-ends without creating an entirely different project to maintain.
Take a look in the pages directory and you’ll see a sub-directory called api. There’s an existing example file called hello.ts and you can delete that. Then add a new file named images.ts. This is where we’ll handle the GET and POST requests from the front-end.
We’ll start by importing a few things and defining the type of data we’re working with. In the images.ts file, add this code:
import type { NextApiRequest, NextApiResponse } from 'next'
import prisma from '../../utils/prisma'

type Palette = {
  name: string
  src: string
  colorHigh: string
  colorMid: string
  colorLow: string
}
Code language: JavaScript (javascript)
We’re importing a few types from Next to define the response and request data we expect, the Prisma client we set up so we can connect to the database, and the type definition for the palette data we’ll be working with on the front-end.
To keep this post simple, we’re going to create a handler function that determines what we need to do based on the type of request being sent. Below the type definition, add the following function:
export default async function handle(req: NextApiRequest, res: NextApiResponse) {
  if (req.method === 'GET') {
    await handleGET(req, res)
  } else if (req.method === 'POST') {
    await handlePOST(req, res)
  } else {
    throw new Error(
      `The HTTP ${req.method} method is not supported at this route.`
    )
  }
}
Code language: JavaScript (javascript)
Our app will only support GET and POST requests, anything else will throw an error. Now we need the function to handle GET requests. Once users start making color palettes, they’ll like want to be able to view them, that’s why we’re creating the handleGET function just below the handle function:
const handleGET = async (req: NextApiRequest, res: NextApiResponse<Palette[]>) => {
  const colorPalettes = await prisma.colorPalette.findMany()
  res.status(200).json(colorPalettes)
}
Code language: JavaScript (javascript)
This one is relatively small because we want to get all of the color palettes a user has uploaded and return that as an array of palette objects. That’s why we’re using the findMany method on the ColorPalette table without any further filtering. Then we return a 200 status code along with the colorPalettes array in JSON format to the front-end.
Next, we need to add the handlePOST function. Right below the handleGET function, add this code:
const handlePOST = async (req: NextApiRequest, res: NextApiResponse<Palette>) => {
  const newColorPalette = JSON.parse(req.body)

  const result = await prisma.colorPalette.create({
    data: {
      name: newColorPalette.name,
      src: newColorPalette.src,
      colorHigh: newColorPalette.colorHigh,
      colorMid: newColorPalette.colorMid,
      colorLow: newColorPalette.colorLow,
    },
  })

  res.status(200).json(result)
}
Code language: JavaScript (javascript)
This function will create a new record in our table whenever a user successfully uploads an image to Cloudinary. We’ll discuss how that works when we get to the front-end of the app. For now, we know what data we expect to receive and we’ll parse that out of the request.
Then we’ll create that new record with the parsed data and return it to the front-end with a 200 success code. Now we have the back-end wrapped up! All that is left now is creating a front-end for users to interface with.
The fun part is here! We’ll finally be able to see how all of the back-end work we’ve done so far connects to what users actually see. The first thing we need to do is add a file called palette-generator.tsx to the pages directory. NextJS knows what routes exist by the file names we add to this directory.
Open that file and add the following imports and type definitions:
import useSwr from 'swr'
import Image from 'next/image';
import styled from 'styled-components';
import { WidgetLoader, Widget } from 'react-cloudinary-upload-widget';
import { useState } from 'react';
import Vibrant from "node-vibrant";

interface ColorPalette {
    colorHigh: string
    colorMid: string
    colorLow: string
}
interface Image extends ColorPalette {
    name: string
    src: string
}

interface CloudinaryResult {
    info: {
        url: string
    }
}
Code language: JavaScript (javascript)
These give us the base for the component we’re about to build so that we know what we have available and what to expect while we’re working with this data. Now let’s add a small styled component. When we get ready to display the color palettes users have generated, we want them to be the colors in our palette as well as have uniform sizes. Below the CloudinaryResult type, add this:
const ColorBlot = styled.div`
    background-color: ${(props: { hexCode: string }) => props.hexCode};
    height: 140px;
    width: 140px;
`
Code language: JavaScript (javascript)
This will be a regular div element that accepts a prop to set the color of the block and it has a set height and width. Feel free to play with this and change styles! Now let’s add a little function to help us handle the different types of requests we need to make. Below the styled component we just made, add the following function:
const fetcher = (url: string, method: string = 'GET', data?: Image) => fetch(url, {
    method: method,
    body: JSON.stringify(data)
}).then((res) => res.json())
Code language: JavaScript (javascript)
We’re getting the URL, a method, and possibly some data so that we can manage GET and POST requests with this one function. The method defaults to GET unless it’s specified. Then we make a regular fetch request and get the results.
Now we can start working on the component that will be exported and seen by the user. Below the fetcher function, add this code:
export default function PaletteGenerator() {
    const { data, error } = useSwr(`/api/images`, fetcher)
    const [name, setName] = useState<string>("")
    const [url, setUrl] = useState<string>("")
    const [palette, setPalette] = useState<ColorPalette>()

    if (error) return <div>Failed to load images</div>
    if (!data) return <div>Loading...</div>

    return ()
}
Code language: JavaScript (javascript)
Don’t worry about the last return statement being empty right now because we have some things to build inside of the component before we start rendering things on the page. We’re starting by defining a few different states and variables.
The useSwr hook lets us load images in a performance-friendly way. We pass in the URL to the API we want to hit and the fetcher function so it knows where the data is coming from and any errors that come up. Then we define several states that store the info that we’ll need to create a new palette record.
After all of the variable definitions, there are a few different render states that possibly get returned to the browser. If there are any errors, then we show users the failed loading message. More importantly, while the data is being fetched from the back-end, we show users a loading state so the app doesn’t crash and they have some feedback on what’s happening.
With all of this in place, let’s add a few functions that will manage a lot for us.
There are a couple of helper functions we need here to make the data easier to work with and to get the color palettes from images users upload. Below the loading state, add the following functions:
async function uploadImage(results: CloudinaryResult) {
    const url = results.info.url

    const img = document.createElement('img')
    img.crossOrigin = "Anonymous"
    img.src = url

    const paletteData = await Vibrant.from(img).getPalette()

    setUrl(url)
    setPalette({
        colorHigh: paletteData.LightVibrant?.getHex() || '',
        colorMid: paletteData.Muted?.getHex() || '',
        colorLow: paletteData.DarkVibrant?.getHex() || ''
    })
}

function saveColorPalette() {
    if (palette != undefined) {
        const result = {
            name: name,
            src: url,
            colorHigh: palette.colorHigh,
            colorMid: palette.colorMid,
            colorLow: palette.colorLow
        }
        fetcher('/api/images', 'POST', result)
    }
}
Code language: JavaScript (javascript)
The uploadImage function will be used in the Cloudinary widget to get the URL of the image. Once we have that, then we have to create a new image element in order to get the color palette out of it with the node-vibrant package. The crossOrigin value will be Anonymous in this case to avoid weird CORS errors. The src will be the URL that’s returned from the Cloudinary widget.
Then this image element gets passed in Vibrant which gives us a number of different colors to choose from. I’ve selected these options because they seem to give a wider range of colors, but feel free to play with these values based on the node-vibrant docs.
Once we have all of the colors and the image URL, we update those states we created earlier. The last helper function is saveColorPalette. This is how we make the POST request to save everything to the back-end.
Alright! Now we can finally turn our attention to what is displayed to our users. All that’s left is adding the elements in that empty return statement.
We’ll start with the image uploader and a few fields. Inside of that empty return statement, add the following elements:
return (
    <>
        <input type="text" onChange={e => setName(e.currentTarget.value)} />
        <WidgetLoader />
        <Widget
            sources={['local', 'camera']}
            cloudName={'your_cloud_name_here'}
            uploadPreset={'your_upload_preset_here'}
            buttonText={'Upload Image'}
            style={{
                color: 'white',
                border: 'none',
                width: '120px',
                backgroundColor: 'green',
                borderRadius: '4px',
                height: '25px',
            }}
            folder={'color_palettes'}
            onSuccess={uploadImage}
        />
        <button style={{ display: 'block' }} onClick={saveColorPalette}>Generate color palette</button>
    </>
)
Code language: JavaScript (javascript)
This is how we’ll get all of the info we need from a user to create and save their generated color palettes. We start by getting a name for the palette and updating the corresponding state. Then we insert the Cloudinary upload widget. (This is the reason we installed axios as the widget has that dependency.)
In the Widget element, there are quite a few props you can work with, but the main two you need to update are the cloudName and uploadPreset. You can find those values in your Cloudinary dashboard. Now you can see where the uploadImage helper function comes in. Every time a user uploads an image, this function will be called. We’ll set up a way to preview the palettes before saving them in the next section.
For now, note that the last element is a button that calls the saveColorPalette function. When a user clicks this button, it will save the color palette, name, and image as a new record in the database. If you run the app now with yarn dev and navigate to the palette-generator route, you should see something similar to this.

Go ahead and upload a few images and save the palettes. We’ll need that data for our final step!
Users will probably want to see the color palettes before they save anything, so based on the states in the app, we’ll display a preview of the data. Right below the button element, add this code:
{
    url != "" && palette != undefined &&
    <div>
        <h2>{name}</h2>
        <Image src={url} alt={name} height={240} width={240} />
        <ColorBlot hexCode={palette.colorHigh}>{palette.colorHigh}</ColorBlot>
        <ColorBlot hexCode={palette.colorMid}>{palette.colorMid}</ColorBlot>
        <ColorBlot hexCode={palette.colorLow}>{palette.colorLow}</ColorBlot>
    </div>
}
Code language: JavaScript (javascript)
This checks to see if there’s data defined for the current states and then displays the results. So upload an image and before you save it, take a look at the page. You should see something similar to this:
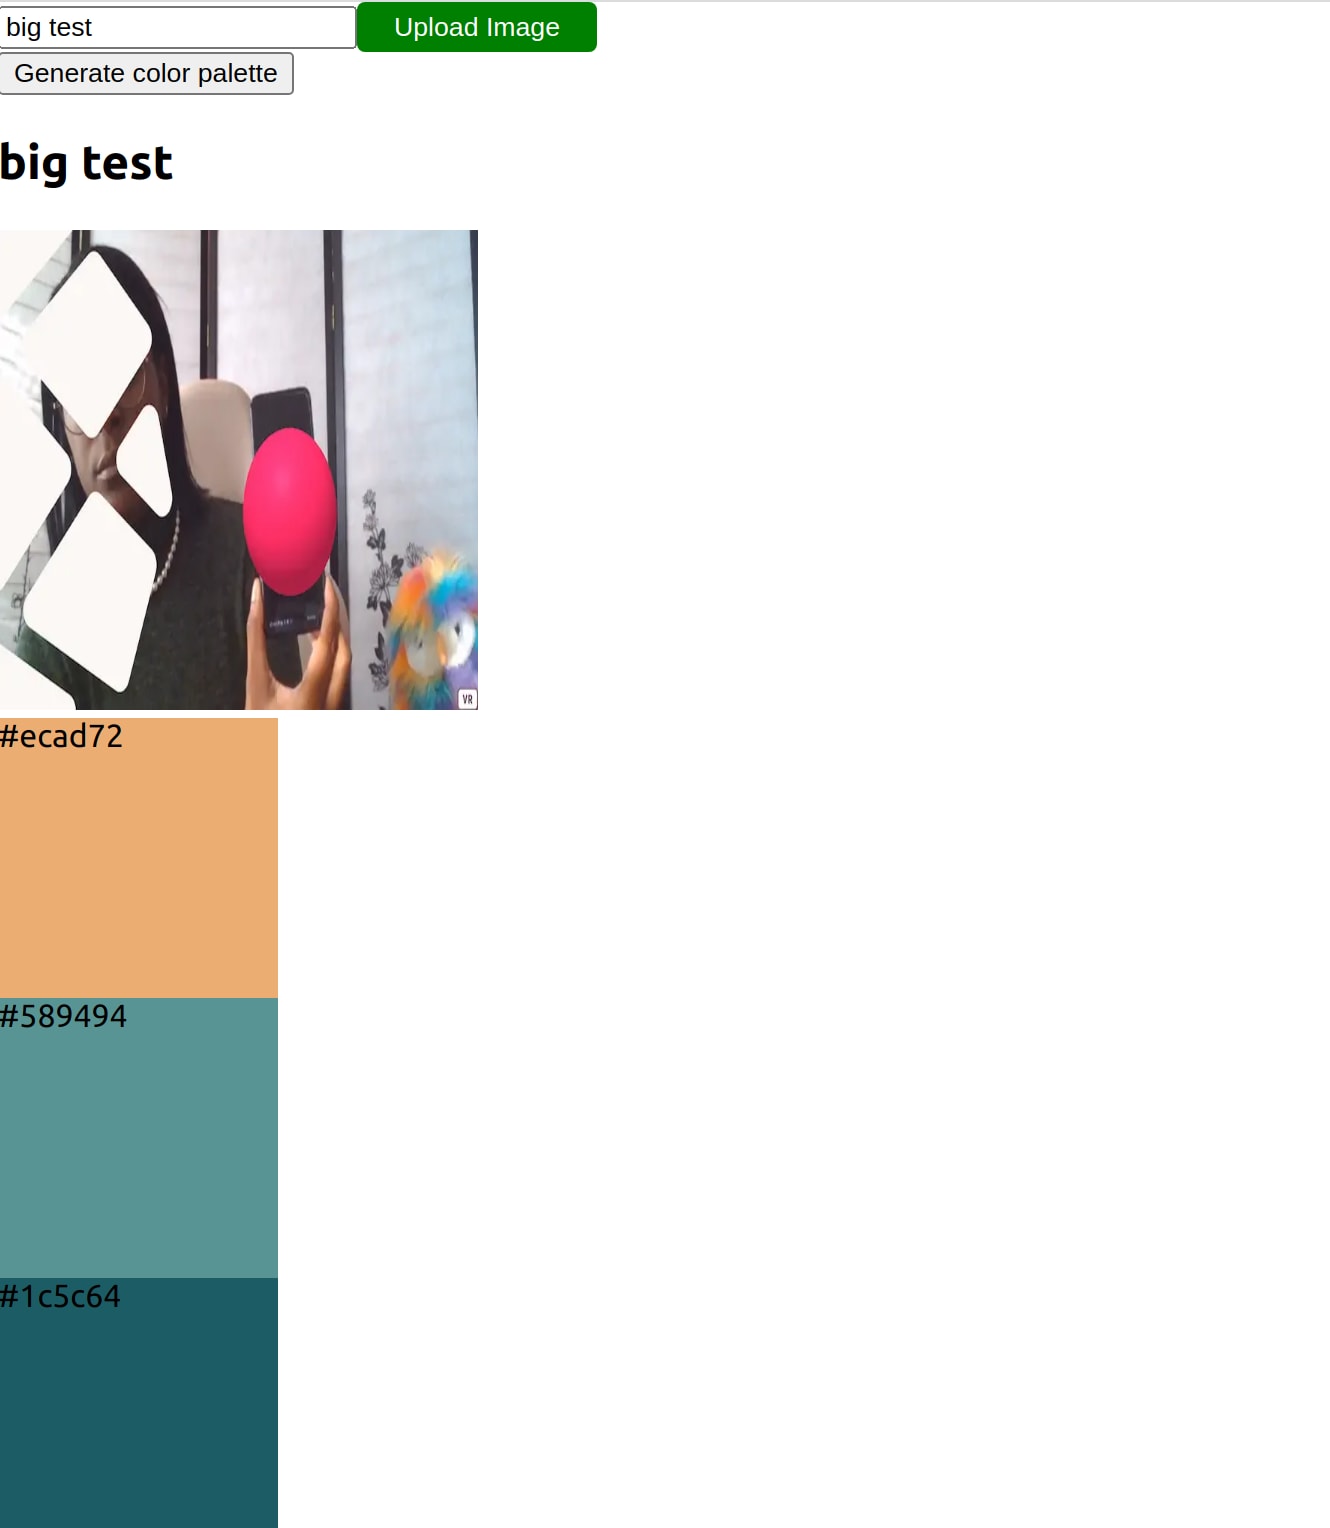
Now we can see what all of our work has been leading up to! Go ahead and save this so you have more data to look at. The last step is displaying all of the palettes returned from our images API. We’ll take that data and map it to the same elements you’ve seen.
The last piece of code we need to add is the display for all of the palettes. Just below the preview code we just added inside of the return statement, add this code:
{
data.map((image: Image) => (
<div key={image.name}>
<h2>{image.name}</h2>
<Image src={image.src} alt={image.name} height={240} width={240} />
<ColorBlot hexCode={image.colorHigh}>{image.colorHigh}</ColorBlot>
<ColorBlot hexCode={image.colorMid}>{image.colorMid}</ColorBlot>
<ColorBlot hexCode={image.colorLow}>{image.colorLow}</ColorBlot>
</div>
))
}
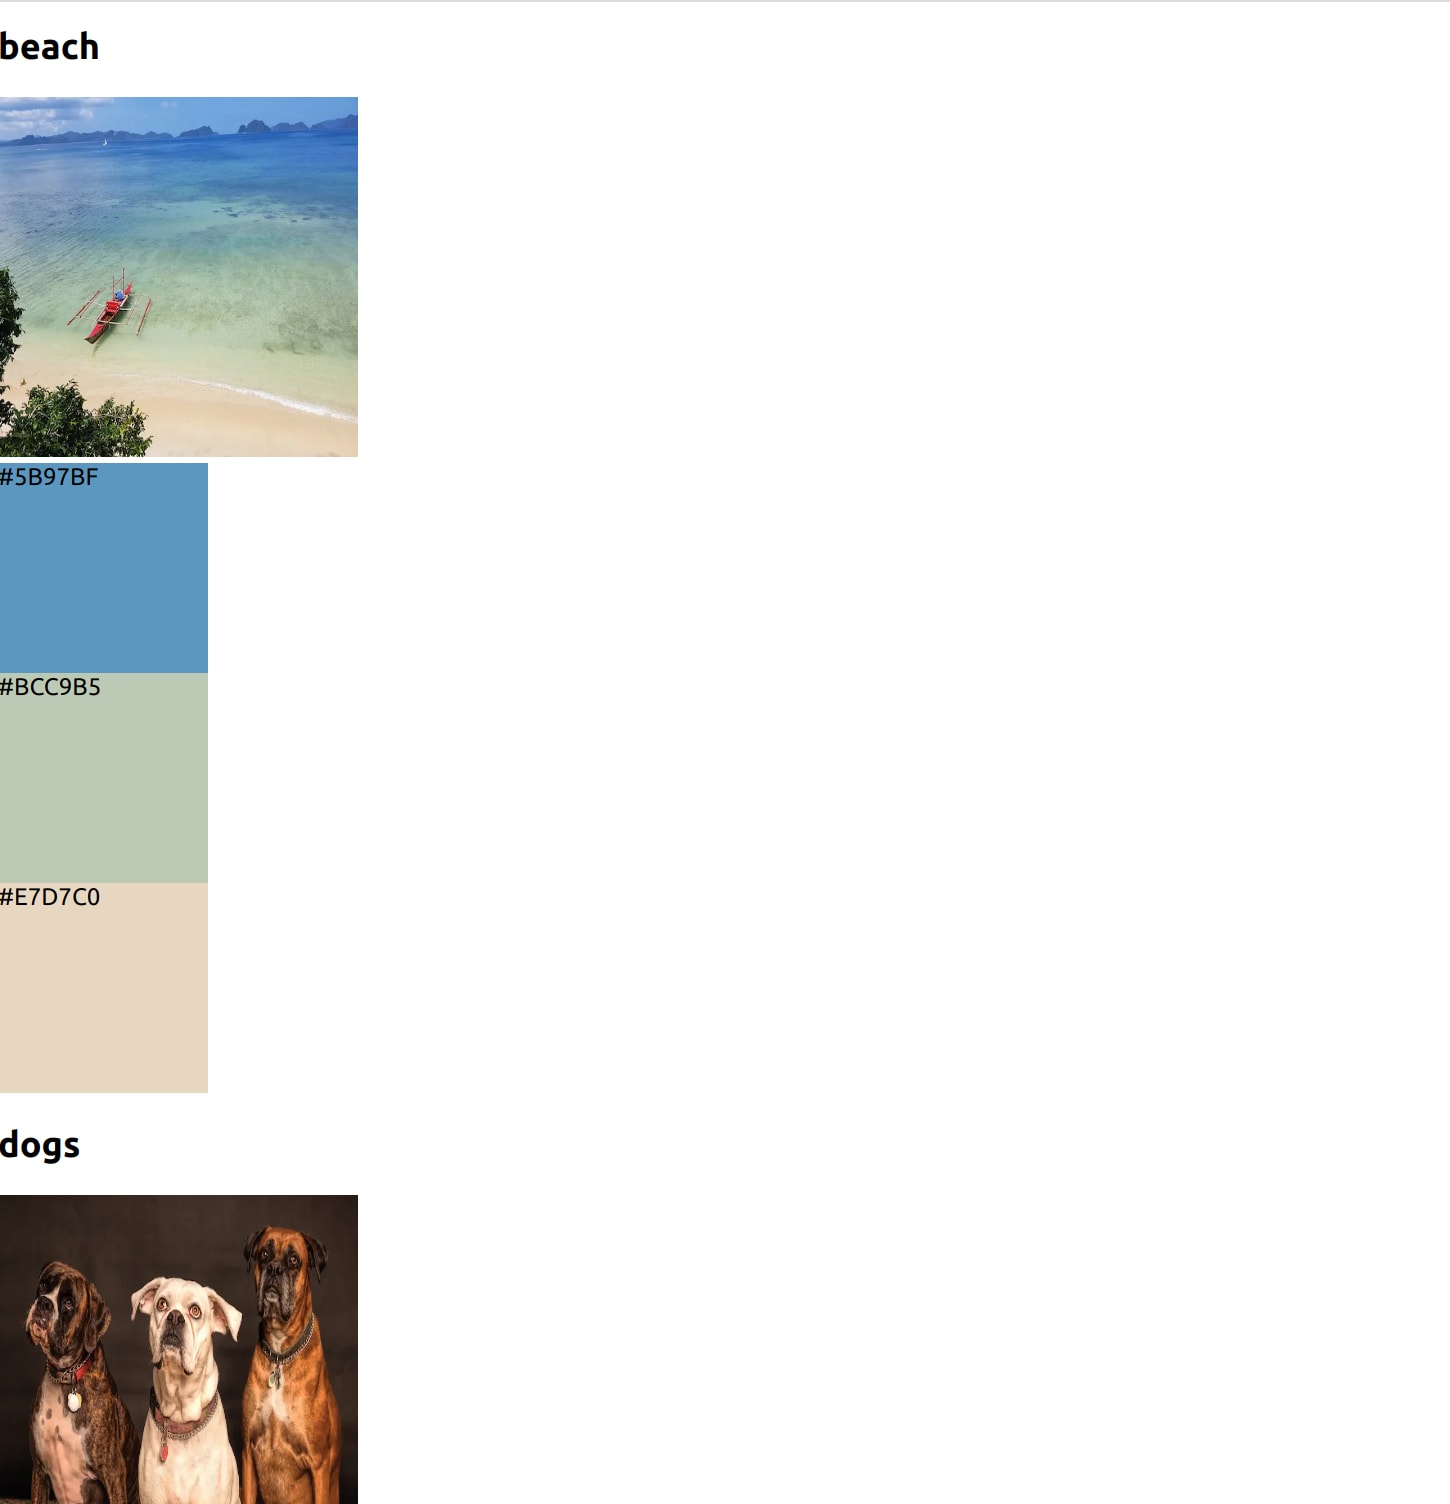
Code language: JavaScript (javascript)Now if you run the app and take a look at the palette-generator route, you should see all of the images and their associated color palettes on the page! That might look like this.
We’re finished with this app now!
If you want to check out the code for the whole project, take a look at this repo.
You can also look at the front-end functionality in this Code Sandbox. Just make sure you update the cloudName and uploadPreset values with your own.
<CodeSandBox title=“friendly-resonance-jmnxbs” id=“friendly-resonance-jmnxbs” />
Sometimes finding matching colors is hard, but finding an image that appeals to you is pretty easy. You could use these color palettes for everything from web design to interior design. Having an app like this can enable your users to do a lot of different tasks quickly and easily.