
The discovery and invention of the Quick Response (QR) code made it possible to embed digital data in text, links, tickets for concerts, and other use cases, thereby making use of a mobile device to translate the image into text for the user.
This tutorial will explain the process of encoding Google calendar invites into a QR code for your event.
The completed project code for this demo is in a CodeSandbox. Fork and run the code to get started.
For your reference, check the following source code on GitHub.
Understanding this article requires the following:
- Basic knowledge of Vue
- Node.js v10 and above. Required for dependency installation
Before encoding a Google calendar invite link in the Nuxt application, you’ll need to run the following command to scaffold the project:
npx create-nuxt-app nuxtjs-calendar-qrcode
With the above command, choose the following configurations as shown below:

Then navigate into the project directory and run the development server, which is accessible on http://localhost:3000 with the following command:
    cd nuxtjs-calendar-qrcode

    yarn dev
Next, install the dependencies that are responsible for creating the QR code:
npm install vue@2 @chenfengyuan/vue-qrcode@1
With the digital transformation the world is experiencing, a QR code gives users the ability to scan the code with a mobile device to receive an invite to an event and add the event to the Google calendar.
This process is possible by encoding the link information in the image.
First, let’s create a folder called assets and the main folder in the root directory to include all the styles needed for the application in the styles.css file. Copy and paste the following code in assets/main/styles.css.
    // assets/main/styles.css

    @import url("https://fonts.googleapis.com/css2?family=Montserrat:wght@400;700&display=swap");
    *,
    *::before,
    *::after {
      margin: 0;
      padding: 0;
      box-sizing: border-box;
    }
    body,
    h1,
    h2,
    h3,
    h4,
    h5,
    p,
    figure,
    picture {
      margin: 0;
    }
    h1,
    h2,
    h3,
    h4,
    h5,
    h6,
    p {
      font-weight: 400;
    }
    body {
      font-family: "Montserrat", sans-serif;
      font-size: 1.125rem;
      color: #ffffff;
      background: #27251f;
      line-height: 1.5;
      min-height: 100vh;
    }
    .container {
      max-width: 75rem;
      width: 85%;
      margin-inline: auto;
    }
    footer {
      position: fixed;
      display: flex;
      align-items: center;
      justify-content: center;
      bottom: 0;
      left: 0;
      width: 100%;
    }
    .row {
      height: 100vh;
      display: flex;
      flex-direction: column;
      align-items: center;
      justify-content: center;
    }
    .row__left {
      margin-bottom: 1em;
      text-align: center;
    }
    @media screen and (min-width: 768px) {
      .row {
        flex-direction: row;
      }
      .row__left {
        text-align: left;
        width: 60%;
      }
      h1 {
        font-size: 2.5rem;
      }
      p {
        font-size: 1.5rem;
      }
    }
Code language: PHP (php)
Next, update the CSS array in the nuxt.config.js file in the root directory to include the created CSS.
    // nuxt.config.js

    export default {
      ...
      css: ["@/assets/main/styles.css"]
    }
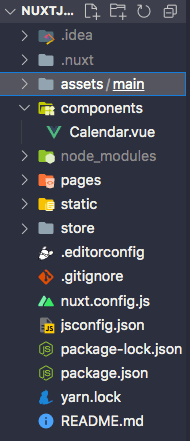
Great! The next step is to create the component for the Google calendar invite. In the root directory, create a folder called components and a file named Calendar.vue.
Copy and paste the following code:
// components/Calendar.vue
<template>
<div class="container">
<section class="row">
<div class="row__left">
<h1>Getting Started in Community</h1>
<p>Scan the code to attend</p>
</div>
<qrcode
:options="{
color: {
dark: '#75DBCD',
light: '#2E282A',
},
width: 300,
}"
value="https://calendar.google.com/event?action=TEMPLATE&tmeid=X2Nscjc4YmJoZXNyNWtsM2pjcDlqOGkyY2NwMTRpcGEwY2xyNmFyamtlY242b3Q5ZWRsZ2cgdGV5ZW5pa2UxQG0&tmsrc=teyenike1%40gmail.com
"
></qrcode>
</section>
<footer>
<address>Teri © 2022 | Built with Nuxt.js</address>
</footer>
</div>
</template>
<script>
import VueQrcode from "@chenfengyuan/vue-qrcode";
export default {
components: {
qrcode: VueQrcode,
},
};
</script>
The code snippets above do the following:
- Import the
VueQrcodepackage and initialize it in the Vue instance in the components object - In the
<qrcode>component, there is an options property object with the values for the color (representing the foreground and background color of the QR code) and the width value in pixels -
value: link to the calendar invite for the event - The other data on the app are static, which shows the information of the events and the footer
Next, import the calendar component to the pages/index.vue file. Copy and paste the following code:
    // pages/index.vue

    <template>
      <Calendar />
    </template>
Here is the final look of the application.
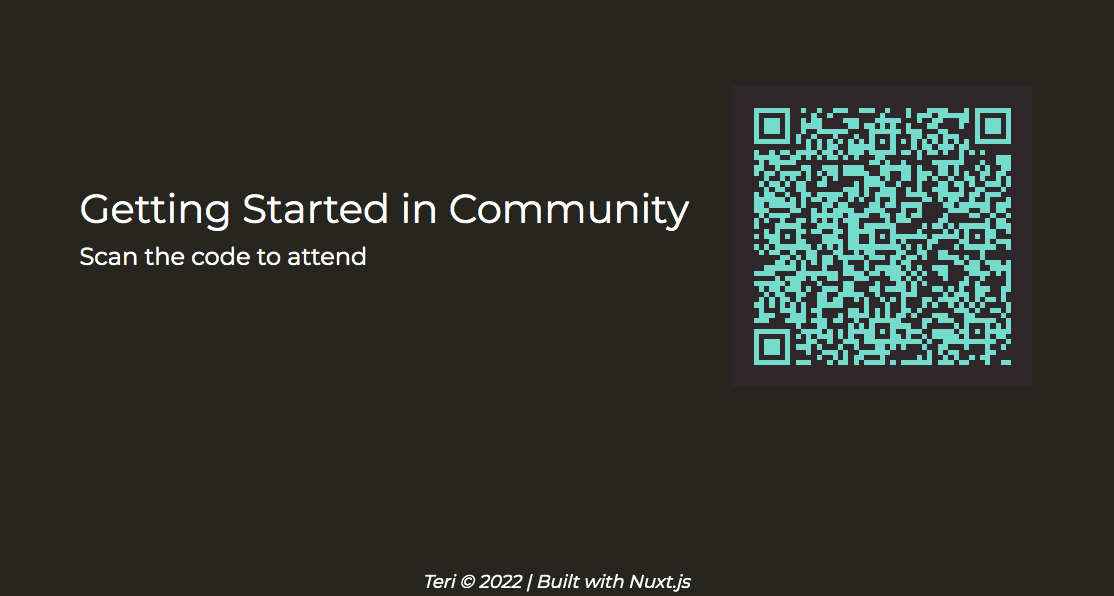
Open your camera app and scan the QR code; a pop-up with the link appears that leads to the event on your Google calendar application.
This article discussed how to encode a Google calendar invite in a QR code that you can deploy for your subsequent events like Twitter spaces or a webinar.
Try this innovative approach today!