
Artificial intelligence (AI) has dramatically improved over the years. Before there was widespread access to AI technology, if you wanted to copy text from another document or image, you had to manually type or write it, which could be very stressful and time-consuming. Now it is possible to automate such a task with Optical Character Recognition (OCR).
Optical Character Recognition is the ability to detect and convert text from digital images and documents into machine-readable text. A standard OCR software typically uses AI to enhance its capabilities by detecting language, writing style, and context.
Cloudinary – a cloud-based media management service that enables you to store, transform, manipulate and deliver your images and videos – also provides an OCR add-on for text detection and extraction.
This article will teach you how to implement Cloudinary’s OCR add-on in your Next.js project to detect and extract text from images.
Click the link below to view a complete demo of this article on CodeSandbox:
https://codesandbox.io/embed/inspiring-mountain-41wj8y?fontsize=14&hidenavigation=1&theme=dark
To view the source code on GitHub, click here.
To understand the concepts in this article, you will need the following:
- Experience with JavaScript and React
- Yarn installed on your PC, you will need Node.js, which comes with NPM
- A Cloudinary account, create a free one here
- Knowledge of Next.js will be good, but it is not strictly required
Open your terminal, navigate to your preferred directory and run the command below to quickly set up the project:
yarn create next-app nextjs-ocr-demo -e https://github.com/dpkreativ/nextjs-ocr-starter
The command above will create a new Next.js project named nextjs-ocr-demo, download the starter files for this demo from GitHub and install its dependencies.
After its successful installation, open the project in your preferred code editor and run the command below in its terminal:
yarn dev
You can now view the project on your browser at localhost:3000.
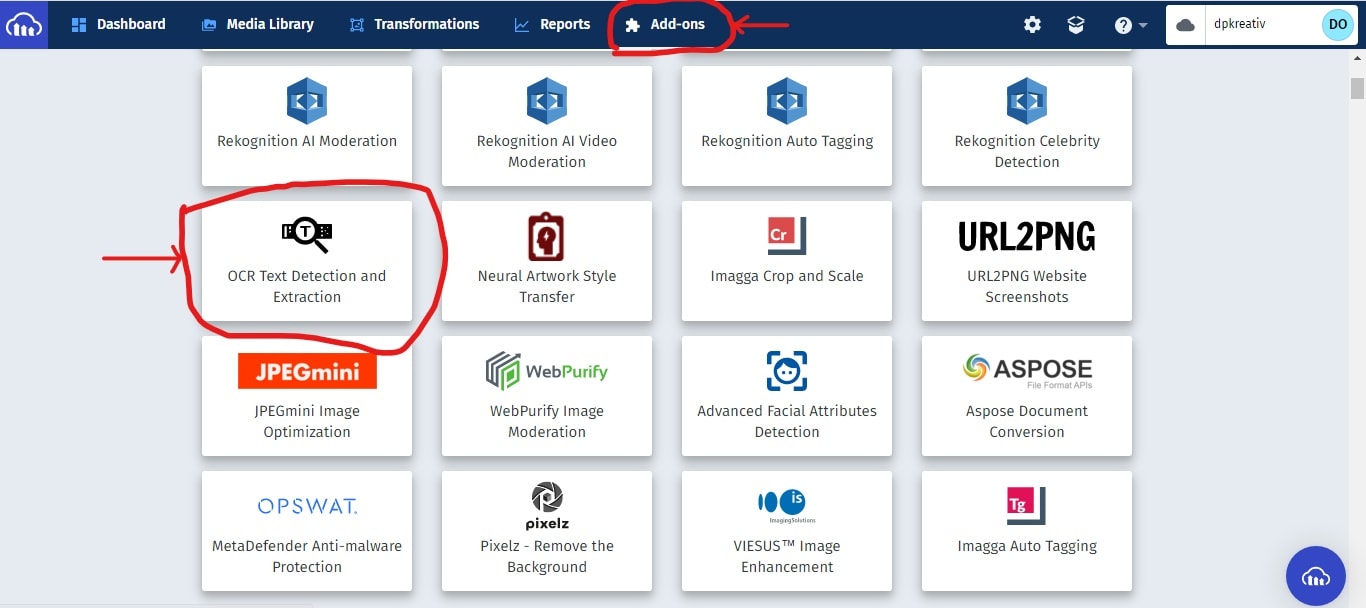
Navigate to your Cloudinary dashboard in your browser and click on the “Add-ons” tab, then scroll down till you locate “OCR Text Detection and Extraction”:
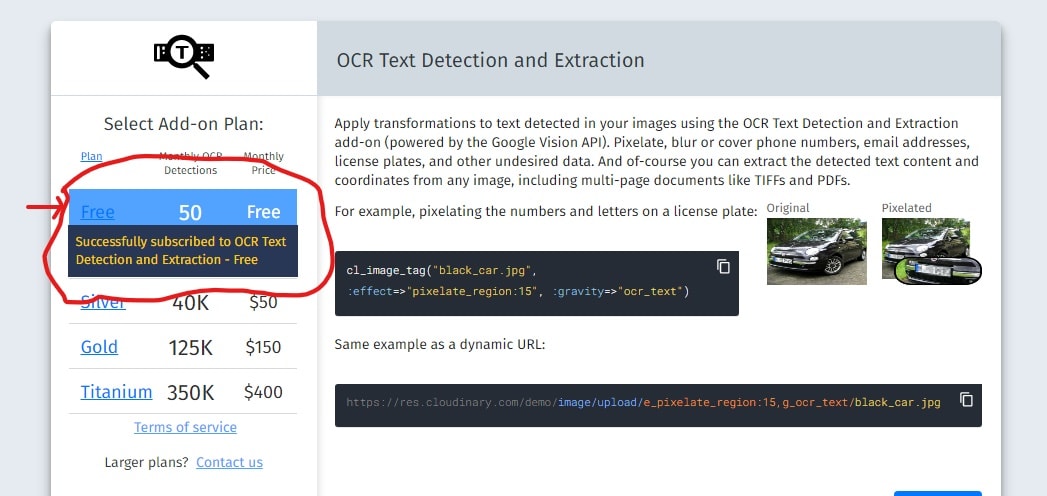
Click on the card, and click on “Free” to get 50 monthly OCR detections for free:
In your project’s terminal, run the command below to install Cloudinary’s SDK, which you will use to implement the OCR add-on:
yarn add cloudinary
In the root folder of your project, create a .env.local file and add the following code to it:
CLOUDINARY_NAME=<YOUR CLOUDINARY CLOUD NAME COMES HERE>
CLOUDINARY_KEY=<YOUR CLOUDINARY API KEY COMES HERE>
CLOUDINARY_SECRET=<YOUR CLOUDINARY API SECRET COMES HERE>
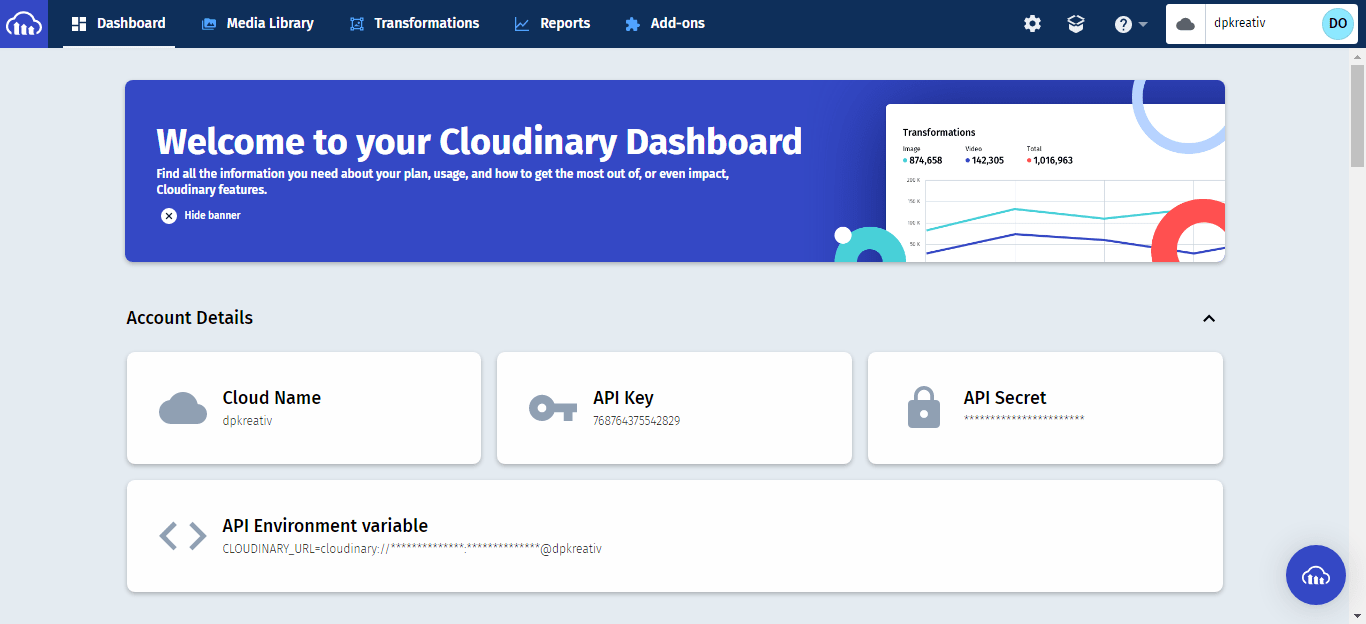
You will copy your Cloudinary “Cloud Name”, “API Key”, and “API Secret” from your Cloudinary dashboard and paste them into the appropriate parts of this file. Navigate to your Cloudinary dashboard to get the data you need:
When you’ve pasted it in, your .env.local file will look like this:
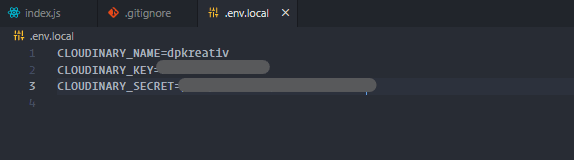
I blurred out my keys for this tutorial.
In your /pages/api/ folder, create a cloudinaryApi.js file and write the code below:
import cloudinary from 'cloudinary';

cloudinary.config({
  cloud_name: process.env.CLOUDINARY_NAME,
  api_key: process.env.CLOUDINARY_KEY,
  api_secret: process.env.CLOUDINARY_SECRET,
});
Here you imported cloudinary’s module and set its configuration.
Update your pages/api/cloudinaryApi.js file with the code below:
import cloudinary from 'cloudinary';

cloudinary.config({
  cloud_name: process.env.CLOUDINARY_NAME,
  api_key: process.env.CLOUDINARY_KEY,
  api_secret: process.env.CLOUDINARY_SECRET,
});

export default (request, response) => {
  const image = request.body;

  return cloudinary.v2.uploader.upload(
    image, { ocr: 'adv_ocr' }, (error, result) => {
      if (error) return response.status(500).json({ error });

      const { textAnnotations } = result.info.ocr.adv_ocr.data[0];

      const extractedText = textAnnotations
        .map((anno, i) => i > 0 && anno.description.replace(/[^0-9a-z]/gi, ''))
        .filter((entry) => typeof entry === 'string')
        .join(' ');

      return response.status(200).json({ data: extractedText });
    }
  );
};
Let’s break this code into bits to understand it:
export default (request, response) => {
  const image = request.body;
};
Here you created and exported an arrow function that takes in two parameters:
-
The
requestparameter contains the API request’s body from the client-side, which you stored in animagevariable -
Use the
responseparameter to return the result after the API has processed the data given to itreturn cloudinary.v2.uploader.upload( image, {ocr: adv_ocr}, (error, result) => {} );
Your arrow function returns an upload method from Cloudinary’s uploader, which takes in three parameters:
-
The
imageparameter contains the data from yourimagevariable. It will be uploaded to Cloudinary for the OCR add-on to process -
ocrparameter is set toadv_ocr, which detects text on images. To detect text on documents like PDFs, set it toadv_ocr:document -
Callback function to handle the data after Cloudinary’s OCR has worked on your image. It takes in two parameters:
error(to set up an error message if the API request fails) andresult, which contains a JSON object with all the details of the image and its extracted textif (error) return response.status(500).json({ error });
Here you’re returning a response with a status code of 500 and a JSON object with the error message.
const { textAnnotations } = result.info.ocr.adv_ocr.data[0];
The result JSON object contains an ocr node under the info section.
-
Used object destructuring to access
textAnnotationspresent inadv_ocr.data[0](the first element in Cloudinary’sadv_ocrengine’sdataarray) -
textAnnotationsis an array of objects that contains adescriptionkey nested in its first object. Thisdescriptioncontains the extracted text you need.const extractedText = textAnnotations.map( (anno, i) => i > 0 && anno.description.replace(/[^0-9a-z]/gi, ‘’) ).filter((entry) => typeof entry === ‘string’).join(’ ’);
Here:
-
Mapped through
textAnnotations, replacing all elements that are not0-9ora-zwith an empty string -
Filtered through your resulting array, selecting only string elements
-
Joined the array elements to form a string of words separated by spaces and stored it in the
extractedTextvariablereturn response.status(200).json({ data: extractedText });
Finally, you returned a response with a status code of 200 to show that it was successful and a JSON object containing the extractedText variable as a data value.
In your pages/index.js file, locate and update the handleSubmit function with the code below:
// OnSubmit function
  const handleOnSubmit = async (e) => {
    e.preventDefault();
    setLoading(true);

    try {
      const { data } = await fetch('/api/cloudinaryApi', {
        method: 'POST',
        body: imageSrc,
      }).then((response) => response.json());

      console.log(data);
      setExtractedText(data);
      setLoading(false);

    } catch (error) {
      console.log(error);
      setLoading(false);
    }
  };
In the code above:
- Used
setLoading(true)to trigger the loading state of yourDetect textbutton - Implemented a
try-catchblock to handle your API calls and any errors you might encounter on the client-side - In the
trysection:- Used the
fetchmethod to send your image data URL to your API, and object destructuring to getdatafromresponse.json() -
setExtractedText(data)updates the state ofextractedTextwith the text fromdata - Use
setLoading(false)to turn off the loading state of yourDetect textbutton
- Used the
- Logged your error to the console in the
catchsection and set the loading state tofalse
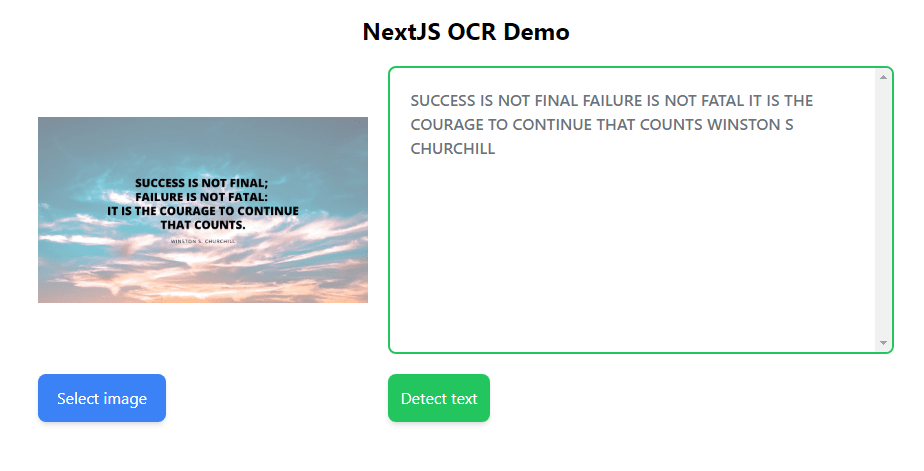
When you test your demo app in your browser, you will see something similar to this:
This article taught you how to detect and extract text from images using Cloudinary’s OCR add-on. For an in-depth knowledge of how the OCR add-on works, please look at its official documentation.