Ensuring our web pages load quickly is our duty as builders of the internet. By lazy loading our images, we are able to save valuable load time for our users. The challenge with lazy loading is pre-generating and storing low-quality placeholders for the full quality image. Let us learn how to generate the placeholders on-demand low-quality image placeholders.
The final project can be viewed on Codesandbox.
You can find the full source code on my Github repository.
Nuxt.Js is a Vue.Js framework that allows us to build our applications with confidence. To get started, ensure you have Yarn, NPM v5.2+ or v6.1+ installed. Open the terminal in your preferred working directory and run the following command.
yarn create nuxt-app nuxtjs-low-quality-placeholder
# OR
npx create-nuxt-app nuxtjs-low-quality-placeholder
# OR
npm init nuxt-app nuxtjs-low-quality-placeholder
Code language: PHP (php)
This will initiate some questions to help set up the project. Here are our recommended defaults:
Project name: nuxtjs-low-quality-placeholder Programming language: JavaScript Package manager: Yarn UI framework: Tailwind CSS Nuxt.Js modules: None Linting tools: None Test frameworks: None Rendering mode: Universal (SSR / SSG) Deployment target: Server (Node.js hosting) Development tools: None What is your Github username? < your-github-username >
Once the setup is complete, you may now enter and run your project. It will be accessible on http://localhost:3000.
cd nuxtjs-low-quality-placeholder

yarn dev
# OR
npm run dev
Code language: PHP (php)
Cloudinary is a media management platform that allows us to build engaging and customized visual experiences. Let us prepare our account for the project. If you do not have an account, feel free to register here.
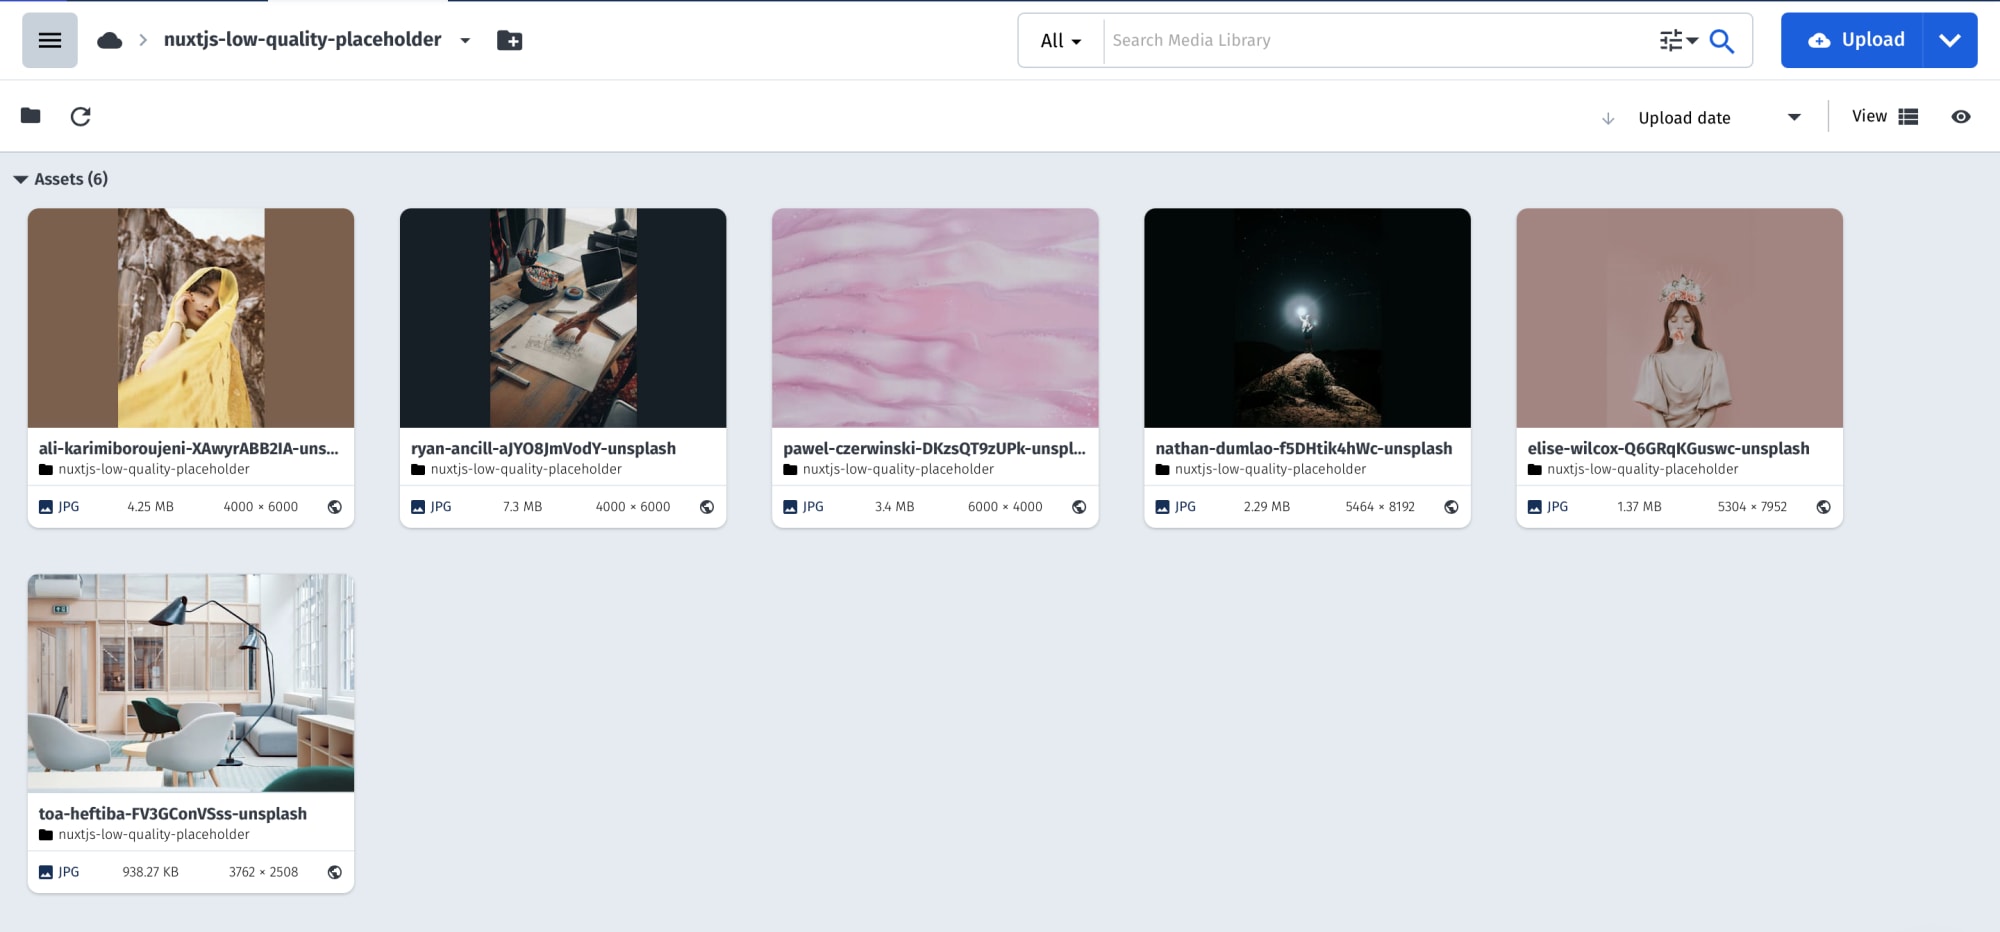
Proceed to the media library section and create a folder named nuxtjs-low-quality-placeholder. Add the following files to the folder.
- ali-karimiboroujeni-XAwyrABB2IA-unsplash.jpg
- ryan-ancill-aJYO8JmVodY-unsplash.jpg
- pawel-czerwinski-DKzsQT9zUPk-unsplash.jpg
- nathan-dumlao-f5DHtik4hWc-unsplash.jpg
- elise-wilcox-Q6GRqKGuswc-unsplash.jpg
- toa-heftiba-FV3GConVSss-unsplash.jpg
You should now have a folder similar to this one.

To allow our application to communicate with Cloudinary, we are going to install @nuxtjs/cloudinary. Run the following command in the root project folder.
yarn add @nuxtjs/cloudinary
# OR
npm run install @nuxtjs/cloudinary
Code language: CSS (css)
Add @nuxtjs/cloudinary as a module in the nuxt.config.js file.
// nuxt.config.js
export default {
    ...
    modules: [
        '@nuxtjs/cloudinary'
    ]
    ...
}
Code language: JavaScript (javascript)
Add a cloudinary section in the nuxt.config.js file for our configurations.
// nuxt.config.js
export default {
    cloudinary: {
        cloudName: process.env.NUXT_ENV_CLOUDINARY_CLOUD_NAME,
        useComponent: true,
        secure: true
    }
}
Code language: JavaScript (javascript)
The above code refers to the NUXT_ENV_CLOUDINARY_CLOUD_NAME environmental variable. These are values we don’t want to be stored in our codebase for either security or portability reasons. Let’s create the .env file in the root project folder.
touch .env
Code language: CSS (css)
Then add your cloud name. This can be located on your Cloudinary dashboard.
NUXT_ENV_CLOUDINARY_CLOUD_NAME=<your-cloudinary-cloud-name>
Code language: HTML, XML (xml)Before optimizing the images, we first need to display them in the user interface. To do this, let us load them into our component state and generate the image path using the Cloudinary API.
// pages/index.vue
<script></script>
Code language: HTML, XML (xml)We may now loop throw the images array and display them.
<!-- pages/index.vue -->
<template>
    ...
    <div v-for="image in images" :key="image.public_id">
        <div>
            <Img
                :src='imagePath(image.public_id)'
                :smallSrc='placeholderPath(image.public_id)'
                :alt="credit"
            />
        </div>
        <div>
            <h3 v-html="image.credit"></h3>
        </div>
    </div>
    ...
</template>
Code language: HTML, XML (xml)To generate low-quality placeholders, we are going to use the cartoonify transformation. We specify a color reduction of 2 and a detail reduction to 0.1.
After cartooning the image, we scale it down to a width of 150 pixels.
// pages/index.vue
<script>
export default {
  ...
  methods:{
    ...
    placeholderPath(publicId){
      return this.$cloudinary.image.url(
        `${publicId}.svg`,
        {
          effect: "cartoonify:colors:2:detail:0.1",
          width: 150,
          crop:'scale'
        }
      );
    }
  }
}
</script>
Code language: HTML, XML (xml)Now that we now have a high quality and a low-resolution version of each photo, we need to implement lazy loading. We will make use of the vue-blur-loader package for this. To get started, let’s install the package.
npm install vue-blur-loader --save
#or
yarn add vue-blur-loader
Code language: CSS (css)
Let us not use the BlurLoader component to lazy load the images. First, let’s load the component into the page.
// pages/index.vue
<script>

import BlurLoader from 'vue-blur-loader'

export default {
  ...
  components:{
    BlurLoader
  },
  ...
}
</script>
Code language: HTML, XML (xml)
We can now replace the img tag we had early with the BlurLoader component injecting both image sources into the component.
<!-- pages/index.vue -->
<template>
    ...
    <div v-for="image in images" :key="image.public_id">
        <div>
            <div>
              <BlurLoader
                :src='imagePath(imagde.public_id)'
                :smallSrc='placeholderPath(image.public_id)'
                :alt="credit"
              />
            </div>
            <div>
                <h3 v-html="image.credit"></h3>
            </div>
        </div>
    </div>
    ...
</template>
Code language: HTML, XML (xml)
Our app should now automatically lazy load the low-quality placeholder before the high-resolution image.
To learn more about the transformations available, feel free to go through the transformation URL API reference.
