
Images are an essential part of websites and web applications. As the web becomes more visual, developers and engineers constantly build tools and applications to reduce page load time and improve the overall user experience.
This post will discuss optimizing and delivering image assets with Netlify-plugin-cloudinary in a Next.js application. In a nutshell, this plugin automatically optimizes and serves your website images during deployment, using Cloudinary.
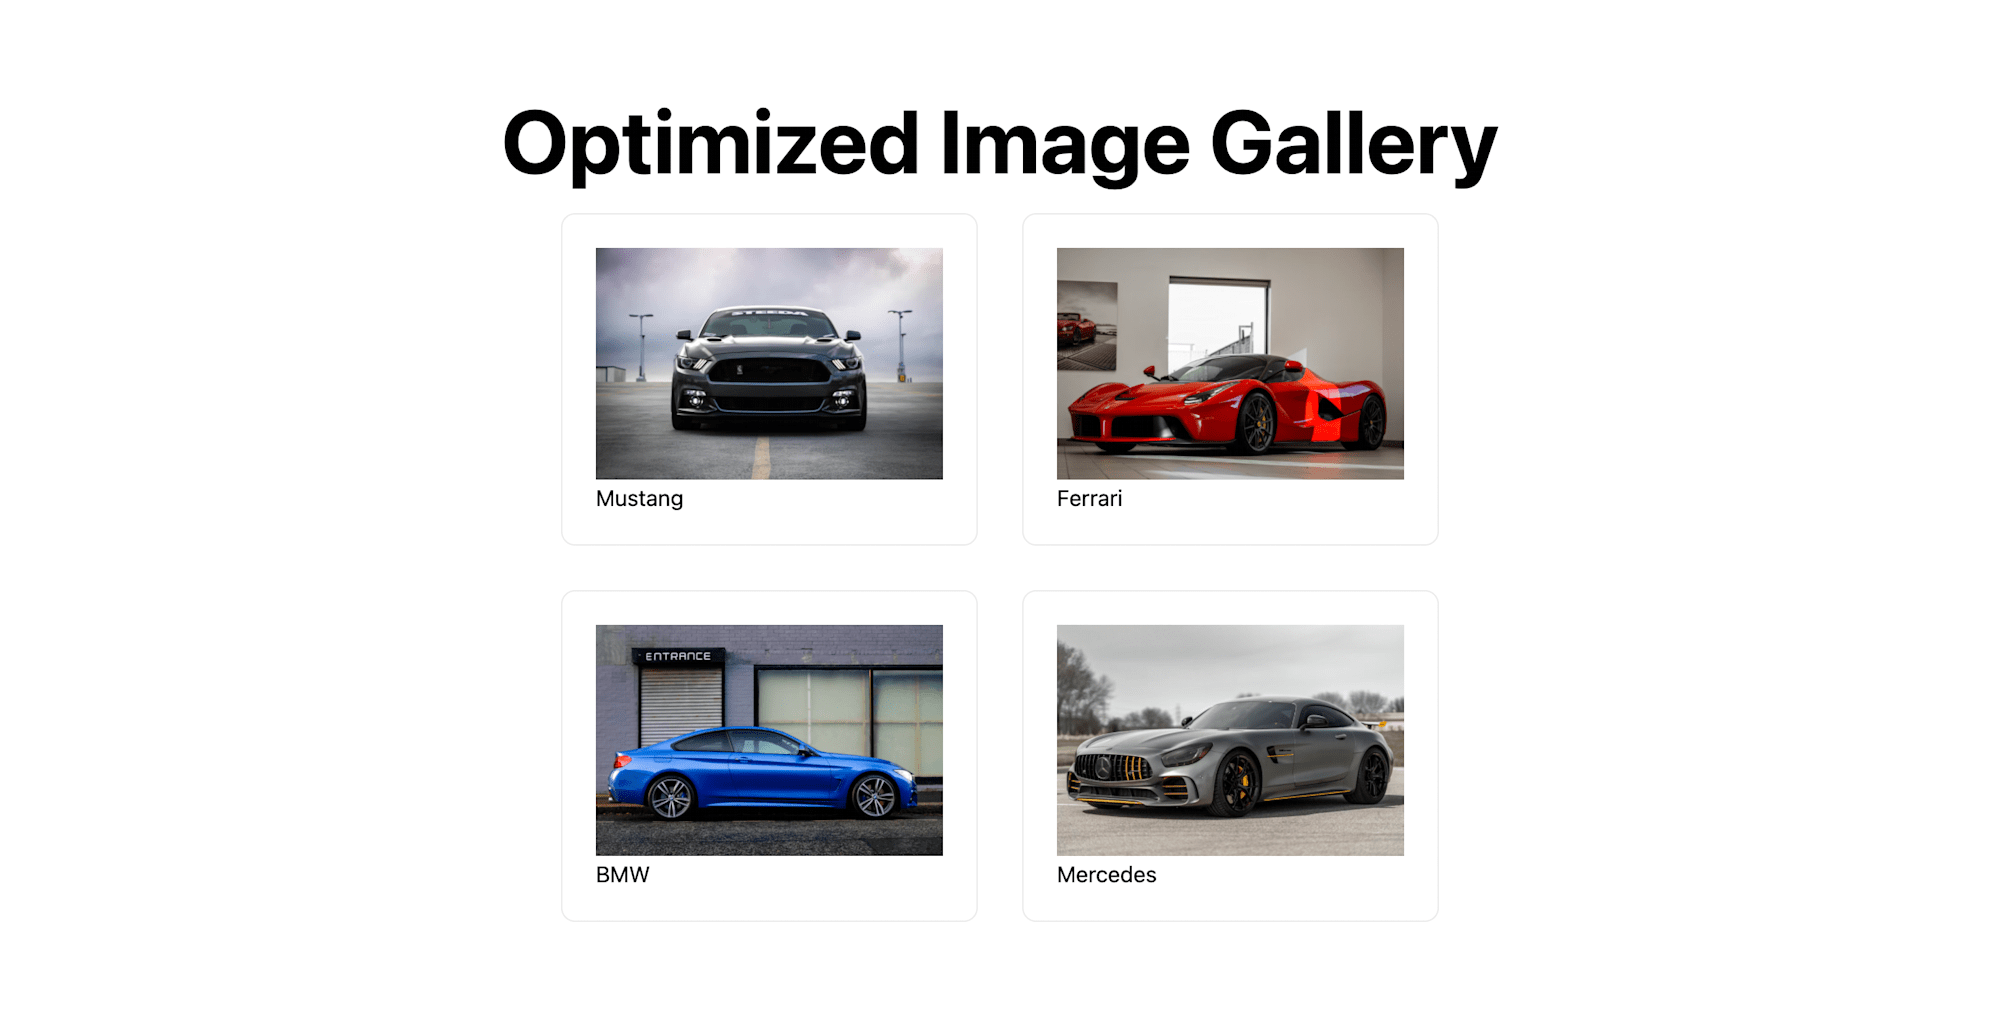
At the end of this tutorial, we will learn how to build an image gallery using Next.js, host the source code on Github, deploy it to Netlify, and automatically serve optimized images using Cloudinary.
We completed this project in a CodeSandbox. Fork and run it to quickly get started.
Github link here.
View deployed version on Netlify here.
To fully grasp the concepts presented in this tutorial, a good knowledge of JavaScript and React.js is required. Experience with Next.js isn’t a requirement, but it’s nice to have.
We also need the following:
- A Cloudinary account for image optimization. Signup is completely free.
- A Github account for saving source code. Signup is completely free.
- A Netlify account for deploying and hosting web applications. Signup is completely free.
We need to create a Next.js starter project by navigating to the desired directory and running the command below in our terminal.
npx create-next-app next_opt_image && cd next_opt_image
The command creates a Next.js project called next_opt_image, and navigates to the project directory.
To create an image gallery, we need to navigate to the URL below and download sample images from Unsplash:
- Mustang – https://unsplash.com/photos/YApiWyp0lqo
- Ferrari – https://unsplash.com/photos/eqW1MPinEV4
- BMW – https://unsplash.com/photos/p7tai9P7H-s
- Mercedes – https://unsplash.com/photos/8qYE6LGHW-c
With that done, we need to navigate to the public folder, and in this folder, create an images folder, copy and paste all the downloaded images.
Next, we need to create a utils folder in the project root directory. In this folder, we create an images.json file. The file contains image data for the gallery.
images.json
[
        {
            "id": 1,
            "name": "Mustang",
            "url": "/images/mustang.jpg"
        },
        {
            "id": 2,
            "name": "Ferrari",
            "url": "/images/ferrari.jpg"
        },
        {
            "id": 3,
            "name": "BMW",
            "url": "/images/bmw.jpg"
        },
        {
            "id": 4,
            "name": "Mercedes",
            "url": "/images/mercedes.jpg"
        }
]
Code language: JSON / JSON with Comments (json)
With that done, we can leverage Next.js CSS Module support to style our page by replacing the content in Home.module.css in the styles folder with the code snippet below:
.container {
  padding: 0 2rem;
}

.main {
  min-height: 100vh;
  padding: 4rem 0;
  flex: 1;
  display: flex;
  flex-direction: column;
  justify-content: center;
  align-items: center;
}

.title {
  margin: 0;
  line-height: 1.15;
  font-size: 4rem;
}

.title,
.description {
  text-align: center;
}

.grid {
  display: flex;
  align-items: center;
  justify-content: center;
  flex-wrap: wrap;
  max-width: 800px;
}

.card {
  margin: 1rem;
  padding: 1.5rem;
  text-align: left;
  color: inherit;
  text-decoration: none;
  border: 1px solid #eaeaea;
  border-radius: 10px;
  transition: color 0.15s ease, border-color 0.15s ease;
  max-width: 300px;
}

.card img {
  height: 100%;
  width: 100%;
}

.card p {
  margin: 0;
  font-size: 1rem;
}


@media (max-width: 600px) {
  .grid {
    width: 100%;
    flex-direction: column;
  }
}
Code language: CSS (css)
Next, we modify the index.js file in the pages folder to the following:
import Head from 'next/head';
import styles from '../styles/Home.module.css';
import images from '../utils/images.json'; //add this

export default function Home() {
      return (
        <div className={styles.container}>
          <Head>
            <title>Next Cloudinary Image</title>
            <meta name='description' content='Next Cloudinary Image' />
            <link rel='icon' href='/favicon.ico' />
          </Head>
          <main className={styles.main}>
            <h1 className={styles.title}>Optimized Image Gallery</h1>
            <div className={styles.grid}>
              {images.map((image) => (
                <div key={image.id} className={styles.card}>
                  <img src={image.url} alt={image.name} />
                  <p>{image.name}</p>
                </div>
              ))}
            </div>
          </main>
        </div>
      );
}
Code language: JavaScript (javascript)
The snippet above does the following:
- Imports the image collection.
- Markup shows the list of images by looping through the image collection.
With that done, we can start a development server using the command below:
npm run dev
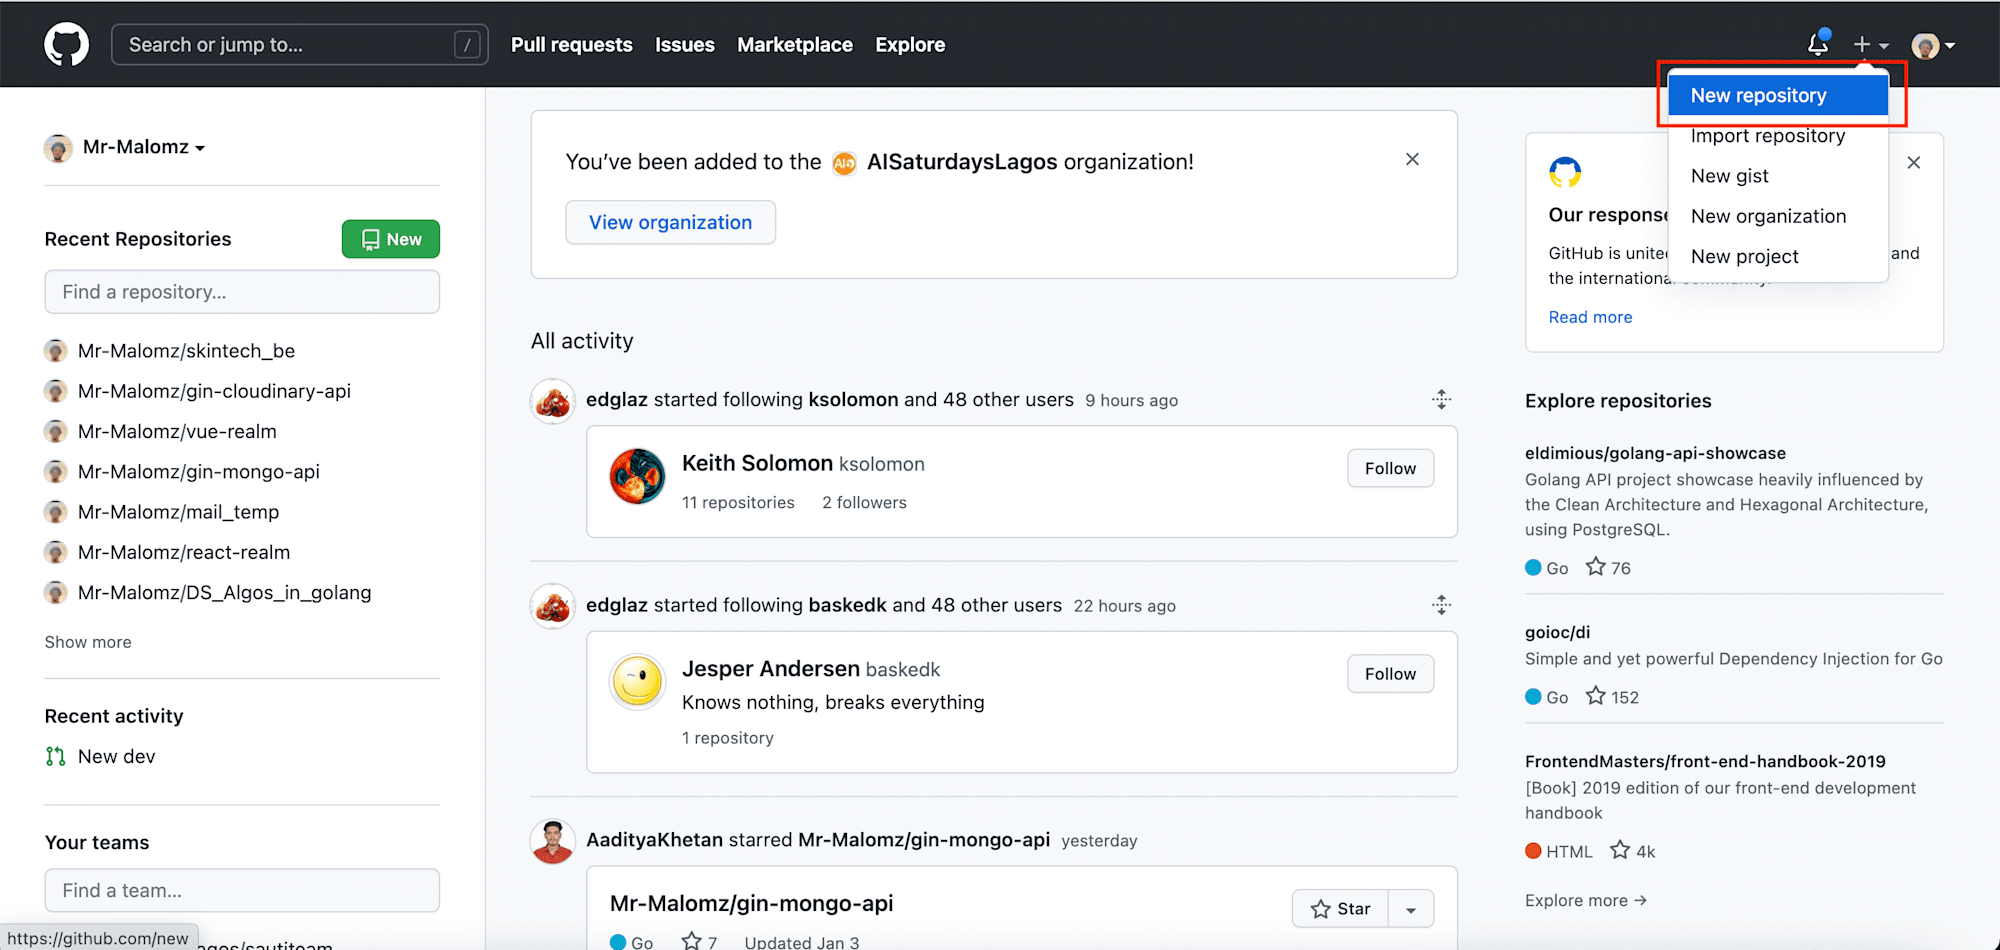
We want to push our source code to GitHub to facilitate a speedy “deploy from GitHub” workflow on Netlify. To get started, we need to log into our Github dashboard. Click on the plus icon and select New Repository.
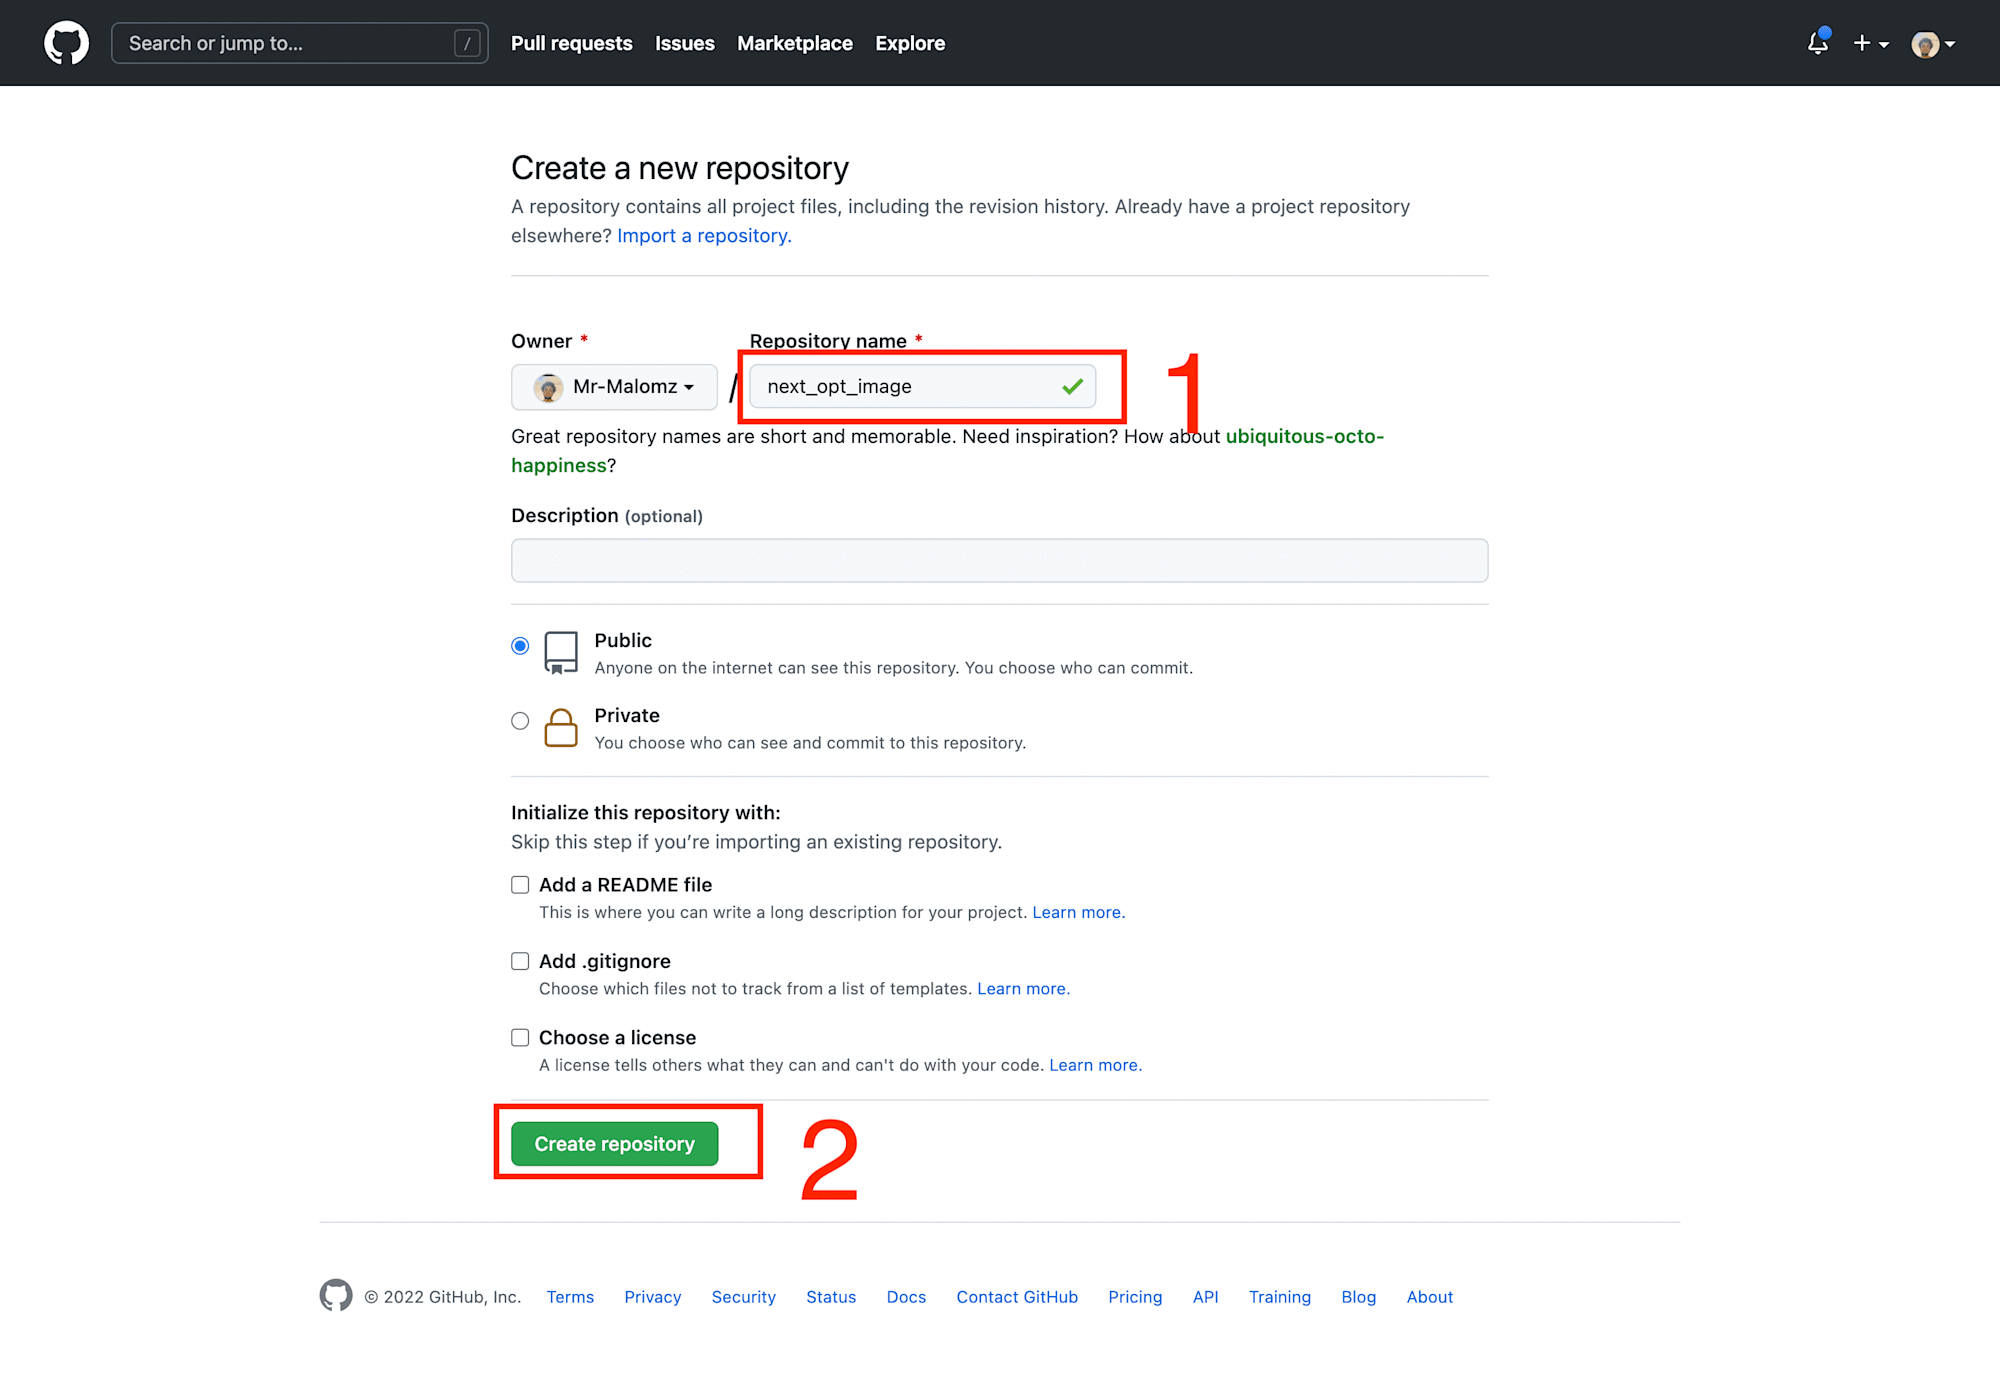
Input next_opt_image as the Repository name and click on Create repository.
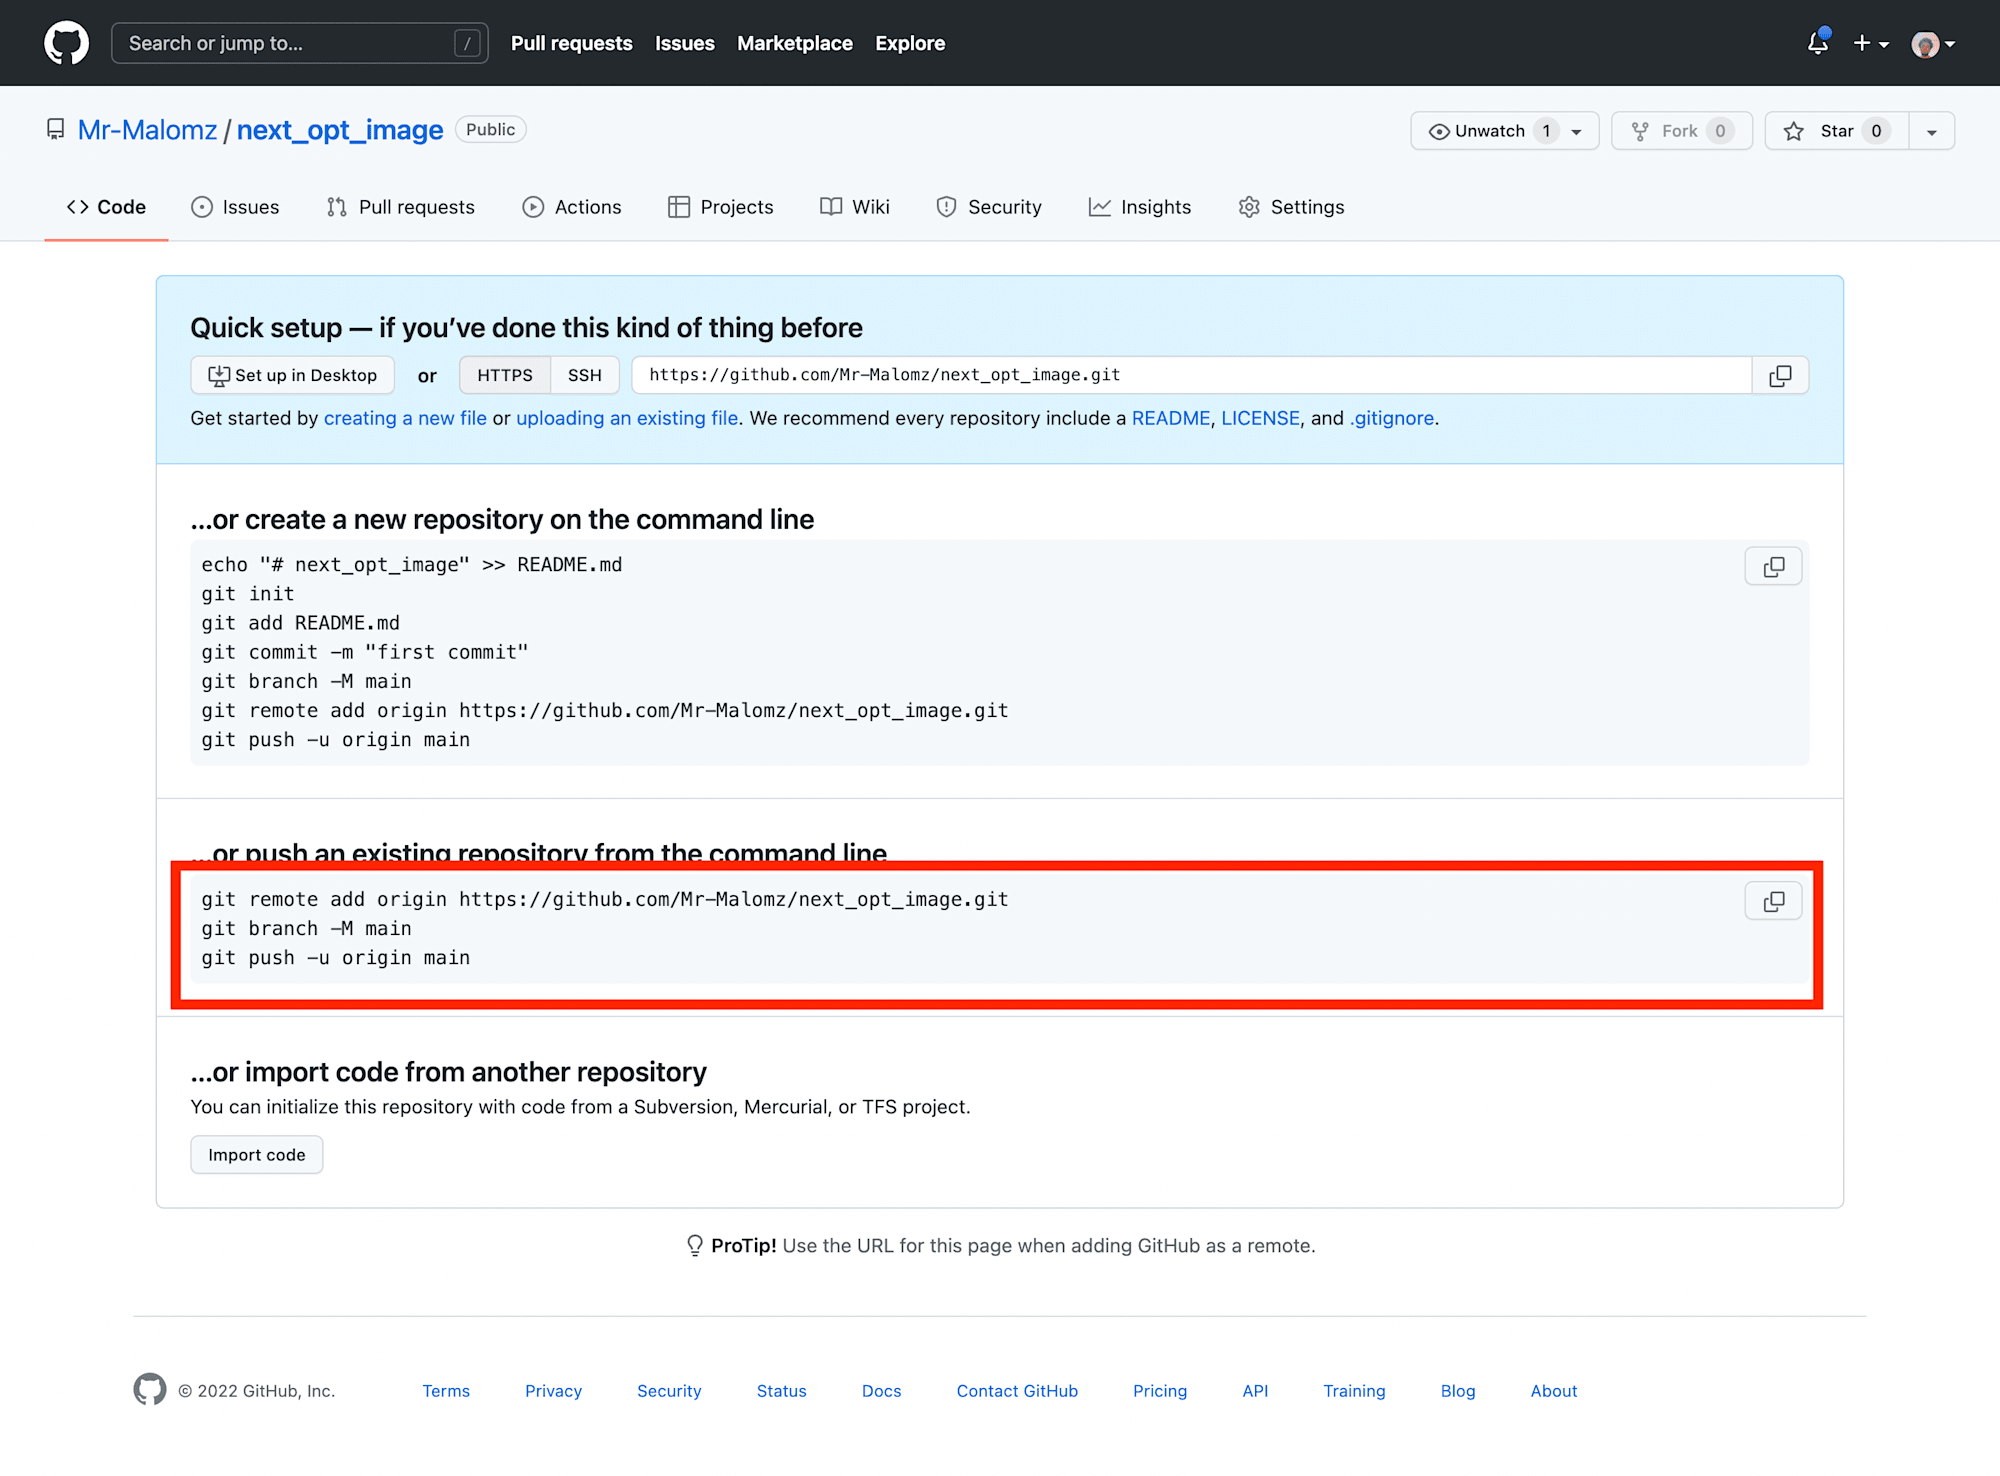
Next, run the command below to add and save recent changes
git add .
git commit -m "add image gallery"
Copy and run the highlighted commands on the terminal:
We can refresh the browser to see updated changes to our repository.
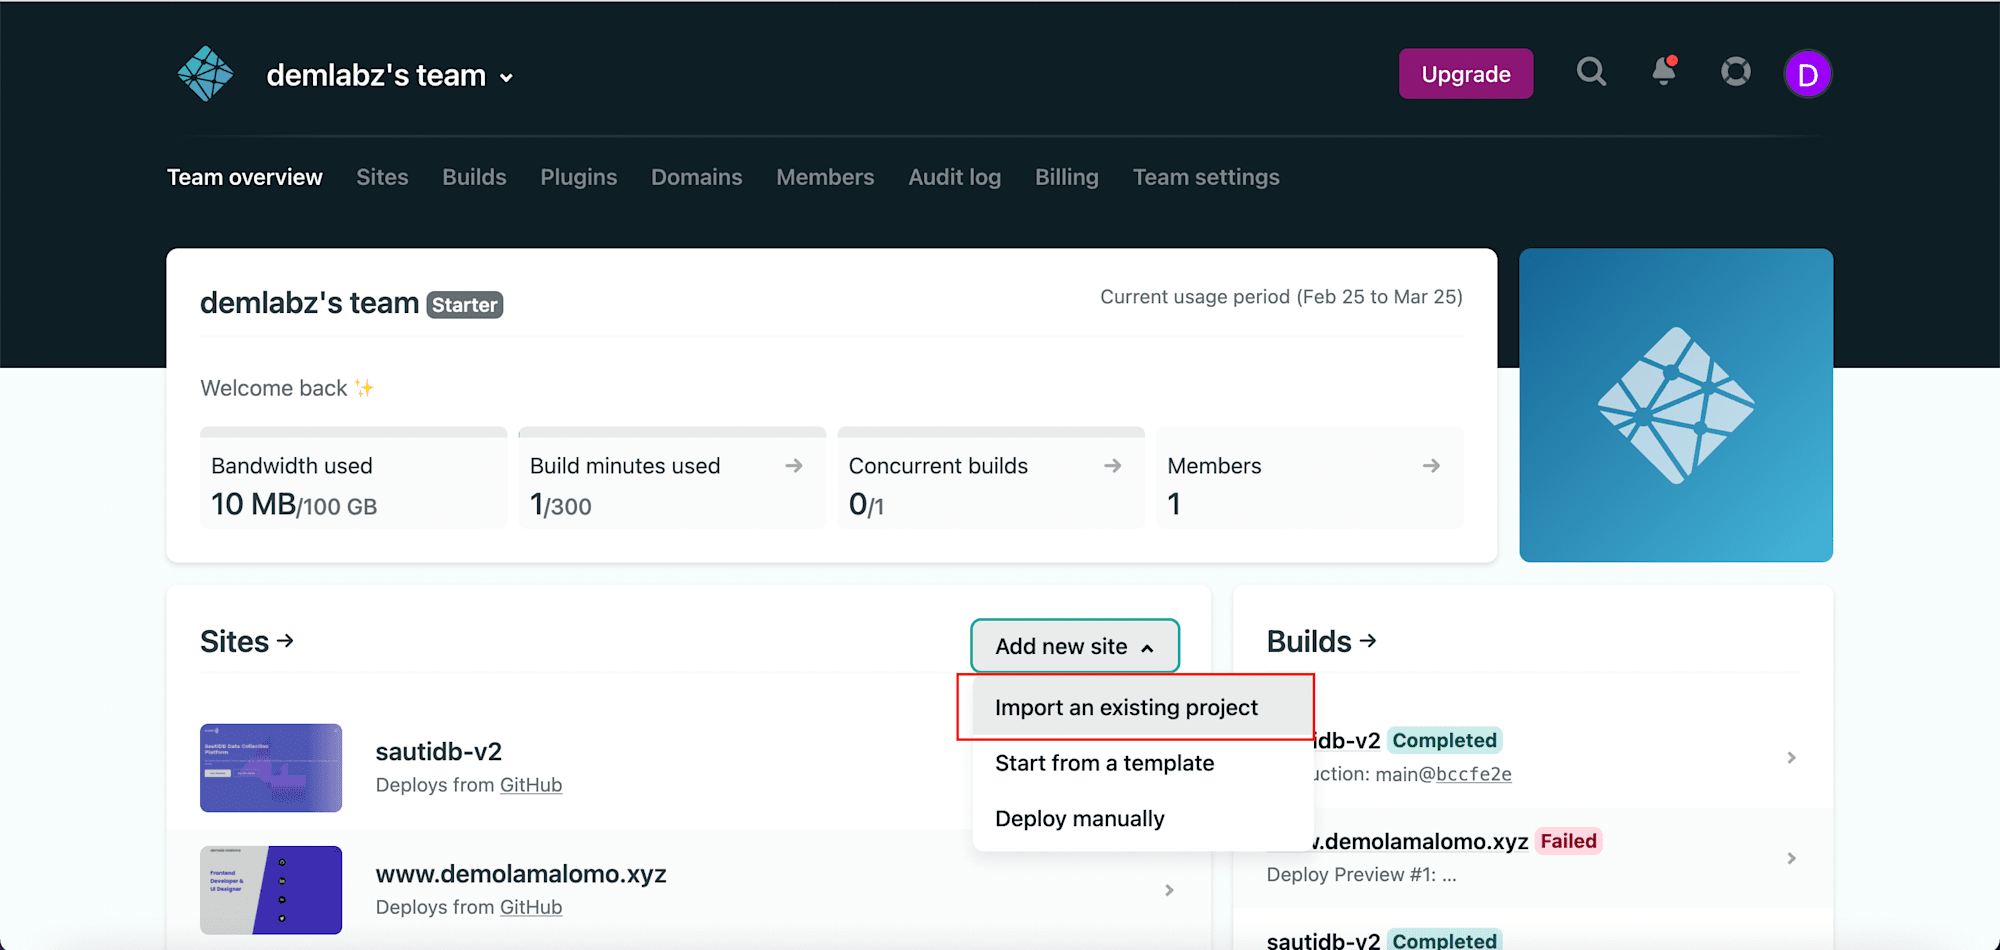
To get started, we need to log into our Netlify dashboard. Click on Add new site dropdown and select Import an existing project.
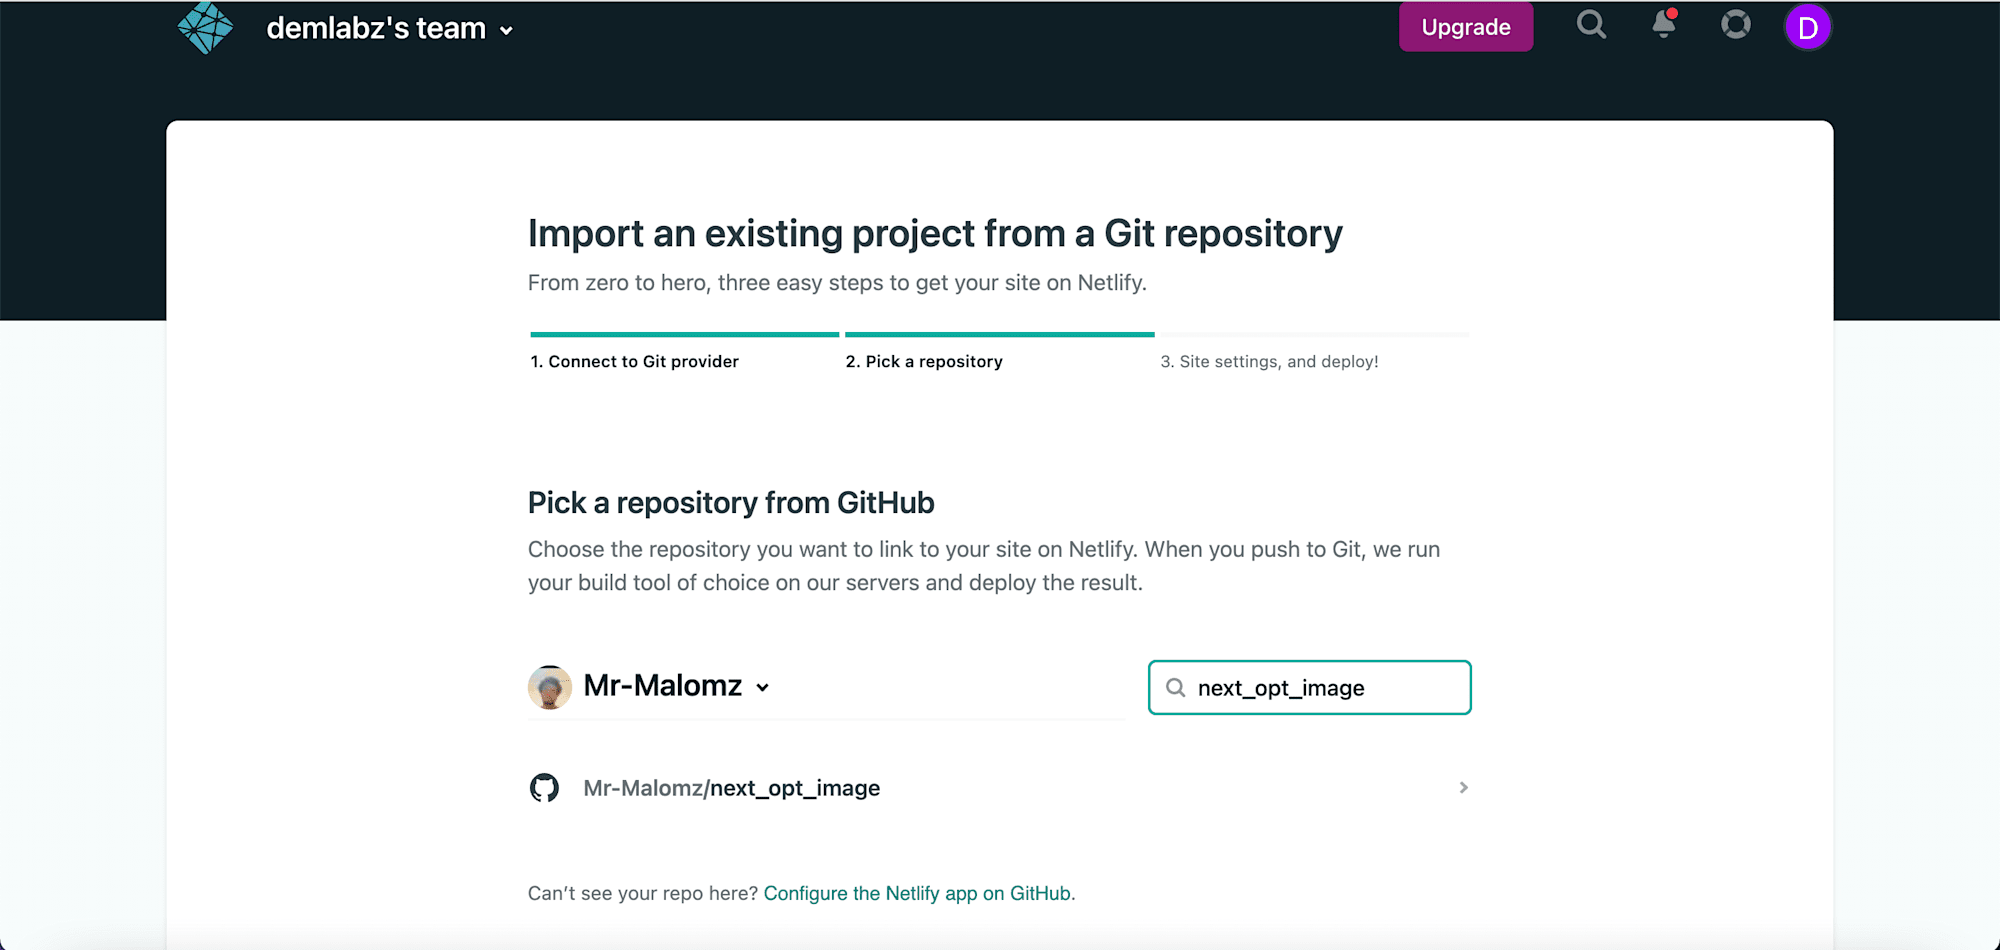
Select Github as the Git provider and authorize Netlify.

Search for next_opt_image and select the repository.
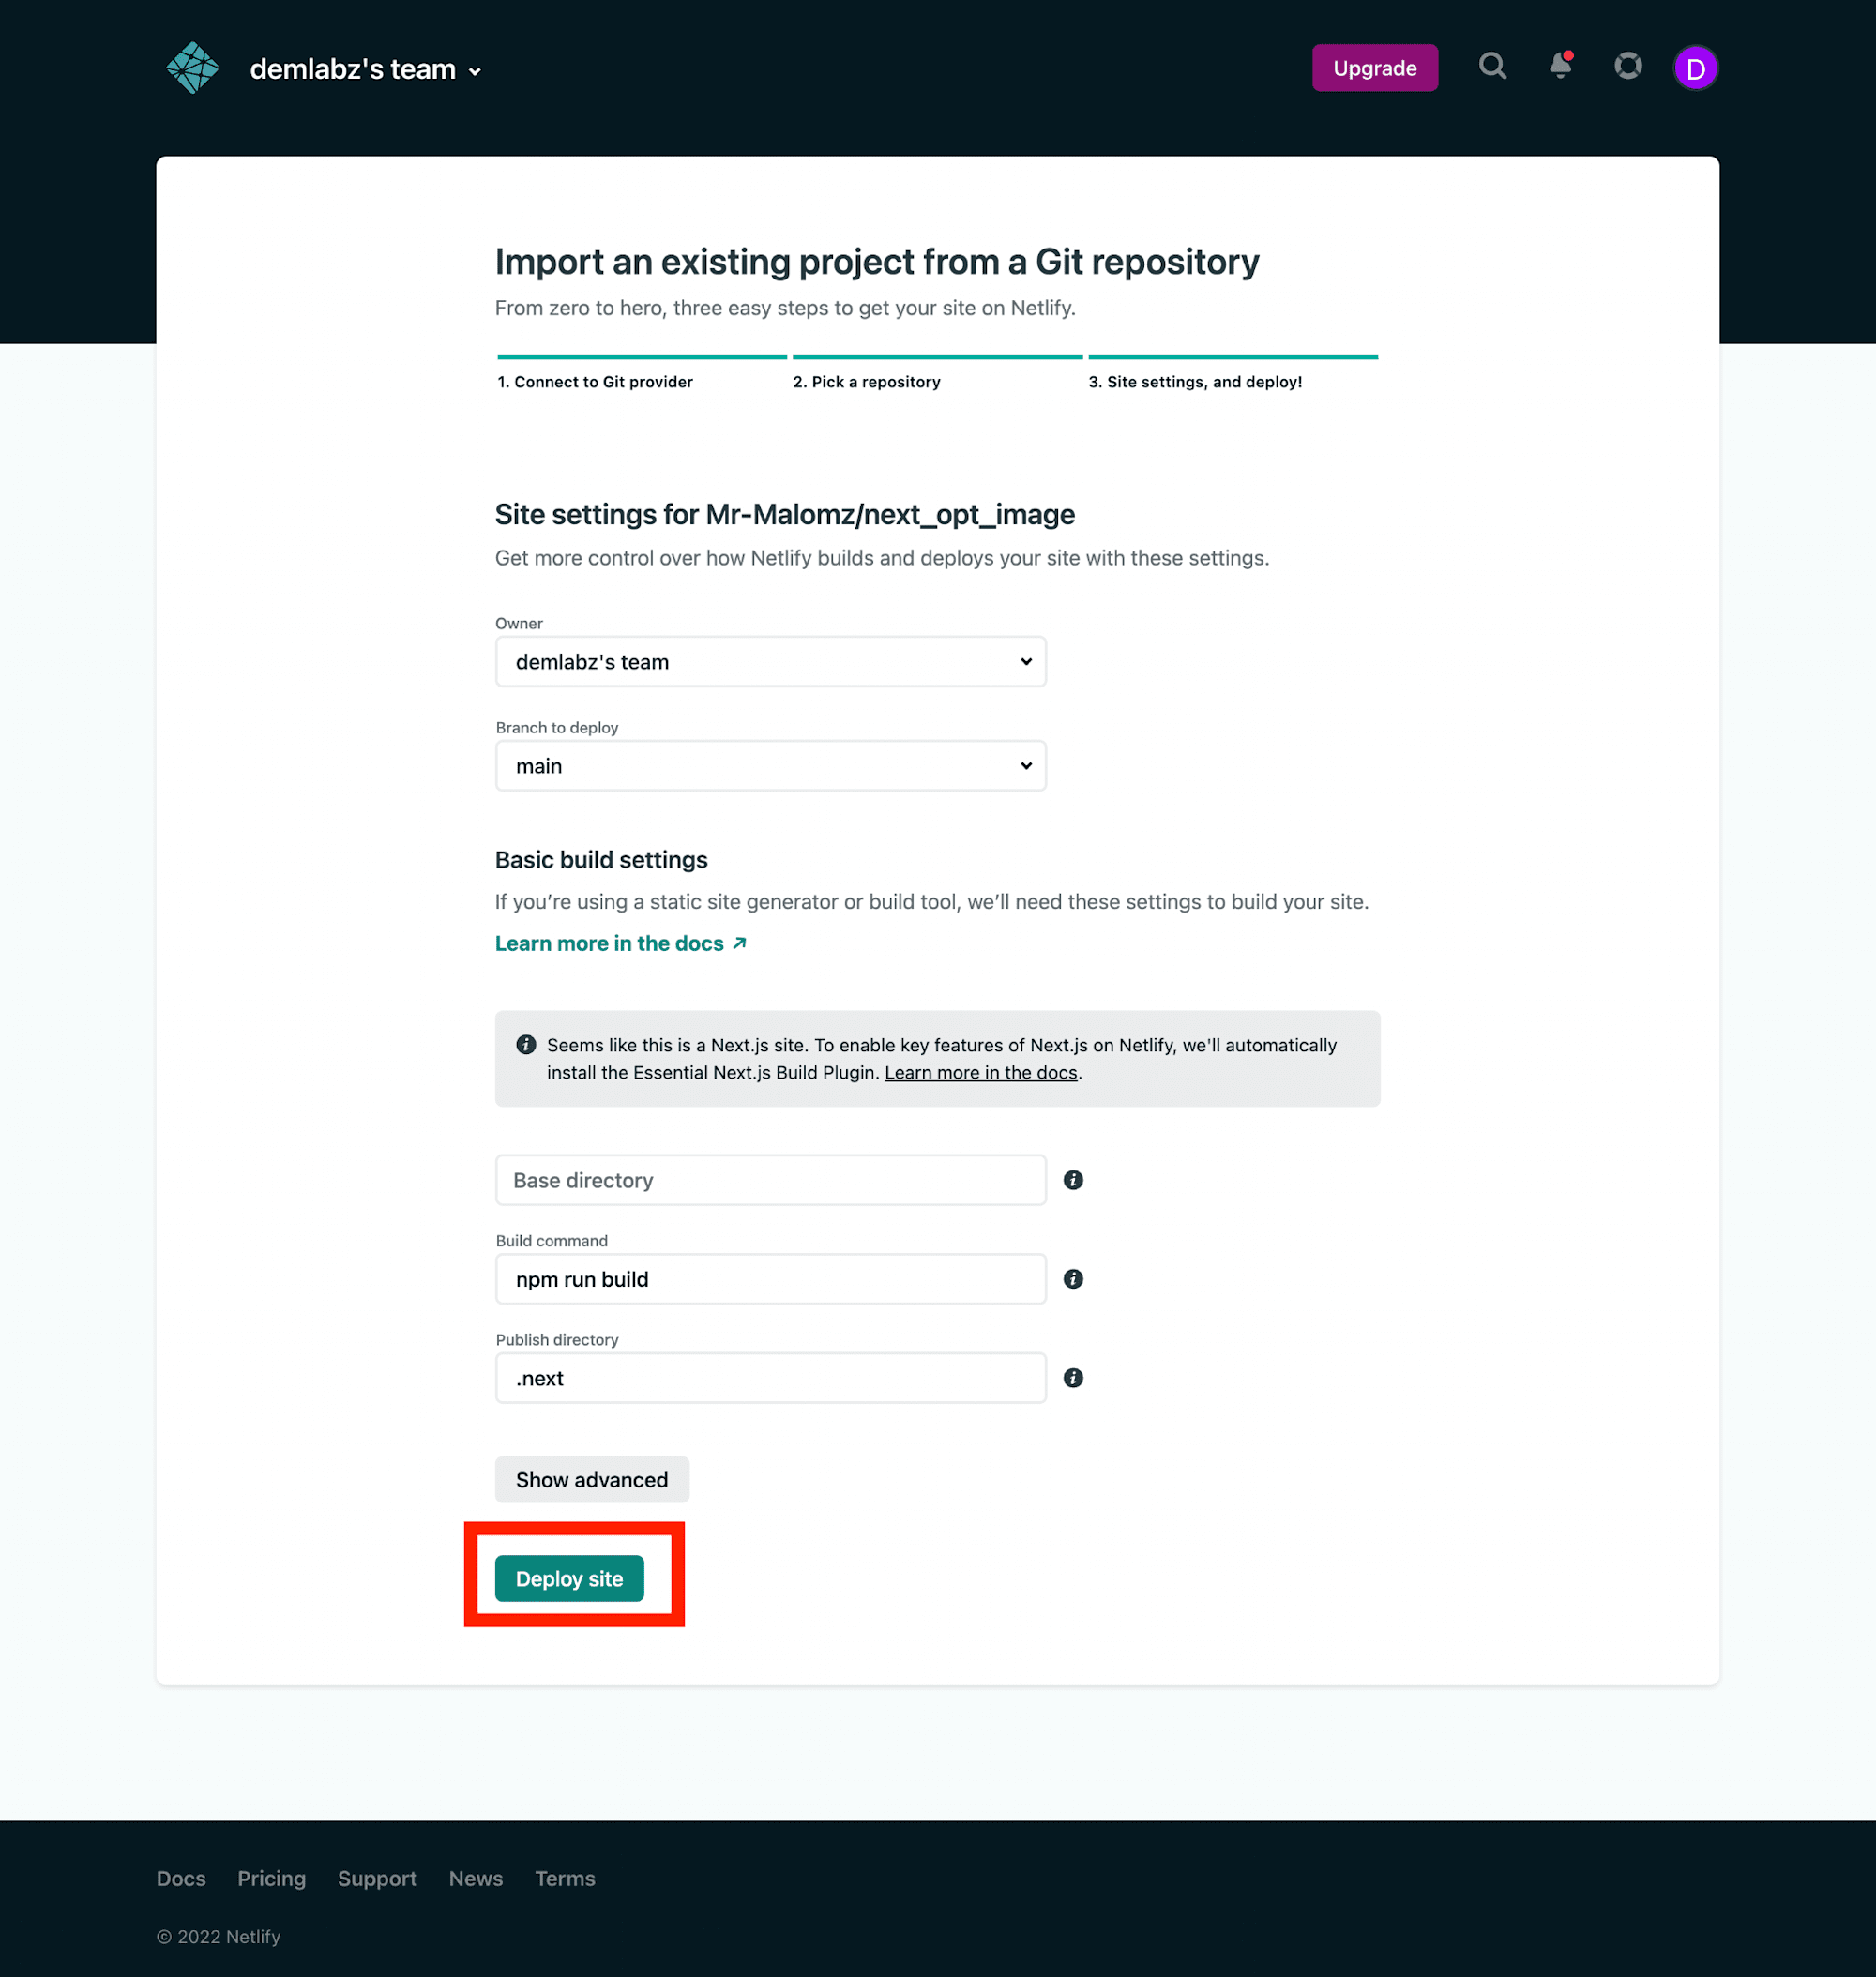
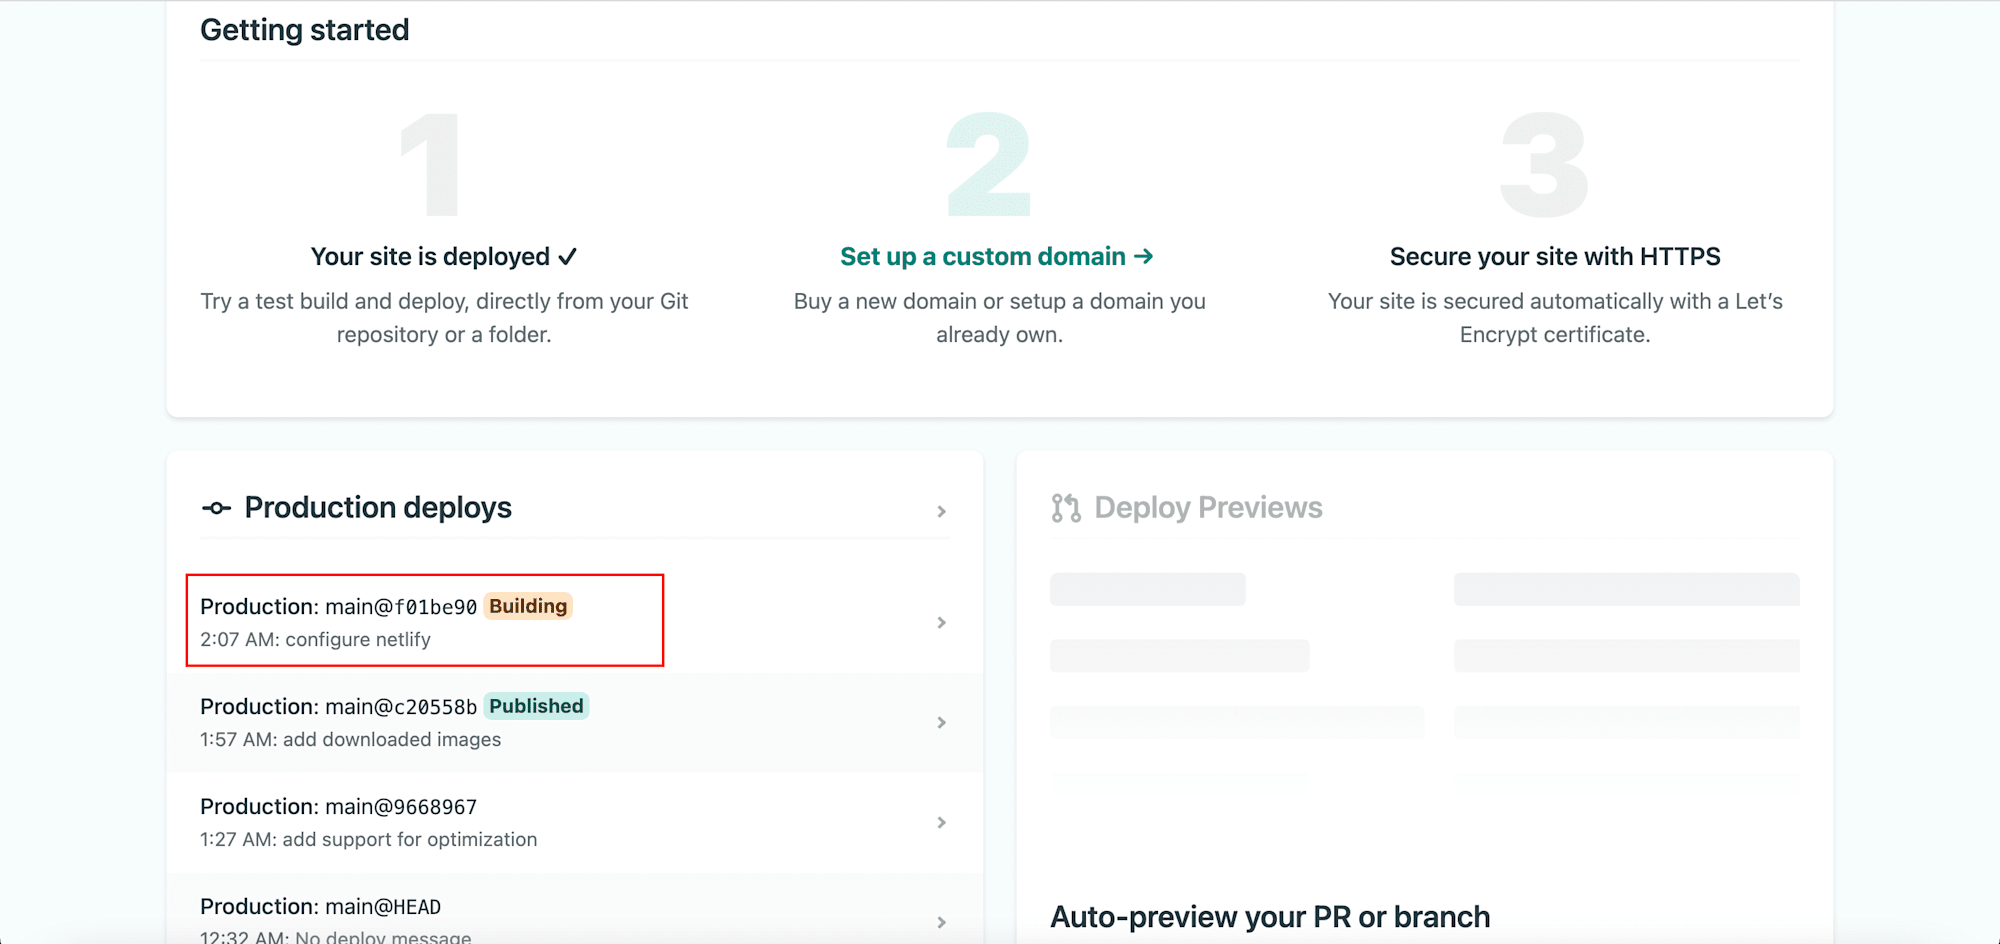
Click on Deploy Site to start deployment. It might take a few minutes.
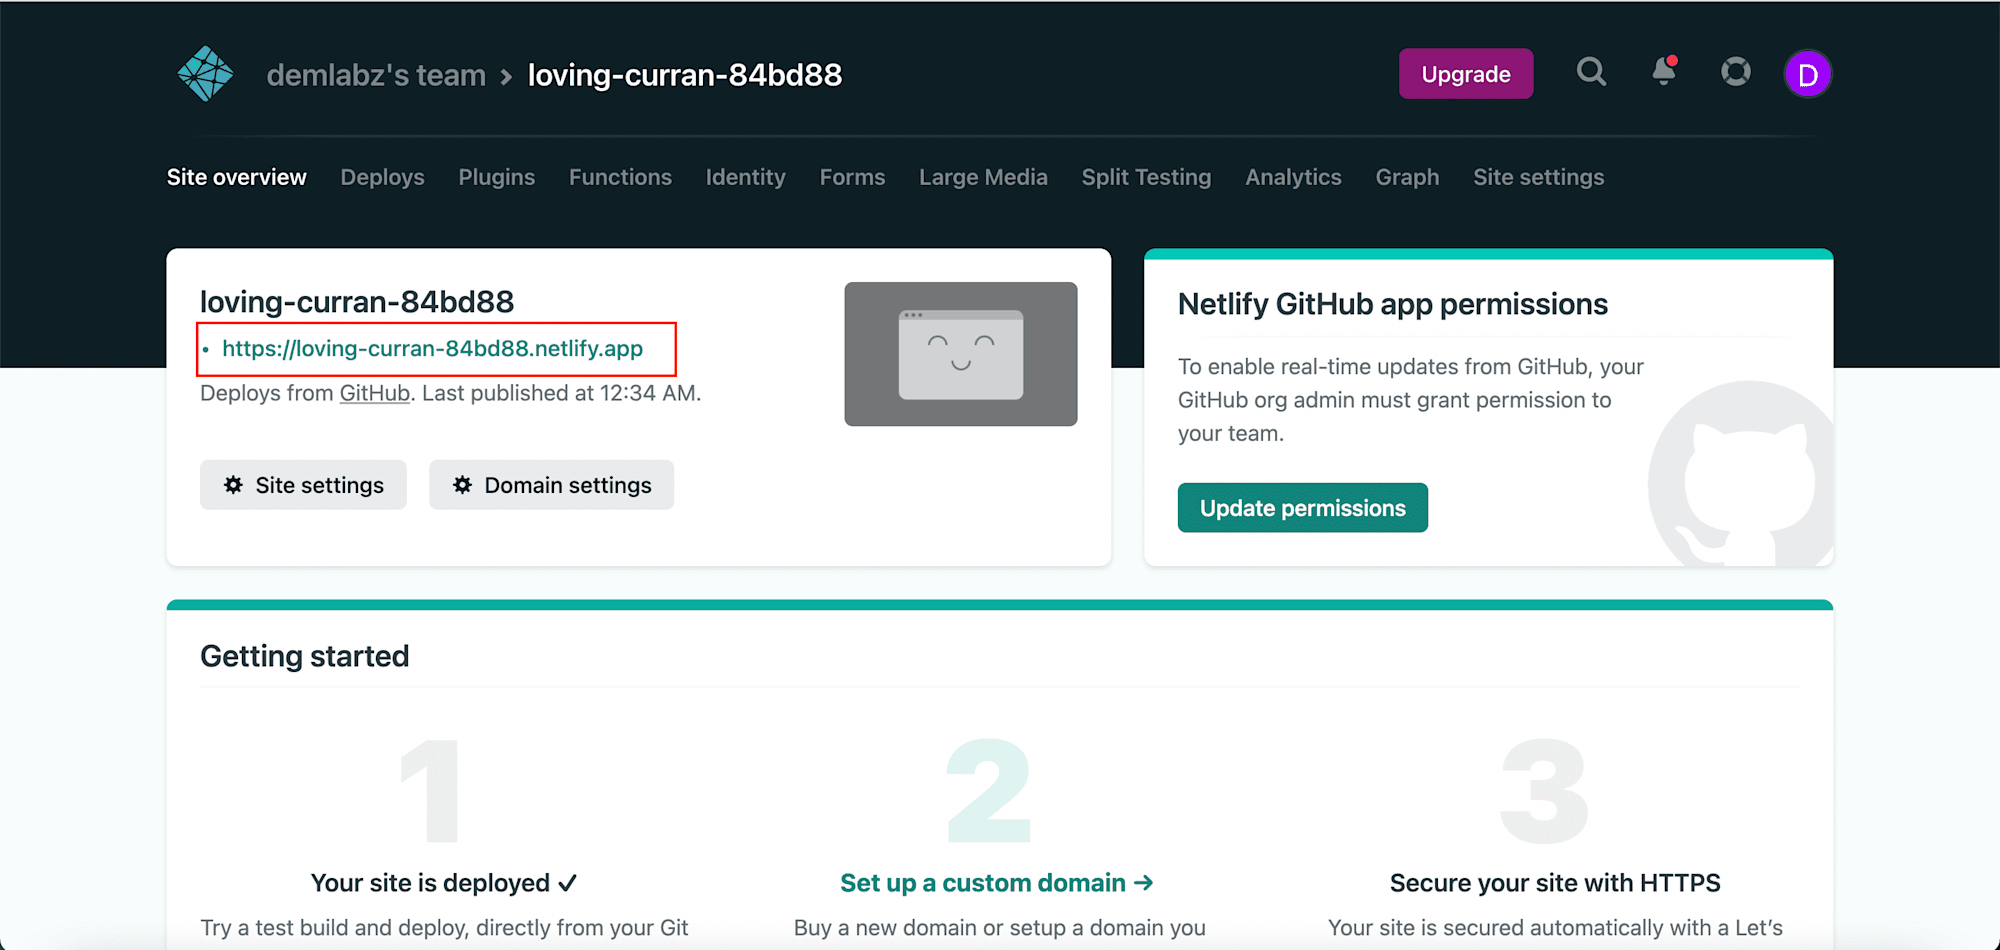
We can view the deployed site by clicking on the generated URL.
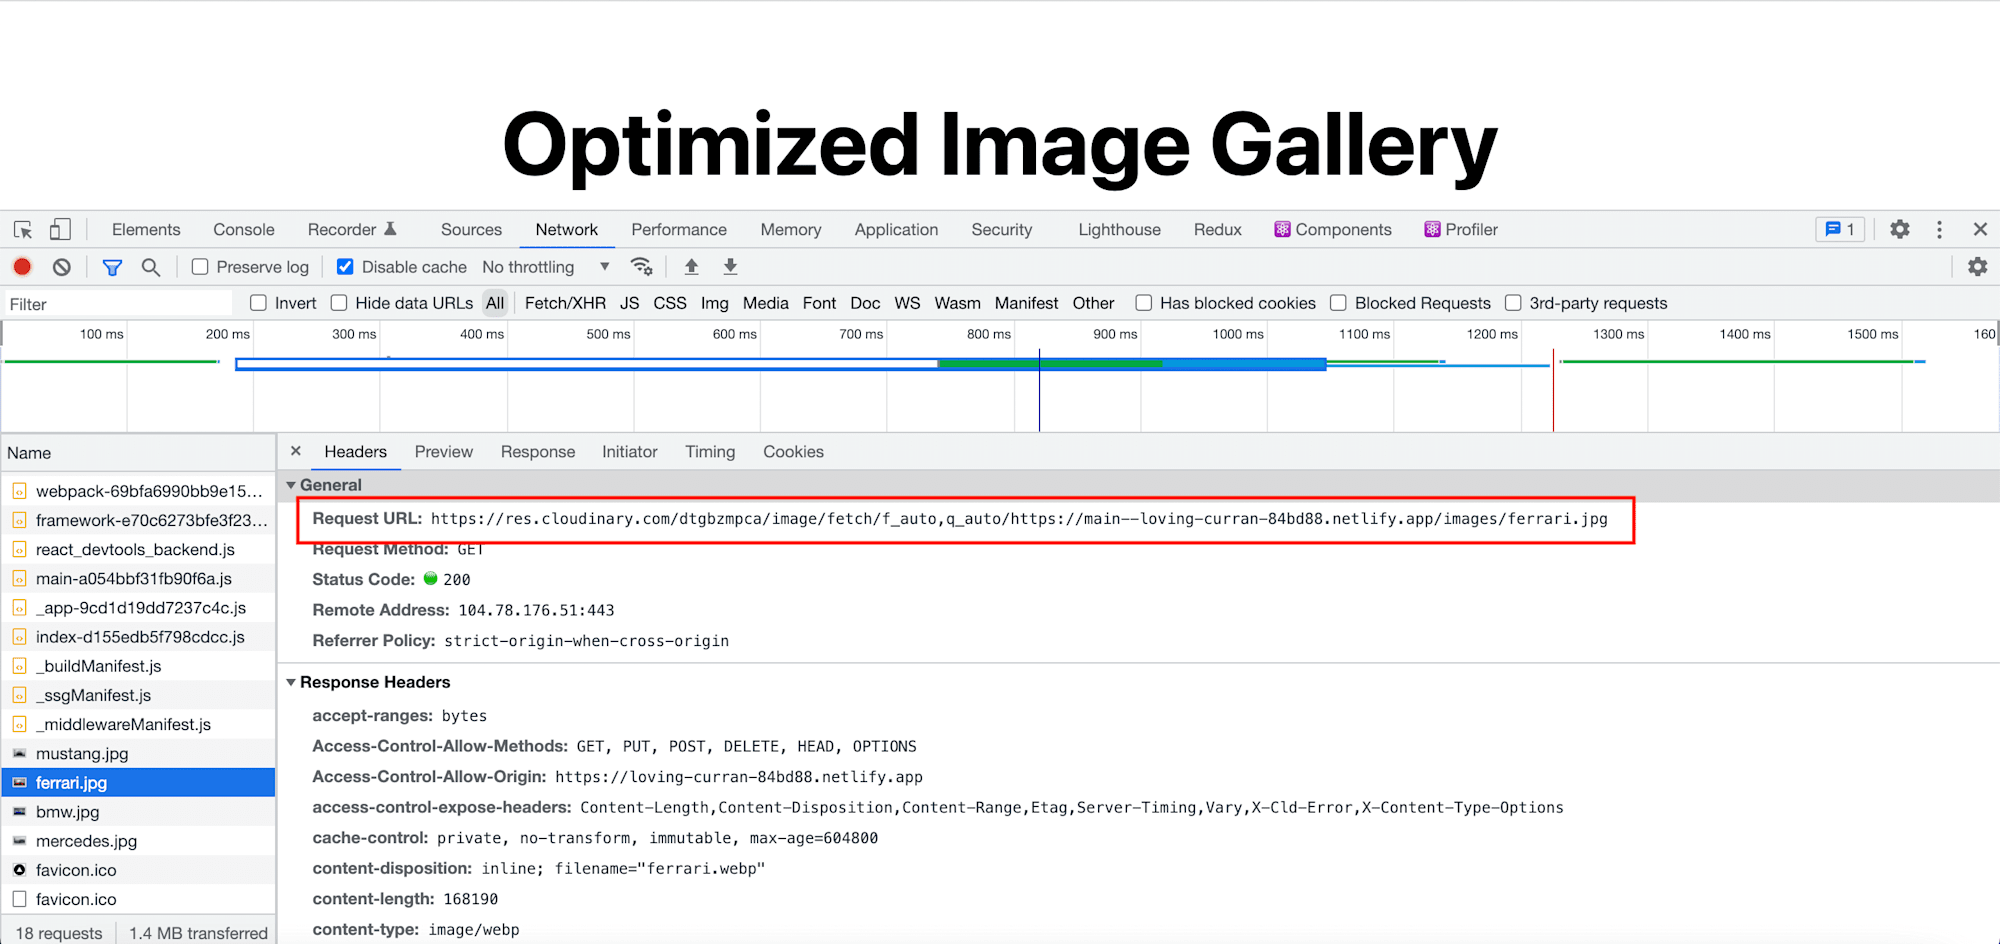
Before optimizing the images in our application, let’s open the developer tools, navigate to the Network tab, and refresh the page to see how the images are currently being served and their sizes.
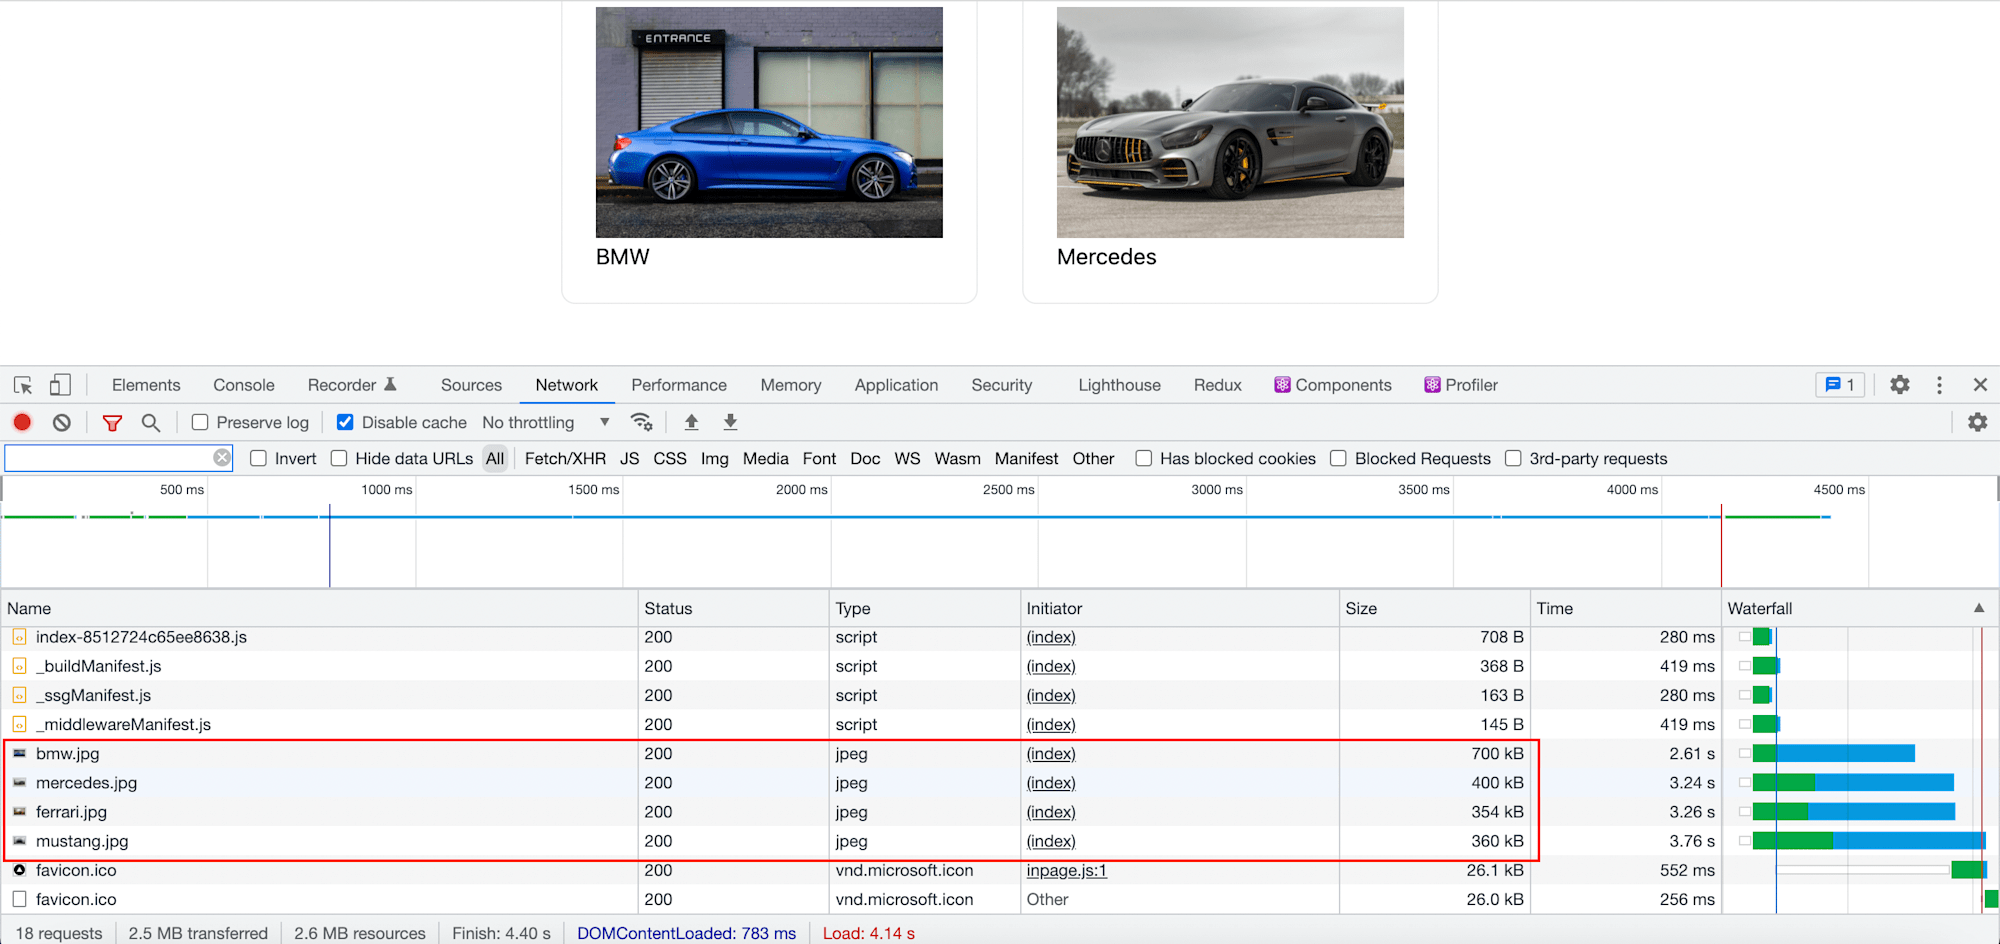
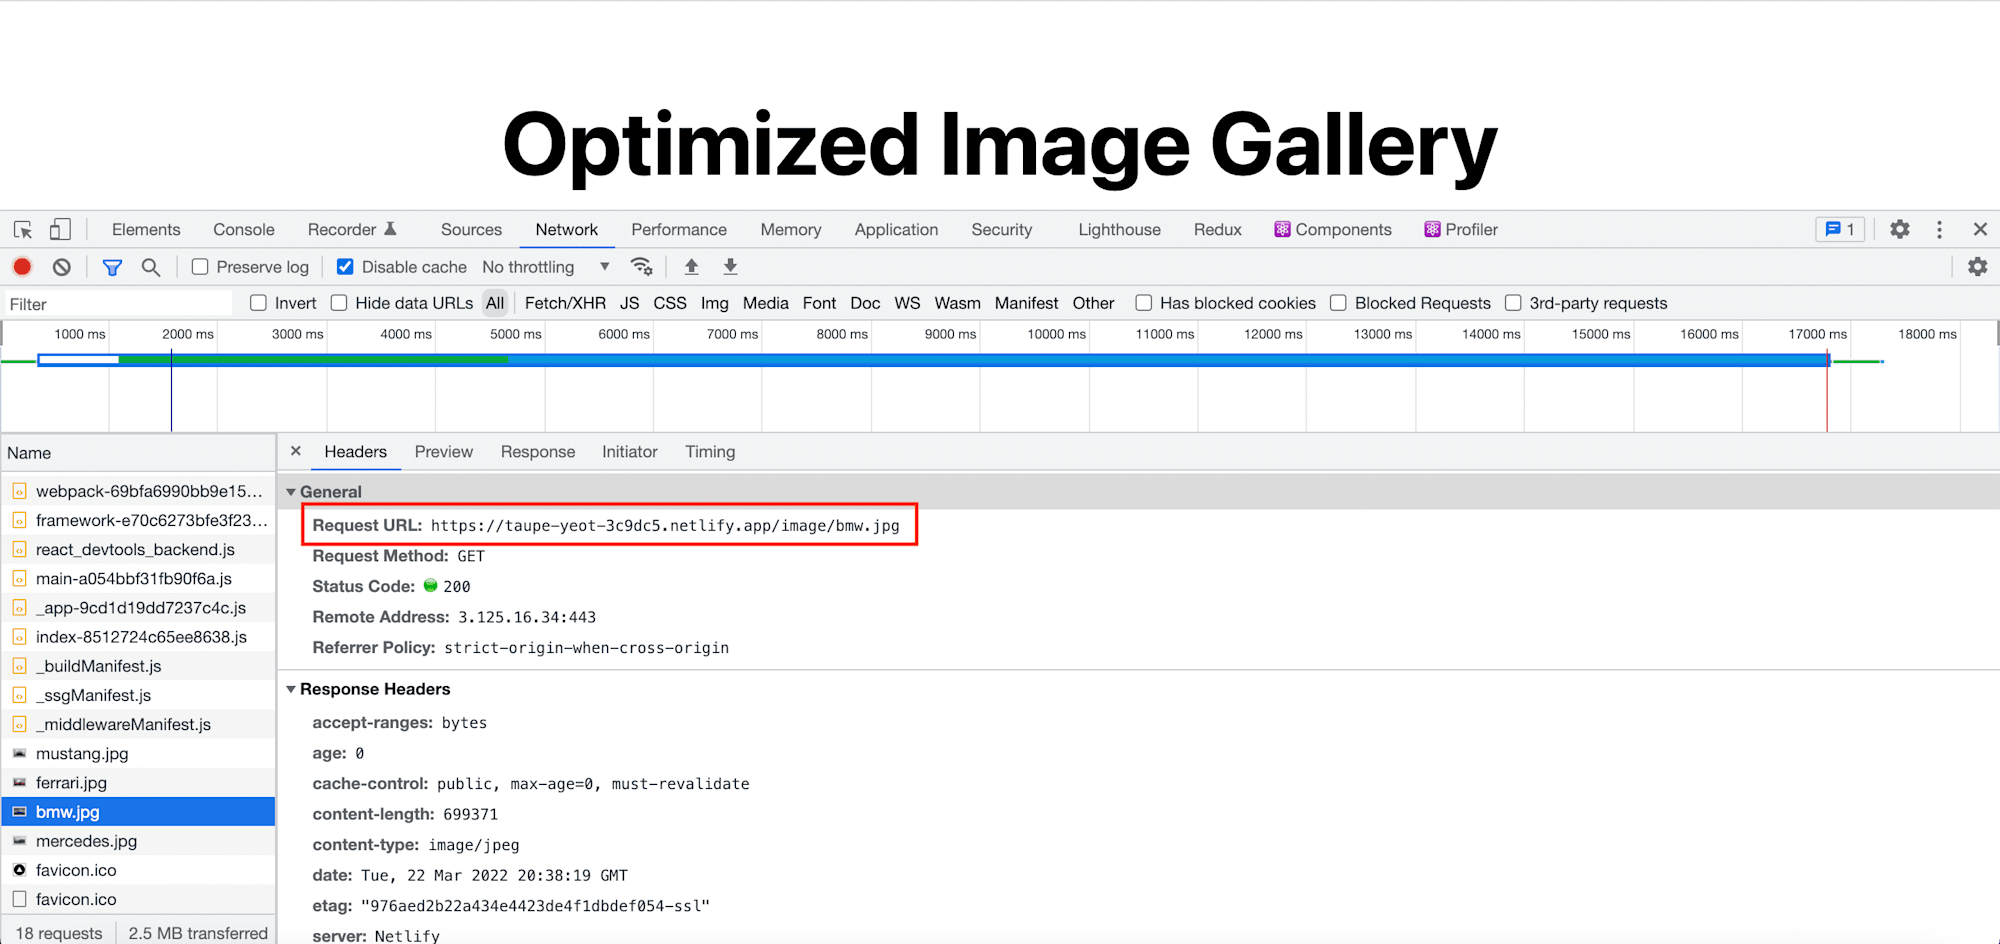
We can also click on any image to see the image URL and the provider serving it.

Netlify-plugin-cloudinary
The Netlify-plugin-cloudinary is a plugin that hooks into Netlify when deploying websites and applications to serve smaller images in modern formats automatically. We don’t have to upload the images manually, get the URL, and embed them into our codebase with the plugin.
To improve the performance of our image gallery, we will be integrating the plugin into our deployment process.
To begin, we proceed to install the netlify-plugin-cloudinary dependency with:
npm install netlify-plugin-cloudinary
Next, we need to create a netlify.toml file in the project root directory and add the code snippet below:
[[plugins]]
   package = "netlify-plugin-cloudinary"

   [plugins.inputs]
   cloudName = "<Your Cloud Name>"
Code language: JavaScript (javascript)
The snippet above does the following:
- Defines
netlify-plugin-cloudinaryas the required plugin. - Sets the plugin input to our
cloudName. ThecloudNamehelps Cloudinary know the account to which the images should be attached.
Finally, we need to commit our changes and push them to the repository by running the command below in the terminal:
git add .
git commit -m "add support for optimization"
git push origin main
On doing this, Netlify will redeploy the latest changes.
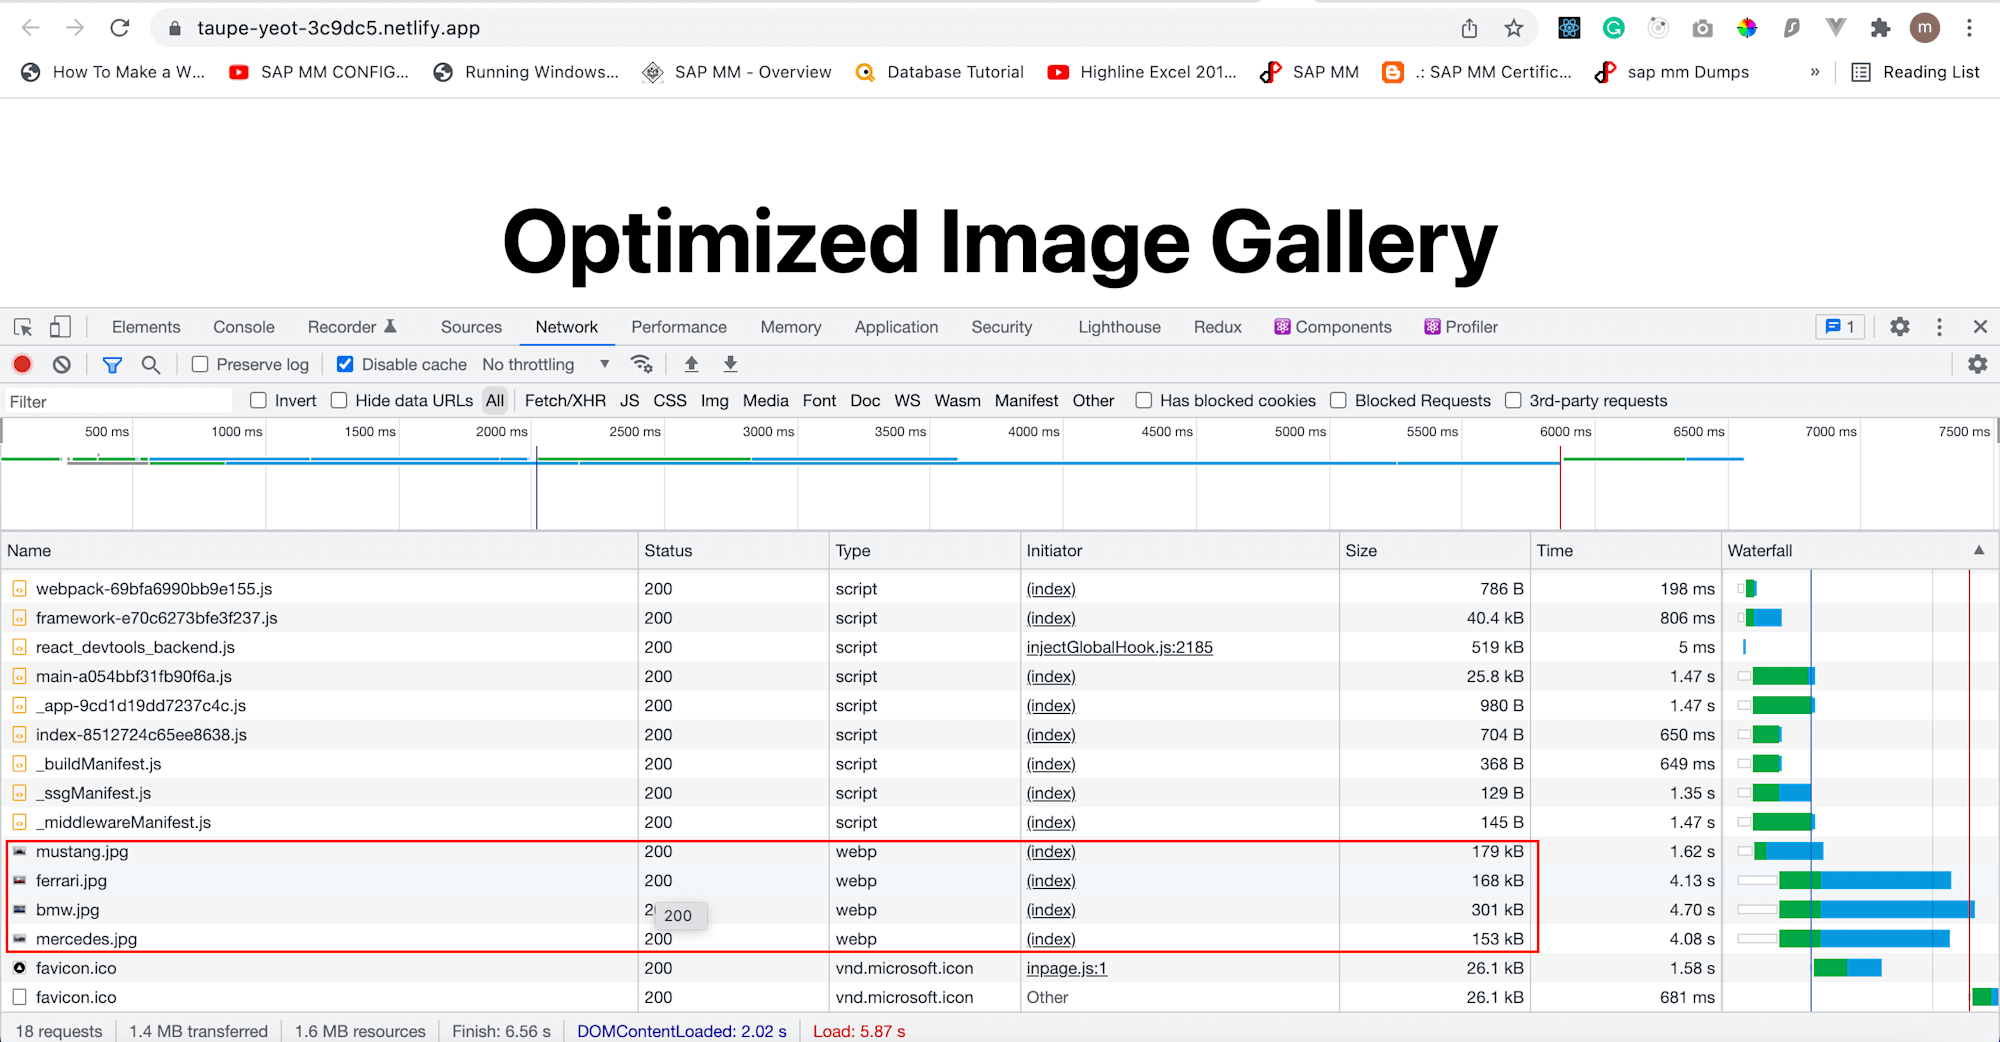
We can inspect the deployed version to see image format, size, and how the images are being served.

This post discussed how to automatically optimize and deliver image assets with Netlify-plugin-cloudinary in a Next.js application.
These resources might be helpful: