
Public competitive sales have always been a key component of our society from expensive jewelry to salvage cars. Having auctions online allows us to reduce costs while increasing the geographic limits of our attendees. In this article, we explore how we can build a real-time app to enable live product auctions.
The completed project is available on Codesandbox.
You can find the full codebase on my Github
We will be using NuxtJS as our framework of choice. This is because of how simple and performant it is as a VueJS framework.
Before setting up, ensure that you have npx installed. NPX is shipped by default since NPM v5.2/v6.1 or Yarn.
Open the terminal and run the following command in your preferred working directory:
yarn create nuxt-app nuxtjs-product-auction
# OR
npx create-nuxt-app nuxtjs-product-auction
# OR
npm init nuxt-app nuxtjs-product-auction
Code language: PHP (php)Here are our recommended defaults for the setup questions that will follow:
Projec name: nuxtjs-product-auction Programming language: JavaScript Package manager: Yarn UI Framework: Tailwind CSS Nuxt.js modules: N/A Linting tools: N/A Testing frameworks: None Rendering mode: Universal (SSR/SSG) Deployment target: Server (Node.js hosting) Development tools: N/A
Once the project is set up, enter the project and run it:
cd nuxtjs-product-auction

yarn dev
# OR
npm run dev
Code language: PHP (php)
Supabase prides itself as the open-source firebase alternative which allows us to create a backend in less than 2 minutes. We will use it to store the bids we receive. If you do not have an account, feel free to create one here. Create a project called nuxtjs-product-auction and a table with the following structure.
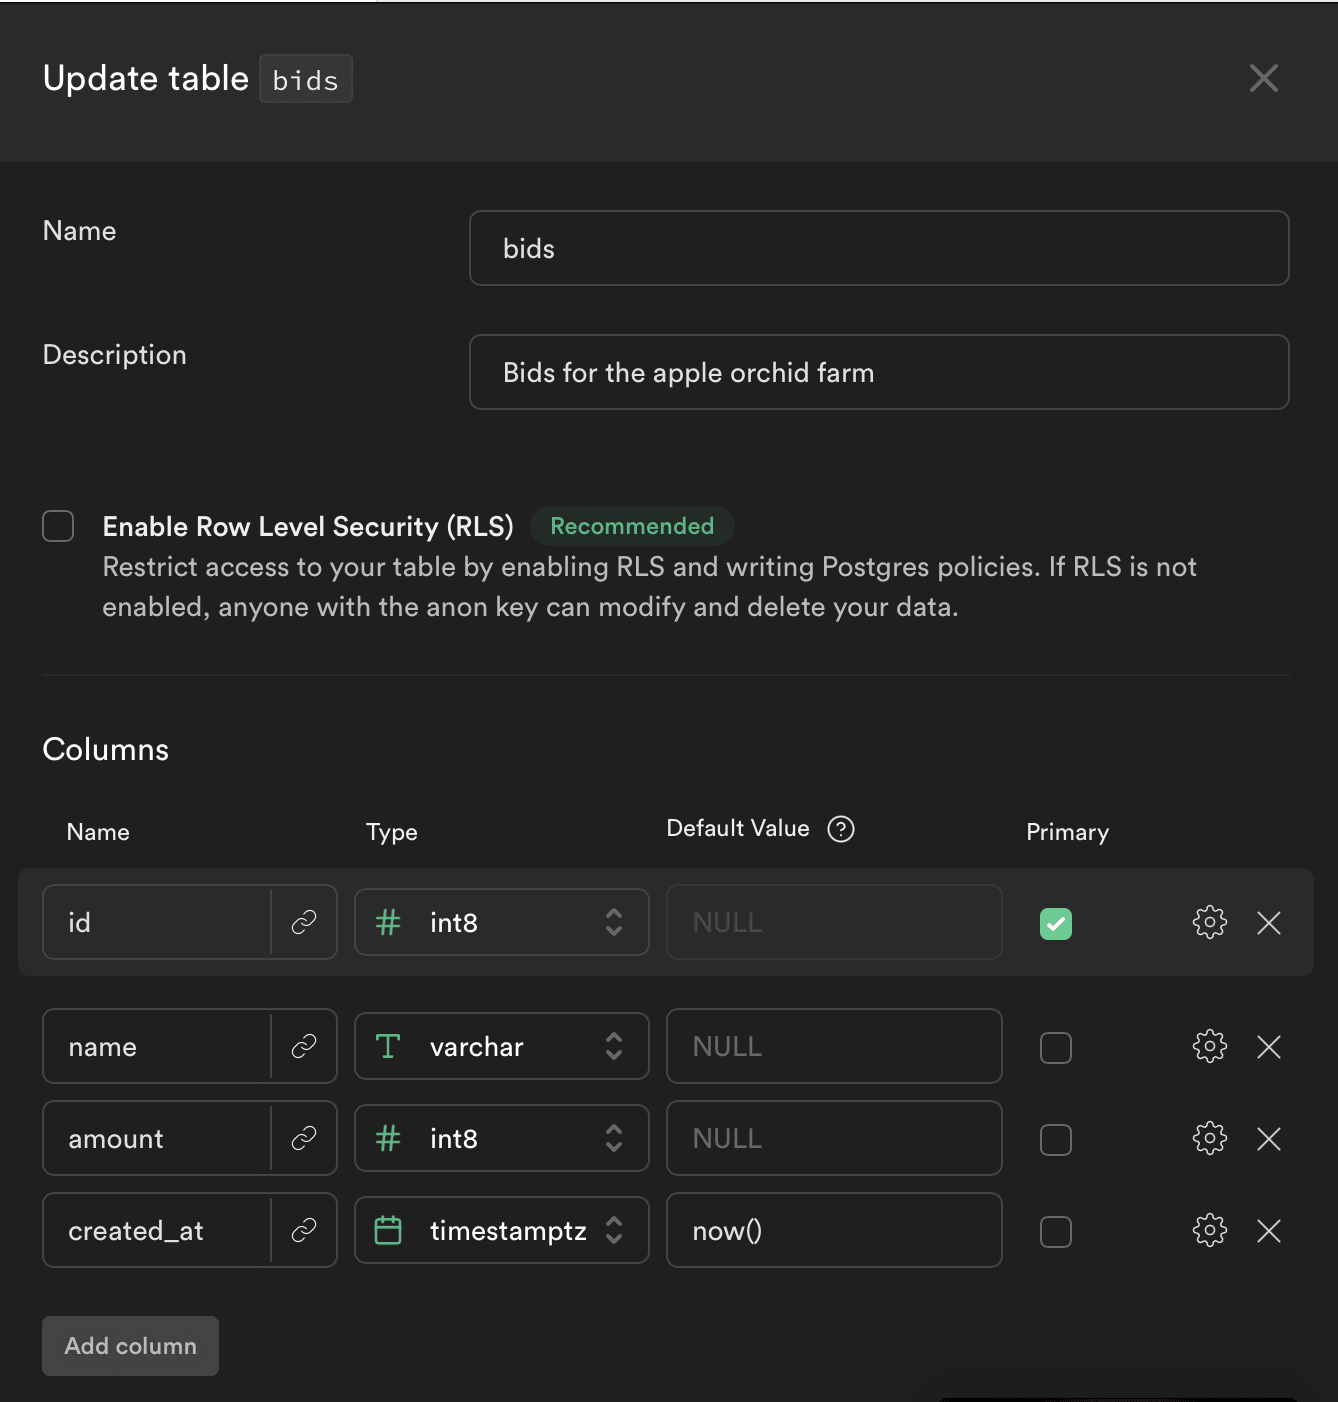
We want to ensure that our table supports real-time events. To do this, proceed to Database > Replication under the supabase_realtime row navigate to Source on the right, and ensure that the bids table is enabled.
We are now going to install the supabase-js, the supported JavaScript library.
npm install @supabase/supabase-js
# OR
yarn add @supabase/supabase-js
Code language: CSS (css)
We now need to set the required environment variables. Create the .env file in the project top folder.
touch .env
Code language: CSS (css)
This will store the sensitive credentials we do not want to be exposed in our codebase.
On supabase, navigate to settings > API to obtain your URL and public anon key. We are going to add these to our .env file.
<!-- .env -->
NUXT_ENV_SUPABASE_URL=https://<your-url>.supabase.co
NUXT_ENV_SUPABASE_KEY=<your-public-anon-key>
Code language: HTML, XML (xml)We will store our images and videos on Cloudinary. This will enable us to use their image gallery component. To create an account, you may signup here. Once registered, you will see your cloud name on your dashboard. Add it to your .env file.
<!-- .env -->
NUXT_ENV_CLOUDINARY_CLOUD_NAME=<cloudinary-cloud-name>
NUXT_ENV_SUPABASE_URL=https://<your-url>.supabase.co
NUXT_ENV_SUPABASE_KEY=<your-public-anon-key>
Code language: HTML, XML (xml)
Proceed to your media library on your Cloudinary dashboard and create a folder called nuxtjs-product-action and a subfolder called apples. Upload the following files to the apples subfolder.
-
nuxtjs-product-auction/apples/pexels-mark-stebnicki-2714463.jpg
-
nuxtjs-product-auction/apples/pexels-juan-c-palacios-3652898.jpg
-
nuxtjs-product-auction/apples/pexels-skylar-kang-6368799.jpg
You should now have a folder similar to this one:
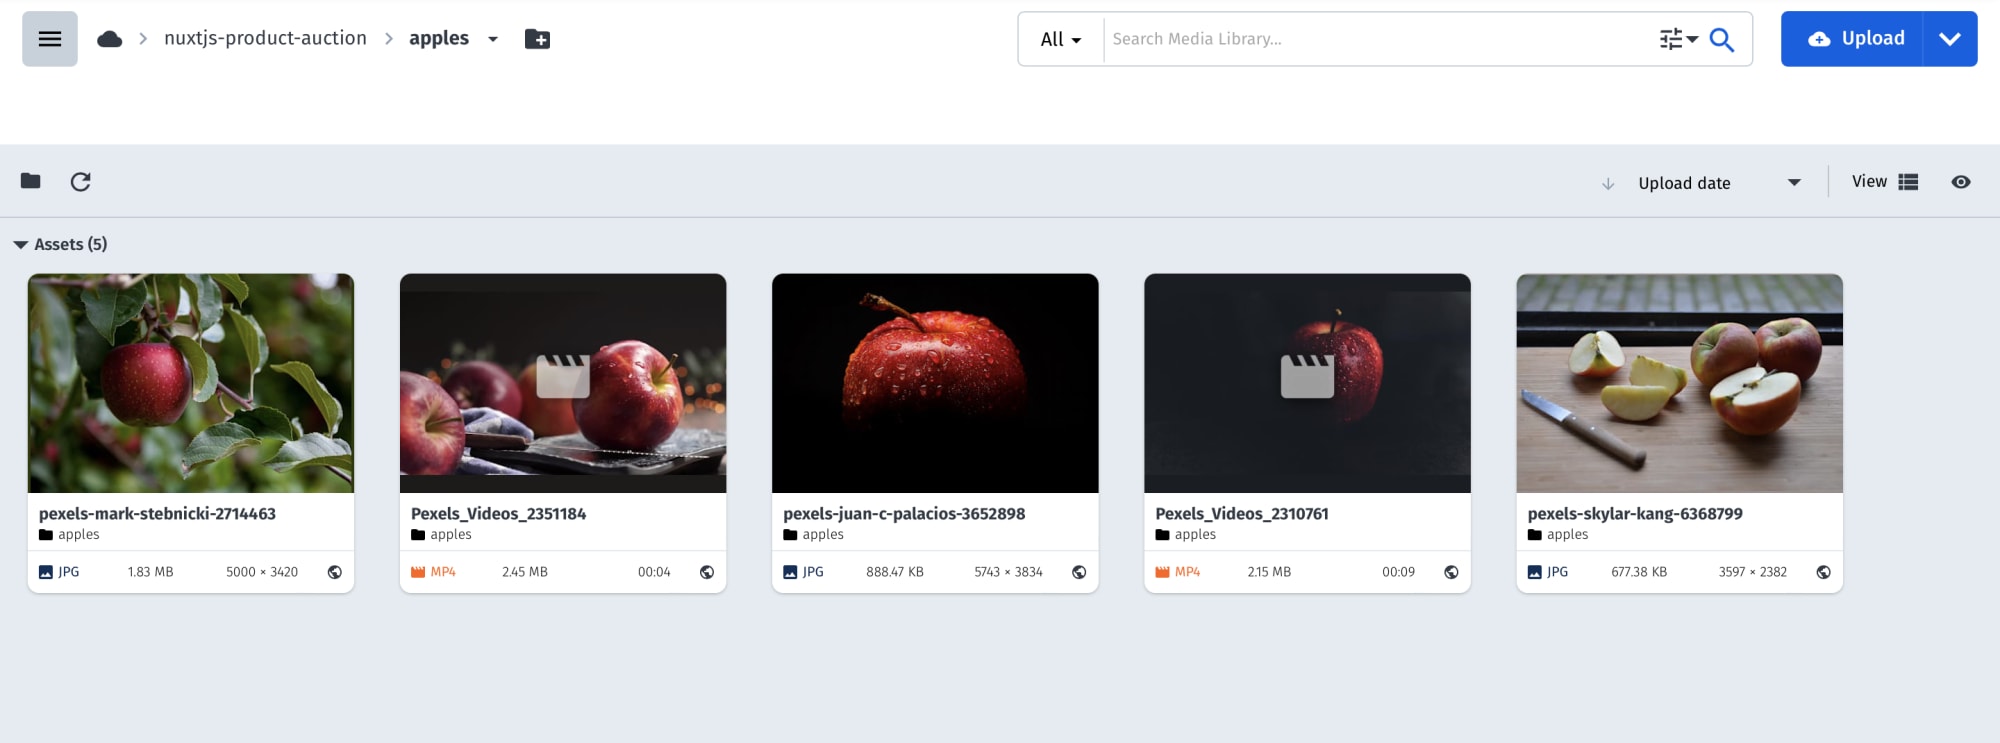
Once this is done, select all the files in the folder cmd/ctr + A and tag them npa-apples. We will use this tag to display the images and videos in our gallery.
We first need to load the source file for the product gallery. This is a single JavaScript file we add to our nuxt.config.js > scripts section.
// nuxt.config.js
export default {
  head: {
    ...
    script: [
      { src: 'https://product-gallery.cloudinary.com/all.js' },
    ],
  },
  ...
}
Code language: JavaScript (javascript)
Let us add the basic HTML to contain our product gallery.
<!-- pages/index.vue -->
<template>
    ....
    <div id="my-gallery"></div>
    ...
Code language: HTML, XML (xml)
We can now configure and render our widget once our page is mounted.
// pages/index.vue
<script>
export default {
  data(){
    return {
      gallery:null,
      ...
    }
  },

  mounted(){
    this.gallery = cloudinary.galleryWidget({
      container: "#my-gallery",
      cloudName: process.env.NUXT_ENV_CLOUDINARY_CLOUD_NAME,
      aspectRatio: "16:9",
      mediaAssets: [
        { tag: "npa-apple", },
        { tag: "npa-apple", mediaType: "video" },
      ],
      videoProps: { playerType: "cloudinary" }
    });
    this.gallery.render();
  },
  ...
}
</script>
Code language: HTML, XML (xml)
In the above snippet, we ensure the widget uses our account by specifying the cloud name. We set the aspect ratio so that our images and videos are viewed consistently. In the media assets, we tell our widget to get both images and videos tagged npa-apple. We also specify to use the Cloudinary video player instead of the normal HTML5 player before we render the gallery.
To get the current bids from our Supabase database, we need to initialize the client and run the query when our page is mounted.
// pages/index.vue
<script>
import { createClient } from '@supabase/supabase-js'
export default {
  data(){
    return {
      ...
      supabase:null,
      bids:null,
      ...
    }
  },
  mounted(){
    ...
    this.supabase = createClient(
        process.env.NUXT_ENV_SUPABASE_URL,
        process.env.NUXT_ENV_SUPABASE_KEY
    );

    this.loadBids();
    ...
  },
  methods:{
    async loadBids(){
      const resp = await this.supabase
        .from('bids')
        .select()
        .order('id', { ascending: false });

      if(resp.status != 200){
        console.log(resp);
      }

      this.bids = resp.data;
    },
    ...
  }
}
</script>
Code language: HTML, XML (xml)
We can now display the bids in our HTML.
<!-- pages/index.vue -->
<template>
    ...
          <p v-if="!bids">Loading bids...</p>
          <ul v-else role="list" >
            <li v-for="bid in bids" :key="bid.id">
              <div >
                <svg xmlns="http://www.w3.org/2000/svg" fill="none" viewBox="0 0 24 24" stroke="currentColor">
                  <path stroke-linecap="round" stroke-linejoin="round" stroke-width="2" d="M17 9V7a2 2 0 00-2-2H5a2 2 0 00-2 2v6a2 2 0 002 2h2m2 4h10a2 2 0 002-2v-6a2 2 0 00-2-2H9a2 2 0 00-2 2v6a2 2 0 002 2zm7-5a2 2 0 11-4 0 2 2 0 014 0z" />
                </svg>
                <div>
                  <div>
                    <h3>{{bid.name}}</h3>
                    <p>$ {{new Intl.NumberFormat().format(bid.amount)}}</p>
                  </div>
                  <p>
                    {{
                      (new Date(bid.created_at)).toLocaleString("en-US")
                    }}
                  </p>
                </div>
              </div>
            </li>
          </ul>
    ...
</template>
Code language: HTML, XML (xml)
We format the amount and the created_at to make them more visually appealing.
Displaying the winning bid is similar to displaying all the bids. We order the bids with the amount column descending and fetch the first row only.
// pages/index.vue
<script>
export default {
  data(){
    return {
      ...
      winningBid:null,
      ...
    }
  },

  ...
  methods:{
    async loadBids(){
      this.loadWinningBid();
      ...
    },
    async loadWinningBid(){
      const resp = await this.supabase
        .from('bids')
        .select()
        .order('amount', { ascending: false })
        .limit(1)
        .single();

      if(resp.status != 200){
        console.log(resp);
      }

      this.winningBid = resp.data;
    },

}
</script>
Code language: HTML, XML (xml)
We will be loading with the winning bid each time loadBids is called. Let us now display the winning bid.
// pages/index.vue
<template>
    ...
          <ul v-if="winningBid" role="list">
            <li>
              <div>
                <svg xmlns="http://www.w3.org/2000/svg" fill="none" viewBox="0 0 24 24" stroke="currentColor">
                  <path stroke-linecap="round" stroke-linejoin="round" stroke-width="2" d="M5 3v4M3 5h4M6 17v4m-2-2h4m5-16l2.286 6.857L21 12l-5.714 2.143L13 21l-2.286-6.857L5 12l5.714-2.143L13 3z" />
                </svg>
                <div>
                  <div>
                    <h3>{{winningBid.name}}</h3>
                    <p>$ {{new Intl.NumberFormat().format(winningBid.amount)}}</p>
                  </div>
                  <p>
                    {{
                      (new Date(winningBid.created_at)).toLocaleString("en-US")
                    }}
                  </p>
                </div>
              </div>
            </li>
          </ul>
    ...
</template>
Code language: HTML, XML (xml)To add a new bid, we first add an HTML form to capture the name and amount of the bid.
<template>
    ...
    <form @submit.prevent="sendBid">
                  <div>
                    <label for="name"> Names </label>
                    <div class="mt-1">
                      <input
                        id="name"
                        name="name"
                        type="text"
                        v-model="newBid.name"
                        required
                      />
                    </div>
                  </div>

                  <div>
                    <label for="amount"> Amount </label>
                    <div>
                      <input
                        id="amount"
                        name="amount"
                        type="number"
                        v-model="newBid.amount"
                        required
                      />
                    </div>
                  </div>

                  <div>
                    <button type="submit">Place Bid</button>
                  </div>
                </form>
    ...
    </template>
Code language: HTML, XML (xml)
Once the form is submitted, we can not add the new entry into the bids table.
// pages/index.vue
<script>
export default {
  data(){
    return {
      ...
      newBid:{
        name:null,
        amount:null
      }
    }
  },
  ...
  methods:{
    ...
    async sendBid(){
      const resp = await this.supabase
        .from('bids')
        .insert([
          this.newBid
        ]);

      if(resp.status != 201){
            console.log(resp);
      }

      this.newBid = {
        name:null,
        amount:null
      };
    },
  }
}
</script>
Code language: HTML, XML (xml)
Once the bid is submitted, we reset the newBid object which resets the form inputs.
Once our bid has been submitted or any user has submitted their bids, we need to be notified so that we can reload the bids again. We will use Supabase subscriptions for this.
We need to listen to any events on our bids table. If there are any events we reload the bids. Before we close our page we also want to close our subscriptions so that our server doesn’t send subscriptions to inactive clients.
// pages/index.vue
<script>
export default {
  ...
  mounted(){
    ...
    this.listenToBids();
  },
  beforeDestroy(){
    this.supabase.removeAllSubscriptions();
  },
  methods:{
    ...
    listenToBids(){
      const subscription = this.supabase
      .from('bids')
      .on('*', () => {
        this.loadBids();
      })
      .subscribe()
    },
    ...
  }
}
</script>
Code language: HTML, XML (xml)With the above code, we now have a live product action app. Feel free to add additional features such as authentication, multiple product auctions as well as start and end time limits.
To learn more about the platforms we have used feel free to review the Cloudinary documentation or the Supabase reference.