
By default, Cloudinary allows you to upload images by specifying an upload preset and a cloud name. Those details are not difficult to figure out, making it easy for hackers to compromise your account online. Luckily, Cloudinary provides a more secure upload method called signed-upload.
Signed uploads include an additional parameter called uploadSignature along with the data of the image being uploaded and your API key. The upload signature is generated by a server upon request. It accepts the parameters you send from the client, signs the parameters using your API key, and then sends resulting upload signature back to the client.
This allows you to upload assets securely to Cloudinary and protects your account from unauthorized access.
Nevertheless, it can be overkill (with the requirement of setting up a server), which may not be necessary if you’re building a client-side application to demonstrate functionality – in which case an unsigned upload would suffice.
In this post, I’ll walk us through:
- How to handle unsigned uploads to Cloudinary in Next.js,
- Describe potential vulnerabilities it may present, and
- Show how to account for it with a Signed upload.
Create a new Next.js application named cloudinary-next-demo by running the following command in the terminal:
npx create-next-app cloudinary-next-demo
This will create a cloudinary-next-demo application for you. After that, change directory into the cloudinary-next-demo project you created with the command:
# Navigate into the project directory

cd cloudinary-next-demo
Code language: PHP (php)
Next, install the following Cloudinary npm package so we can easily use Cloudinary on the server:
npm install cloudinary
As we are going to upload images to Cloudinary, we need to create an upload preset and set the upload mode to unsigned. To do that, log into your Cloudinary account and click on Settings > Upload.
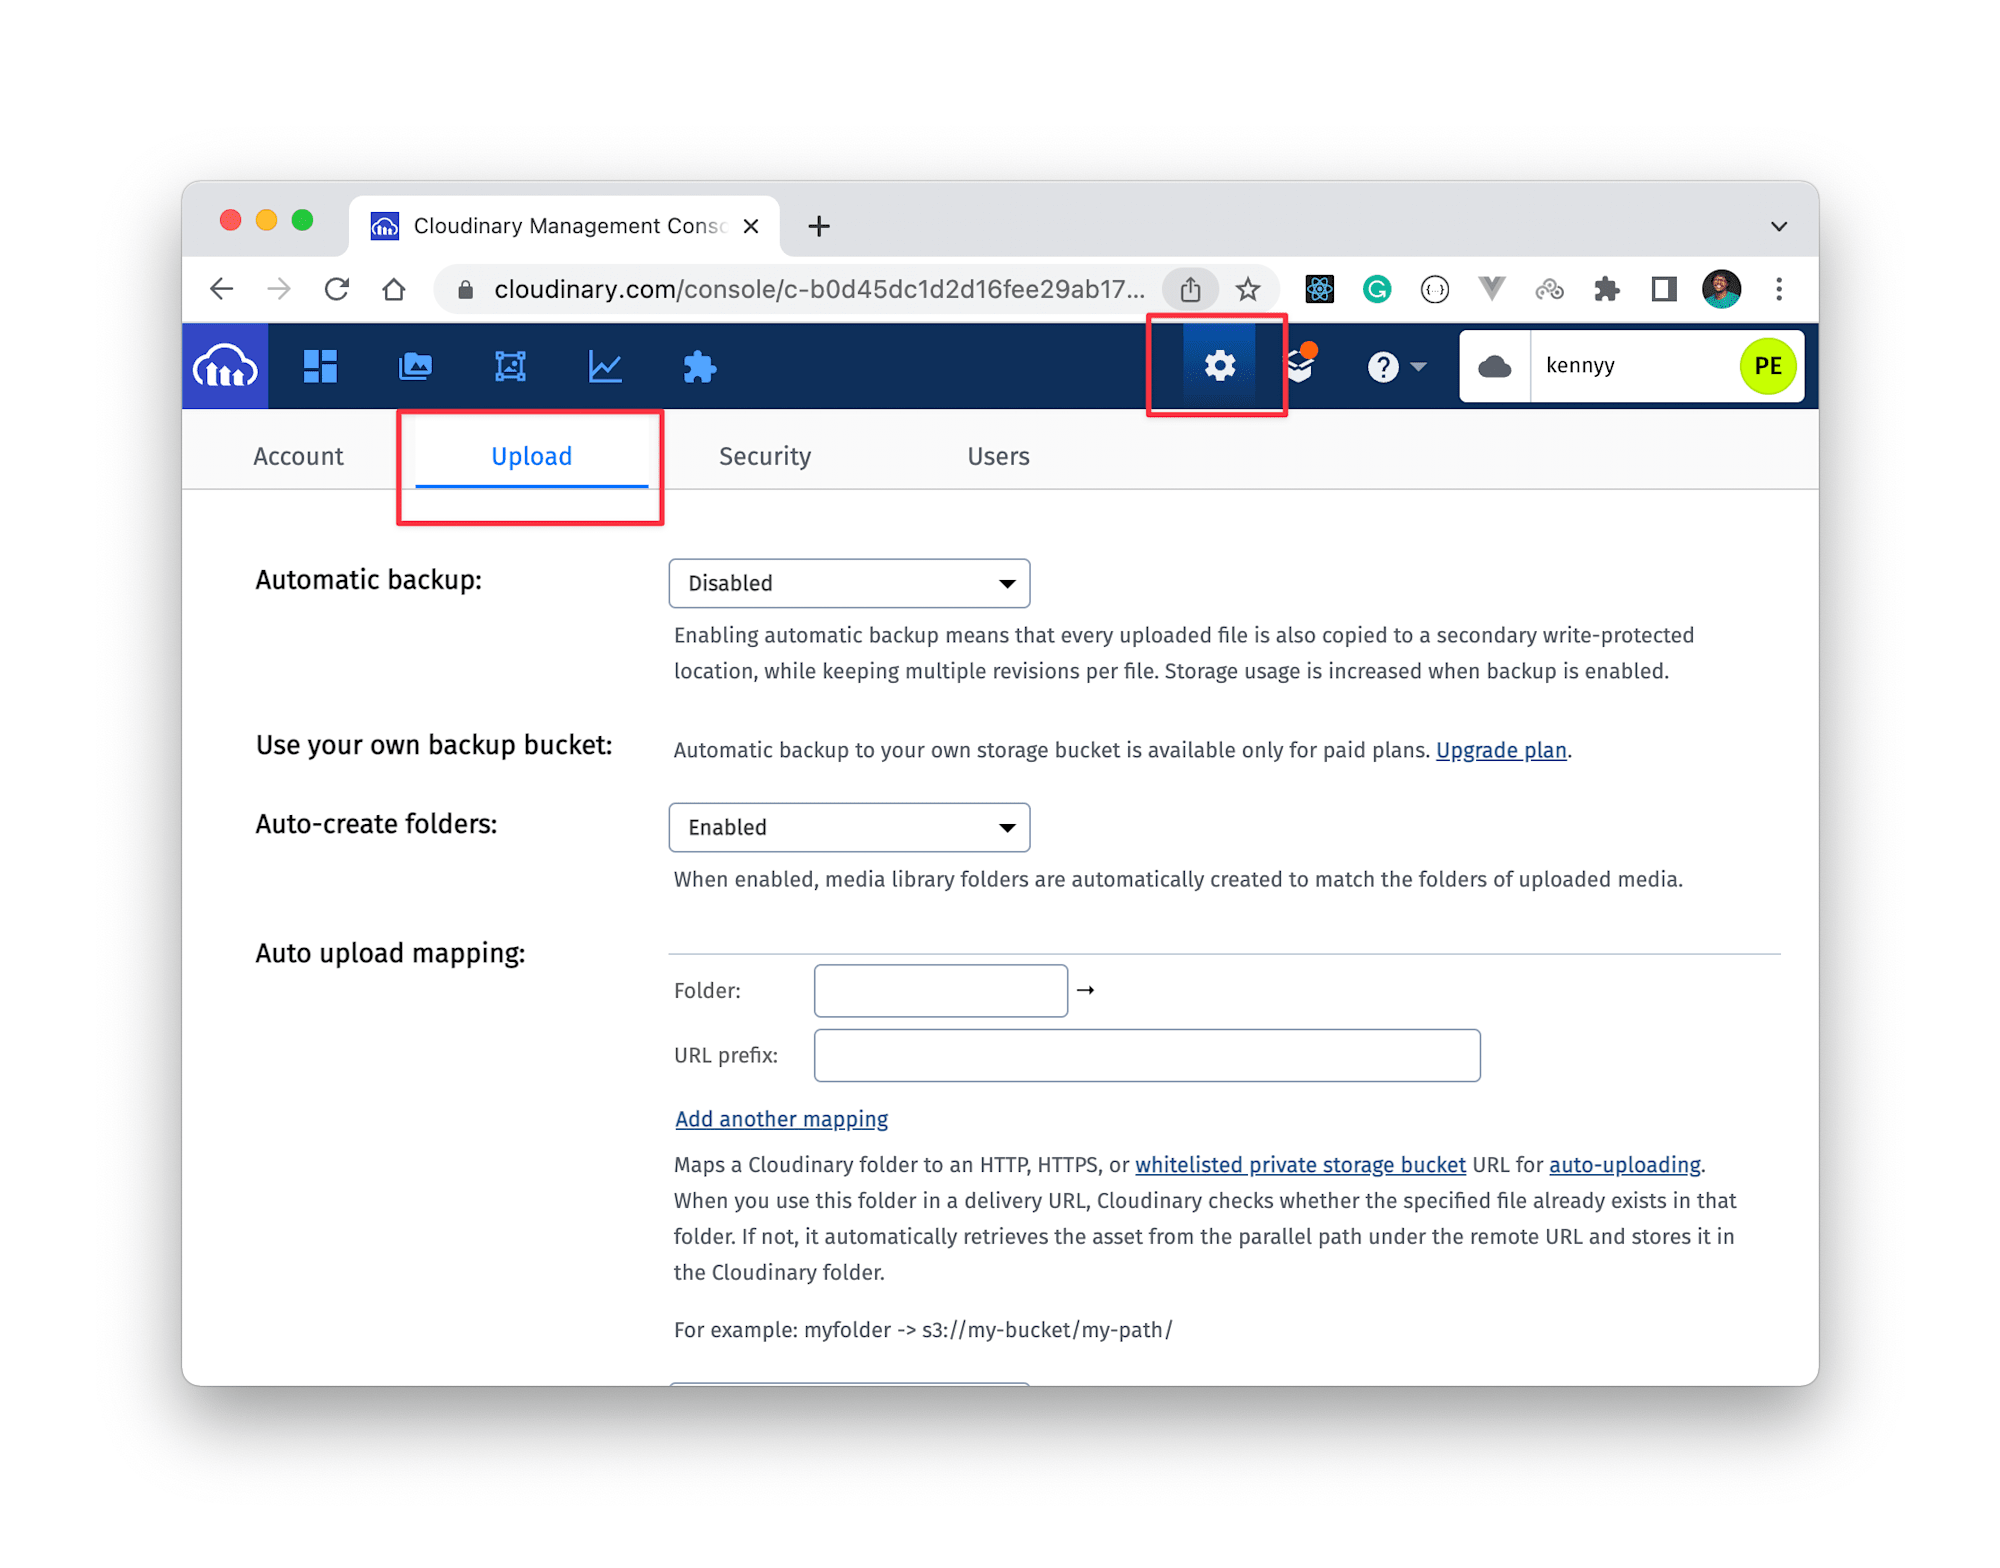
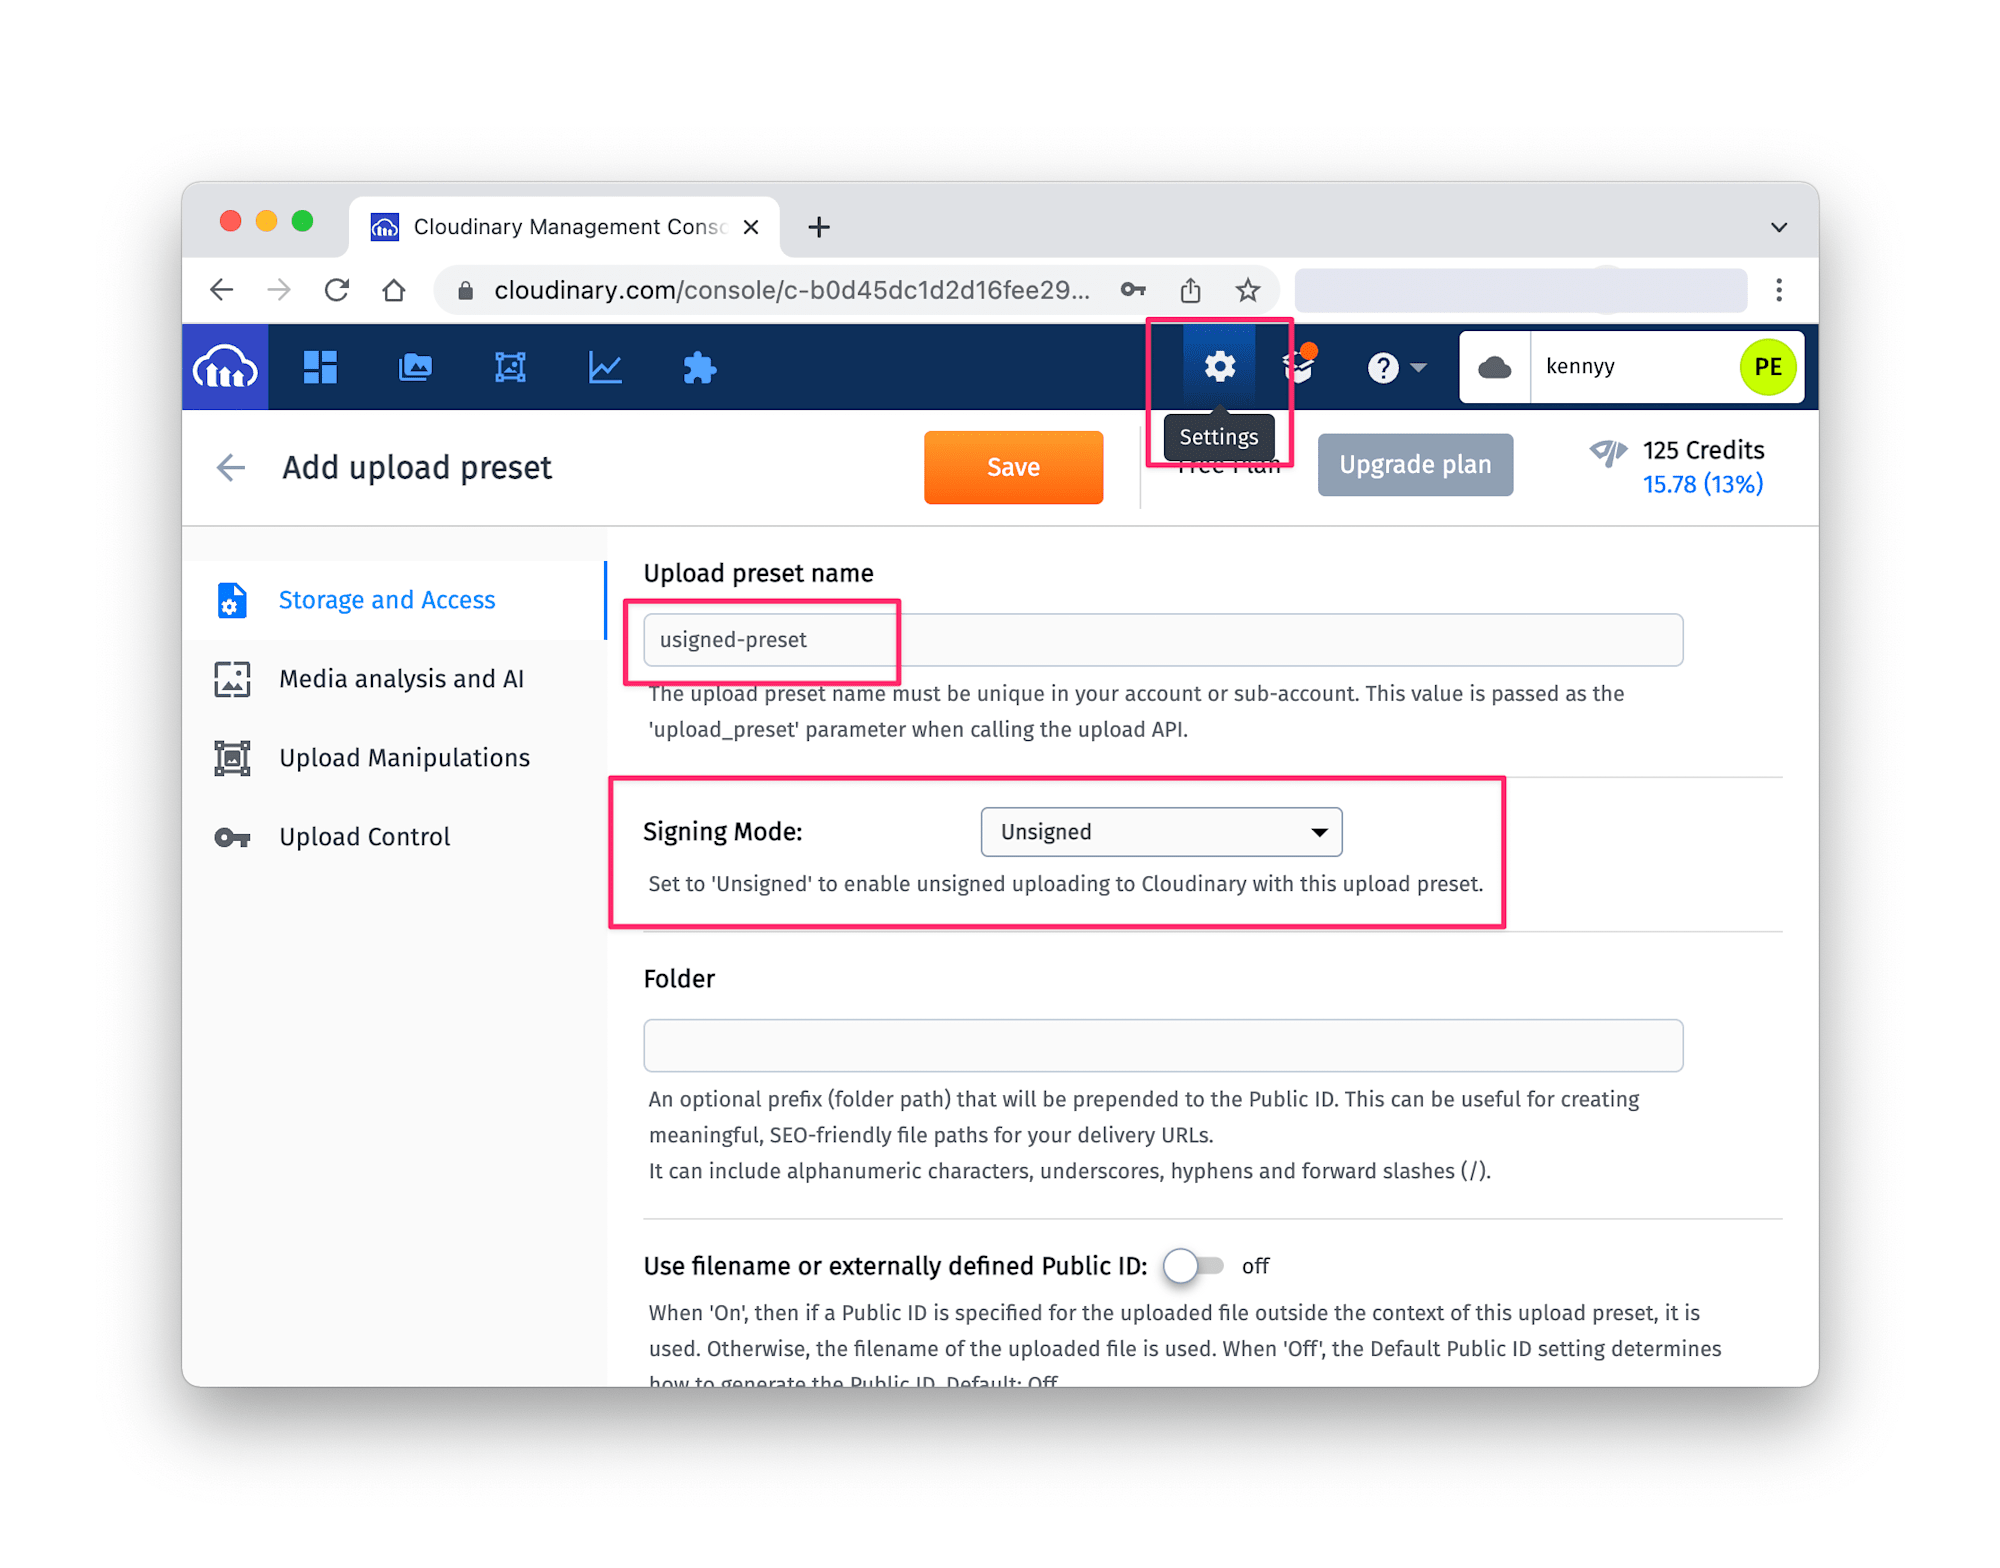
Now, scroll down to upload presets and click on Add upload presets. Then:
- Provide an upload preset name.
- Set Signing Mode to unsigned, and
- Set a desired folder to hold the image uploads (optional).
Lastly, open your projects _document.js file (create it if it doesn’t exist) and update it with this snippet:
import Document, { Html, Head, Main, NextScript } from "next/document";

class MyDocument extends Document {
  static async getInitialProps(ctx) {
    const initialProps = await Document.getInitialProps(ctx);
    return { ...initialProps };
  }

  render() {
    return (
      <Html>
        <Head>
          <script
            defer
            src="https://widget.cloudinary.com/v2.0/global/all.js"
            type="text/javascript"
          ></script>
        </Head>
        <body>
          <Main />
          <NextScript />
        </body>
      </Html>
    );
  }
}

export default MyDocument;
Code language: JavaScript (javascript)
Here, we added the Cloudinary CDN to the <Head /> tag so that we can create the Cloudinary upload widget using the browser window object.
Next, run the development server with npm run dev to see the changes in the browser as we build the project.
Open the project folder in your preferred code editor and create a components folder in the root of the project. Inside it, create a new ImageUpload.js file and update it with this snippet:
// src/components/ImageUpload.js
import { useState } from "react";
export function ImageUpload() {
  const [isImagUploaded, setIsImageUploaded] = useState(false);

  async function handleWidgetClick() {
    const widget = window.cloudinary.createUploadWidget(
      {
        cloudName: "YOUR_CLOUD_NAME",
        uploadPreset: "YOUR_UNSIGNED_UPLOAD_PRESET",
        resourceType: "image",
      },
      (error, result) => {
        if (!error && result && result.event === "success") {
          console.log("Uploaded", result.info);
          setIsImageUploaded(true);
        } else if (error) {
          console.log(error);
        }
      }
    );

    widget.open();
  }

  return (
    <div>
      <button type="button" onClick={handleWidgetClick}>
        Upload Image
      </button>

      {isImagUploaded ? (
        <>
          <div>Successfully uploaded</div>
        </>
      ) : null}
    </div>
  );
}

Code language: PHP (php)
This is all you need to upload images to Cloudinary using the unsigned upload method. If you save the project, you should see that uploading to Cloudinary works as expected on the browser.

The parameters we passed to the Cloudinary upload widget to make the upload possible is the cloudname, the upload preset and the resourceType. As a result, if the upload preset is known to someone, they can use it to upload resources to our account without authorization.
They can’t edit, override or delete content from our account, however, if the issue is not caught on time, they could max out our resources and incur debts for us.
First, we can remedy the situation easily by changing the upload preset name from our Cloudinary console.
Better still, we can prevent it from happening at all by using the signed upload method.
Signed upload adds an extra layer of security by requiring an upload signature that is generated on a server using your Cloudinary API secret. That would solve the security concern we have with the unsigned upload method.
First, we need to create a utility function that would make a POST request to generate an upload signature from our server. To do that, create a utils folder on the root of the project and create a new generateSignature.js file. Update the file with the snippet below:
export function generateSignature(callback, paramsToSign) {
  fetch(`/api/sign`, {
    method: "POST",
    body: JSON.stringify({
      paramsToSign,
    }),
  })
    .then((r) => r.json())
    .then(({ signature }) => {
      callback(signature);
    });
}

Code language: JavaScript (javascript)
Here, we are making a POST request to the api/sign route where our server lives. The callback parameter will be used to process the signature returned from the server while the paramsToSign parameter will represent the data we are sending to the server to be signed.
With this, we can set up our server in the specified pages/api/sign route. Create the sign.js file in the pages/api folder and add this snippet to it:
import { v2 as cloudinary } from "cloudinary";

export default async function handler(req, res) {
  const body = JSON.parse(req.body) || {};
  const { paramsToSign } = body;

  const apiSecret = "YOUR_CLOUDINARY_API_SECRET";

  try {
    const signature = cloudinary.utils.api_sign_request(
      paramsToSign,
      apiSecret
    );
    res.json({ signature });
  } catch (error) {
    console.log(error);
    res.send(error);
  }
}
Code language: JavaScript (javascript)
When a request comes in from the client, we destructure the paramsToSign object out of the request body and sign it using the Cloudinary utility function for signing upload signatures cloudinary.utils.api_sign_request(). Then send back the signed signature to the client making the request.
Next, we need to update our Cloudinary upload widget in the ImageUpload.js file to include the uploadSignature parameter and set the value to our generateSignature function.
// src/components/ImageUpload.js
import { useState } from "react";
import { generateSignature } from "../utils/generateSignature";
export function ImageUpload() {
  const [isImagUploaded, setIsImageUploaded] = useState(false);

  async function handleWidgetClick() {
    const widget = window.cloudinary.createUploadWidget(
      {
        cloudName: "YOUR_CLOUD_NAME",
        apiKey: "YOUR_CLOUDINARY_API_KEY",
        uploadSignature: generateSignature,
        resourceType: "image",
      },
      (error, result) => {
        if (!error && result && result.event === "success") {
          console.log("Uploaded", result.info);
          setIsImageUploaded(true);
        } else if (error) {
          console.log(error);
        }
      }
    );
    widget.open();
  }

  return (
    <div>
      <button type="button" onClick={handleWidgetClick}>
        Upload Image
      </button>
      {isImagUploaded ? (
        <>
          <div>Successfully uploaded</div>
        </>
      ) : null}
    </div>
  );
}

Code language: PHP (php)
In the snippet above, we first import the generateSignature function from the utilities folder. Then, we:
- Add the
uploadSignatureand the parameter to the upload widget and set it to thegenerateSignaturefunction. - Add the Cloudinary API key to the upload widget parameters.
- Remove the upload preset param as we no longer need it.
Now if you click the button to upload an image to Cloudinary again, it should work as an authorized request to the server and your image should be uploaded successfully as seen below.

In this article, we’ve successfully demonstrated how to implement the two Cloudinary upload methods (signed and unsigned) uploads. We went over the security vulnerability of the unsigned method and also demonstrated how we can solve that vulnerability using the signed upload method. If you’d like to read more about this, see the docs or play with the code here on Github