
At Cloudinary, we manage the entire pipeline of media assets for thousands of customers of varying sizes from numerous verticals.
As part of our commitment to support the entire flow of media assets, we are now introducing an intuitive media editing widget: an out-of-the-box, interactive UI providing your users with a set of common image editing actions for immediate use on your website or web app. The widget is interactive and simple, built on Cloudinary’s transformation capabilities, and requiring only a few lines of code to integrate. Afterwards, you can seamlessly and effortlessly add content to your site or app with no need for in-house image editing capabilities.
The Media Editor is especially useful for enabling your own content providers that may need to make simple edits on images manually. The editor helps to scale internal operations by reducing dependency on designers for simple recurring tasks, and allowing content providers to quickly review and tweak assets when needed.
The Media Editor widget provides a flexible means to review, fix, or adjust your media assets when needed. The following widget features can help you achieve your goals:
- Resize and crop: Provide your users with predefined options for resizing the image, allow them to manually crop an image using crop handles, or even to flip or rotate the image.
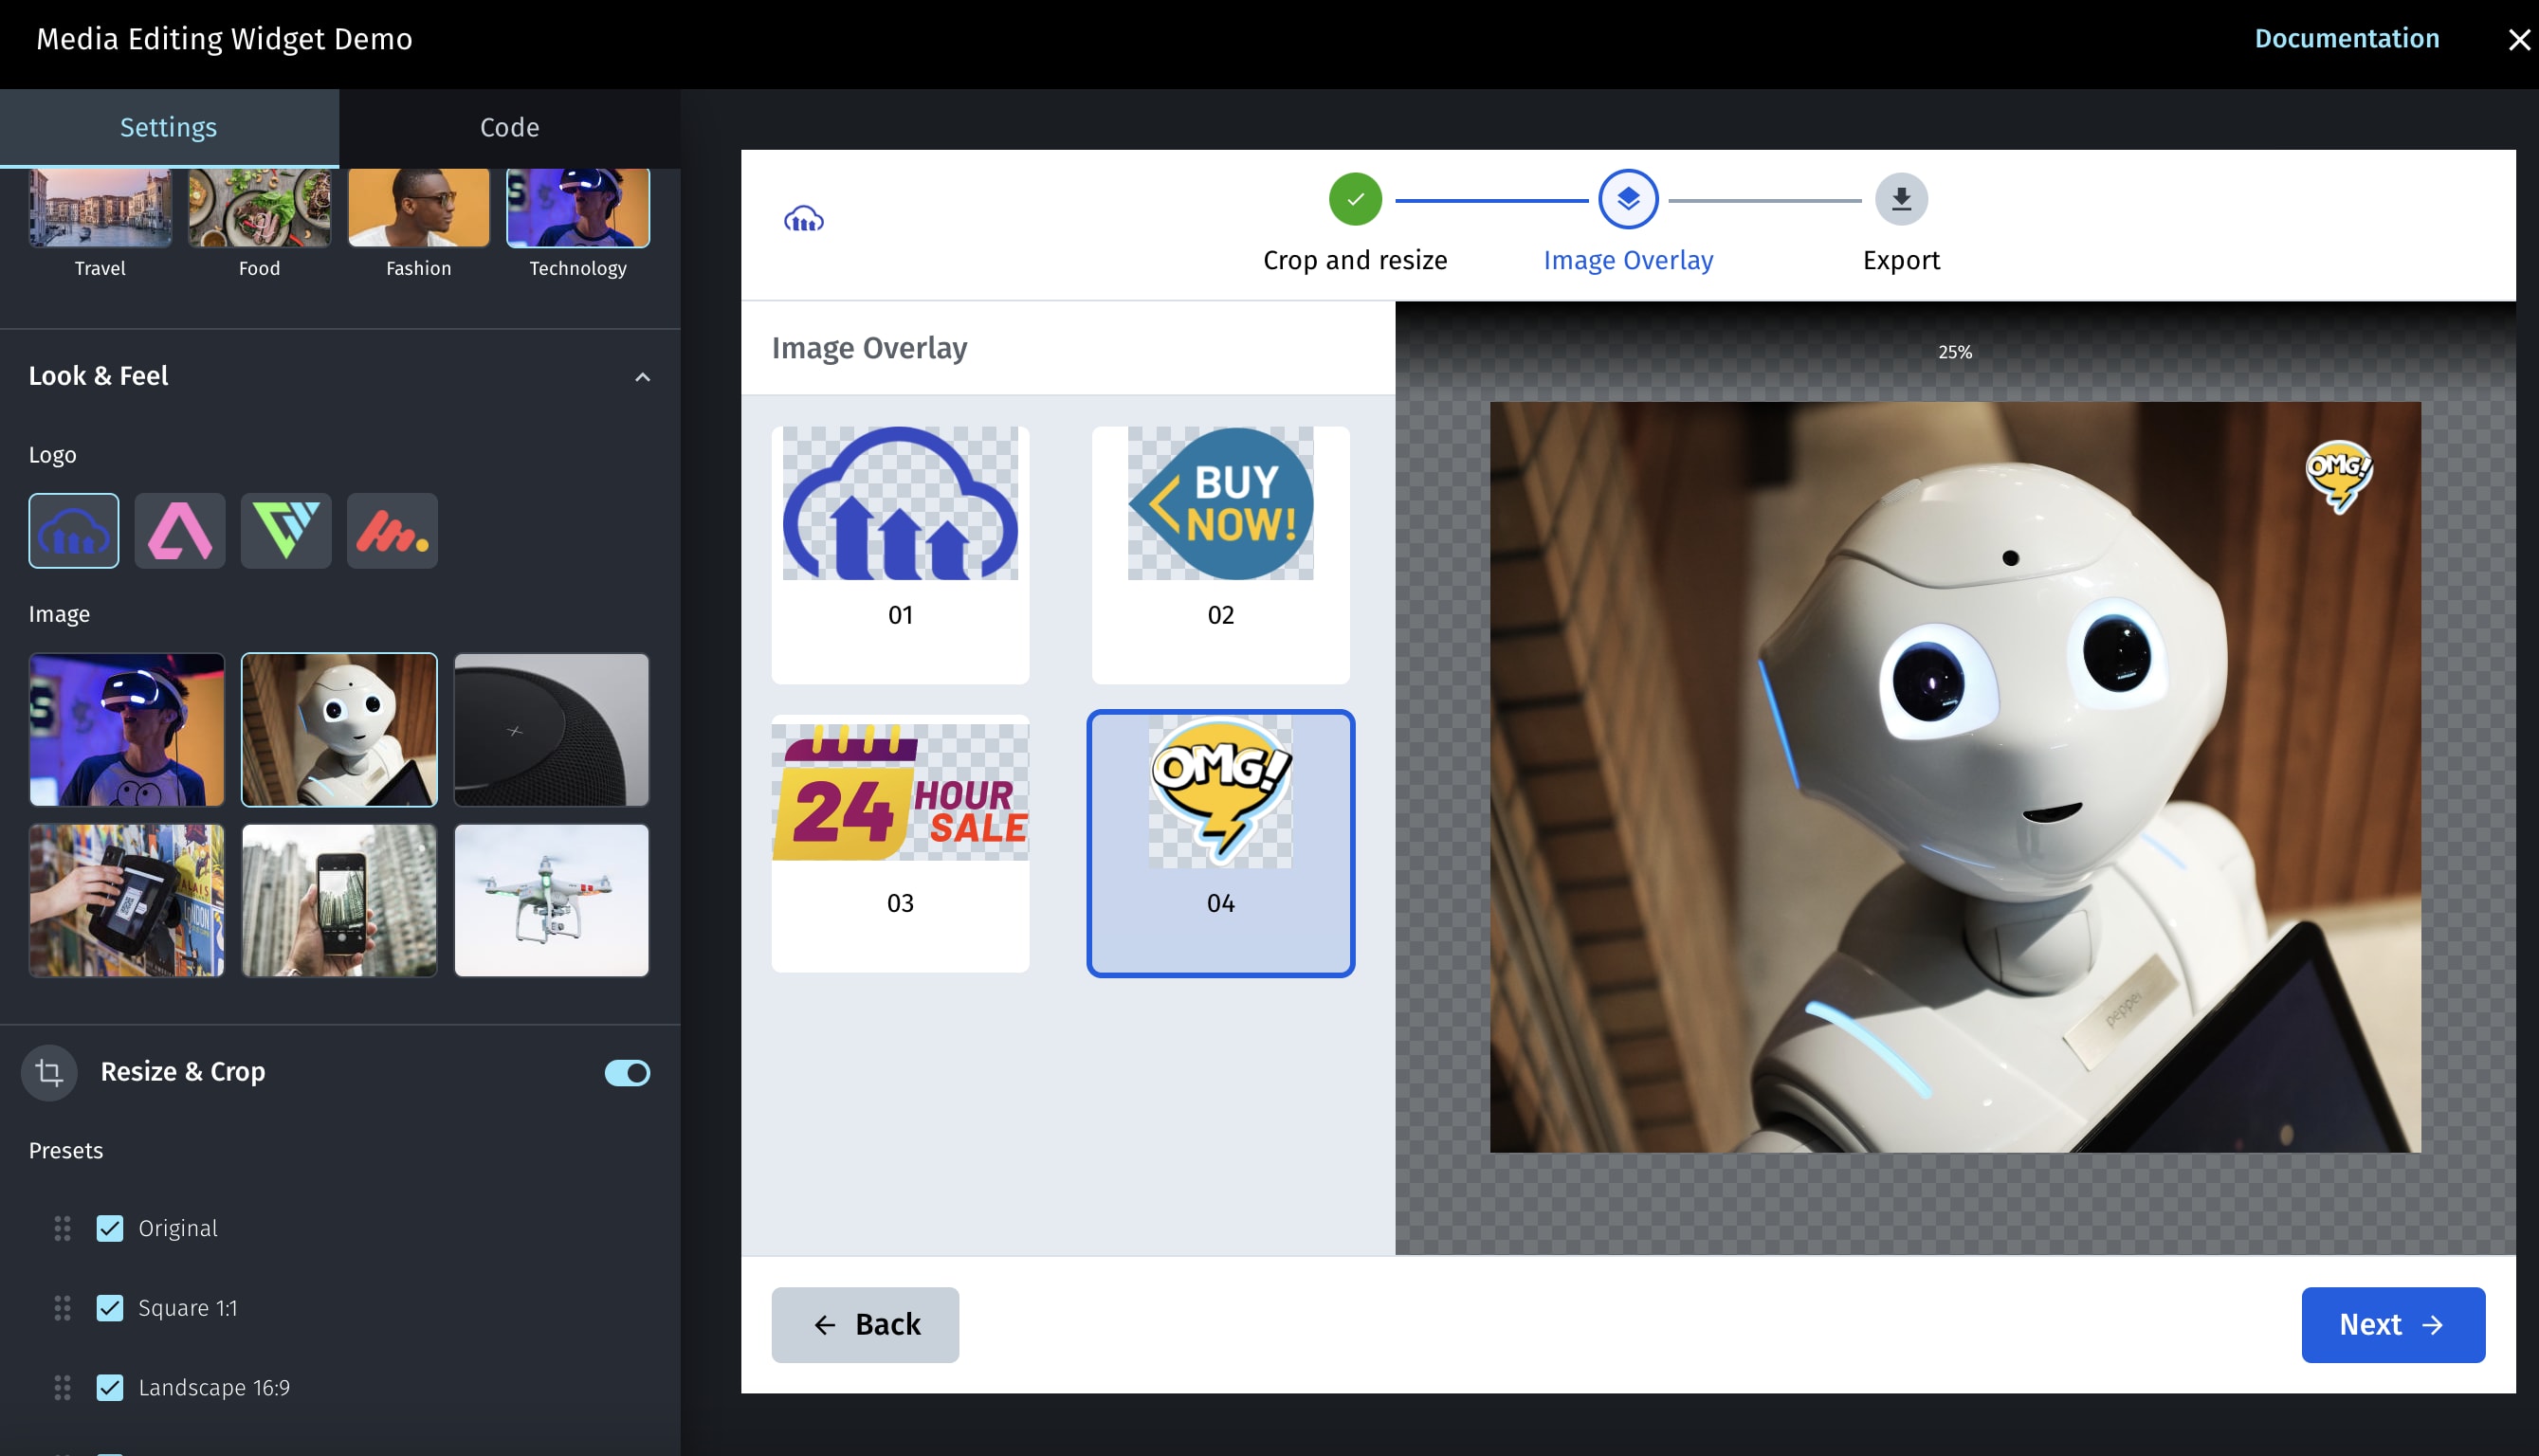
- Image overlays: Supply your users with image overlays to select from, and define the optional locations to add them to the base image.
- Export: Offer your users the ability to select from various exporting options, including changing format and quality.
- Events: A variety of Media Editor widget events are triggered in order to allow you to introduce custom behavior in your application.
- Analytics tracking: Data about how your users interact with the widget.
- Localization: The text labels used in the widget can be fully customized for different languages and locales.
Adding the widget into your application is simple: just include the widget script and then call the widget with a few lines of code, providing the publicId of an image to edit, and the name of your Cloudinary cloud. The “export” event will include the data for the final edited image. For example:
<script src="https://media-editor.cloudinary.com//all.js" type="text/javascript"></script>

<script>
const myEditor = cloudinary.mediaEditor();
myEditor.update({
  publicIds: ["sample"],
  cloudName: "demo",
});
myEditor.show();
myEditor.on("export",function(data){
   // your code to handle the final image, for example:
   console.log(data);
})
</script>

Code language: HTML, XML (xml)
That’s it –that’s all that’s needed to implement the default widget. You can try a live example right now by clicking the button below and editing an image.
As can be seen, the default functionality includes a resize and crop step, and an export step. Of course there are plenty of ways to extend the default functionality and override the default settings.
Instead of just using the default configuration for the resizeAndCrop step, one of the options you have is to limit the user’s ability to resize the image, and provide your own presets for the user to select. For the following example, we disable the interactive cropping ("interactiveCrop": false) and then provide two Cloudinary predefined options (facebookCover and linkedInCover) and one custom option (label: "Cover Ad", width: 500, aspectRatio: "16:9"):
const myEditor = cloudinary.mediaEditor();
myEditor.update({
  publicIds: ["sample"],
  cloudName: "demo",
  "resizeAndCrop": {
      "interactiveCrop": false,
      "presets": [
         "facebookCover",
         "linkedInCover",
         {
  label: "Cover Ad",
  width: 500,
  aspectRatio: "16:9"
         }
      ]
    }
});
myEditor.show();
myEditor.on("export",function(data){
  console.log(data);
})
Code language: JavaScript (javascript)
See the ResizeProps options for more details on all the available options.
The default widget doesn’t include the overlay functionality out-of-the-box. Adding an overlay can be a valuable addition to the image, letting your users add a company logo or even a watermark. To enable this step, you have to provide the imageOverlay parameter populated with an ordered array of overlays that the user can choose from. Each overlay in the array is defined with a publicId, a label, any transformation to apply, and an array of allowed placement options that are defined by a bounding box (width and height), a location on the base image (gravity) and any offset from the selected location (x and y).
For example, to add 2 options for overlays to your users as follows: The ‘cloudinary_logo’ image with a blackwhite effect applied and 2 placement options (top-right and top-left), The ‘cloudinary_text’ image with a negative effect applied and a single placement option (bottom-right):
const myEditor= cloudinary.mediaEditor();
myEditor.update({
  cloudName: "demo",
  publicIds: ["cloud"],
  widgetSteps: ["imageOverlay"],
  imageOverlay: {
    overlays: [
       {
        "publicId": "cloudinary_logo",
        "label": "Logo",
        "transformation": [{ "effect": "blackwhite" }],
        "placementOptions": [{
            "x": 10,
            "y": 10,
            "width": 400,
            "height": 400,
            "gravity": "north_west"
          },
          {
            "x": 0,
            "y": 0,
            "width": 400,
            "height": 400,
            "gravity": "north_east"
          }
        ]
      },
      {
        "publicId": "cloudinary_text",
        "label": "Logo with Text",
        "transformation": [{ "effect": "negative" }],
        "placementOptions": [{
            "x": 0,
            "y": 0,
            "width": 400,
            "height": 400,
            "gravity": "south_east"
       }
    ]
  };
});
Code language: JavaScript (javascript)
See the ImageOverlayProps options for more details on all the available options.
Once the user finishes editing the image, the export step of the widget enables them to select how to finish with their editing. By default, only adjusting quality options are available, but you can also offer your users some format options to choose from, as well as limiting their ability to download the final image or share it. Use the export parameter to populate the Media Editor with an ordered array of formats and quality to select from, and whether the URL and Download options are displayed.
For example, to just use the widget as a way to change quality and format of an image, you can disable the download option, add some format options (jpg and png), and provide your own quality options:
const myEditor= cloudinary.mediaEditor();
myEditor.update({
  cloudName: "demo",
  publicIds: ["flower"],
  widgetSteps: ["export"],
  export: {
    "formats": [
      "jpg",
      "png"
    ],
    "quality": [
      "auto",
      60,
      "low"
    ],
    "download": false,
    "share": false
  };
});
myEditor.on("export",function(data){
  // your code to handle the final image
})
Code language: JavaScript (javascript)
See the ExportProps options for more details on all the available options.
Just to make your life that much easier, we’ve created a live Media Editor Demo page that lets you experiment with the various customization options available for the widget. Not only can you use this demo to get a better idea of what the widget offers, but the Demo page also automatically generates the code template you need to implement your customized widget on your own site.
Cloudinary’s Media Editor is an interactive and fully customizable user interface that allows you to provide your users with an easy way to do common editing tasks, including resizing, cropping, adding overlays, and more. For more information on the Media Editor widget, and all the customization and functional parameters, please see the documentation. If you have any questions, please comment below or test it on your own site by signing up for free.
Interested in more Media Editor features? Some are already planned and on our roadmap, for example Text Overlays, where you can vote or share your requests.