
It may not be surprising that you’ve already uploaded a file today, whether it will disappear after a time or be stored in an online database. So, it’s become imperative to create applications enabling file uploads. Using Next.js server-side, you can implement this.
In this blog post, we’ll discuss the frontend, what our project does, and the tools we need.
The project is a digital flashcard for memorizing. A physical flashcard has a front and a back; the front poses a question, and the reverse offers the solution. A digital flashcard allows us to add images and videos to help us better remember things.
The advantages of a flashcard are listed below.
- It aids in enhancing visual memory.
- It promotes learning and is portable.
- For acronyms, mathematical formulas, algorithmic codes, etc., flashcards are instructive.
- It’s affordable.
See demo here.
The frontend part of our work deals with how we interact with our project as seen in the live URL shared above. Here are the tools used for the frontend.
Using the npm i <tool_name> command, we can install them.
aos. This is used for the animation of cards as we scroll down the application.react-icons. This was used to display icons in our project.react-quill. This is for the WYSIWYG editor for adding front and back content.react-toastify. This was used for the toast notifications in our app.- Tailwind CSS. This is the main CSS of our application. Please note that other custom CSS was used in the project. Visit the Github URL above to see all.
Here’s the logic of our application.
- A user registers by utilizing the Credentials or Github providers (email and password). Look at the file at `pages/auth/signup` in the Github URL.
- After successful registration, the user is routed to the login page `pages/auth/signin`.
- After successfully logging in, the user can view all of the cards that other users have made.
- We can choose from options like making a card, seeing our collections and cards, searching for a card based on its name or category, switching between dark and light settings, like a card, and watching a video.
- The card name, category, image, optional video, and front and back content must all be added before a card can be created.
- The user can begin flipping cards to practice memorizing, and films and visuals will assist them to develop their memory.
- A user who is the card’s owner can update or delete the card once it has been created.
- A user can add a freshly made card to their collection by clicking the Plus symbol while they are not the owner of it.
- There are three options for editing a card. We have the option to only update the card’s image, video, or other information.
- We can search for a card by typing its name or its category into the search box.
Below is a High-Level Model of the frontend logic:

Visit the live URL above to see the application.
Here’s how to install and configure Cloudinary.
1. Install Cloudinary.
Run this command:
npm install cloudinary
2. Create a Cloudinary account.
We need our Cloudinary cloud name, API key, and API secret to proceed. Head over to the Cloudinary website to get these three.
Click the Dashboard tab. There, we’ll find our API key, API secret, and cloud name.

Click Settings, then Upload. There, you can add presets.
Give the name and folder the value “flashcard” and click Save.

3. Add Cloudinary details to .env.local file.
Create a .env.local file and add the following:
// .env.local
CLOUDINARY_API_KEY=<our_key>
CLOUDINARY_API_SECRET=<our_api_secret>
CLOUDINARY_NAME=<our_cloud_name>
Code language: HTML, XML (xml)
4. Create a Cloudinary configuration file.
Create a folder in the root of our project called utils. Inside it, create a file cloudinary.js and add the following code:
import cloudinary from "cloudinary";

cloudinary.v2.config({
    cloud_name: process.env.CLOUDINARY_NAME,
    api_key: process.env.CLOUDINARY_API_KEY,
    api_secret: process.env.CLOUDINARY_API_SECRET
})

export default cloudinaryCode language: CSS (css)1. Create a Xata account.
Click this link to create a Xata account.
2. Create a database and tables.
If you’re new to Xata on creating tables, please read and visit these links https://xata.io/docs/intro/getting-started and https://xata.io/docs/quickstart/index. Now, create a database called “test” or “flashcard”. After that, create the following tables:


3. Install the Xata database.
Watch the video here and see this installation documentation, or:
- Install Xata CLI:
npm install -g @xata/cli
Code language: CSS (css)- Next, connect with the Xata database:
xata auth login
We’ll choose Create a new API key in browser when our terminal prompts us. This opens a browser. We’ll enter the name of our API key.
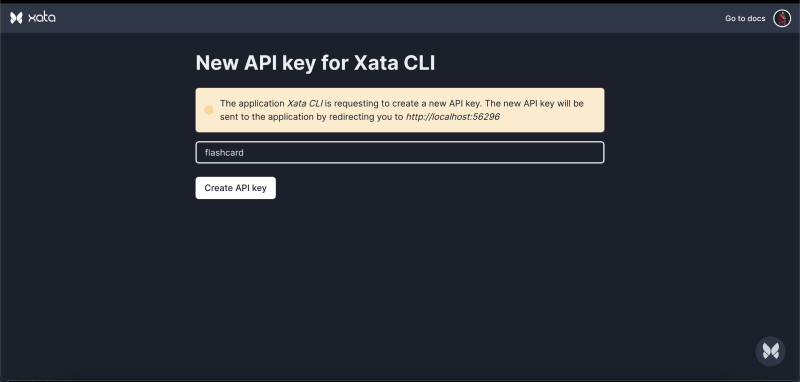
If successful, we’ll see this on the browser page.

A message “All set! you can now start using Xata” will be displayed on our terminal.
- Initialize our project with Xata:
xata init
We’ll choose the following during the terminal prompts;
- Select existing database “test” or “flashcard”.
- Select Generate Javascript code with ES modules for “Do you want to use code generation in our project?”
- Type in “utils/xata” for “Choose the output file for the code generator”.
- Select “No” for “Do you want to generate the TypeScript declarations?”.
- For “Choose a default development branch (fallback branch)” select “main”.
- Lastly, for “Do you want to create a .gitignore file and ignore the .env file?, select “Yes”.
Once done, we should see the message, “You are all set!”
Make sure to select utils/xata as where our Xata Codegen file will reside. If successful, our xata.js file should look like this:
import { buildClient } from '@xata.io/client';
/** @typedef { import('./types').SchemaTables } SchemaTables */
/** @type { SchemaTables } */
const tables = [
  {
    name: 'Users',
    columns: [
      { name: 'username', type: 'string', unique: true },
      { name: 'email', type: 'email', unique: true },
      { name: 'fullName', type: 'text' },
      { name: 'password', type: 'string' },
      { name: 'provider', type: 'string' },
      { name: 'profilePicture', type: 'string' },
      { name: 'profilePictureId', type: 'string' },
    ],
  },
  {
    name: 'Cards',
    columns: [
      { name: 'name', type: 'string' },
      { name: 'image', type: 'string' },
      { name: 'video', type: 'string' },
      { name: 'user', type: 'link', link: { table: 'Users' } },
      { name: 'likes', type: 'multiple' },
      { name: 'color', type: 'string' },
      { name: 'front', type: 'text' },
      { name: 'back', type: 'text' },
      { name: 'video_id', type: 'string' },
      { name: 'video_signature', type: 'string' },
      { name: 'image_id', type: 'string' },
      { name: 'image_signature', type: 'string' },
      { name: 'category', type: 'string' },
      { name: 'collectors', type: 'multiple' },
    ],
  },
];
/** @type { import('@xata.io/client').ClientConstructor<{}> } */
const DatabaseClient = buildClient();
const defaultOptions = {
  databaseURL:
    'https://Theodore-Kelechukwu-Onyejiaku-s-workspace-4666kh.eu-west-1.xata.sh/db/test',
};
/** @typedef { import('./types').DatabaseSchema } DatabaseSchema */
/** @extends DatabaseClient<DatabaseSchema> */
export class XataClient extends DatabaseClient {
  constructor(options) {
    super({ ...defaultOptions, ...options }, tables);
  }
}
let instance;
/** @type { () => XataClient } */
export const getXataClient = () => {
  if (instance) return instance;
  instance = new XataClient();
  return instance;
};
Code language: JavaScript (javascript)Since this will be done on the Next.js server side, the following packages are to be installed:
npm i bcrypt datauri multer next-auth next-connect
bcrypt. This will help in authentication, hashing of passwords, and verification.datauri. This will help us convert parsed files (image and video) to base 64 encodings.multer. This will help us parse the request body.next-auth. This will add authentication.next-connect. This will help us add Multer as a middleware to a route handler.
We’ll have to create a card to upload an image and a video. So, create a file called create-card.js in the api folder of the pages folder.
import nc from 'next-connect';
import { getToken } from 'next-auth/jwt';
import multer from 'multer';
import path from 'path';
import DatauriParser from 'datauri/parser';
import cloudinary from '../../utils/cloudinary';
import { getXataClient } from '../../utils/xata';

const xata = getXataClient();

const handler = nc({
  onError: (res) => {
    res.status(500).end('Something broke!');
  },
  onNoMatch: (req, res) => {
    res.status(404).end('Page is not found');
  },
})
  // uploading two files
  .use(multer().any())
  .post(async (req, res) => {
    // get user's token
    const token = await getToken({ req });

    // if no token
    if (!token) {
      return res.status(401).json({ error: 'You are not signed in', data: null });
    }
    // get parsed image and video from multer
    const image = req.files.filter((file) => file.fieldname === 'image')[0];
    const video = req.files.filter((file) => file.fieldname === 'video')[0];
    // create a neew Data URI parser
    const parser = new DatauriParser();
    try {
      // create image
      const createImage = async (img) => {
        const base64Image = parser.format(path.extname(img.originalname).toString(), img.buffer);
        const uploadedImageResponse = await cloudinary.uploader.upload(base64Image.content, 'flashcards', { resource_type: 'image' });
        return uploadedImageResponse;
      };

      // create video
      const createVideo = async (vid) => {
        const base64Video = parser.format(path.extname(vid.originalname).toString(), vid.buffer);
        const uploadedVideoResponse = await cloudinary.uploader.upload(base64Video.content, 'flashcards', { resource_type: 'video' });
        return uploadedVideoResponse;
      };

      // saving information
      const createdImage = await createImage(image);
      const imageUrl = createdImage.url;
      const image_id = createdImage.public_id;
      const image_signature = createdImage.signature;
      const createdVideo = video ? await createVideo(video) : null;
      const videoUrl = createdVideo?.url;
      const video_id = createdVideo?.public_id;
      const video_signature = createVideo?.signature;

      // creating a new card
      const card = await xata.db.Cards.create({
        name: req.body.cardName,
        category: req.body.category,
        color: req.body.cardColor,
        front: req.body.front,
        back: req.body.back,
        image: imageUrl,
        image_id,
        image_signature,
        video: videoUrl,
        video_id,
        video_signature,
        user: token.user.id,
      });
      res.json({ error: null, data: card });
    } catch (error) {
      res.status(500).json({ error, data: null });
    }
  });

// disable body parser
export const config = {
  api: {
    bodyParser: false,
  },
};

export default handler;
Code language: JavaScript (javascript)
This will handle any POST request to /api/create-card. So, the frontend will send form data, including the image and video we want to upload.
- Line 1. We’ll import the package
next-connnect. - Line 9: We’ll create a new Xata instance.
- Line 20: We’ll apply the Multer middleware. The Multer middleware ensures that it parses any files using the
any()method. And we store the image and video for each card inside the variablesimageandvideoin lines 30 and 31. - Line 33: We’ll create the
datauri/parserinstance to convert the parsed files to a base 64 encodings file. This way, we can upload the image and video generated in lines 40 and 47 to cloudinary. - Line 36-40: Here, we’ll convert the parsed image file to a base 64 encoding for upload to Cloudinary. This is done using the
uploader.upload()method of the Cloudinary SDK. Notice we passed in the upload presets,flashcards,and an option{ resource_type: 'image' }telling Cloudinary that this is an image we want to upload. This method returns a response, including the URL of the new Image created, which is stored in the database asimage. - Line 43-47: Same as Line 36-40. The only difference is this time, we tell Cloudinary that it is a video
{ resource_type: 'video' }. - Line 60-73: We’ll create a new card by invoking the
create()function of Xata and passing the values from the frontend.
See what will be sent from the frontend in lines 115-126 below.
import { useState } from 'react';
import { useSession } from 'next-auth/react';
import { useRouter } from 'next/router';
import { toast } from 'react-toastify';
import LoginToContinue from '../components/LoginToContinue';
import SkeletonLoader from '../components/SkeletonLoader';
import 'react-quill/dist/quill.snow.css';
import 'react-quill/dist/quill.bubble.css';
import { modules, formats } from '../utils/editor';
import { isImage, isVideo, validateSize } from '../utils/fileValidation';
import ProcessIndicator from '../components/ProcessIndicator';

const ReactQuill = typeof window === 'object' ? require('react-quill') : () => false;

export default function Create() {
  const router = useRouter();
  const colors = ['#FFFFFF', '#000000', '#251447', '#870A30'];
  const { data: session, status } = useSession();
  const [imageSrc, setImageSrc] = useState('');
  const [videoSrc, setVideoSrc] = useState('');
  const [image, setImage] = useState();
  const [video, setVideo] = useState();
  const [front, setFront] = useState('');
  const [back, setBack] = useState('');
  const [imageError, setImageError] = useState('');
  const [videoError, setVideoError] = useState('');
  const [cardName, setCardName] = useState('');
  const [category, setCategory] = useState('');
  const [cardColor, setCardColor] = useState('#FFFFFF');
  const [loading, setLoading] = useState(false);

  if (status === 'loading') {
    return <SkeletonLoader />;
  }

  const handleCardName = (e) => {
    setCardName(e.target.value);
  };
  const handleImageChange = (e) => {
    setImageError('');
    const img = e.target.files[0];
    // if no image selected
    if (!img) {
      return;
    }

    // check if image
    const result = isImage(img.name);
    if (!result) {
      const error = 'File type should be a image';
      toast(error, { type: 'error' });
      setImageError(error);
      return;
    }
    const isImageLarge = validateSize(img);
    if (isImageLarge) {
      const error = 'File must be less or equal to 5MB';
      toast(error, { type: 'error' });
      setImageError(error);
      return;
    }
    const reader = new FileReader();
    // converts to BASE 64
    reader.readAsDataURL(img);
    reader.addEventListener('load', () => {
      setImageSrc(reader.result);
      setImage(img);
    });
  };

  const handleVideoChange = (e) => {
    setVideoError('');
    const vid = e.target.files[0];
    // if no video selected
    if (!vid) {
      return;
    }

    // check if video
    const result = isVideo(vid.name);
    if (!result) {
      const error = 'File type should be a video';
      toast(error, { type: 'error' });
      setVideoError(error);
      return;
    }
    const isFileLarge = validateSize(vid);
    if (isFileLarge) {
      const error = 'Video file must be less or equal to 5MB';
      toast(error, { type: 'error' });
      setVideoError((error));
      return;
    }
    const blobURL = URL.createObjectURL(vid);
    const reader = new FileReader();
    // converts to BASE 64
    reader.readAsDataURL(vid);
    reader.addEventListener('load', () => {
      setVideo('');
      setVideoSrc(reader.result);
      setVideo(vid);
    });
  };

  if (status === 'unauthenticated') {
    return <LoginToContinue />;
  }

  const handleSubmit = async () => {
    if (!cardName || !front || !back || !image || !category) {
      toast('Please enter required fields with asterisk', { type: 'error' });
      return;
    }
    setLoading(true);
    const formData = new FormData();
    formData.append('cardName', cardName);
    formData.append('cardColor', cardColor);
    formData.append('front', front);
    formData.append('back', back);
    formData.append('image', image);
    formData.append('video', video);
    formData.append('category', category);
    const res = await fetch('/api/create-card', {
      method: 'POST',
      body: formData,
    });
    const { error } = await res.json();
    if (error) {
      toast('There was error', { type: 'error' });
      setLoading(false);
      return;
    }
    toast('Card created successfully!!!', { type: 'success' });
    setLoading(false);
    router.push('/my-cards');
  };

  return (

    <div className=" p-5 dark:bg-black w-full dark:text-white">
      {loading ? <ProcessIndicator />
        : (
          <div className="">
            <div className="my-5">
              <label className="font-bold">
                Name of Card
                <span className="text-red-400">*</span>
              </label>
              <input onChange={handleCardName} value={cardName} className="w-full text-black border p-2 my-5 dark:placeholder:text-gray-600" placeholder="Xata Multiple-Select" />
            </div>
            <div className="my-5">
              <label className="font-bold">
                Card Category
                <span className="text-red-400">*</span>
              </label>
              <select name="category" onChange={(e) => { setCategory(e.target.value); }} className="block my-5">
                <option value="">__Select__</option>
                <option value="programming">Programming</option>
                <option value="science">Science</option>
                <option value="art">Art</option>
                <option value="technology">Technology</option>
                <option value="technical-writing">Technical Writing</option>
                <option value="education">Education</option>
              </select>
            </div>
            {/* SELECT CARD COLOR */}
            <div>
              <h1 className="my-5 dark:text-white font-bold">
                Select Card Color
                <span className="text-red-400">*</span>
              </h1>
              <div className="flex space-x-10 py-5 overflow-x-scroll items-center max-w-5xl justify-between md:justify-start md:space-x-10  dark:text-gray-400">
                {colors.map((color, index) => <span onClick={() => { setCardColor(color); }} key={color} style={{ background: color }} className={`p-10 rounded-md dark:border shadow-xl ${color === cardColor ? 'border-4 border-blue-700' : ''}`} />)}
              </div>
            </div>
            {/* CHOOSE VIDEO OR PICTURE */}

            <div className="my-5">
              <div className="">
                <label>
                  Select Picture
                  {' '}
                  <span className="text-red-500">(Max 5MB)</span>
                  <span className="text-red-400">*</span>
                </label>
                <p className="my-5 text-red-400">{imageError}</p>
                <input type="file" onChange={handleImageChange} className="block" />
              </div>
              {image && <img alt="card" src={imageSrc} className="basis-1/2 h-auto w-48 my-5" accept="image/*" />}
            </div>

            <div className="my-5">
              <label>
                Select Video
                {' '}
                <span className="text-red-500">(Max 5MB)</span>
              </label>
              <p className="my-5 text-red-400">{videoError}</p>
              <input type="file" onChange={handleVideoChange} className="block my-5" accept="video/mp4,video/x-m4v,video/*" />
              {video && (
                <video src={videoSrc} className="w-48 h-auto" controls />
              )}
            </div>

            {/* ENTER CONTENT */}
            <div className="w-full my-5 dark:text-white">
              {/* FRONT */}
              <h1 className="my-5">
                FRONT
                <span className="text-red-400">*</span>
              </h1>
              <ReactQuill id="editor" formats={formats} modules={modules} theme="snow" value={front} onChange={setFront} className="w-full h-96 pb-10  dark:text-white" />
            </div>
            <div className="w-full my-10 dark:text-white">
              {/* BACK */}
              <h1 className="my-5">
                BACK
                <span className="text-red-400">*</span>
              </h1>
              <ReactQuill id="editor" formats={formats} modules={modules} theme="snow" value={back} onChange={setBack} className="w-full h-96 pb-10 dark:text-white" />
            </div>
            <button type="button" onClick={handleSubmit} className="p-2 bg-black text-white my-5 rounded-md">
              Create Flashcard
            </button>

          </div>
        )}
    </div>
  );
}
Code language: JavaScript (javascript)
Updating an existing image in Cloudinary also means updating our card. Create a new API route handler called update-card-image.js.
import nc from 'next-connect';
import { getToken } from 'next-auth/jwt';
import multer from 'multer';
import path from 'path';
import DatauriParser from 'datauri/parser';
import cloudinary from '../../utils/cloudinary';
import { getXataClient } from '../../utils/xata';

const handler = nc({
  onError: (err, res) => {
    res.status(500).end('Something broke!');
  },
  onNoMatch: (req, res) => {
    res.status(404).end('Page is not found');
  },
})
  .use(multer().single('image'))
  .post(async (req, res) => {
    const xata = getXataClient();
    const image = req.file;

    const token = await getToken({ req });
    // if no token
    if (!token) {
      return res.status(403).json({ error: 'You are not signed in', data: null });
    }

    const userId = token.user.id;
    // check if card is user's
    if (!(req.body.userId === userId)) {
      return res.status(403).json({ error: 'You cannot update this card.', data: null });
    }

    const parser = new DatauriParser();
    try {
      // destroy existing image on cloudinary
      await cloudinary.v2.uploader.destroy(req.body.imageId);
      // create new one
      const base64Image = await parser.format(path.extname(image.originalname).toString(), image.buffer);
      const uploadedImageResponse = await cloudinary.uploader.upload(base64Image.content, 'flashcards', { resource_type: 'image' });
      const image_id = uploadedImageResponse.public_id;
      const image_signature = uploadedImageResponse.signature;
      const card = await xata.db.Cards.update(req.body.cardId, {
        image: await uploadedImageResponse.url,
        image_id,
        image_signature,
      });

      res.json({ error: null, data: card });
    } catch (error) {
      res.status(500).json({ error, data: null });
    }
  });

// disable body parser
export const config = {
  api: {
    bodyParser: false,
  },
};

export default handler;
Code language: JavaScript (javascript)
There isn’t much difference from create-card.js.
- Line 17: We told Multer that it should parse a single file named
image. This is the name of the form data image from the frontend. - Line 37: We’ll delete the existing Cloudinary image of a card by invoking the Cloudinary
destroy()method. This method only requires the id of the image to delete. - Line 43: We’ll update the card with the new image URL, id, and signature.
This is the same as the code above. We’ll create a new file called update-card-video . The only difference is that this time we’ll tell Multer to parse a file named “video” in line 17. See the code below:
import nc from 'next-connect';
import { getToken } from 'next-auth/jwt';
import multer from 'multer';
import path from 'path';
import DatauriParser from 'datauri/parser';
import cloudinary from '../../utils/cloudinary';
import { getXataClient } from '../../utils/xata';

const handler = nc({
  onError: (err, res) => {
    res.status(500).end('Something broke!');
  },
  onNoMatch: (req, res) => {
    res.status(404).end('Page is not found');
  },
})
  .use(multer().single('video'))
  .post(async (req, res) => {
    const xata = getXataClient();
    const video = req.file;

    const parser = new DatauriParser();
    try {
      const token = await getToken({ req });
      // if no token
      if (!token) {
        return res.status(403).json({ error: 'You are not signed in', data: null });
      }
      const userId = token.user.id;
      // check if card is user's
      if (!(req.body.userId === userId)) {
        return res.status(403).json({ error: 'You cannot update this card.', data: null });
      }

      // destroy any existing video on cloudinary
      if (req.body.videoId !== 'null') {
        await cloudinary.v2.uploader.destroy(req.body.videoId);
      }

      // create new one
      const base64Video = await parser.format(path.extname(video.originalname).toString(), video.buffer);
      const uploadedVideoResponse = await cloudinary.uploader.upload(base64Video.content, 'flashcards', { resource_type: 'video' });
      const video_id = uploadedVideoResponse.public_id;
      const video_signature = uploadedVideoResponse.signature;
      const card = await xata.db.Cards.update(req.body.cardId, {
        video: await uploadedVideoResponse.url,
        video_id,
        video_signature,
      });
      res.json({ error: null, data: card });
    } catch (error) {
      res.status(500).json({ error, data: null });
    }
  });

// disable body parser
export const config = {
  api: {
    bodyParser: false,
  },
};

export default handler;
Code language: JavaScript (javascript)In deleting a card, we’ll delete the image and video.
import { getToken } from 'next-auth/jwt';
import { getXataClient } from '../../utils/xata';
import cloudinary from '../../utils/cloudinary';

const handler = async (req, res) => {
  try {
    const xata = getXataClient();
    const token = await getToken({ req });
    if (!token) {
      return res.status(403).json({ error: 'Please signin to perform this operation.', data: null });
    }

    const userId = token.user.id;
    // check if owner
    if (!(req.body.user.id === userId)) {
      return res.status(403).json({ error: 'Please you cannot delete this card', data: null });
    }

    // delete video if any
    if (req.body.video_id) {
      await cloudinary.v2.uploader.destroy(req.body.video_id);
    }

    // delete image if any
    if (req.body.image_id) {
      await cloudinary.v2.uploader.destroy(req.body.image_id);
    }

    // finally, delete card
    const record = await xata.db.Cards.delete(req.body.id);
    return res.json({ error: null, data: record });
  } catch (error) {
    res.status(500).json({ error: 'something went wrong', data: null });
  }
};

export default handler;
Code language: JavaScript (javascript)- Line 21 and 26: We’ll call the Cloudinary
destroy()methods and passed the image id and video id of the card we want to delete. - Line 30: We’ll invoke the
delete()method of Xata by passing the id of the card we want to delete.
In this blog post, we looked at uploading images and videos to Cloudinary using Next.js-server side and persisting data in the database using Xata. The frontend and full code have been provided in the GitHub URL section of this post. Visit here for the live application and sign up for a free Cloudinary account today.