In web development and content creation, optimizing media for site performance is a must to enhance the user experience. One commonly used media format for short animations is the GIF. While GIFs have their place, they can be resource-intensive, leading to slower page loads and increased bandwidth usage. An effective and optimal alternative is using short, autoplay videos. Autoplay videos are typically more efficient in terms of compression and quality, providing a smoother and more performant user experience.
In this blog post, we’ll dive into how to use Cloudinary to optimize videos for WordPress by replacing GIFs with autoplay videos. We’ll cover the benefits of autoplay videos over GIFs, the process of setting up Cloudinary, uploading and optimizing videos, and embedding them into your WordPress site.
The graphics interchange format, popularly known as GIFs, have been around since the late 1980s and is a staple for short animations on the web. Despite their popularity, GIFs come with several drawbacks:
- File size. GIFs are often larger than their video counterparts because they use a less efficient compression algorithm. This results in higher bandwidth usage and slower page loads.
- Color limitations. GIFs support a maximum of 256 colors, which can lead to lower-quality images and noticeable dithering, especially in complex animations.
- No audio support. GIFs are silent by nature, which can be a limitation if you want to include sound in your animations.
Autoplay videos offer several advantages over GIFs:
- Efficient compression. Modern video formats like MP4 use advanced compression techniques, resulting in smaller file sizes without sacrificing quality. This makes autoplay videos less resource-intensive.
- Higher quality. Videos can display millions of colors, providing a richer and more vibrant viewing experience compared to GIFs.
- Audio support. Videos can include audio, offering more flexibility in content creation.
- Control over playback. Videos offer better control over playback options, such as looping, pausing, and muting, which can enhance user experience.
Before we dive into the step-by-step guide, make sure you have the following:
- A WordPress site.
- A Cloudinary account.
- The Cloudinary WordPress Plugin.
Now, let’s take a step-by-step walkthrough on how to create this.
The first thing we need to do is sign up for a free Cloudinary account.
Once signed in, familiarize yourself with the Cloudinary dashboard. Note your Cloudinary URL, which is essential for uploading and retrieving media located in your API keys page:
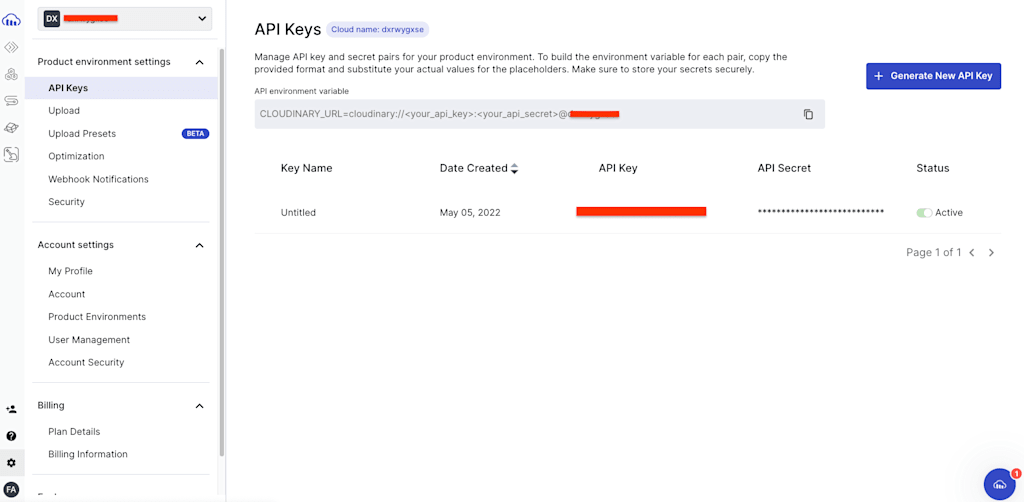
The next thing we need to do is install the Cloudinary plugin in your WP Admin after you create a WordPress install.
- Plugin installation:
- In your WordPress admin dashboard, navigate to Plugins > Add New.
- Search for “Cloudinary” and install the plugin.
- Activate and configure:
- Activate the plugin.
- Go to the Cloudinary settings page in your WordPress dashboard and enter your Cloudinary API credentials (found in your Cloudinary dashboard).
You should see a dashboard that looks like this in your WP Admin:
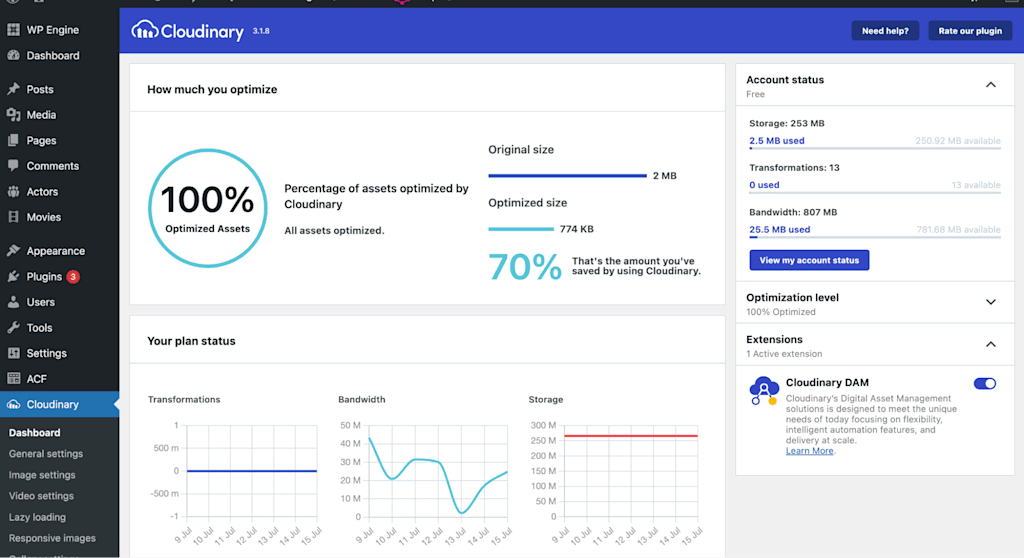
Now that we have our WordPress install setup with the Cloudinary plugin, we need to upload our videos into Cloudinary.
- Access Media Library. Go to your Cloudinary Media Library.
- Upload video. Click the Upload button and select your video file. Ensure the video is optimized for web use, typically in MP4 format. You should see this:
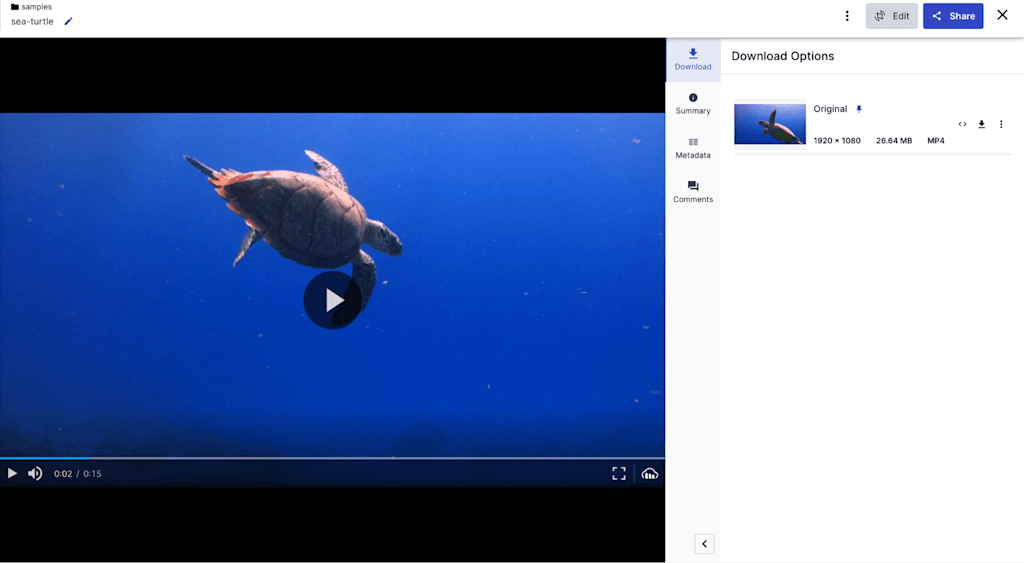
Cloudinary provides several optimization options to ensure your video is web-friendly:
- Quality and format:
- Use the following URL parameters to optimize your video:
q_auto. Automatically adjusts quality to balance file size and visual quality.f_auto. Automatically selects the best format for the user’s browser.
- Use the following URL parameters to optimize your video:
Place those URL parameters into your Cloudinary URL and it should look like this example:
https://res.cloudinary.com/YOUR_CLOUD_NAME/video/upload/q_auto,f_auto/YOUR_VIDEO.mp4Code language: JavaScript (javascript)Cloudinary also offers advanced options like bitrate control, codec selection, and resolution adjustments. These can further enhance performance and quality based on your specific needs. For this article, we will just be using the two parameters above.
After uploading and optimizing your video, copy the video URL from your Cloudinary Media Library.
Next, go back to your WP Admin dashboard and navigate to a Post or a Page. Whichever type you want to add the video to. In my example, I’ll embed it into a post.
Once you’re at the edit page of your post or page, click the block editor + sign and search and select Custom HTML Block.
Then embed your HTML in the block:
<video autoplay loop muted playsinline>
  <source src="https://res.cloudinary.com/YOUR_CLOUD_NAME/video/upload/q_auto,f_auto/YOUR_VIDEO.mp4" type="video/mp4">
  Your browser does not support the video tag.
</video>Code language: HTML, XML (xml)
If you’ve followed the steps correctly, you should see this in your WP Admin:
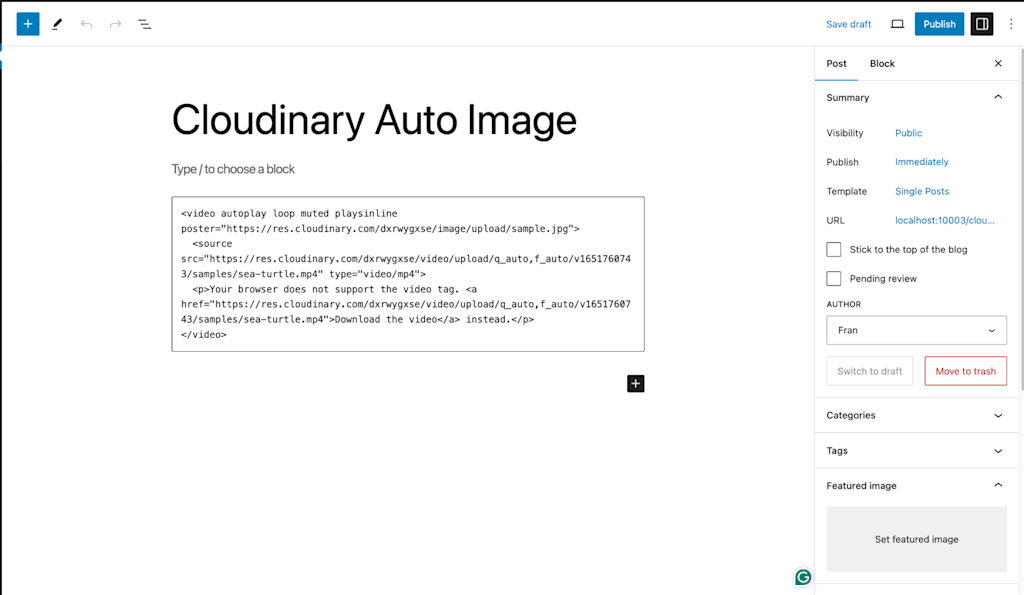
Here is a an explanation of the attributes we passed into the HTML:
autoplay. The video will start playing as soon as it is ready.loop. The video will replay automatically after finishing.muted. The video will play without sound.playsinline. Ensures the video plays inline on mobile devices without entering fullscreen mode.
There are a few additional customizations you can do to your image page. The two most common are setting poster images and fallback content.
A poster image is a static image to display before the video starts playing. This can be helpful if you want an image to act as a preview of the video content, enticing users to watch the video. This is particularly useful for marketing videos, tutorials, or any content where the initial visual can attract attention. This can be done by adding the poster attribute to the <video> tag:
<video autoplay loop muted playsinline poster="https://res.cloudinary.com/YOUR_CLOUD_NAME/image/upload/YOUR_POSTER_IMAGE.jpg">
  <source src="https://res.cloudinary.com/YOUR_CLOUD_NAME/video/upload/q_auto,f_auto/YOUR_VIDEO.mp4" type="video/mp4">
  Your browser does not support the video tag.
</video>Code language: HTML, XML (xml)
Fallback content is additional content provided within the <video> tag that will be displayed if the video cannot be played for any reason. This content typically includes a message, alternative links, or other media that can be rendered when the video tag fails to work. This ensures that users still have access to some form of content even if their browser or device can’t play the video.
This is also useful for ensuring that content is accessible to all users, including those with disabilities or those using assistive technologies. Fallback content can include descriptive text or links to download the video, making the content more accessible.
This example is one that provides fallback content for browsers that don’t support the video tag. You can customize your fallback content to fit your site’s needs:
<video autoplay loop muted playsinline>
  <source src="https://res.cloudinary.com/YOUR_CLOUD_NAME/video/upload/q_auto,f_auto/YOUR_VIDEO.mp4" type="video/mp4">
  <p>Your browser does not support the video tag. <a href="https://res.cloudinary.com/YOUR_CLOUD_NAME/video/upload/q_auto,f_auto/YOUR_VIDEO.mp4">Download the video</a> instead.</p>
</video>Code language: HTML, XML (xml)Now, let’s use CSS to style our video so it fits better on the page. In order to do this in your WP admin dashboard, navigate to Appearance > Customize. Then open the Additional CSS section. You should see this page:
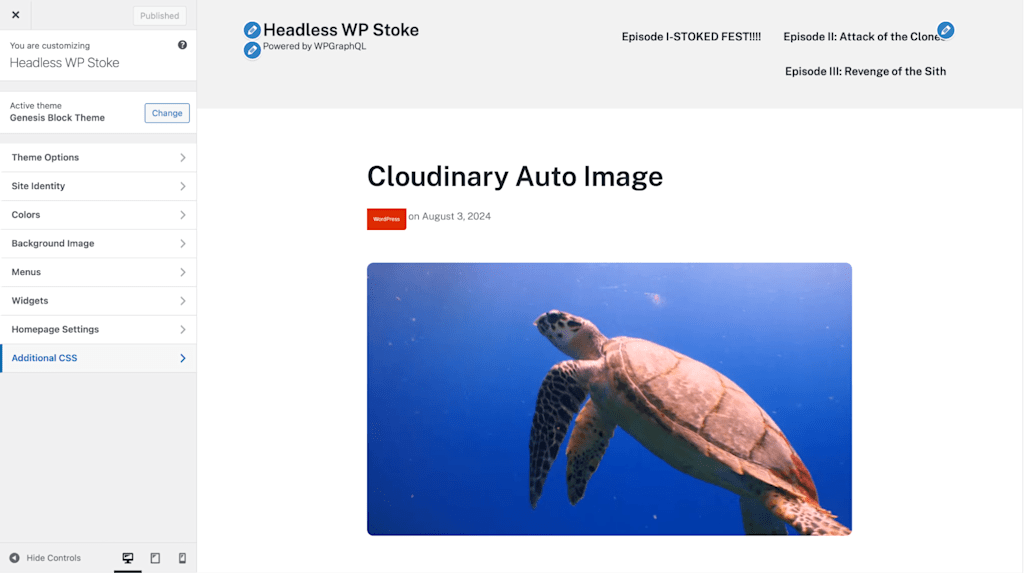
When you click Additional CSS, it gives you a field to paste the CSS code in:
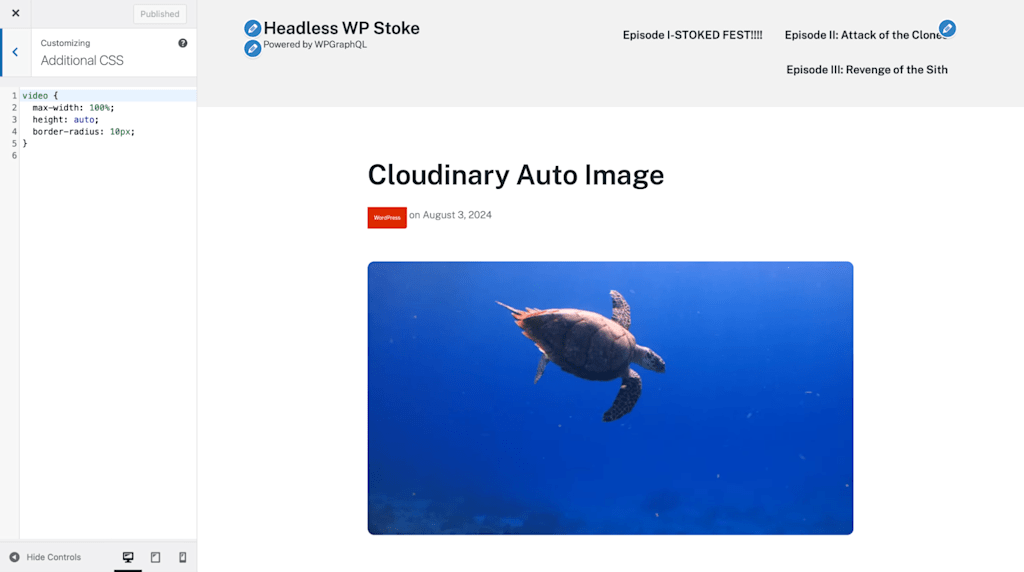
Copy and paste this CSS in the field:
video {
  max-width: 100%;
  height: auto;
  border-radius: 10px;
}Code language: CSS (css)
Done! You should have a WordPress page that has an image that auto plays like a GIF like this:
- Responsive testing. Ensure the video plays correctly on various devices, including desktops, tablets, and smartphones.
- Cross-browser compatibility. Check the video’s performance on different browsers (e.g., Chrome, Firefox, Safari, Edge).
- Page load speed. Use tools like Google PageSpeed Insights or GTmetrix to monitor the impact of the video on your page load speed.
- Bandwidth usage. Analyze your site’s bandwidth usage to ensure the video optimization is effective.
By leveraging Cloudinary for video hosting and optimization, you can significantly enhance the performance and user experience of your WordPress site. Autoplay videos provide a modern, efficient, and high-quality alternative to GIFs, ensuring your content is visually appealing and resource-friendly. To learn more about how Cloudinary can help you enhance your site performance, contact us today.
If you found this blog post helpful and want to discuss it in more detail, head over to the Cloudinary Community forum and its associated Discord.
