
Wouldn’t it be nice if all the media in your library had useful tags to help categorize and organize them? Traditionally this might be a bit impractical. You or your team probably don’t have the time to add tags to every piece of media that ends up in your library. Luckily, Cloudinary’s AI Analysis features can handle this for you. This blog post will focus on one in particular: automatically tagging images and videos. Having useful tags can unlock all types of use cases. With tags, your visual assets become easily searchable in your library and applications. In this post, we’ll create a new upload preset that enables all of our uploaded media to be automatically tagged. Using presets provides a lot of benefits by allowing us to manage some of our configuration outside of our codebase.
Cloudinary’s AI Analysis APIs and Add-ons open up powerful capabilities for managing your media assets. These tools enable advanced features like metadata extraction, object recognition, auto tagging, and more. To use auto tagging, you’ll need to activate an add-on in your Cloudinary account. Specifically, we’ll be working with the Google Auto Tagging Add-on, which uses Google Vision AI to analyze your images and videos, automatically assigning meaningful tags based on detected objects, scenes, and concepts.
- Log in to your Cloudinary Console.
- Navigate to the Add-ons tab.
- Locate the Google Auto Tagging Add-on and register for it. Once the add-on is activated, you’re ready to integrate auto tagging into your Cloudinary media pipeline.
When configuring auto tagging for your uploads, you’ll need to use two key parameters:
categorization specifies which add-on should handle the tagging. For this post, we’ll use google_tagging, which leverages the Google Auto Tagging Add-on.
auto_tagging sets the minimum confidence score required for a tag to be applied. This score ranges from 0.0 (0%) to 1.0 (100%), and it helps filter out less reliable tags.
Here’s an example of uploading an image with auto tagging enabled:
const response = await cloudinary.uploader.upload( './cat-image.jpg', { resource_type: 'image', categorization: 'google_tagging', auto_tagging: 0.7, // Minimum confidence of 70% } );
This will automatically assign tags to your image based on objects or scenes detected by Google Vision AI. Tags with a confidence score of 70% or higher will be added to the image. All of the tags assigned to the upload are included in the response:
console.log('Auto-generated tags:', response.tags);
Making changes and deploying/releasing new versions of an application can be expensive and time-consuming. Upload presets are an underrated tool that simplify defining all the relevant configuration options for your media uploads to Cloudinary. If you’re already using a preset for your uploads, you won’t even need to touch any code to enable auto tagging.
An upload preset is a predefined set of upload options stored in your Cloudinary account. By using a preset, you can apply consistent configurations — like auto tagging — to all uploads without needing to pass parameters in every API call.
Follow these steps to create an upload preset for auto tagging:
- Navigate to the Cloudinary Console. Log in to your Cloudinary account and go to the Settings section in the top-right menu.
- *Navigate to Upload Presets. In the Settings page, click on the Upload Presets tab.
- Create/Update Preset. Click Add Upload Preset or an existing preset to add auto tagging.
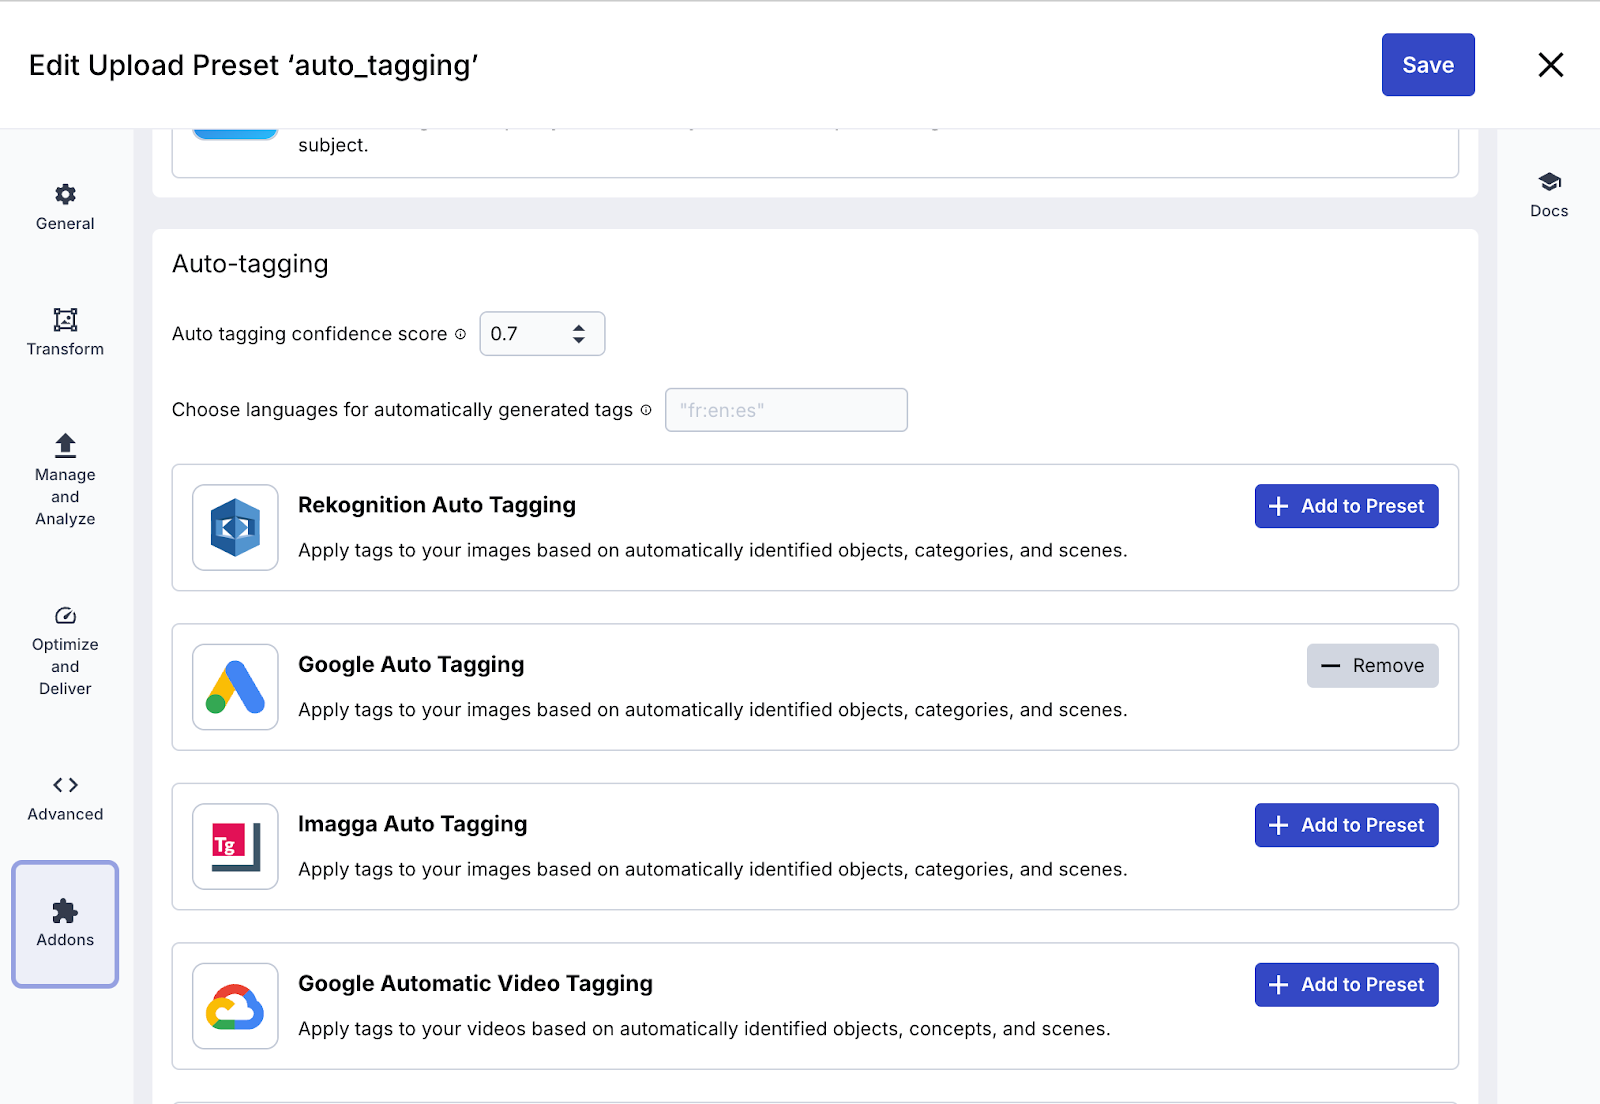
- Configure the Preset: Configure any options that you would like to have aside from the auto tagging if you’re creating a new preset Click the Addons tab in the side navigation Scroll to the Auto Tagging sections and select your desired confidence score Find the Google Auto Tagging preset and click Add to Preset.
- Save the Preset. Click the Save button in the top-right corner to store the preset. Here’s what your preset configuration page should look like after enabling Google Auto Tagging to your preset:
Once the preset is created, you can reference it in your upload calls by passing its name in the upload_preset parameter.
Here’s an example:
const response = await cloudinary.uploader.upload( './dog-video.mp4', { resource_type: 'video', upload_preset: 'auto_tagging_preset', // Use the preset you created } );

console.log('Auto-tagged video:', response.tags);
This will apply the auto tagging configuration defined in your preset to the uploaded media.
With Cloudinary’s Google Auto Tagging Add-on, organizing and managing your media library becomes a breeze. By automating the tagging process, you save time and make your library searchable. Upload presets are an underrated tool that allow us to move our upload configuration out of our code. This allows us to enable new features like auto tagging without having to make any changes to our application.


